Creating a moody, atmospheric photo manipulation sounds intimidating. But with the right source images and a clear step-by-step process, you can pull off a stunning medieval night scene that looks like it took years of practice.
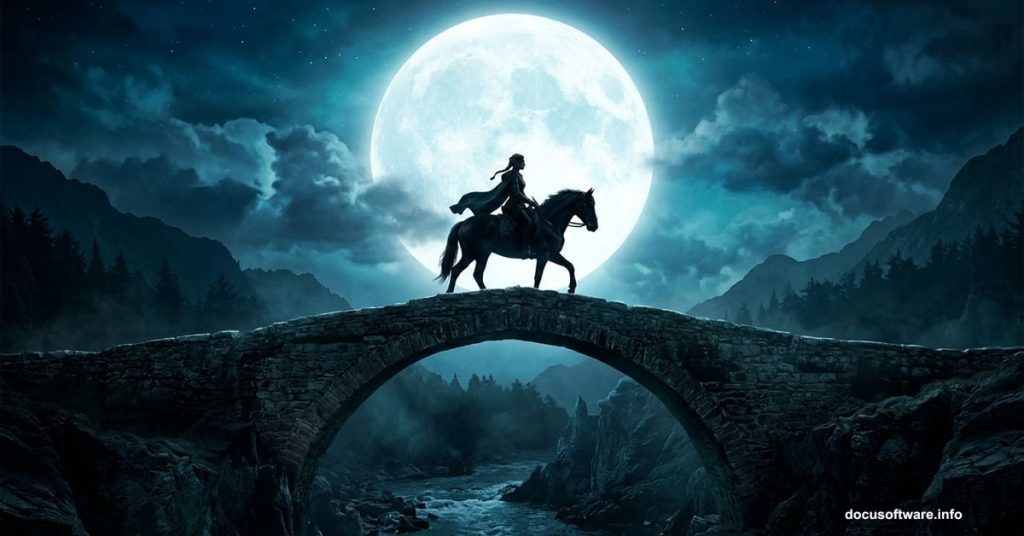
This tutorial walks you through building a complete scene featuring a medieval woman riding a horse under a dramatic night sky. We’ll layer sky, landscape, rocks, a bridge, moon, model, and trees. Then we’ll tie everything together with adjustment layers that make the whole composition feel cohesive and cinematic.
Here’s what you’ll need before we start.
Gathering Your Source Images
Pull together these resources before opening Photoshop. You’ll need a sky image, landscape photo, two separate rock images, a bridge, moon, model photo, and a tree.
Having everything ready before you begin saves a lot of frustrating back-and-forth. Trust me on this one.
Building the Base Canvas
Open Photoshop and create a new document at 1800×1361 pixels. Fill it with white to start clean.
Now open your sky image. Grab the Rectangular Marquee Tool (M) and select just the sky portion. Drag it onto your white canvas with the Move Tool (V), then right-click the layer and convert it to a Smart Object. This keeps your sky flexible for non-destructive edits later.
Softening and Shaping the Sky
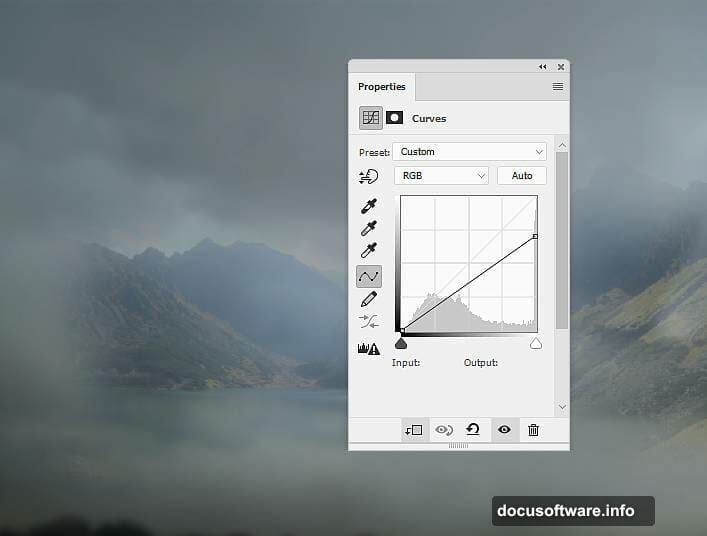
Go to Filter > Blur > Gaussian Blur and set the radius to 9 pixels. This softens the sky and gives it that dreamy, painted quality you want for a night scene.
Next, go to Layer > New Adjustment Layer > Curves and clip it to your sky layer. Boost the midtones slightly to bring more light into the sky. Then add a second Curves adjustment layer, also clipped, and pull it down to darken things up.
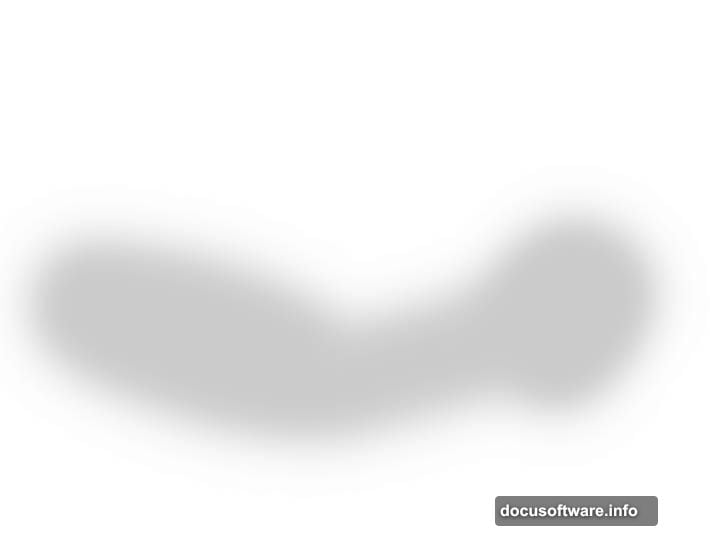
Here’s the key step on that second Curves layer. Click its mask and grab the Brush Tool (B). Choose a soft round brush with black paint. Paint over the upper portion of the sky to remove the darkening effect there. You want the darker mood to sit at the horizon, not swallow the whole sky.
Dialing In the Sky Color
Add a Color Balance adjustment layer and adjust the Midtones settings to push the sky toward cooler, more atmospheric tones. Blue and cyan shifts work beautifully for night scenes. Experiment until it feels like that blue-black hour just after sunset.
Placing the Landscape
Open your landscape image and drag it into the main document. Position it at the bottom of the canvas so it sits naturally beneath the sky.
Add a layer mask by clicking the second icon at the bottom of the Layers panel. Select a soft black brush and paint along the top edge of the landscape layer. This blends the sky and landscape together, hiding any hard seams. Also brush away the lake portion if your landscape has one. You want clean earth meeting that moody sky.
Clip a Curves adjustment layer to the landscape and reduce the lightness to darken the terrain. Then paint on that Curves mask with a soft black brush at about 10% opacity. Focus on the mountains in the middle distance. Pulling back the darkness there keeps the depth realistic without flattening the scene.
Desaturating for That Night Feel
Here’s where the scene starts looking genuinely nocturnal. Add a Hue/Saturation adjustment layer and drag Saturation down to -73.
This step alone is surprisingly powerful. It strips out the daytime color warmth and leaves you with a cool, muted landscape that reads as night. You’ll add selective color back in later through other adjustment layers.
Adding Foreground Rocks
Open your first rock image and isolate the rocks from their background using the Magnetic Lasso Tool (L). This tool follows edges automatically, which speeds things up considerably on rocky textures.
Select the left rock and drag it into the main canvas. Position it on the right side of the foreground. Use the Free Transform Tool (Ctrl+T) to resize and angle it naturally. Then flip it horizontally by going to Edit > Transform > Flip Horizontal.
Flipping gives you visual variety without sourcing an entirely new image. It’s a small trick that makes a big difference in how authentic the foreground feels.
![Photoshop Layers panel showing stacked adjustment layers for medieval night scene photo manipulation]
Continuing the Scene Build

At this stage your canvas has the foundational elements locked in. The sky is soft and dark. The landscape sits beneath it with natural blending. Your first rock anchors the foreground.
The next phases bring in your second rock for balance, the bridge structure, the glowing moon, your medieval model, and the atmospheric tree. Each element gets its own adjustment layers to match the overall lighting and color palette of the night scene.
The real magic happens when you start unifying everything. Clipping Curves and Color Balance adjustments to individual layers lets you nudge each element independently until the whole scene feels like it was photographed in one place, at one moment, under the same light.
Keep your Layer panel organized as you go. Group elements into labeled folders for sky, landscape, foreground, and characters. A messy layer stack makes later adjustments genuinely painful.
Making It All Feel Real
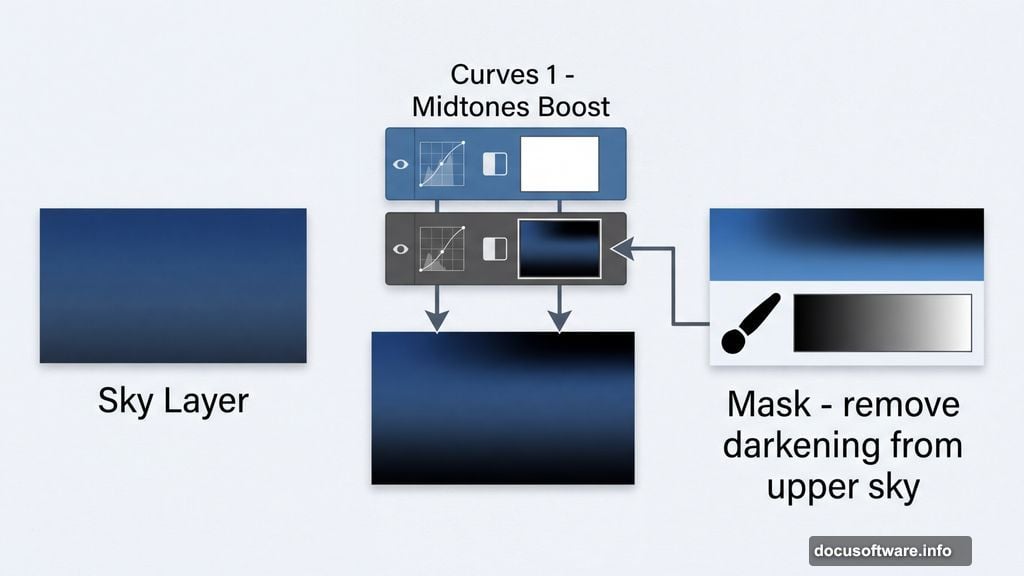
Photo manipulation lives or dies on consistent lighting. Your medieval woman and horse need to feel illuminated by the same moonlight hitting your rocks and landscape.
Watch for two common problems. First, color temperature mismatches. Warm-toned photos dropped into a cool night scene look immediately wrong. Use Hue/Saturation and Color Balance adjustments to cool everything down consistently. Second, edge quality. Hard, sharp edges on masked elements break the illusion fast. Always finish masked layers with a soft brush pass at low opacity to feather the edges naturally.
The tree layer often needs the most attention here. Trees have complex silhouettes that are difficult to mask perfectly. Work patiently around branches and accept that some roughness at the edges actually helps. Real trees have messy outlines.
When the whole scene comes together, the adjustment layers do the heavy lifting. They’re what separate a convincing composite from a collection of obvious cutouts.
This kind of project teaches you more about light, shadow, and atmosphere than almost any other Photoshop exercise. Building a scene from scratch forces you to really think about where light comes from and how it falls across every surface. That understanding sticks with you long after you finish this particular image.