There’s something magical about photo manipulation. You start with a blank canvas and a handful of stock images, and somewhere along the way, a completely believable fantasy world takes shape.
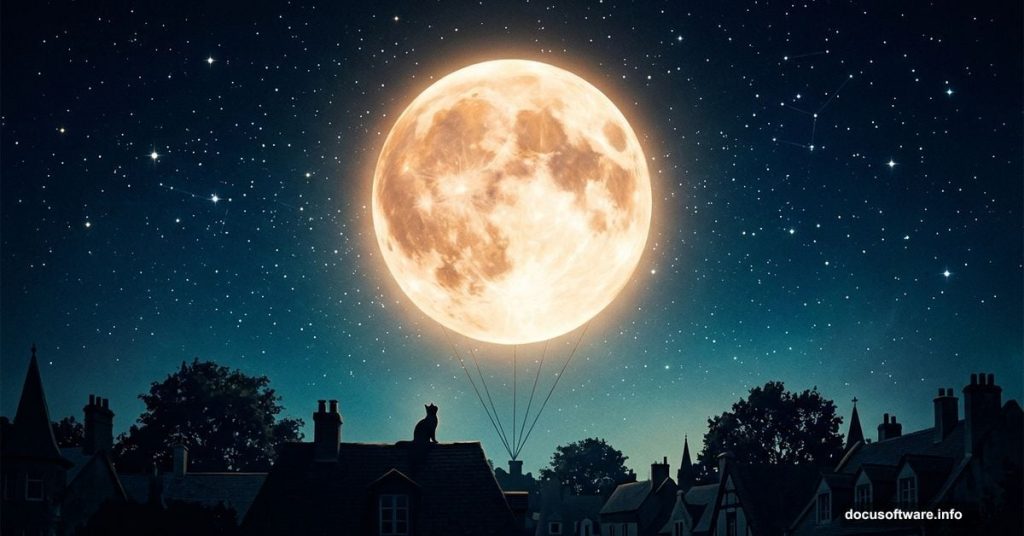
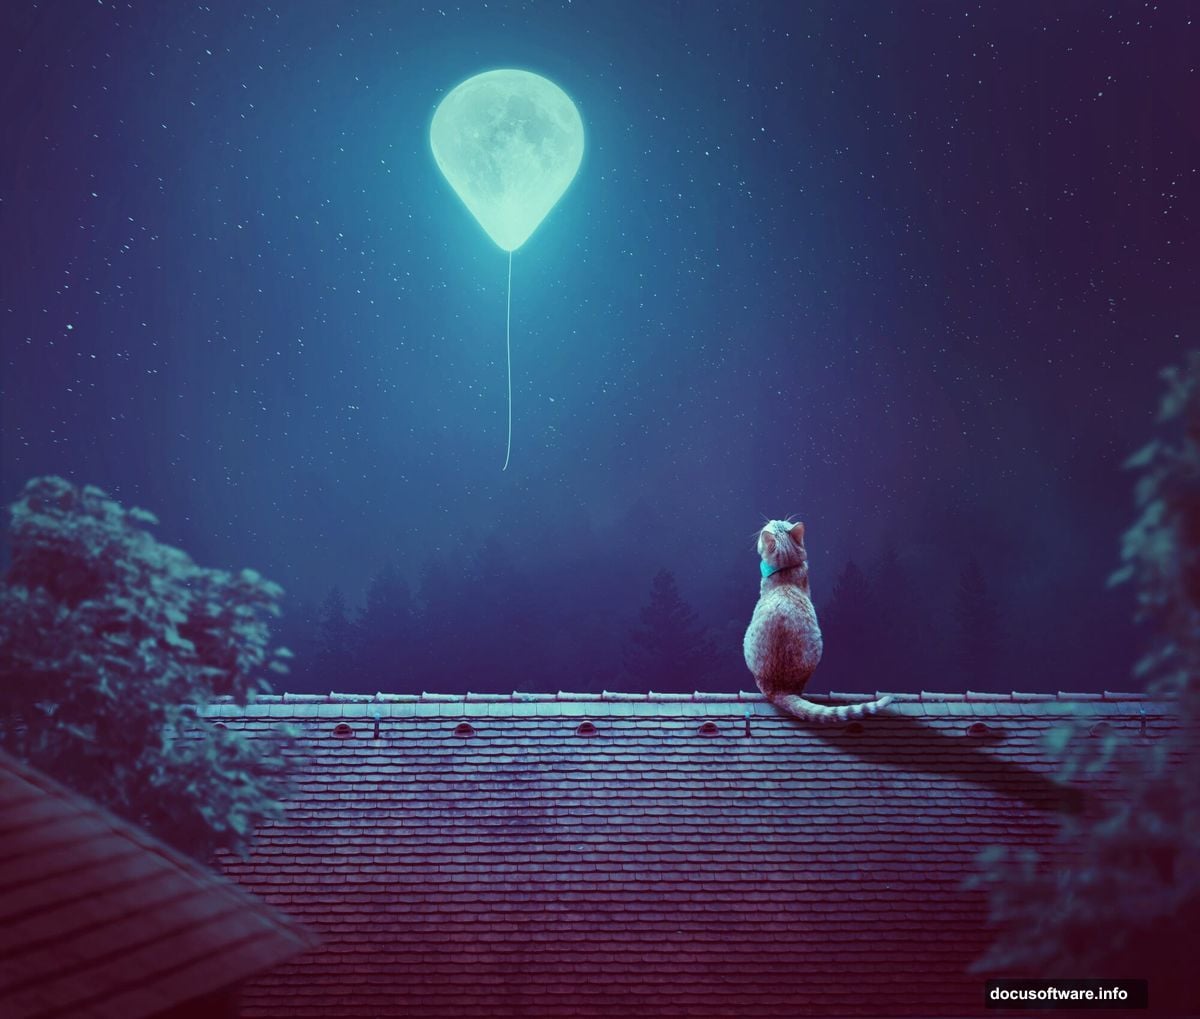
This tutorial walks you through building a dreamy night scene featuring a cat watching a glowing moon balloon float above rooftops and trees. It sounds ambitious, but the process breaks down into manageable steps that any intermediate Photoshop user can follow.
Here’s what you’ll create: a moody, atmospheric scene combining a starry sky, a dark landscape, layered rooftops, and soft, painterly lighting. The whole thing comes together through smart use of adjustment layers, blending modes, and layer masks.
Start With Your Document and Background Gradient
First, create a new 2000 x 1698 px document and fill it with white. This gives you a large canvas with plenty of room to work.
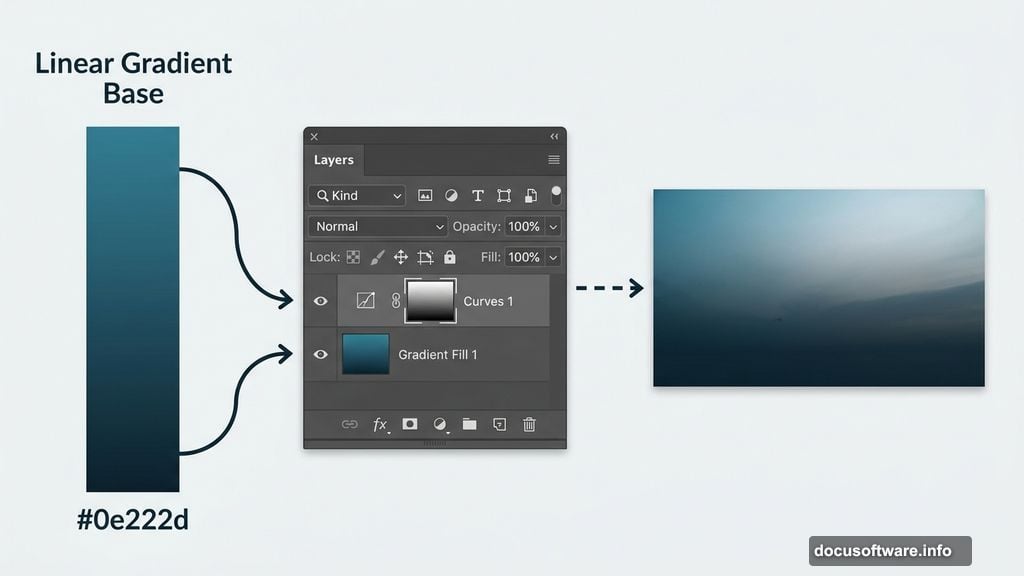
Next, hit Ctrl+Shift+N to make a new layer, then press G to activate the Gradient Tool. Choose Linear Gradient and set your two colors to #327990 (a muted teal) and #0e222d (a deep navy). Drag a line from the left side of the canvas to create your first sky base. This gradient becomes the atmospheric foundation everything else builds on.
So why start with a gradient instead of jumping straight to the star image? Because it gives you control. You’re establishing the mood of the scene before adding any textures or detail.
Shape Your Sky With Curves and a Brush

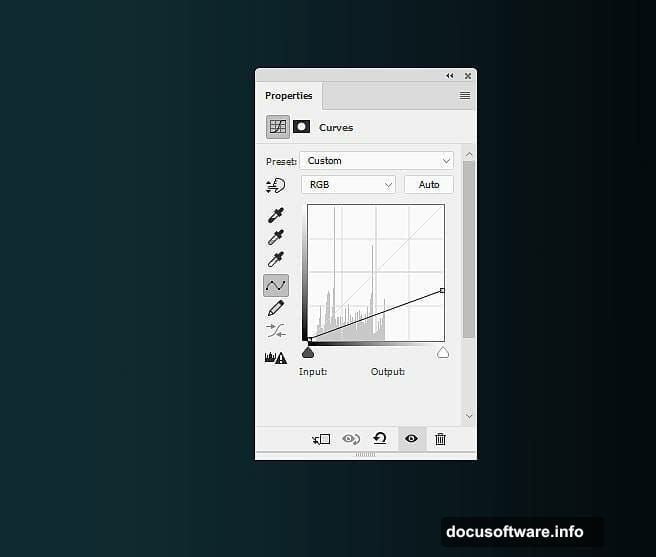
With your gradient layer in place, go to Layer > New Adjustment Layer > Curves and pull the curve down to darken the scene. But here’s the important part. This adjustment layer comes with a built-in mask, and you’ll use it right away.
Activate the Brush Tool (B), select a soft round brush, and paint with black on the mask. Focus on the upper section of the canvas. This technique hides the darkening effect near the top, which keeps that area lighter and ready to blend naturally with the stars you’ll add next.
Think of it like using a dimmer switch. You’re not darkening everything uniformly. Instead, you’re sculpting the light so it feels natural.
Add Stars Using Screen Blend Mode
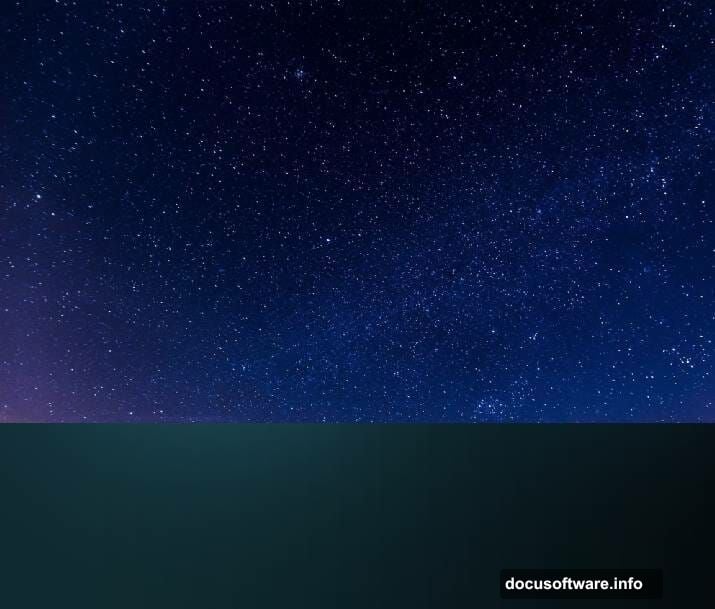
Open your stars image and use the Rectangular Marquee Tool (M) to select just the starry sky portion. Place it at the top of your main document. Then set this layer’s blending mode to Screen at 100% opacity.
Screen mode is brilliant for this kind of work. It makes dark areas transparent and lets light areas shine through, so your star layer blends seamlessly into the gradient below without any harsh edges.
Refine the Stars With Three Quick Adjustments
The stars might look too colorful or too bright at first. Three quick adjustments fix that.
First, add a Hue/Saturation adjustment layer as a Clipping Mask and drag Saturation all the way down to -100. This strips the color from the stars so they read as clean white points of light rather than tinted blobs. Then add a Levels adjustment layer, also as a Clipping Mask, to reduce the overall brightness of the star layer.
Finally, add a mask directly to the stars layer itself. Using a soft black brush at varied opacities, gently paint over areas where the stars overlap the landscape zone near the bottom. This gradual fade keeps the composition feeling cohesive instead of layered and obvious.
Bring In the Landscape and Mask the Sky
Open your background landscape image and drag it onto the canvas using the Move Tool (V). Position it toward the lower portion of the canvas so it sits naturally beneath your star-filled sky.
Add a mask to this layer immediately. Use a soft black brush to paint away the sky in the landscape photo, leaving only the plants, ground, and terrain visible. This is where the scene starts feeling real. The landscape merges into your gradient sky instead of sitting awkwardly on top of it.
Color Correct the Landscape to Match the Scene
Your landscape photo probably has its own lighting and color temperature that won’t match your night sky gradient. Fix this with two adjustment layers, both set as Clipping Masks so they only affect the landscape layer below.
Add a Photo Filter adjustment layer and choose the color #9eccc7, a cool blue-green. This shifts the landscape toward the same cool tones as your sky. Then add a Color Balance adjustment layer and tweak the Midtones settings to push the colors further into alignment.
These two steps are what separate a convincing composite from one that looks obviously assembled from mismatched photos.
Darken the Landscape for Nighttime Depth
Add a Curves adjustment layer (again as a Clipping Mask) and pull the curve down to deepen the shadows in the landscape. A nighttime scene needs weight and darkness in the lower portions to feel believable.
This is also a good moment to zoom out and assess the overall balance of your scene. The upper sky should feel lighter and more atmospheric. The ground and vegetation should feel heavy and dark, almost like silhouettes. That contrast is what creates the sense of depth that makes the moon balloon the visual star of the final image.
What Comes Next
With the sky built and the landscape established, the next phases involve adding the rooftop layers, the tree silhouettes, and the iconic moon balloon itself. After that, you’ll introduce the cat, refine the colors of the entire composition, and apply final adjustment layers to unify the lighting across every element.
Each addition follows the same logic: place the image, mask away what you don’t need, then use adjustment layers as Clipping Masks to match its color and brightness to the scene you’ve already built.
The approach is methodical and forgiving. If something looks off, you’re never actually destroying pixels. Every change lives on an adjustment layer or a mask, so you can tweak anything at any point.
Photo manipulation like this works best when you think less about the individual pieces and more about the light source connecting them. Once your moon balloon is in place, every element in the scene should appear lit by the same soft, cool glow. That single detail makes the fantasy feel strangely real.