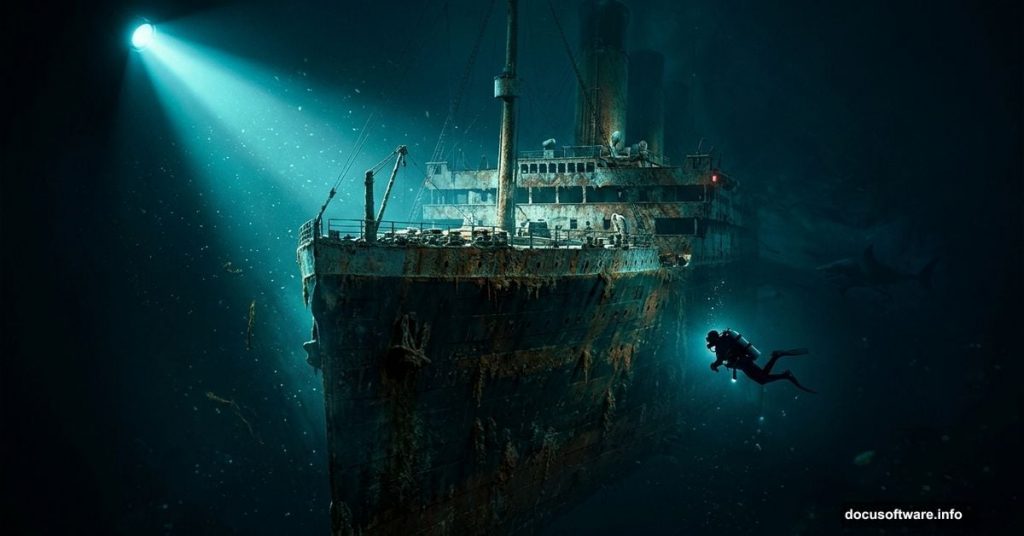
Few creative challenges in photo manipulation are as dramatic as recreating an iconic shipwreck scene from scratch. This tutorial walks you through building a fully composited underwater Titanic image, complete with moody lighting, sea creatures, atmospheric textures, and a lone diver exploring the deep. If you’ve ever wanted to push your Photoshop compositing skills into genuinely cinematic territory, this is the project for you.
The whole thing breaks down into logical stages. First, you build the underwater background. Then you drop in the Titanic and blend it naturally into the environment. After that, you layer in a diver, fish, a shark, and texture details. Finally, you pull everything together with Camera Raw Filter for that polished, cohesive look.
Let’s get into it.
What You Need Before Starting
Grab these resource images before opening Photoshop:
- Underwater 1
- Underwater Sand
- Underwater 2
- Diver
- Texture
- Titanic
- Shark
- Fish
Having all your assets ready upfront saves a lot of back-and-forth mid-project.
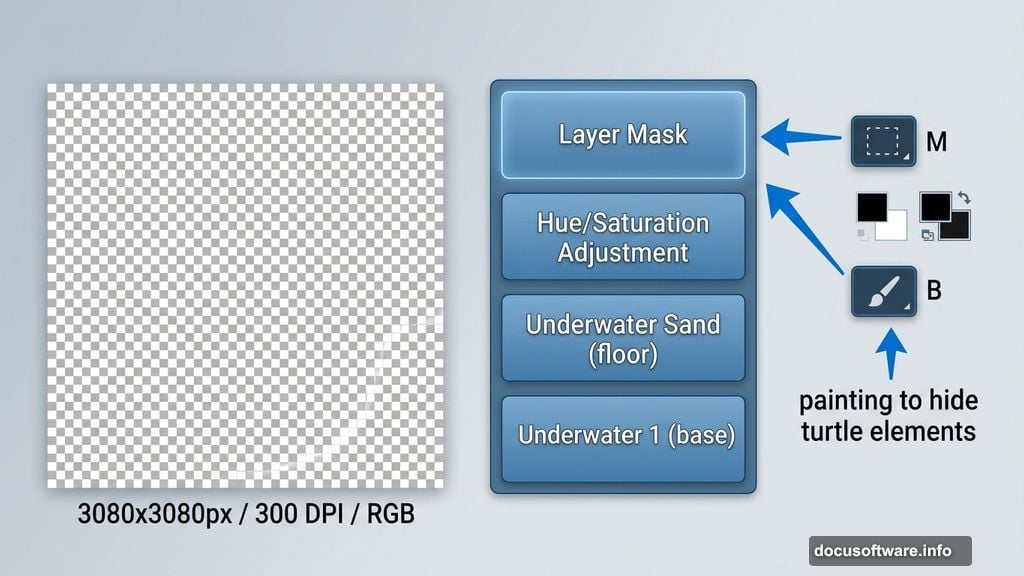
Setting Up Your Canvas
Start fresh with a new document. Go to File > New and enter these settings:
- Preset: Custom
- Width: 3080px
- Height: 3080px
- Resolution: 300px
- Color Mode: RGB Color, 8-bit
- Background Contents: Transparent

The 3080px square canvas gives you plenty of room to work with detail. Plus, 300 DPI means the final image looks sharp whether you print it or display it digitally.
Building the Underwater Background
Placing Your First Background Layer
Go to File > Place and select your first Underwater image. Once it lands on the canvas, grab the Transform tool with Ctrl/Cmd + T. Hold Alt + Shift to scale from the center while keeping proportions locked. In Photoshop CC, just hold Alt and Photoshop handles all sides together automatically.
Position it to cover the full canvas. This becomes your base ocean environment.
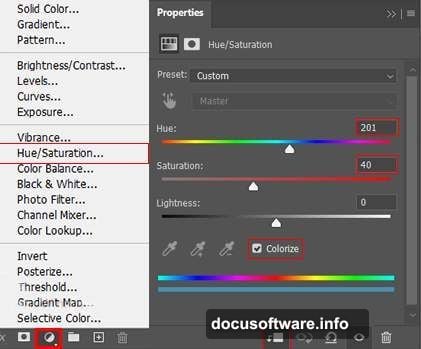
Adding the Hue/Saturation Adjustment Layer
Next, add a Hue/Saturation adjustment layer directly above your background. This lets you dial in the color temperature of the underwater environment. Deep ocean scenes typically lean toward cooler blues and greens, so push the hues in that direction to sell the depth.
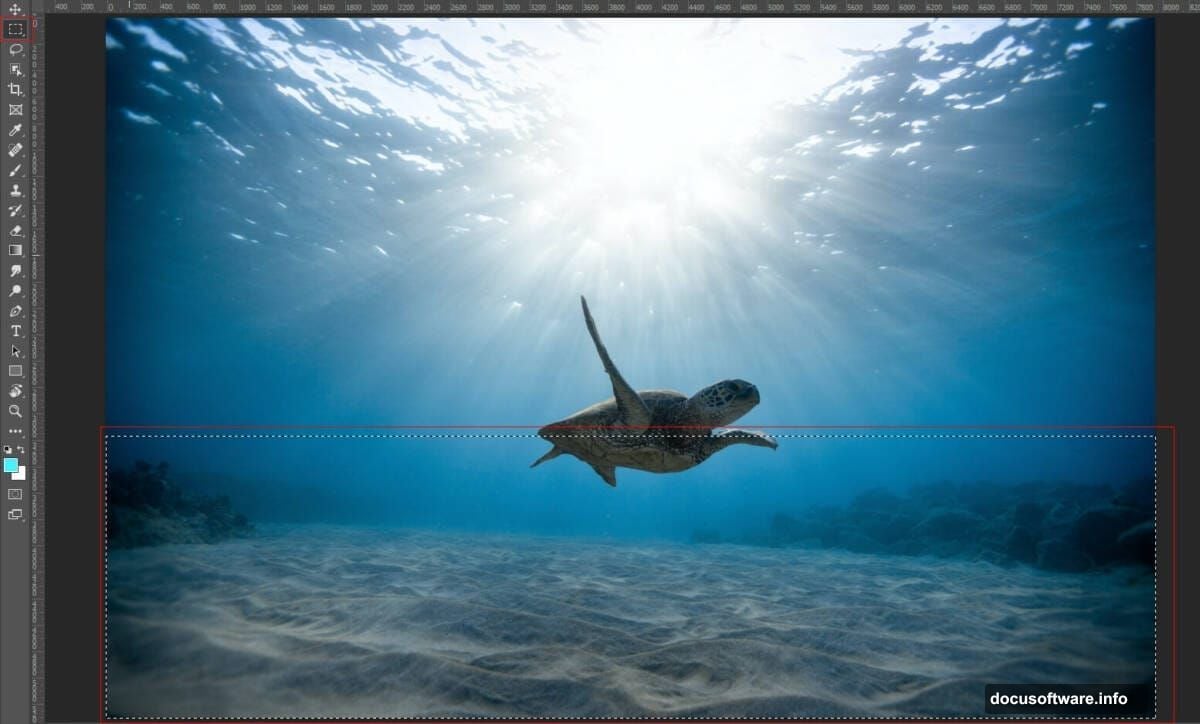
Bringing in the Sandy Ocean Floor
Open your Underwater Sand image separately. Select the section you want using the Rectangular Marquee Tool (M), then copy it with Ctrl/Cmd + C and paste it onto your working canvas with Ctrl/Cmd + V.
Use the Transform tool again to position and scale it along the bottom of your composition. Then add a Layer Mask to this layer. Grab a soft round Brush Tool (B) with black as your foreground color, and paint over any unwanted elements — specifically a turtle visible in the original image. Painting with black on the mask hides those areas cleanly without permanently deleting anything.
Color Correction Adjustment Layers
Now stack several adjustment layers to unify the color of your background elements:
Color Balance helps match the warm and cool tones between your two background images. Underwater scenes often need a push toward cyan and blue in the midtones.
Hue/Saturation again — but this time drop the opacity to around 34%. This creates a subtle secondary color shift without overwhelming the first adjustment. Stacking multiple low-opacity adjustments gives you far more control than one heavy-handed correction.
Selective Color lets you target specific color ranges independently. Use it to fine-tune the greens and blues in the water, making them feel like they belong in the same body of water.
Color Fill Layer set to Soft Light blend mode at 26% opacity adds a gentle atmospheric tint over everything. Soft Light is perfect here because it brightens highlights and deepens shadows simultaneously, giving the whole background more visual depth.
Adding the Second Water Layer
![Photoshop layers panel showing underwater composite with color adjustment layers stacked above ocean floor base images]
Place your Underwater 2 image via File > Place. This layer adds surface light rays or additional water texture to break up what might otherwise look like a flat background. Use the Transform tool to position it so the lighting direction feels consistent with your other background elements.
Blend modes are your friend here. Experiment with Screen or Soft Light depending on how bright or dark the Underwater 2 image appears. The goal is to add visual complexity without muddying the color palette you’ve already built.
Dropping in the Titanic
This is where the project really comes alive. Place your Titanic image onto the canvas and scale it to feel massive relative to the rest of the scene. Ships like the Titanic command presence, so don’t shrink it.
Once positioned, add a Layer Mask and use a soft brush to fade the ship’s edges into the surrounding water. The key is making the ship look like it belongs in the water rather than sitting on top of it. Paint along the edges where the ship meets the dark ocean background, gradually blending the two together.
Color matching matters a lot here. Use a Hue/Saturation clipping mask directly on the Titanic layer to shift its overall color toward the blue-green underwater palette you’ve established. The ship should look like it’s been sitting under the ocean for over a century — desaturated, cold, slightly green from algae and corrosion.
Adding the Diver and Sea Creatures
Placing the Diver
A lone diver adds incredible scale contrast and human storytelling to the scene. Place your diver image and use the Pen Tool or Quick Selection Tool to extract them cleanly from their original background.
Position the diver near the Titanic to emphasize just how enormous the wreck is. Even a small diver figure communicates the scale better than any visual trick. Add a soft outer glow or a slight haze to suggest water between the viewer and the diver.
Fish and Shark
Place your fish and shark images using the same extraction approach. Scatter fish naturally around the scene — they rarely swim in perfectly straight lines, so vary the positioning and rotation. Scale some smaller to create a sense of depth, placing closer fish larger and distant fish smaller.
The shark adds tension. Position it mid-frame or emerging from the darker areas of the composition. A well-placed shark with its edges softened into the background looks genuinely menacing without feeling pasted on.
Adding Texture
Overlay your texture image above the sea creatures but below your final color grading layers. Set it to a blend mode like Multiply or Overlay at low opacity, around 20-30%. This adds a gritty, aged quality to the whole composite, making it feel like the image was captured through actual murky ocean water.
Final Color Grading with Camera Raw Filter
Here’s where everything ties together. Flatten your composition into a smart object, then go to Filter > Camera Raw Filter.
Camera Raw gives you cinematic control over the final image. For an underwater scene, consider these adjustments:
Drop the exposure slightly to keep the mood dark and mysterious. Underwater light is scarce, and an overly bright scene kills the atmosphere.
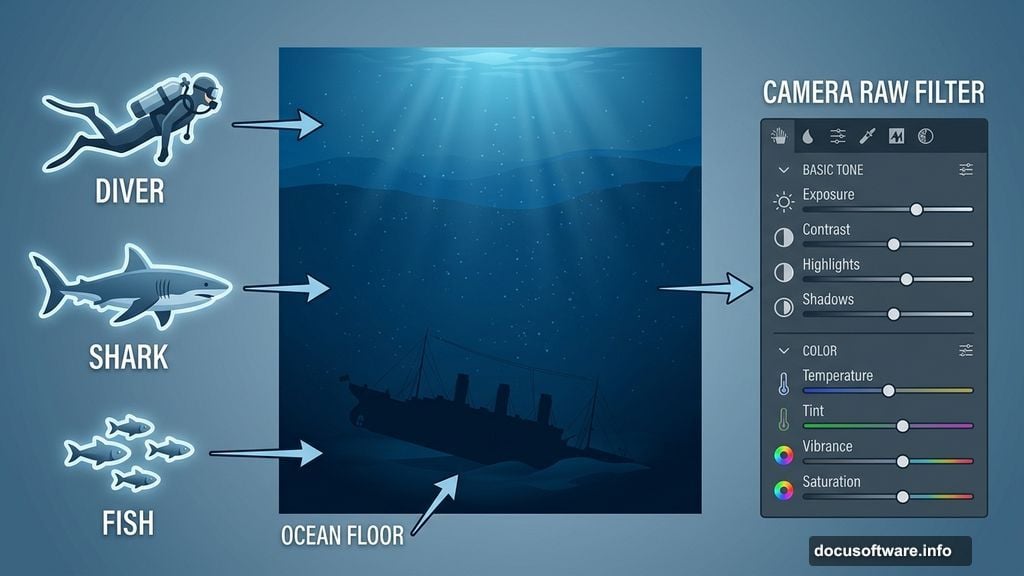
Increase the clarity slightly to add mid-tone contrast and make the Titanic’s structural details pop. But go easy — too much clarity looks harsh.
Push the blues and teals in the HSL panel to make the water color feel cohesive across every element. This is the single most effective thing you can do to make a composite feel like one unified photograph.
Add a slight vignette in the Effects panel. Darker edges naturally draw the eye toward the center where the Titanic sits, reinforcing the composition without needing to repaint anything.
What Makes This Composite Work
The secret to any great photo manipulation isn’t the individual assets — it’s the consistency. Light direction, color temperature, edge softness, and atmospheric haze all need to tell the same story.
Every element in this scene should feel like it was photographed in the same body of water at the same depth on the same day. Adjustment layers and Camera Raw are what bridge the gap between “collection of images” and “convincing scene.”
Take your time on the blending. Rush the masking and the whole thing falls apart. But get the masks right, and viewers will genuinely believe they’re looking at the great ship resting two miles beneath the North Atlantic.