Creating a fantasy photo manipulation sounds intimidating at first. But with the right steps, even intermediate Photoshop users can pull off something that looks genuinely magical.
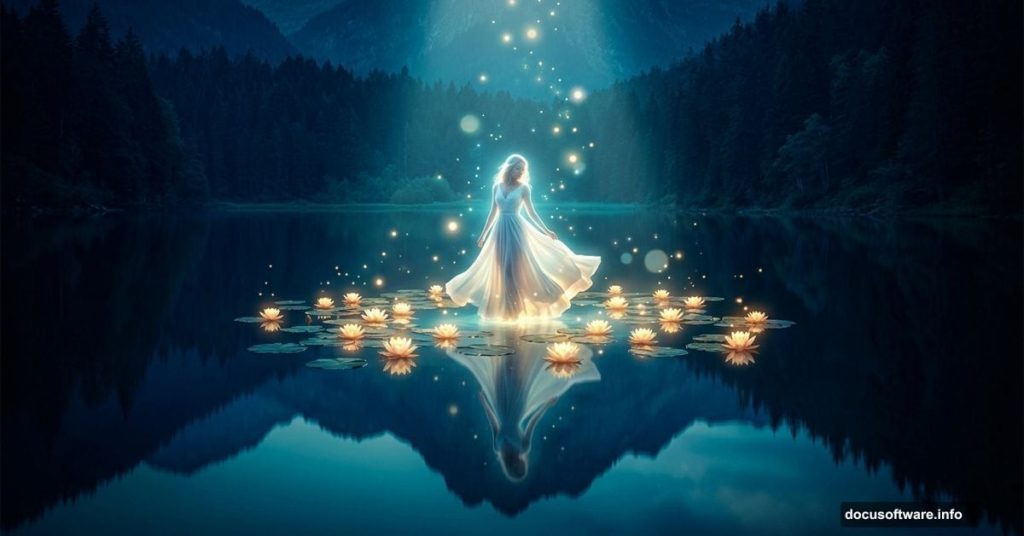
This tutorial walks you through building a dreamy lake scene featuring a lady surrounded by glowing water lilies. You’ll start with a simple forest photo and transform it into something that looks straight out of a fairy tale. By the end, you’ll have painted light effects, magical floating dots, and a polished fantasy atmosphere using adjustment layers.
Here’s what you’ll need before jumping in: a forest image, a water lily photo, a model photo, a light texture, and a rock image. All resources are available through the tutorial’s linked downloads.
Build the Base Canvas First
Start by creating a new document at 2000 x 1500 px and filling it with white. Open your forest image and drag it onto the canvas using the Move Tool (V). Right-click the layer and convert it to a Smart Object. This keeps your edits non-destructive, so you can adjust things later without losing quality.
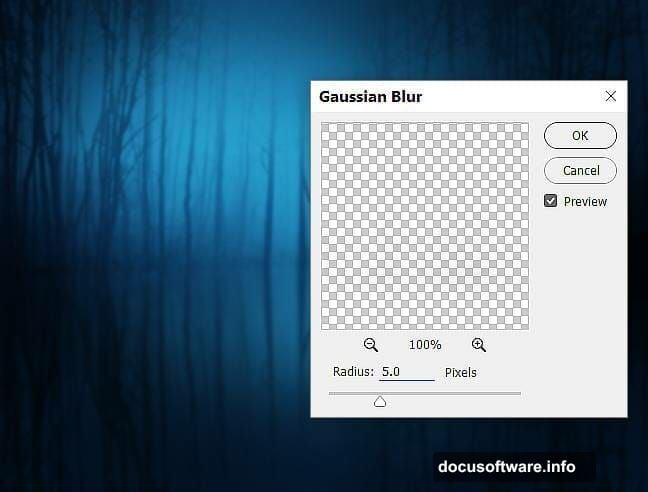
Next, go to Filter > Blur > Gaussian Blur and set the radius to 4 px. A slight blur softens the forest and makes it read more like a distant background.
Turn the Forest into a Reflective Lake
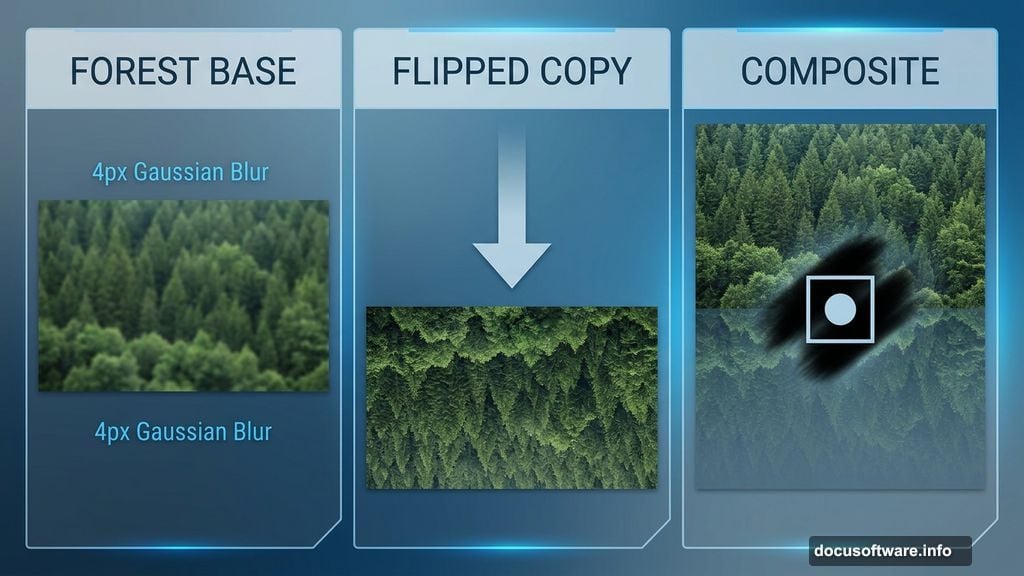
This is where the scene starts coming together. Press Ctrl+J to duplicate your blurred forest layer, then go to Edit > Transform > Flip Vertical. Use the Move Tool to drag the flipped copy downward so it sits below the original, like a mirror reflection.
Now click the second icon at the bottom of the Layers panel to add a layer mask to the flipped layer. Grab a soft round brush set to black and gently erase the hard ground area. What you’re left with looks convincingly like still water reflecting the forest above. It’s a simple trick, but the result is surprisingly effective.
Add Color and Depth with Adjustment Layers

Raw forest photos rarely have the moody, magical quality you want for fantasy work. Adjustment layers fix that fast.
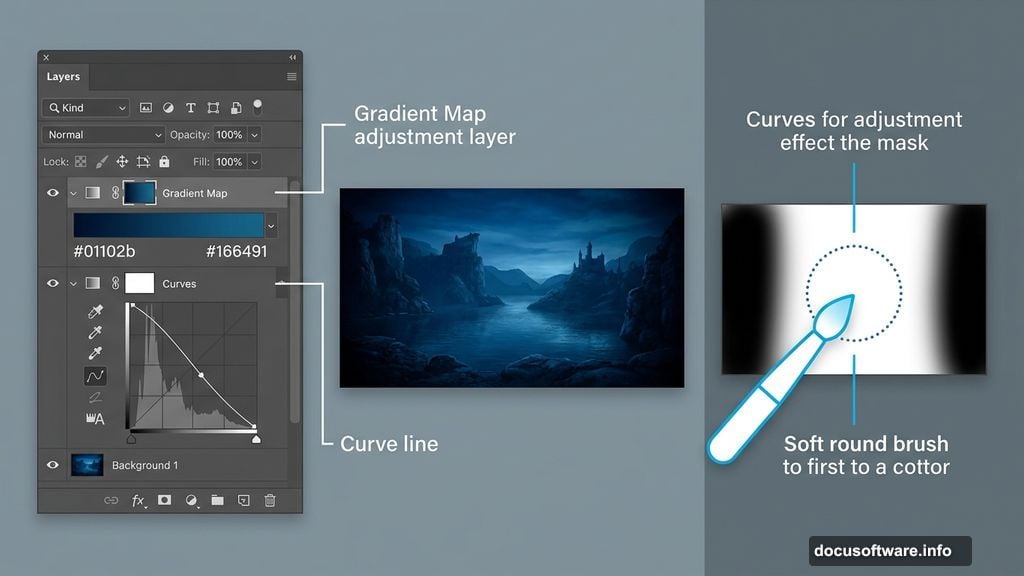
Go to Layer > New Adjustment Layer > Gradient Map and set the colors to #01102b and #166491. This pushes the whole image toward deep blues and midnight tones, which immediately gives it that mysterious feel.
Add a Curves adjustment layer and pull the curve down to darken the scene overall. On the layer mask, use a soft black brush to erase the center area. This keeps the middle brighter while the edges stay dark, drawing the eye naturally toward the focal point.
Brighten the Center for Natural Light Focus
Add another Curves adjustment layer and this time increase the lightness. You want to light up just the middle section of the scene, where your model will eventually stand.
On this layer’s mask, paint with a soft black brush over everything except the center. Keep the edges shadowed. This contrast between the lit center and darker surroundings is what gives the composition that cinematic, spotlight quality.
Paint in Background Details
Create a new empty layer and place it above all your current layers. Grab a small brush with the color #04070e and paint subtle details behind the trees. Think dark shapes, hints of depth, nothing too defined.
Apply a Gaussian Blur of 5 px to this painted layer. The blur blends those details softly into the background so they feel like part of the scene rather than something painted on top.
Add the First Light Glow
Create another new layer and switch to a soft brush loaded with #cadef9, a pale icy blue. Paint this color across the middle area of the background where the light source will appear to come from.
Change this layer’s blend mode to Overlay and drop the opacity to 70%. Then add a mask and use a soft black brush to soften the edges of the glow. The Overlay mode lets the light interact naturally with the layers beneath, making it feel integrated rather than slapped on.
Keep Building Layer by Layer
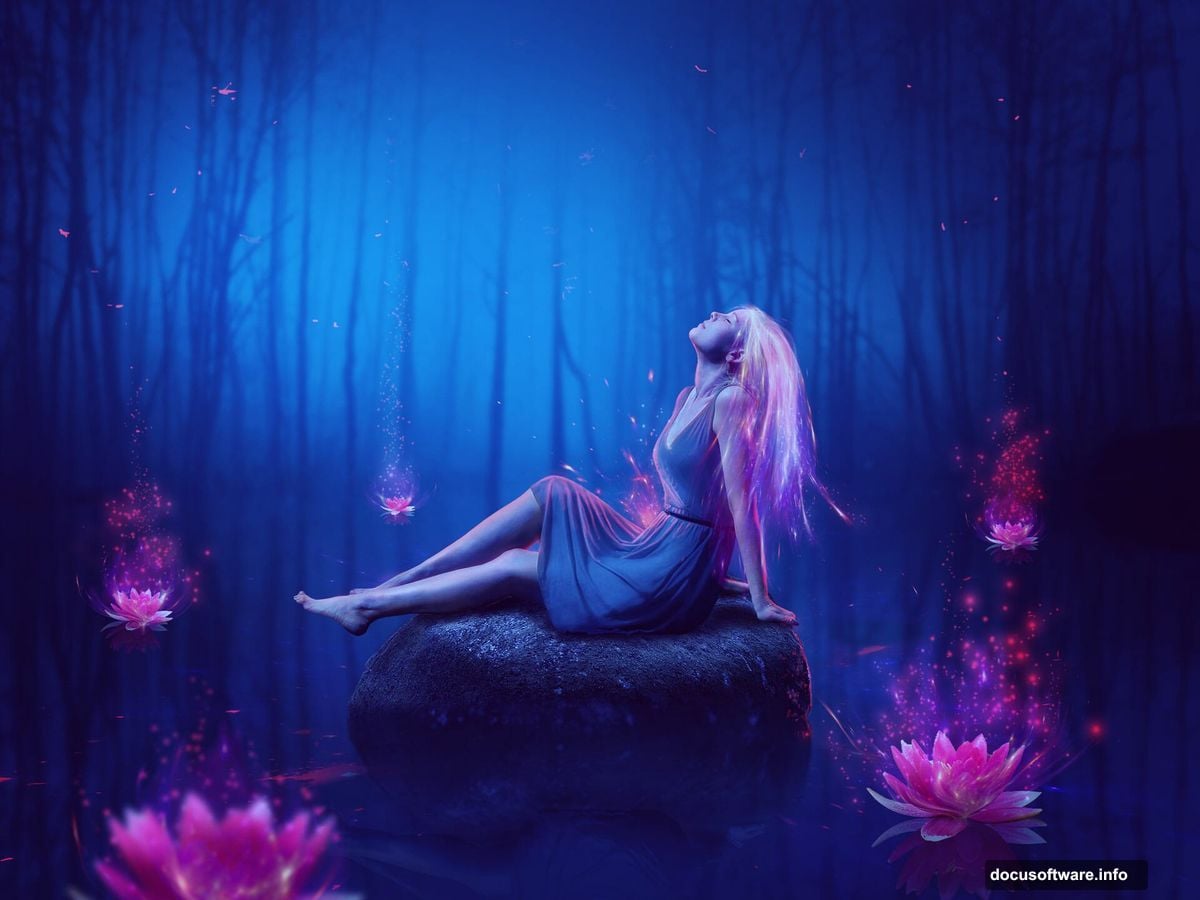
The steps covered here form the foundation of the entire composite. From this point, the tutorial continues through adding the rock element, placing and retouching the model, building the water lily effects, and painting the magical glowing dots that tie everything together.
Each stage follows the same logic: work non-destructively with Smart Objects and masks, build atmosphere through Curves and Gradient Map layers, and use Overlay and Soft Light blend modes to layer light naturally.
Photo manipulation in Photoshop rewards patience more than raw skill. Take your time with each mask. Blur the things that should feel distant. Keep your adjustment layers grouped and labeled so you can revisit them. And don’t be afraid to repaint your light effects multiple times until the glow feels organic.
The fantasy lake scene is one of those projects that teaches you more about light, color, and composition than almost any other exercise. Once you understand how the reflection trick works and how Curves layers shape a mood, you’ll start seeing those techniques everywhere.