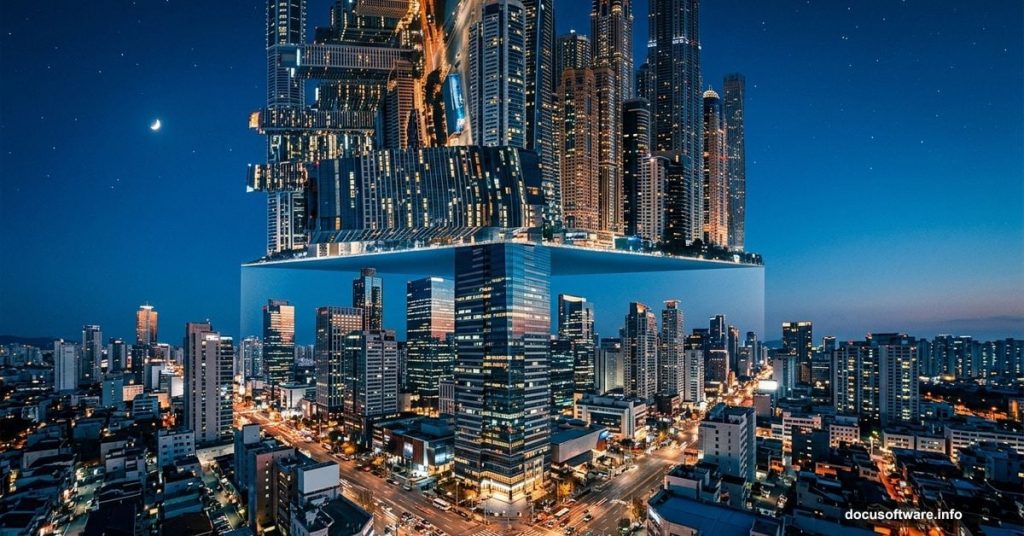
Ever watched Inception and wondered how to recreate those gravity-defying cityscapes in Photoshop? Good news — it’s way simpler than you’d expect, and you don’t need to be a Photoshop expert to pull it off.
This tutorial walks you through bending a cityscape into a vertical wall using just a few basic tools. All you need is a landscape photo, the Polygonal Lasso tool, and a neat zooming trick that makes pixel-perfect selections a breeze. Plus, the whole thing comes together in four steps.
Pick the Right Landscape Photo
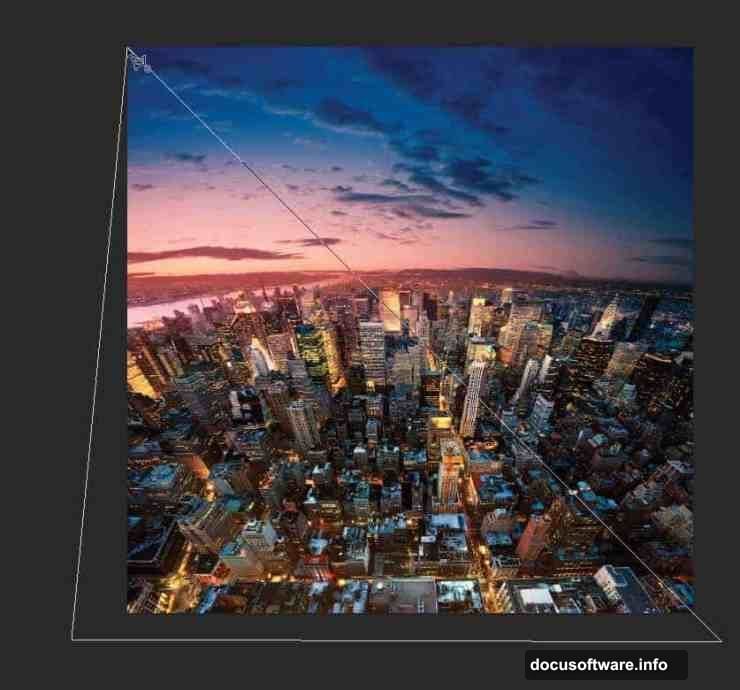
Start by opening a landscape photo in Photoshop. Technically any photo works, but you’ll get the best results with one where the top half is mostly sky.
Why sky? Because that open space gives the folded cityscape room to breathe. When you flip and rotate your selection, a sky-heavy top half creates a cleaner, more dramatic wall effect. City photos with buildings stretching right to the top edge tend to look cluttered after the transformation.

Not sure which photo to grab? Search for wide cityscape shots taken at street level. Those tend to work beautifully for this effect.
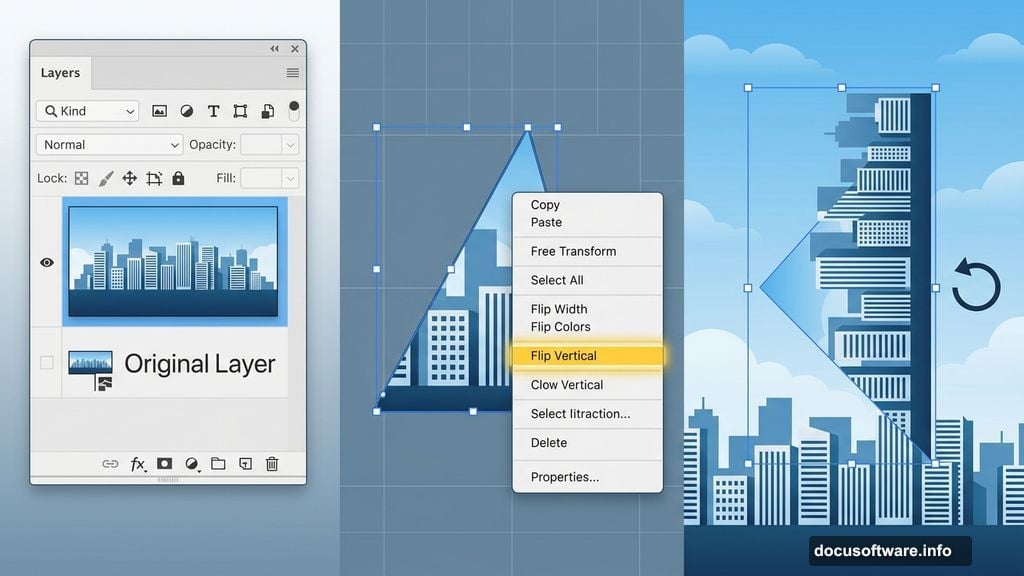
Create a Pixel-Perfect Triangular Selection
This is the trickiest part of the whole tutorial — but there’s a clever trick that makes it surprisingly manageable.
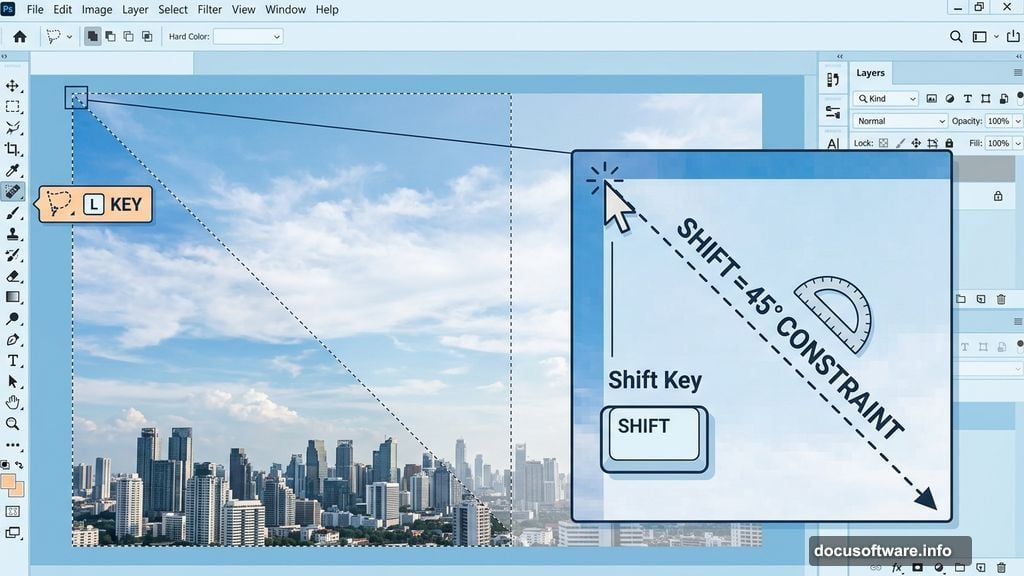
You need a perfect right-angled triangular selection using the Polygonal Lasso tool (press L on your keyboard to grab it). The challenge is hitting that exact corner pixel on a non-square image. Here’s how to nail it every time.
First, zoom all the way into the top-left corner of your image. Get really close. Then click exactly on the top-left pixel with the Polygonal Lasso tool. Next, press Ctrl/Cmd + minus to zoom back out. Now hold the Shift key and click somewhere below your image. Holding Shift constrains the line to 45-degree angles, so you get a perfectly diagonal edge without any guesswork. Finally, click around to complete the triangular selection.
Duplicate and Flip Your Selection
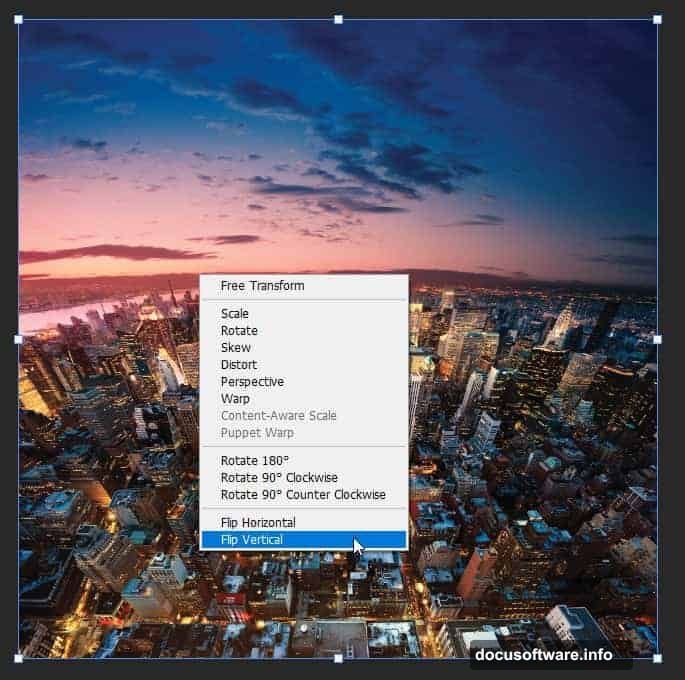
With your triangular selection active, press Ctrl/Cmd + J. This duplicates just that selected area onto a brand new layer. Your original photo stays completely untouched underneath.
Now press Ctrl/Cmd + T to activate the Free Transform tool. Right-click inside the transform box and choose Flip Vertical from the menu. Your triangular piece flips upside down, ready to become your cityscape wall.
Rotate Into Position
Here comes the satisfying part. Move your cursor just outside the transform bounding box until it turns into a curved rotation arrow.
Hold the Shift key while dragging to rotate. Just like with the selection, Shift constrains your rotation to 15-degree increments. So snapping into exactly the right angle is fast and clean. Rotate the flipped piece until the buildings line up as a vertical wall against the original cityscape.
Hit Enter to confirm the transformation, and you’re done.
Push It Further
Once you’ve nailed the basic technique, try a variation. Instead of selecting the top-left corner, grab a triangular selection from the top-right corner instead. Flipping and rotating that piece creates a downward drop effect that looks completely different but equally striking.
The same four-step process works for both variations. Select, duplicate, flip, rotate. That’s really all there is to it.
And if you want to skip the manual steps entirely, there are Inception Photoshop Actions available that automate the whole effect for you. But honestly, doing it by hand once or twice teaches you so much more about how the Polygonal Lasso tool and Free Transform actually work together.
The best part about this technique is how transferable it is. Once you understand the core idea of duplicating, flipping, and rotating selections, you’ll start seeing creative possibilities in almost every landscape photo you come across.