Ever look at a sweeping desert landscape and think, “This needs a city dropped right in the middle of it”? That’s exactly what we’re building today. This tutorial walks you through creating a surreal desert cityscape from scratch, blending multiple photo elements into one cohesive, atmospheric scene.
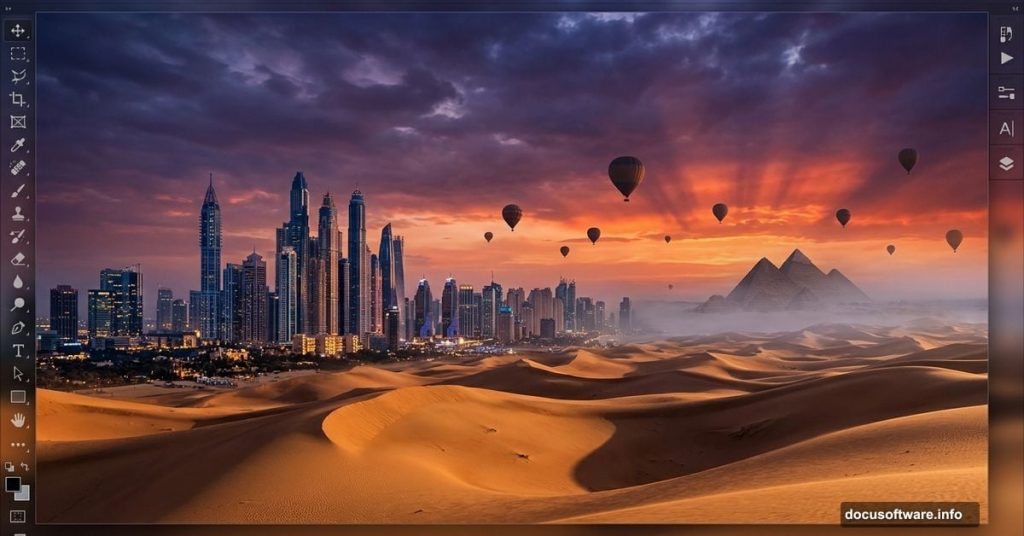
By the end, you’ll have a moody, cinematic image complete with balloons, mist, pyramids, and a dramatic sky. Let’s get into it.
, featuring a city skyline blending into sand dunes under a purple twilight sky](hero-desert-city-photoshop-manipulation.jpg)
What You’ll Need Before Starting
Gather these resources before opening Photoshop. Having everything ready saves a lot of back-and-forth later.
You’ll need photos of a city, a desert road, a person (which we’ll remove), balloons, pyramids, and a cloud texture. Also grab a set of cloud brushes. Free versions of most these resources are easy to find on sites like Unsplash or DeviantArt.
Step 1: Set Up Your Canvas
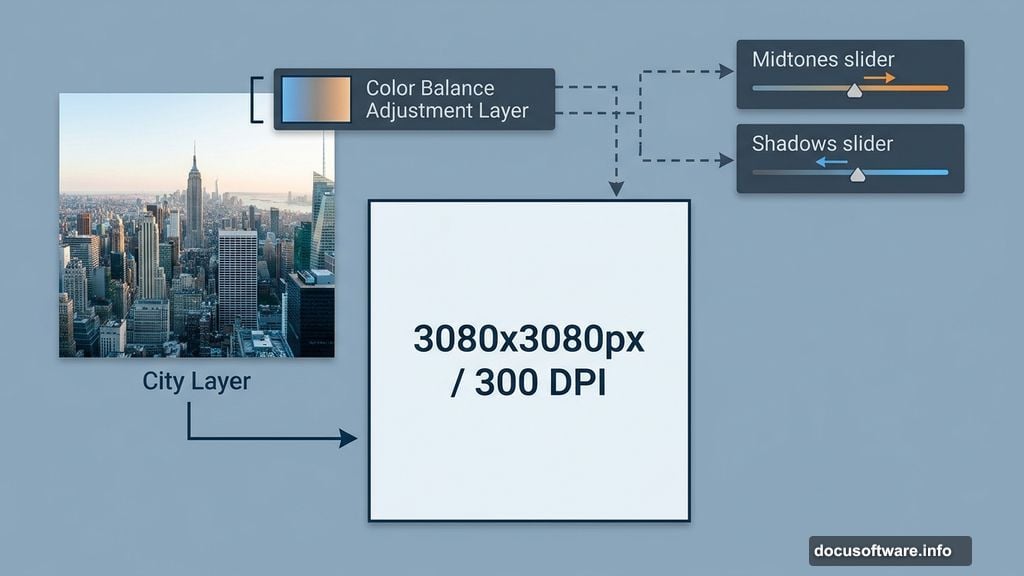
Start fresh. Go to File > New and enter these settings exactly:
- Width: 3080px
- Height: 3080px
- Resolution: 300px
- Color Mode: RGB Color, 8-bit
- Background Contents: Transparent
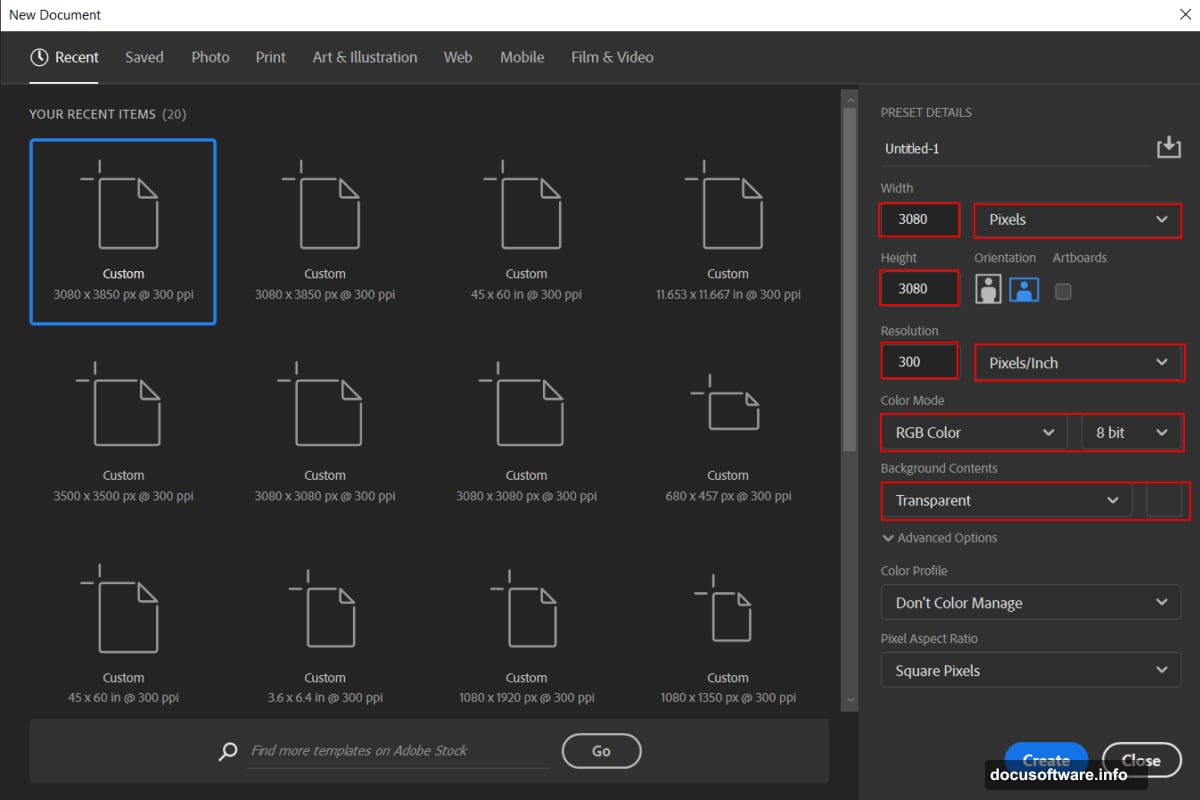
The 300 DPI resolution gives you plenty of quality if you ever want to print. Plus, a square canvas works beautifully for this kind of centered composition.
Step 2: Place Your Background City Image
Go to File > Place and select your city photo. Once it lands on the canvas, hit Ctrl/Cmd + T to open the Transform tool. Hold Alt + Shift to scale from the center while keeping proportions locked. In Photoshop CC, just hold Alt and all sides resize together.
Position the city so it sits naturally in the upper portion of the frame. This reserves space below for your desert foreground.
Step 3: Add a Color Balance Adjustment Layer
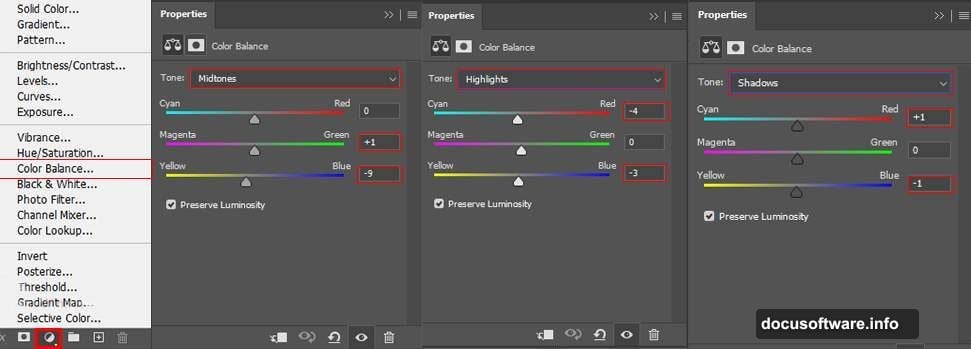
Here’s where the mood starts taking shape. Add a Color Balance adjustment layer above your city layer. This lets you push the overall tone toward warmer desert hues or cooler twilight blues, depending on your creative direction.
Clip this adjustment layer to the city layer so it only affects that element. Small shifts in the Midtones and Shadows sliders make a big difference at this stage.
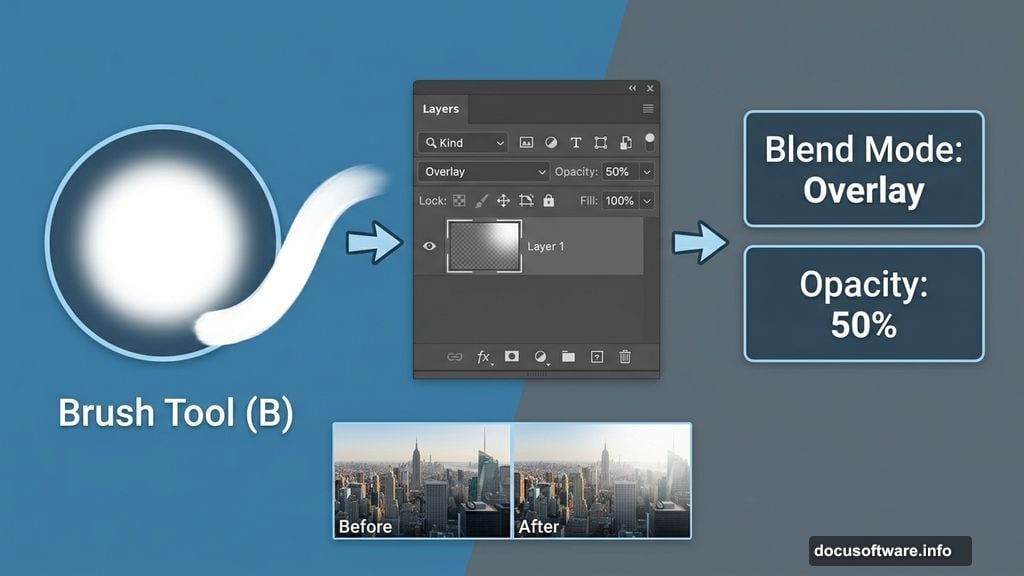
Step 4: Paint in a Light Source
Create a new empty layer above the adjustment layer. Grab the Brush tool (B), choose a large Soft Round brush, and set your foreground color to white.
Paint a soft glow in the upper right corner to suggest sunlight or a distant light source. Then change the layer blend mode to Overlay and drop the opacity to around 50%. This integrates the light naturally without blowing out highlights.
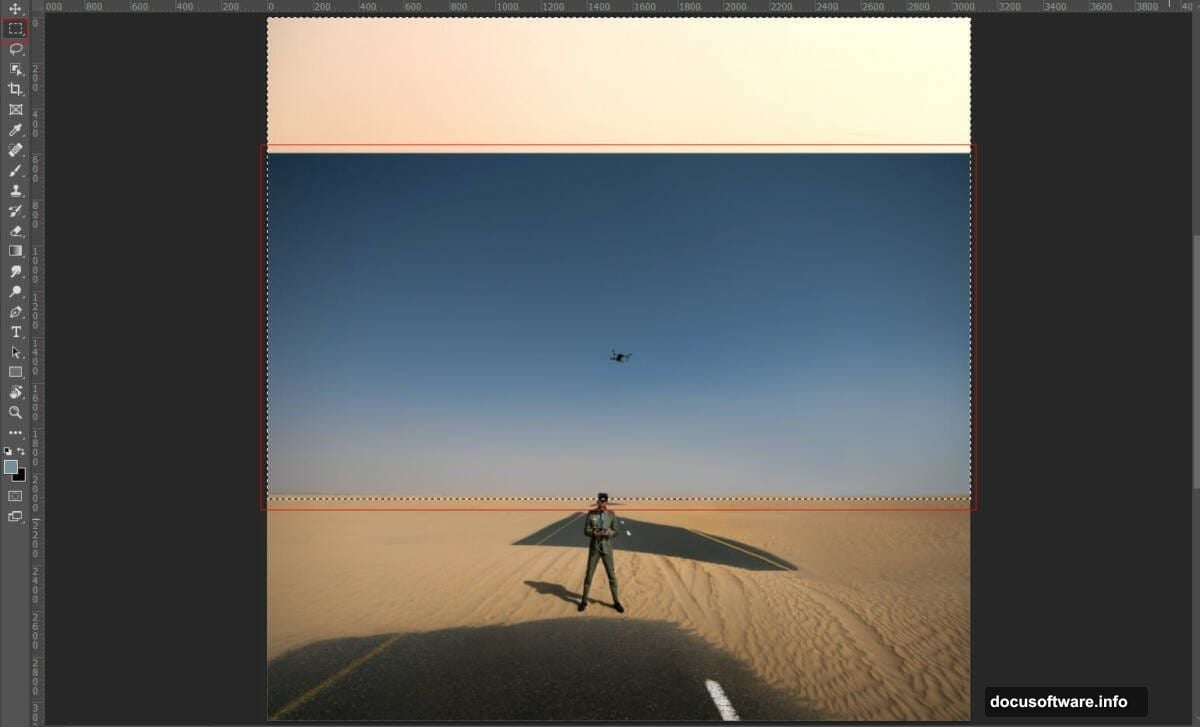
Step 5: Bring in the Desert and Mask the Sky
Go to File > Place again and select your desert photo. Transform and position it so the road and sand occupy the lower half of the canvas. The horizon line should sit roughly where the city meets the ground.
Now for the key step. Use the Rectangular Marquee tool to select only the sky portion of the desert photo. With that selection active, click the Add Layer Mask button at the bottom of the Layers panel. This hides the desert sky and reveals the city image beneath it, creating your first blend.
Adjust the mask edge with a soft brush if the transition looks harsh. A slight feather goes a long way here.
Step 6: Remove the Person with Clone Stamp
Your desert photo probably includes a person or vehicle that needs to go. The Clone Stamp tool (S) handles this cleanly, but there’s a smart way to do it.
Create a new empty layer above the desert layer before you start cloning. Select the Clone Stamp tool, tick Sample: Current & Below in the options bar, and do all your retouching on that empty layer. This keeps your original desert photo untouched and gives you the freedom to erase mistakes without any permanent damage.
Clone over the person and their shadow by sampling nearby road and sand textures. Take your time here. Sloppy cloning at this stage shows up later when you add finishing effects.
Step 7: Blend the Elements Together
With your base layers in place, start adding adjustment layers to unify everything. A Hue/Saturation layer can warm up the desert sand. A Curves layer helps match the overall brightness between the city and desert sections.
The goal is making both photos feel like they were shot in the same light at the same time. Pay attention to shadows and where the light falls on each element.
Step 8: Add Balloons, Mist, and Pyramids
This is where the scene gets interesting. Place your balloon images and transform them to appropriate sizes for depth. Smaller balloons near the horizon read as distant. Larger ones lower in the frame feel closer.
Add a mist layer using your cloud brushes on a new layer set to Screen blend mode. Paint softly across the horizon where the city meets the desert. This atmospheric haze does more for realism than almost anything else in the composition.
Drop in the pyramid images and blend them using layer masks and Color Balance adjustments to match the desert lighting.
Step 9: Apply Gradient Maps and Camera Raw
For the final cinematic polish, add a Gradient Map adjustment layer at the top of your layer stack. A purple-to-orange gradient pushed to low opacity creates that signature desert twilight feel. Set it to Soft Light or Color blend mode and experiment with opacity.
Finally, flatten a merged copy of your work (Ctrl/Cmd + Alt + Shift + E) and run the Camera Raw Filter on it. Boost the texture slider, add a slight vignette, and fine-tune the color grading. This step ties everything together and gives the image that polished, editorial quality you’ve been working toward.
Getting to That A+ Finish
One piece of advice worth taking seriously: the small details separate a good result from a great one. The road markings in your desert photo might look too sharp and clean against the blended city background. Consider reducing the intensity of lane lines with a subtle desaturate brush or by painting over them with a sampled sand color.
Similarly, adding some dust or sand texture in the foreground pulls the eye into the scene naturally. A bit of particle scatter, a slight lens blur on the far background, and careful attention to where shadows fall can lift the whole image noticeably.
Photo manipulation rewards patience. The more time you spend on those finishing passes, the more convincing the final result becomes. Go build something strange and beautiful.