Creating a dramatic space portrait feels intimidating at first. But once you break it down into layers, masks, and lighting adjustments, the whole process becomes surprisingly manageable — even fun.
This tutorial walks you through building a glowing, cosmic woman portrait using photo manipulation techniques in Adobe Photoshop. You’ll combine space backgrounds, star textures, a model cutout, and hand-painted lighting effects to create something that looks genuinely out of this world.
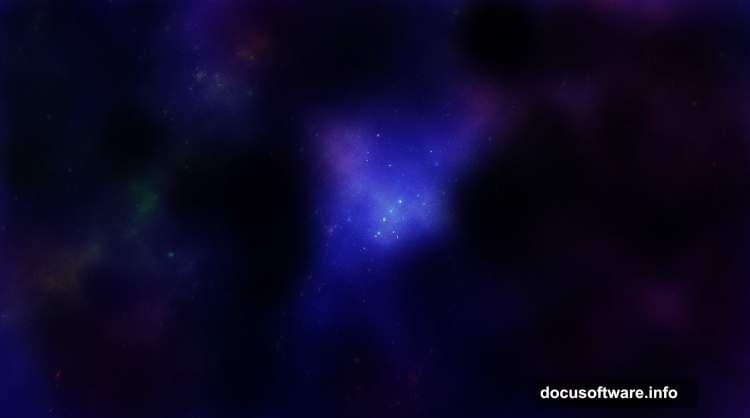
Here’s what you’ll need before we start: two space background images, a stars texture, a model photo, light effects, a light sphere, a planet texture, an abstract background, and two nebula images. The final canvas size is 2560×1440 pixels.
Building Your Space Background
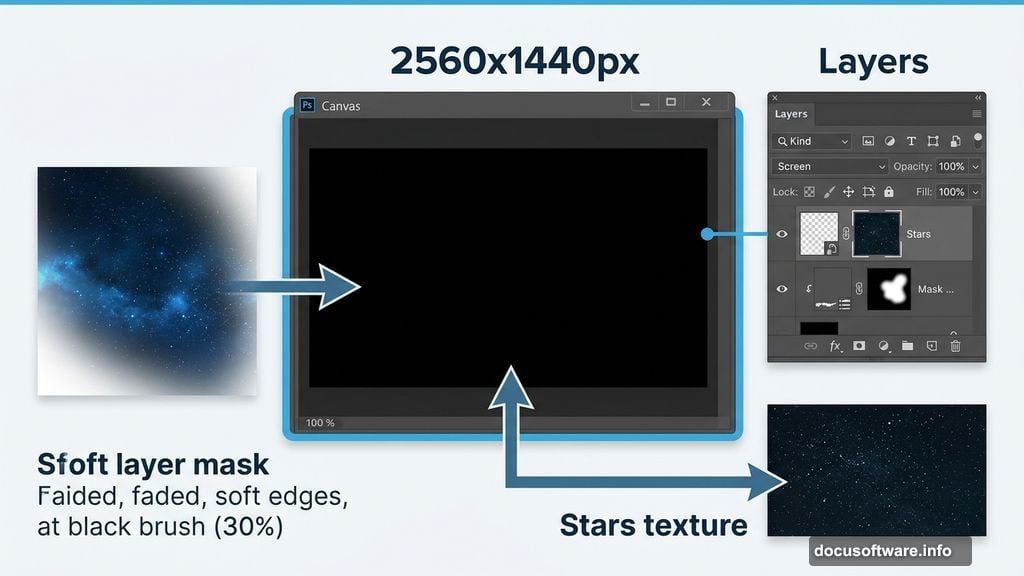
Start by creating a new 2560×1440 px document and filling it with solid black. This dark base gives you full control over how your space elements blend together later.
Open your first space background image and drag it onto the black canvas using the Move Tool (V). Right-click the layer and convert it to a Smart Object. This keeps your original image intact while you make adjustments.
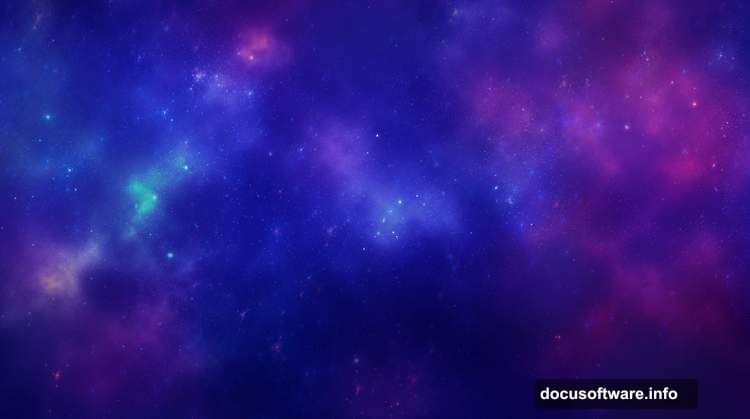
Next, add a layer mask by clicking the second icon at the bottom of the Layers panel. Grab the Brush Tool (B) and choose a soft round brush. Set your brush color to black and lower the opacity to around 30%. Gently paint over the sides of the canvas to fade the background edges and give the scene more depth.
Adding Stars and Contrast
Drag your stars image onto the canvas and set the layer blending mode to Screen at 100% opacity. The Screen mode makes the dark areas of the stars layer invisible, so only the bright star points show through. Add a mask to this layer and use a soft black brush to soften the stars in certain areas, keeping things looking natural rather than pasted-on.
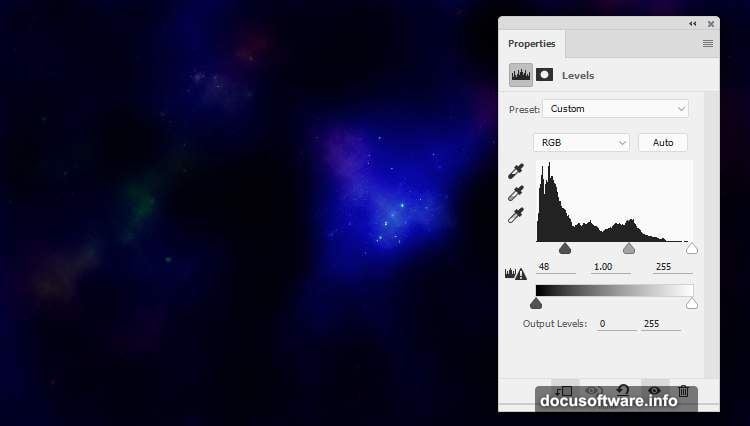
Now add a Levels adjustment layer clipped to the space background. This lets you reduce its visibility without permanently altering the original. Then add another Levels adjustment layer clipped to your stars layer to fine-tune contrast and brightness.
Follow that with a Hue/Saturation adjustment layer on the stars. Shifting the hue here lets you push the color toward cooler blues and purples, which sells the deep-space atmosphere fast.
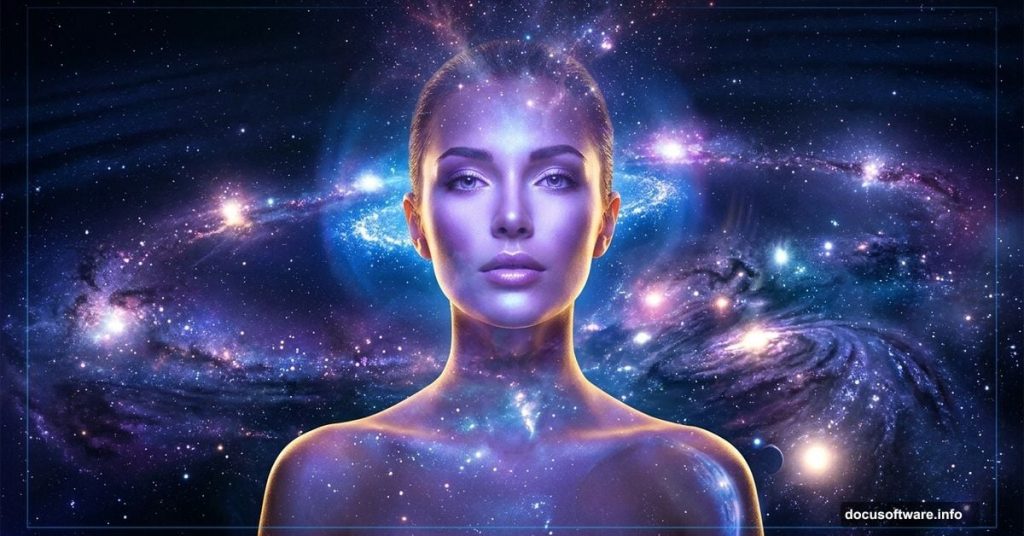
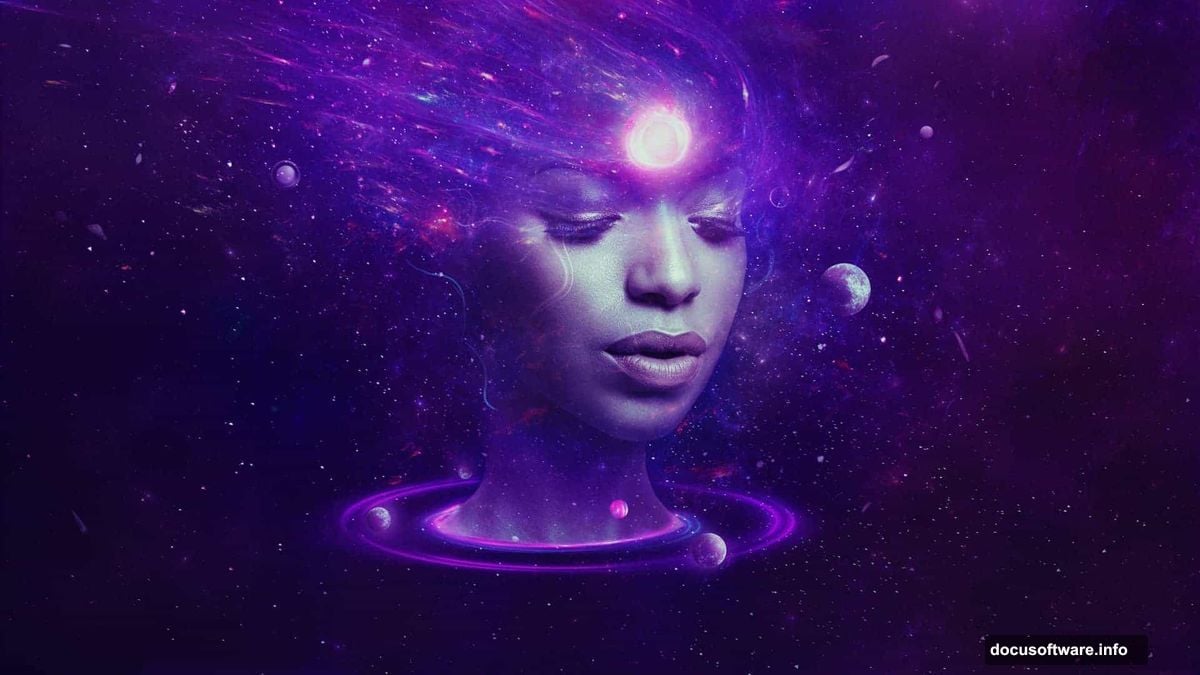
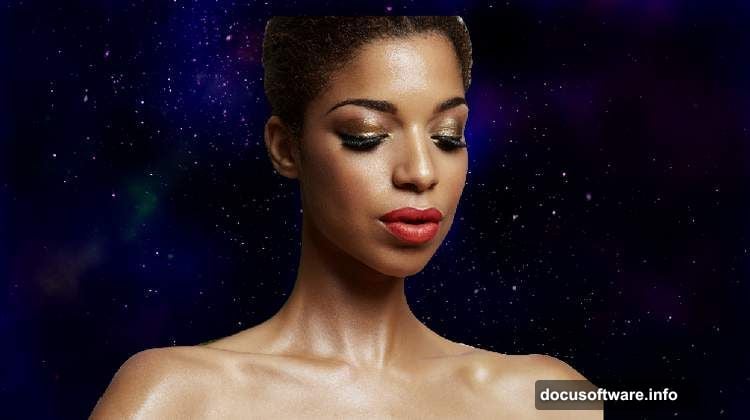
Cutting Out and Placing Your Model
Open your model photo and cut her out from the background using whatever method works best for you — the Pen Tool, Select Subject, or Refine Edge all do the job well. Place her in the center of the canvas and add a layer mask to her layer.
With a soft black brush, paint over the top of her head to fade her smoothly into the space background behind her. Switch to a hard brush to cleanly remove her body below the neck and the lower neck area. The goal is a portrait that emerges from the cosmos rather than sitting on top of it.
Painting Light and Shadow with Dodge and Burn
This is where the portrait really comes alive. Create a new layer, set its blending mode to Overlay at 100%, and fill it with 50% gray. The 50% gray becomes invisible in Overlay mode, giving you a clean surface to paint light and shadow without touching your model layer directly.
Hit O to activate the Dodge and Burn Tool. Set the Range to Midtones and keep the Exposure low — around 10 to 15%. Use Dodge to brighten the cheekbones, chin, and any areas where your imaginary light source hits. Use Burn to deepen the shadows along the sides of the cheeks, neck, and jaw.
Toggling this layer between Overlay and Normal mode lets you see exactly what you’re painting. The Normal view shows your gray brushstrokes; the Overlay view shows the actual light and shadow effect on the portrait.
Refining Skin Tone and Color
Add a Hue/Saturation adjustment layer above the model and bring Saturation down to -83. This desaturates the skin significantly, giving it a cooler, otherworldly quality that fits the space theme.
Follow up with a Color Balance adjustment layer. Adjust both the Midtones and Highlights sliders to push the skin tones toward the cooler, slightly blue-green range typical of sci-fi portraits. Then add a Curves adjustment layer to lift the brightness on the chin, cheeks, and behind the neck — the areas your cosmic light source would naturally hit.

Use a soft black brush at about 30% opacity on the Curves mask to paint back any areas that are already bright enough. This keeps your highlights from blowing out and maintains realistic dimension across the face.
The remaining steps in this tutorial continue building on this foundation — adding nebula layers, abstract elements, glowing light effects, and final color grading that ties everything together. Each new layer adds another dimension to the portrait, gradually transforming a simple model photo into a fully realized piece of space-themed digital art.
Once you’ve worked through the whole process, you’ll have a solid handle on the core skills that power most photo manipulation projects: smart masking, non-destructive adjustment layers, Dodge and Burn painting, and blending modes. Those techniques carry into practically every composite you’ll ever build.