Imagine misty fjords, weathered longships cutting through dark water, and ravens circling a dramatic mountain sky. That’s exactly the scene this Photoshop tutorial helps you build from scratch, and it’s more approachable than you might think.
This walkthrough from designer Maria Semelevich covers everything from building a foggy landscape base to placing models and adding final atmospheric color grading. Whether you’re fairly new to Photoshop or just looking for a creative project to sharpen your skills, this one is genuinely fun to work through. Put on some music, brew something warm, and let’s dig in.
What You’ll Actually Build
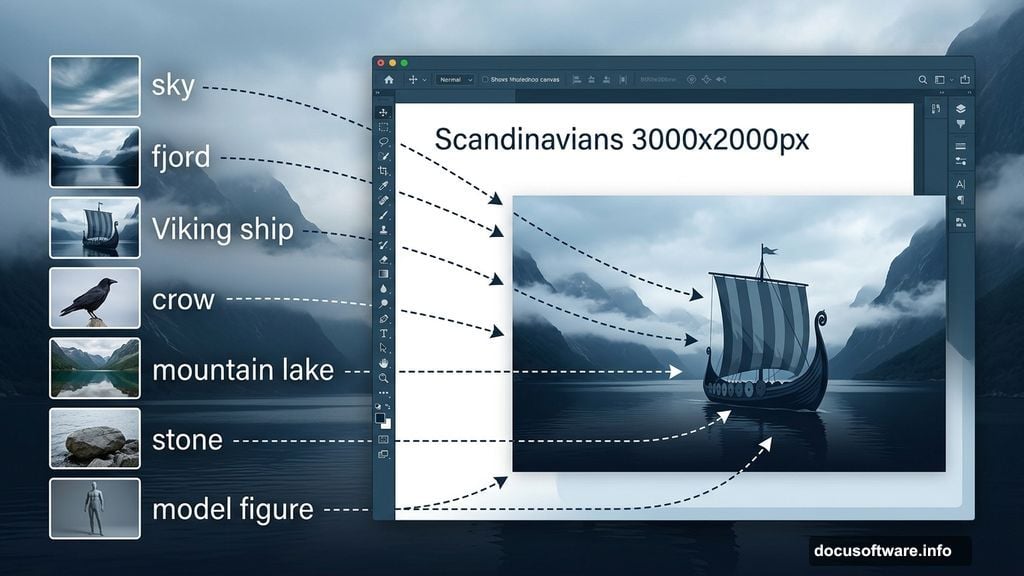
The finished piece shows an ancient Scandinavian scene full of atmosphere and drama. You’ll construct a layered landscape with water, mountains, and moody sky. Then you’ll add sailing ships, a human figure, atmospheric stones, and a flock of crows to complete the epic mood.
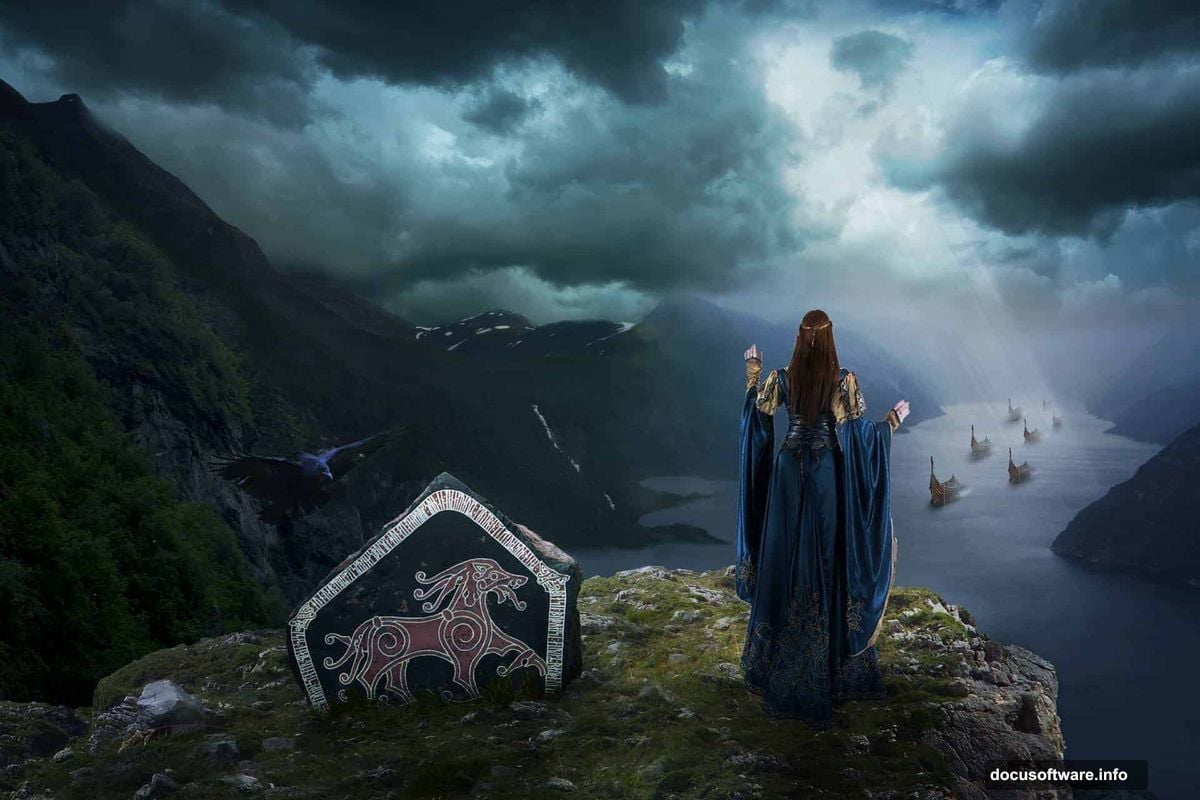
Finally, adjustment layers pull everything together with a cohesive color tone. Think cool blues, golden highlights, and that unmistakable “ancient world” atmosphere.
Gather Your Stock Images First
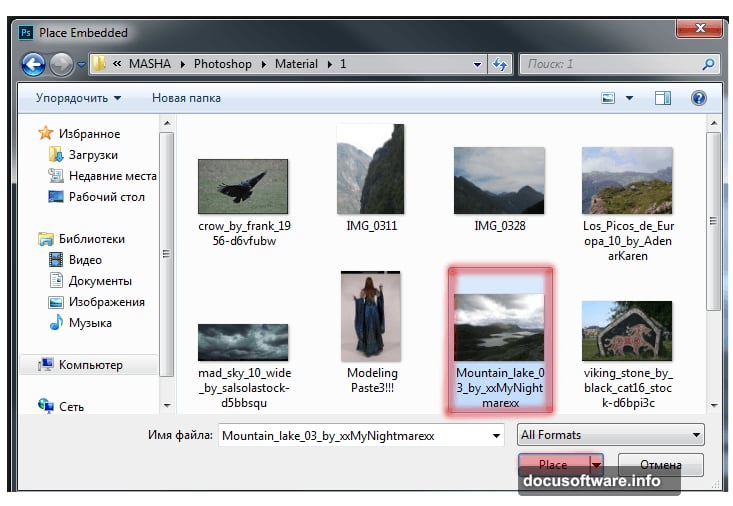
Before opening Photoshop, download all your stock resources into a single folder. This saves a lot of frustration mid-project. The tutorial uses freely available stock images covering a dramatic sky, a coastal promontory, a mountain lake, a crow, a stone, a Viking ship, fjord photography, and a human model figure.
Having everything organized upfront means you can focus on the creative work rather than hunting for files mid-session.
Setting Up Your Photoshop Document
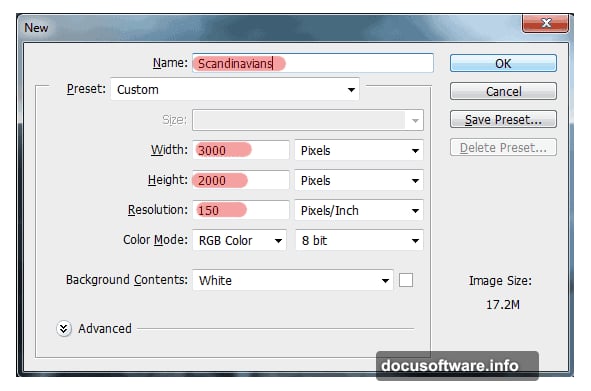
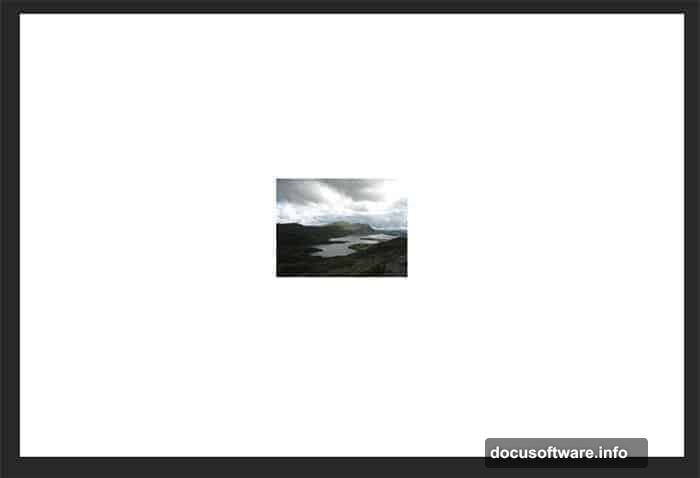
Start by creating a new document using File > New (or the shortcut Cmd/Ctrl + N). Set the canvas to 3000 pixels wide by 2000 pixels high. This gives you plenty of room to work at a comfortable scale without things feeling cramped.
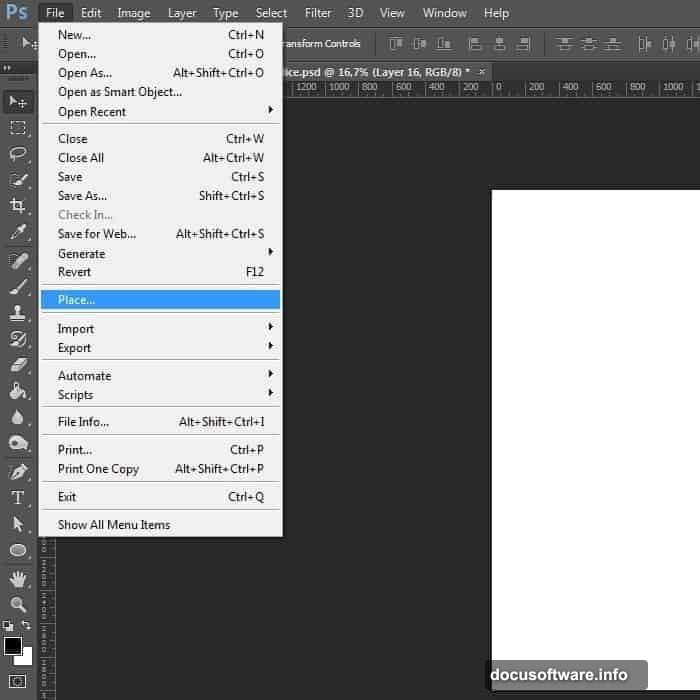
Name the document something meaningful, like “Scandinavians,” so it’s easy to find later. Then bring in a landscape reference image using File > Place. This acts as a visual skeleton for composition, helping you judge where elements should sit. You’ll remove it at the very end.
Layer Masks and Blending Landscapes
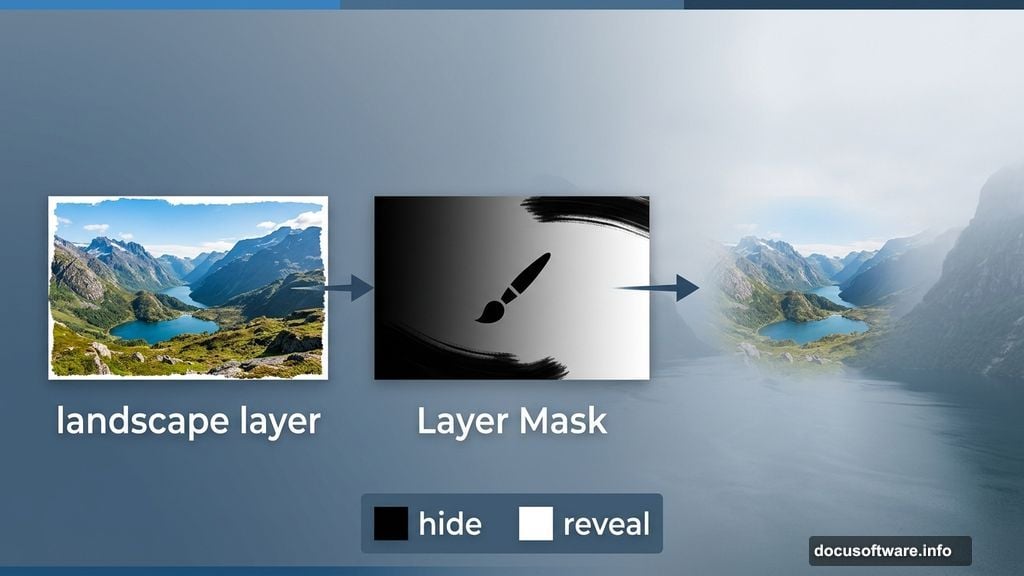
This is where the real photo manipulation magic happens. The tutorial walks you through placing your foggy landscape image as the compositional foundation. Using layer masks, you can blend the edges of each new element smoothly into the scene.
Think of layer masks like a gentle eraser that never permanently deletes anything. You paint black on the mask to hide parts of a layer and white to reveal them. This non-destructive approach lets you refine blends and tweak edges as many times as you need.
Building the Mountainside and Water
Next, you’ll shape the environment itself. The mountain lake photo gets transformed and positioned to create convincing depth. Photoshop’s Transform tool (Cmd/Ctrl + T) lets you scale, rotate, and warp images to fit your composition naturally.
The fjord photographs slot in to add realistic Norwegian coastal texture. These are particularly striking elements because the real landscape photography brings an authenticity that’s hard to fake with illustrations alone.
Placing the Viking Ships
Few things sell an ancient Scandinavian scene like longships on dark water. The tutorial guides you through placing the ship stock image, scaling it to feel correctly proportioned within the scene, and blending it convincingly with the water below.
Matching the lighting direction between the ship and the rest of your scene is crucial here. Pay attention to where your light source sits and make sure shadows fall consistently across every element.
Adding the Model, Stone, and Crows
Now the scene gets its human element. The model image slots into the composition following the same masking and blending process. Careful edge work around hair and clothing edges makes the biggest difference in making this feel real rather than obviously composited.
The stone adds weight and texture to the foreground. Meanwhile, the crow stock image gets duplicated and varied to scatter a convincing flock across the sky. Small scale variations between birds sell the sense of distance beautifully.
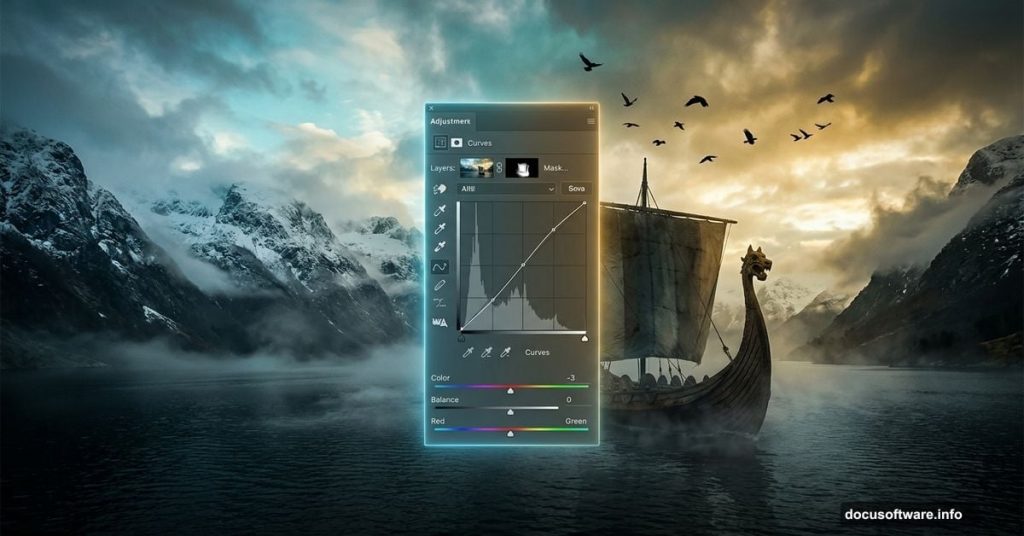
Sky Work and Atmospheric Adjustment Layers
The sky makes or breaks a moody atmospheric piece. This tutorial spends time getting the cloud formations and horizon right before moving into the final adjustment phase.
Once the scene is fully assembled, adjustment layers bring everything into harmony. The Selective Color adjustment layer is particularly important here. For the blues in the scene: set Cyan to 0, Magenta to 0, and Yellow to +14. For the yellows: set Cyan to +43, Magenta to +40, and Yellow to +100. These settings push the color palette toward that warm-meets-cool Scandinavian epic tone.
Layer Organization Keeps Things Sane
Throughout the whole project, the tutorial emphasizes keeping layers organized into named groups. Starting with a “land” group for your base landscape elements establishes good habits early.
Complex composites with many stock images can become genuinely confusing fast. Named groups mean you can always find the element you need to tweak without hunting through dozens of unlabeled layers.
This project is a wonderful way to practice the core skills every photo manipulator needs: masking, blending, transformation, and color grading. The Viking theme gives you plenty of dramatic material to work with, and the step-by-step structure means you always know what comes next. Try pushing the color grading in your own direction once you’ve followed the main steps, because making the final piece unmistakably your own is where the real creative satisfaction lives.