Photo manipulation in Photoshop is one of those skills that feels like pure magic once you get the hang of it. You start with a handful of separate photos, and by the end, you’ve created something that looks like it belongs in a dream.
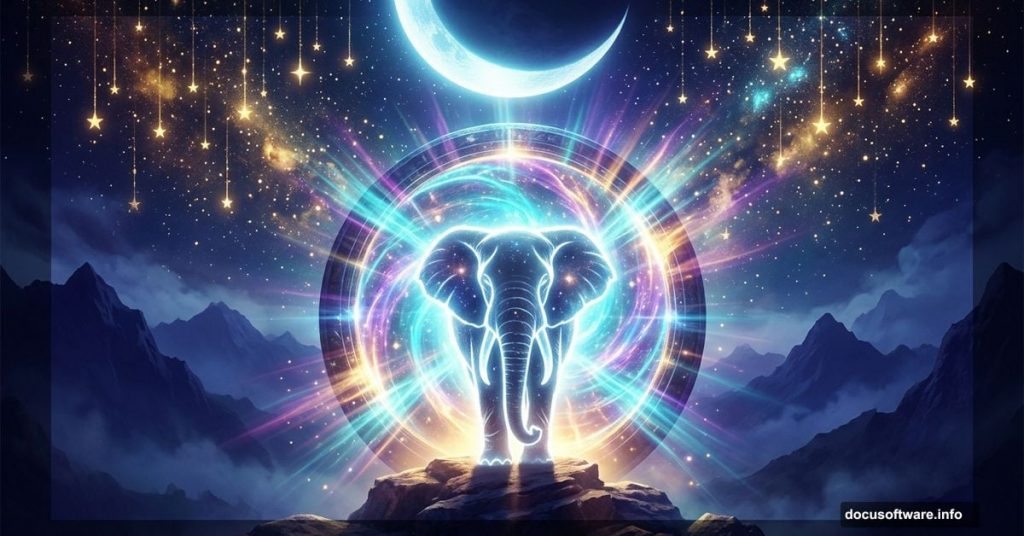
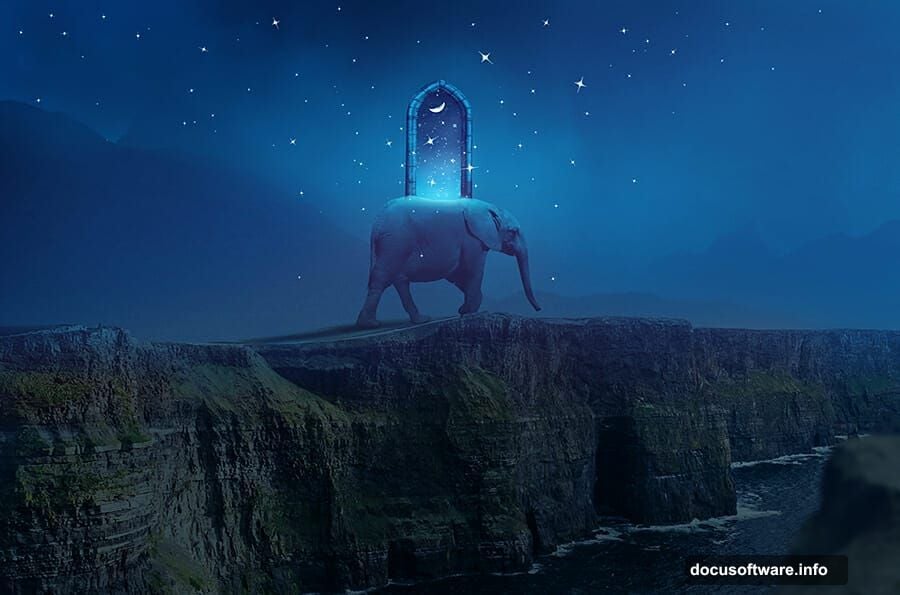
This tutorial walks you through building a complete fantasy scene featuring an elephant, a glowing portal, a crescent moon, and cascading stars. Don’t worry if you’re new to compositing. Every step is broken down clearly, and by the end, you’ll have a stunning piece of digital art to show off.
Here’s a quick look at everything you’ll need before we start.
Gather Your Resources First
You’ll need these images to follow along: two sky photos, two mountain photos, a cliff, a rock, an elephant, a portal, a moon, and a set of glitter brushes. Having everything downloaded and organized before you open Photoshop saves a lot of frustration later.
Also, set up a new document at 1968×1300 pixels and fill it with white. That’s your blank canvas for everything that follows.
Building the Sky with Curves Adjustment Layers
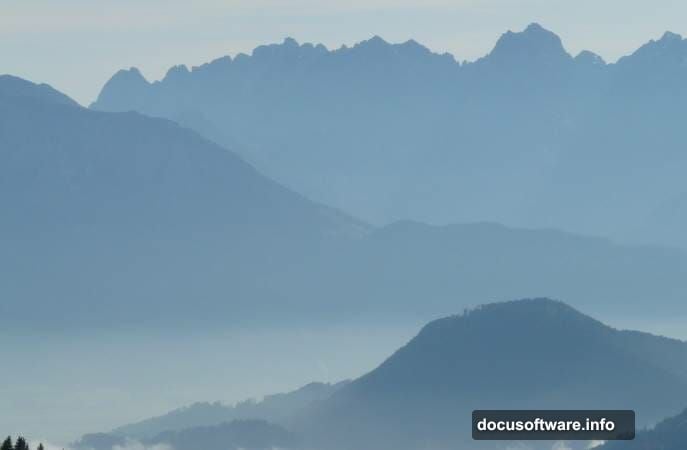
Start by dragging your first sky image onto the canvas with the Move Tool (V). Then use Free Transform (Ctrl+T) to scale it down to about 60%. This gives you room to work without the sky dominating everything from the start.
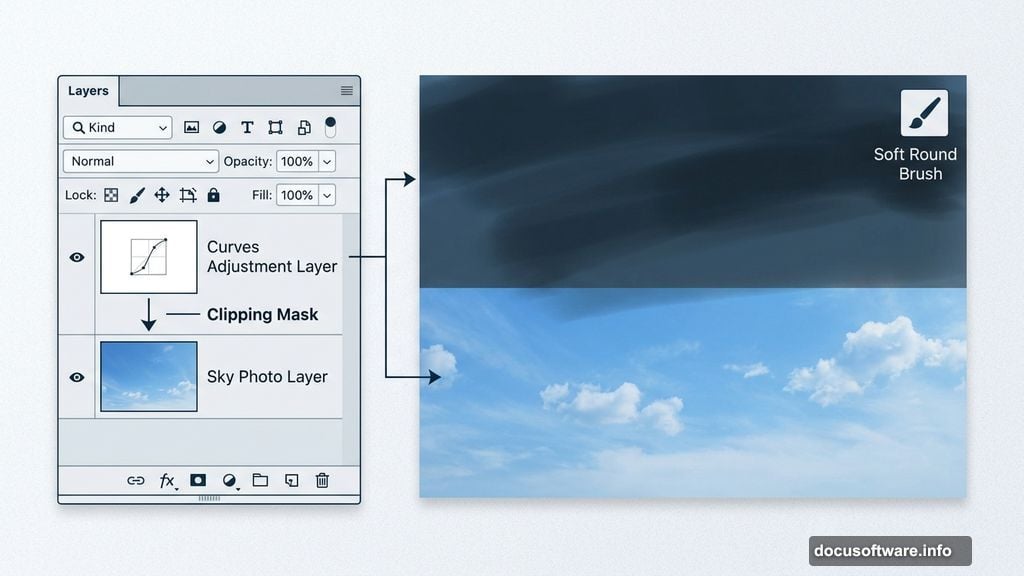
Next, create a Curves adjustment layer and set it as a Clipping Mask. This is a technique worth understanding. A Clipping Mask means the adjustment only affects the layer directly below it, not your entire document. Think of it like clipping a note to a specific page in a notebook.
On the Curves layer mask, grab a soft round brush set to black at about 20-40% opacity. Paint gently over the top and middle of the sky to reduce brightness in those areas. This creates a subtle gradient effect that looks natural rather than flat.
Adding Atmospheric Haze to the Sky
Create a second Curves adjustment layer and push the brightness up a bit more. This adds a dreamy, hazy quality to the whole sky. Then use a soft black brush on the layer mask to pull back that effect on the top left and lower portions of the canvas.
The goal here is to create depth. Skies in real photos rarely have consistent light from edge to edge. By dimming certain areas selectively, you make the whole scene feel more believable, even when the subject matter is completely fantastical.
Bringing in the Mountains with Layer Masking
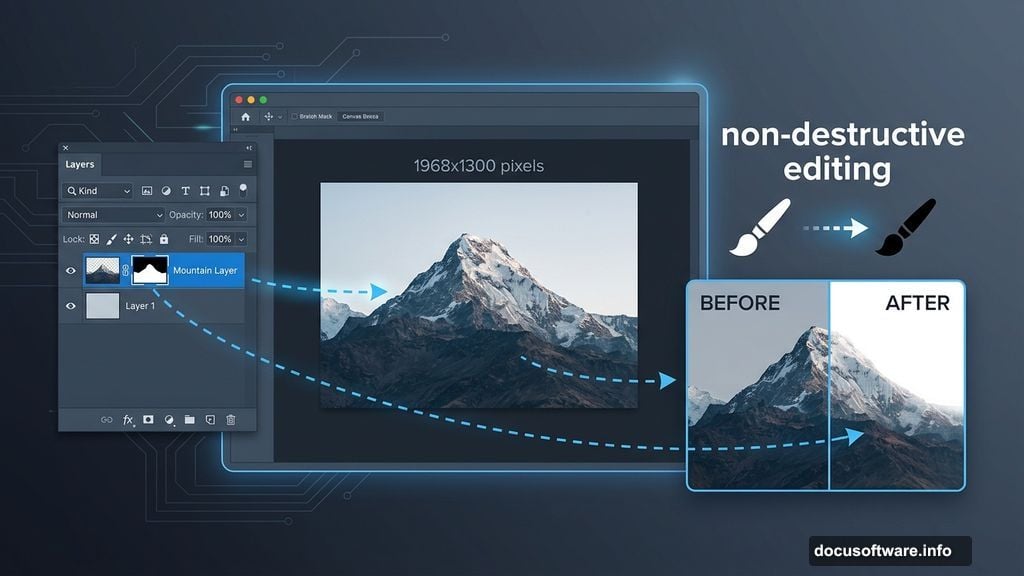
Open your first mountain image and drag it into the document. Click the mask icon at the bottom of the Layers panel to add a layer mask. Then use a soft black brush to erase the sky portion and the mountain on the right side, blending it smoothly into your existing background.
Layer masking is non-destructive, which means you’re not actually deleting any pixels. You’re just hiding them. So if you paint too much away, you can switch your brush to white and paint it back. This flexibility is one of the best reasons to work with masks instead of the eraser tool.
Add a Curves adjustment layer clipped to this mountain layer and darken it slightly. Then add a Hue/Saturation adjustment layer and drop the Saturation to -82. This desaturates the mountain, making it feel more distant and atmospheric, like something seen through haze on the horizon.
Positioning the Second Mountain

Isolate your second mountain from its original photo and place it in the middle right of the canvas. Add a mask to this layer too, and use a soft black brush to erase the sea area at the base. Blend it carefully so it sits naturally behind the first mountain, creating a convincing sense of depth.
Create another Curves adjustment layer clipped to this second mountain. This time, reduce the contrast and overall visibility. Mountains further in the distance appear lighter and less sharp. Nailing this simple atmospheric perspective trick makes a huge difference in how realistic your scene looks.
Placing the Cliff and Rock Elements
Now comes the fun part. Add your cliff and rock images to the scene. Position the cliff so it anchors the lower portion of your composition. The rock can sit nearby to add texture and visual interest at ground level.
Use masking on both layers to blend their edges into the surrounding environment. A soft brush with low opacity works great here. The idea is to avoid harsh lines where the new elements meet the background. Nature doesn’t have clean edges, so your composite shouldn’t either.
Adding the Elephant to Your Fantasy Scene
Isolate the elephant from its original photo and place it on the cliff. Take your time with the cutout here. The elephant is the star of the scene, so rough edges will stand out immediately.
Once placed, use adjustment layers (clipped to the elephant layer) to match its tone and lighting to the surrounding scene. Add a Curves layer to adjust brightness and contrast. If the elephant looks too warm or too cool compared to the background, a Hue/Saturation layer lets you nudge the color balance until everything feels cohesive.
Creating the Portal and Fantasy Sky Inside It
Import the portal image and position it in your scene. This is where things get really exciting. Inside the portal, you’ll create a completely different sky. Think of it as a window into another world.
Add your second sky image and mask it so it only appears within the portal opening. Then layer in a crescent moon. Position the moon so it feels like it’s floating inside or just beyond the portal. Use a soft glow effect around it with a low-opacity brush in a warm or cool color, depending on the mood you want.
Scattering Stars with Glitter Brushes
Load your glitter brushes into Photoshop. Create a new layer above everything else and set your foreground color to white or a soft yellow. Then start painting stars across the scene, both inside the portal and scattered around it.
Vary your brush size as you go. Larger stars feel closer. Smaller ones recede into the distance. A random, natural scatter looks far more convincing than placing stars in neat patterns. Also try reducing the opacity on some star clusters to create depth, making certain stars look further away.
Final Polish with Vibrance Adjustment
Add a Vibrance adjustment layer at the very top of your layer stack. Don’t clip it to anything. You want it to affect the entire composition. Vibrance boosts color intensity in a smarter way than plain Saturation. It pushes muted colors more aggressively while leaving already-saturated colors mostly alone. The result is a richer, more vivid image without looking overdone.
At this stage, take a step back and look at your whole piece. Check whether the light sources feel consistent, whether the elephant reads clearly against the background, and whether the portal feels like a natural focal point. Small tweaks to individual Curves layers can solve most problems at this stage.
Photoshop compositing is part technical skill and part creative intuition. The techniques here, layer masking, clipping masks, Curves and Hue/Saturation adjustments, are the same tools professionals use on every project. Once you feel comfortable with them in this fantasy context, you’ll find yourself reaching for them constantly in all kinds of photo editing work. So keep experimenting, push the scene further, and see what else you can add to make the world inside your canvas feel truly alive.