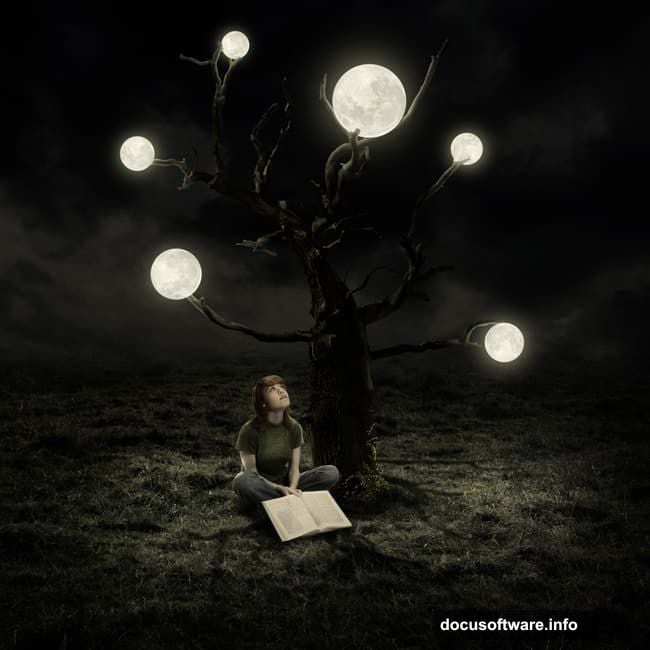
Ever looked at a piece of digital art and thought, “how did they make that?” That gorgeous dreamlike quality where trees glow under multiple moons and day somehow becomes night? That’s exactly what this tutorial delivers.
This photo manipulation walkthrough shows you how to build a stunning surreal artwork featuring a tree surrounded by moons. Best of all, you only need Photoshop CS3 or newer to follow along. So if you have an older version sitting on your computer, you’re good to go.
Here’s what you’ll create: a moody nighttime scene built from scratch using stock photos, adjustment layers, masking techniques, and custom lighting effects. Let’s walk through the whole process.
What You’ll Need Before Starting
The tutorial uses five stock photo resources: a model, a tree with transparent background, a grass image, a sky photo, and a moon image. Gather these first. Having all your assets ready before you open Photoshop saves a lot of frustration mid-build.
You’ll also want to be comfortable with a handful of core Photoshop tools. Specifically the Move Tool (V), Rectangular Marquee Tool (M), Free Transform (Cmd/Ctrl+T), and basic layer mask painting. Don’t worry if you’re not an expert. The steps break everything down clearly.
Building the Base Scene from Grass and Sky
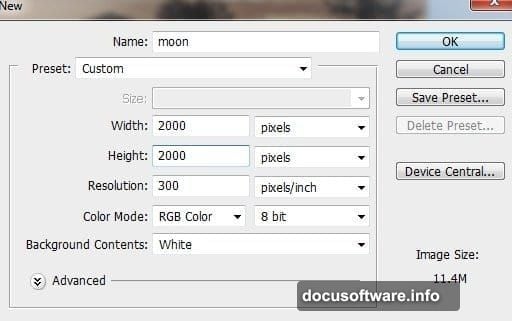
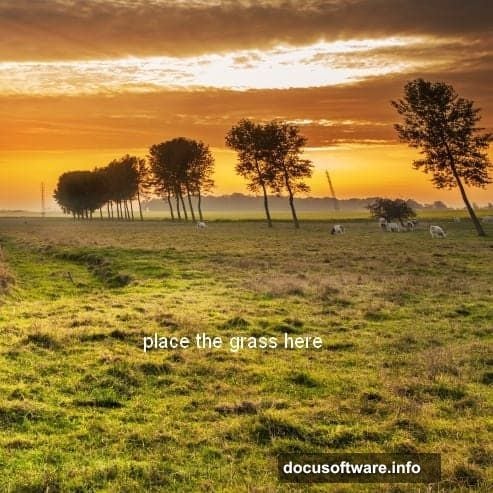
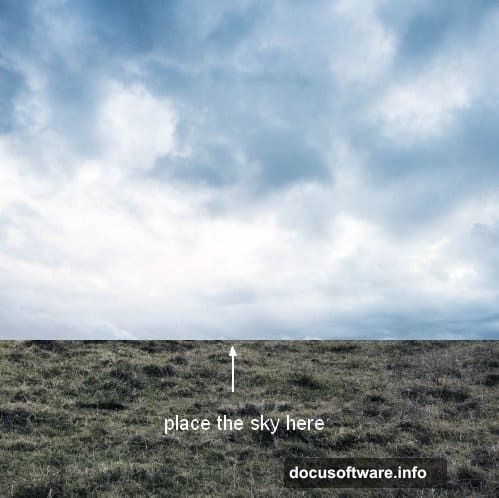
Start with a fresh document using whatever dimensions the tutorial specifies. Then bring in your grass image and position it as the base layer. Simple enough.
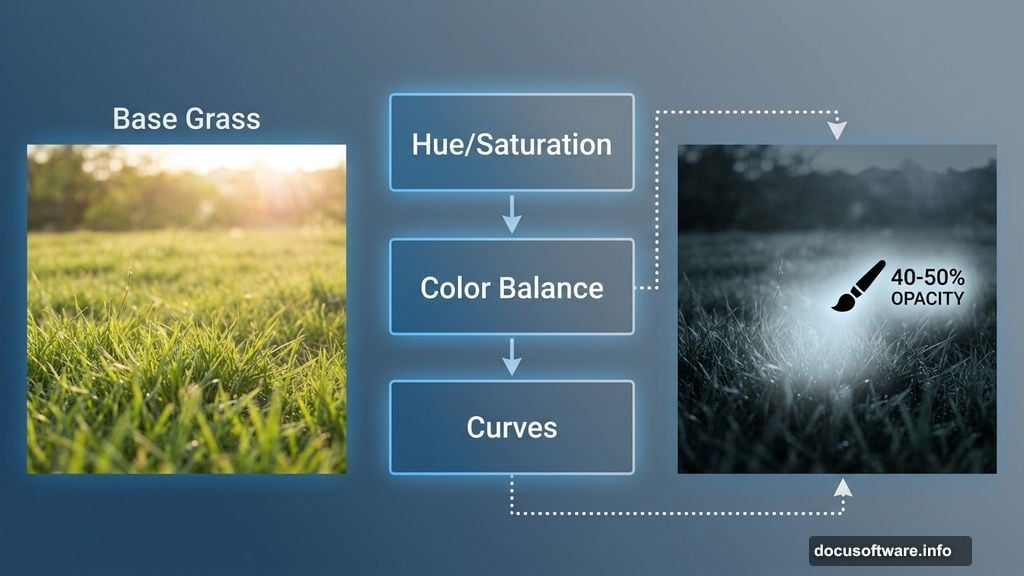
Next comes your first taste of adjustment layers. Go to Layer > New Adjustment Layer > Hue/Saturation and clip it to the grass layer. This reduces the grass saturation so it feels more atmospheric. Then add a Color Balance adjustment to shift the grass tones, followed by a Curves layer to darken everything down.
Here’s a neat trick for the Curves layer: add a mask to it and use a soft black brush at about 40-50% opacity to paint back brightness in the foreground area. This creates natural depth without flattening the whole scene.
For the sky, use the Rectangular Marquee Tool to select just the sky portion of your photo. Place it in the upper section of your canvas and use Free Transform to resize it. Then add a layer mask and paint the bottom edge with a soft black brush. This blends the sky smoothly into the grass below, removing any hard seams.
Add Curves and Hue/Saturation adjustment layers clipped to the sky to darken it and match its tone to the grass. Consistency between elements is everything in photo manipulation.
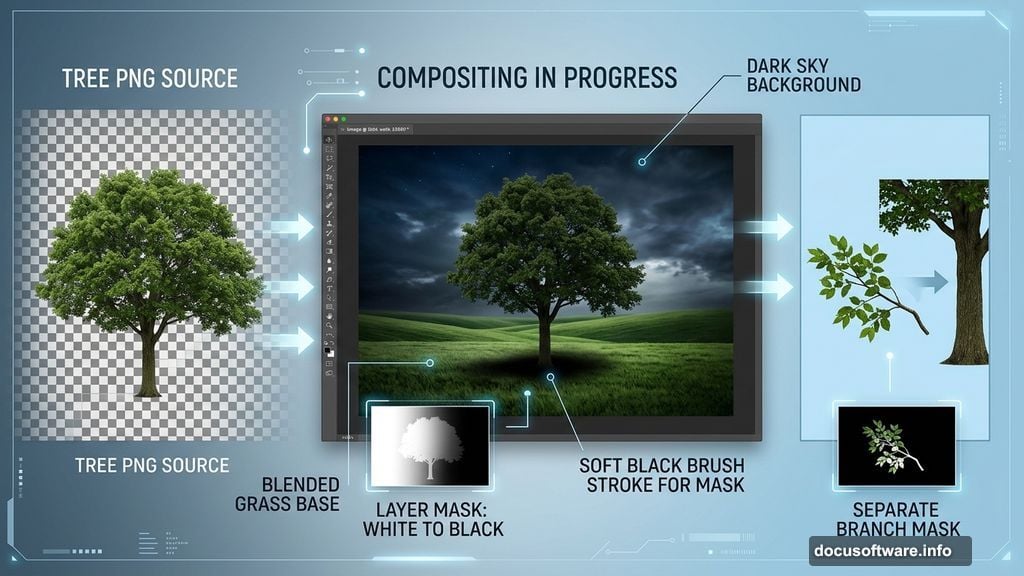
Adding the Tree and Branch Layers
Open your tree image. Since it comes with a transparent background, just drag it straight into your document. Add a mask and use a soft black brush to blend the base of the tree into the grass naturally.
Then comes a nice detail: grab a separate branch from the tree image and position it to the left of the main trunk. Blend it in with another layer mask. This small addition adds visual complexity and makes the composition feel more organic.
Creating Realistic Tree Shadows
This is where things get interesting. Since your moons will light the scene from above, the tree shadow should fall directly underneath the trunk, not off to one side.
Create a new layer positioned below all your tree layers. Hold down Cmd/Ctrl+Shift and click the tree and branch layer thumbnails to load their combined selection. Now you can paint or fill the shadow shape on this new layer and transform it to sit flat on the ground beneath the tree. It’s a clever approach that keeps everything looking grounded and intentional.
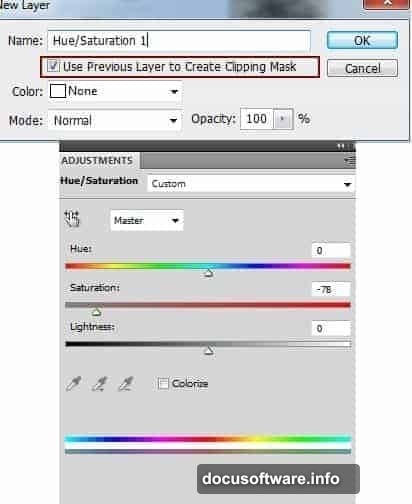
What “Curves with Clipping Mask” Actually Means
One question that comes up often in this tutorial: what does “Curves (Clipping Mask)” mean in step 7?
Here’s the simple explanation. A Clipping Mask ties an adjustment layer directly to the layer below it. So instead of affecting your entire image, that Curves adjustment only changes the one layer it’s clipped to. Think of it as putting a fence around the adjustment so it can’t escape onto other layers.
To create one, make your Curves adjustment layer and then go to Layer > Create Clipping Mask. Or just hold Alt/Option and click between the two layers. You’ll see a small arrow appear indicating the clip relationship.
Converting Day to Night with Adjustment Layers
This is honestly the most satisfying part of the whole project. Your starting images are daylight shots. But a few strategic adjustment layers completely transform the mood into night.
Multiple adjustment layers work together here to drain warmth from the scene, reduce overall brightness, and shift colors into cooler blue-grey tones. Each one builds on the last. The sky gets darker. The grass loses its sunny green quality. Everything starts feeling mysterious and cinematic.
This technique is incredibly useful beyond just this project. Once you understand how to push a daylight scene into night through Curves, Color Balance, and Hue/Saturation combinations, you can apply it to almost any photo manipulation work.
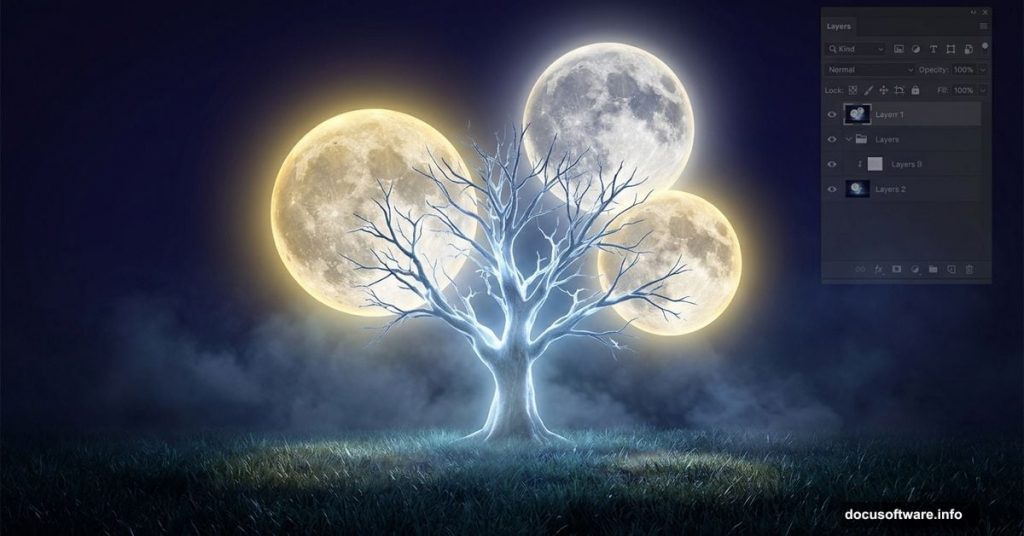
Placing Moons and Finishing Lighting Effects
With the base scene established, you bring in your moon images and position them in the composition. Multiple moons scattered at different sizes create that signature surreal quality.
Blending the moons convincingly requires masking and brush work to soften their edges against the sky. Adjustment layers clipped to each moon help them match the overall color temperature of the scene.
Finally, the tutorial adds custom lighting effects to suggest the glow cast by the moons onto the tree and ground below. This might include soft light brush strokes on new layers set to Screen or Overlay blending modes. These finishing touches pull everything together and give the artwork that magical, luminous feeling you’re after.
This project is a genuinely great exercise in photo manipulation fundamentals. You touch almost every important skill: masking, adjustment layers, blending modes, color grading, and compositional thinking. Work through it once and you’ll find yourself reaching for these same techniques in every future project.