There’s something wonderfully meditative about building a scene from scratch in Photoshop. You start with a blank canvas and a handful of stock images. Then, layer by layer, something almost magical takes shape.
This tutorial walks you through creating a warm, atmospheric landscape featuring a majestic deer. We’ll cover everything from placing your background to adding finishing touches with Camera Raw Filter. Plus, even if you’re newer to Photoshop, each step is manageable with a little patience.
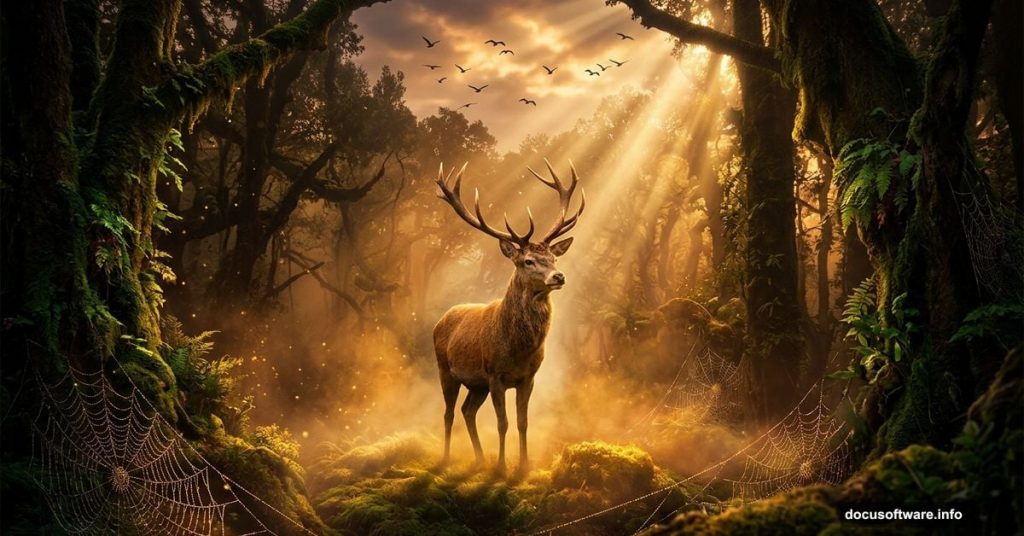
Here’s what the final result includes: a blended forest background, a carefully cut-out deer, a moody sky, decorative brushwork like spiderwebs, moss, and a spider, plus birds scattered throughout the scene.
Set Up Your Canvas First
Every good composition starts with the right foundation. So before placing a single image, create your document with these exact settings.
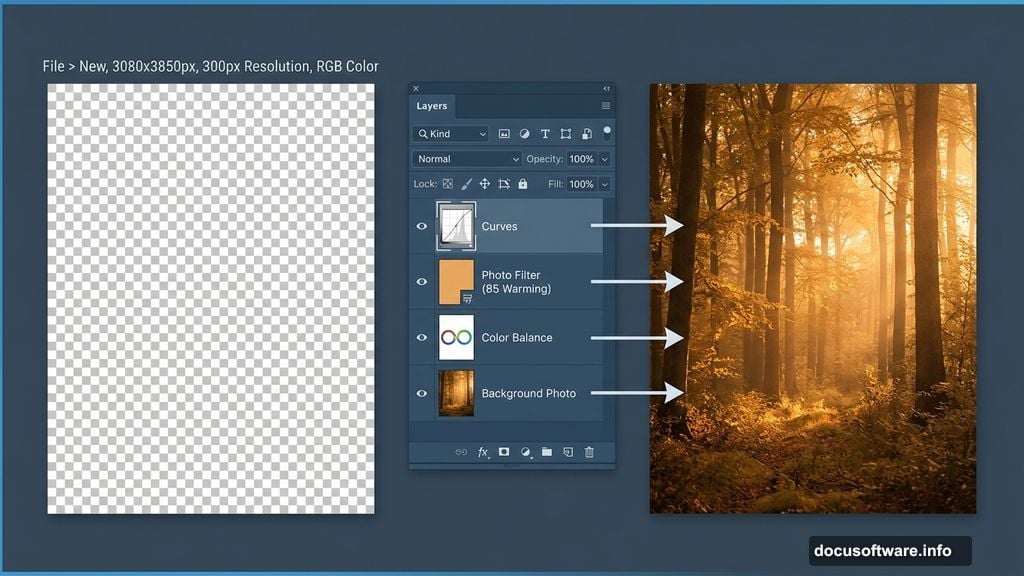
Go to File > New in the menu bar. Then enter these values:
- Preset: Custom
- Width: 3080px
- Height: 3850px
- Resolution: 300px
- Color Mode: RGB Color, 8 bit
- Background Contents: Transparent
That resolution gives you a print-quality image. And the portrait orientation suits the tall, forest-scene composition perfectly.
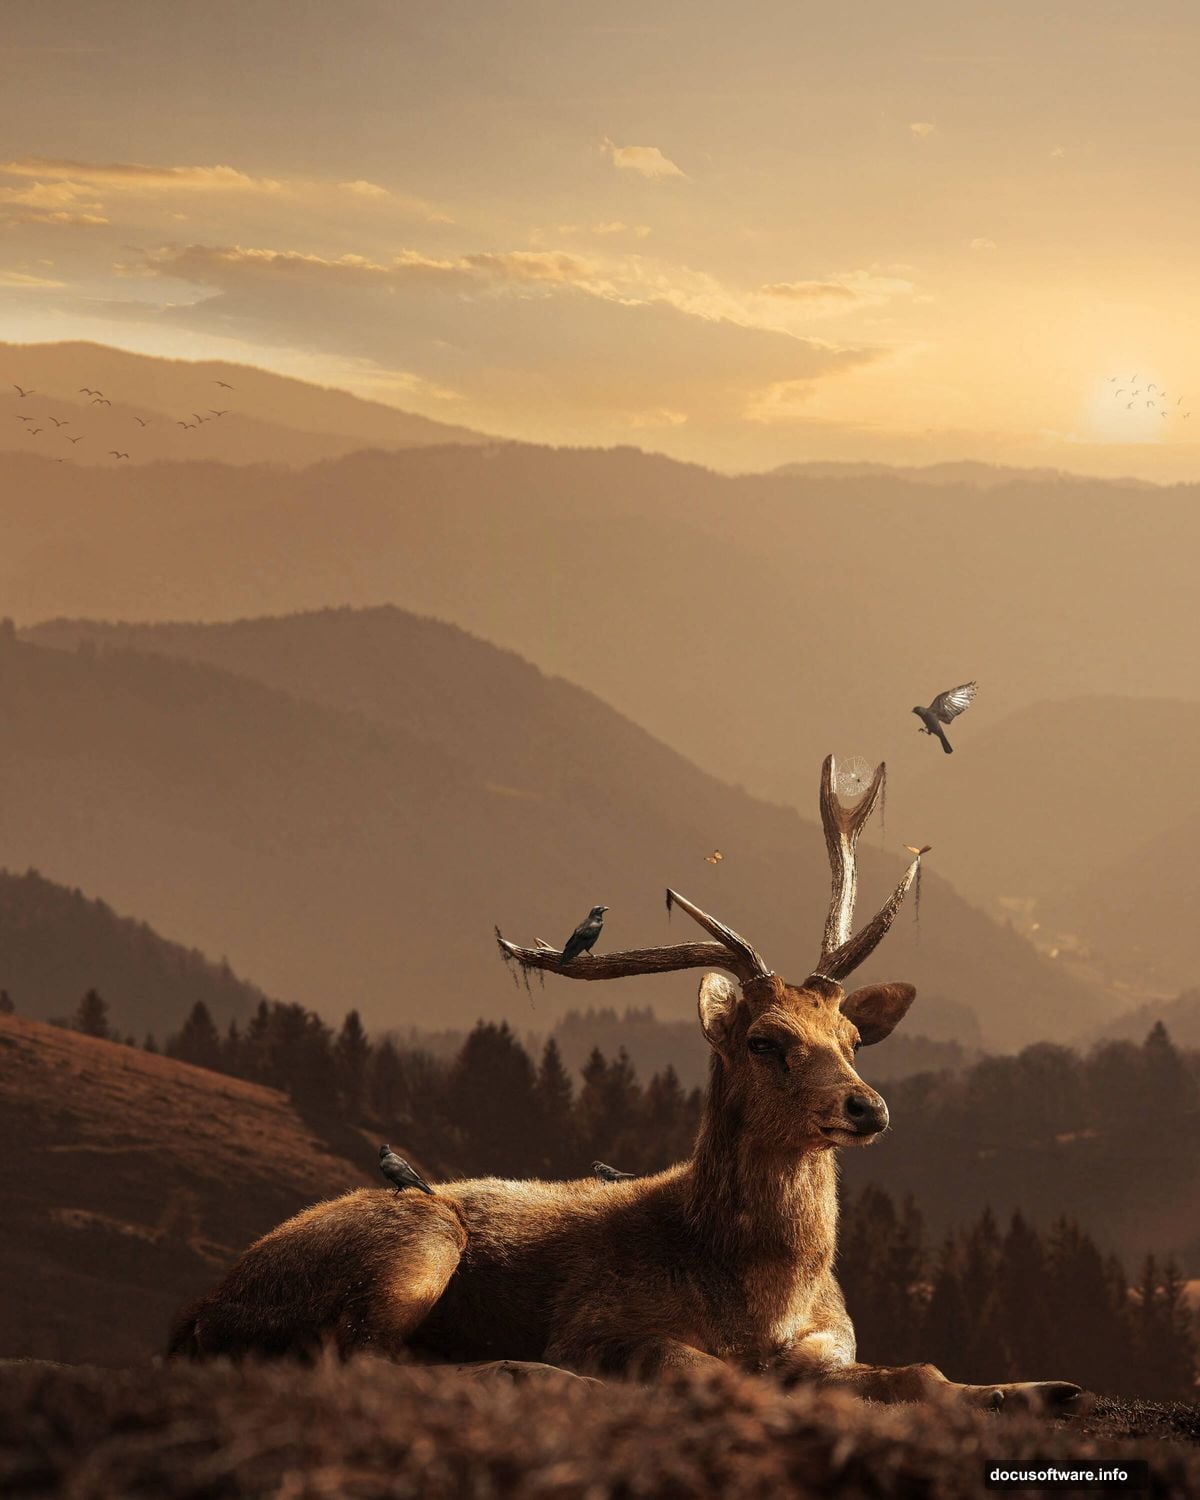
Place and Position Your Background
Now the fun begins. Go to File > Place and select your background image. Once it lands on the canvas, use the Transform tool (Ctrl/Cmd + T) to resize and position it.
Here’s a helpful tip for resizing. Hold Alt + Shift while dragging a corner handle to scale proportionally from the center. If you’re in Photoshop CC, just hold Alt by itself. That scales all sides together automatically.
Take your time getting the positioning right. The background sets the mood for everything that follows.
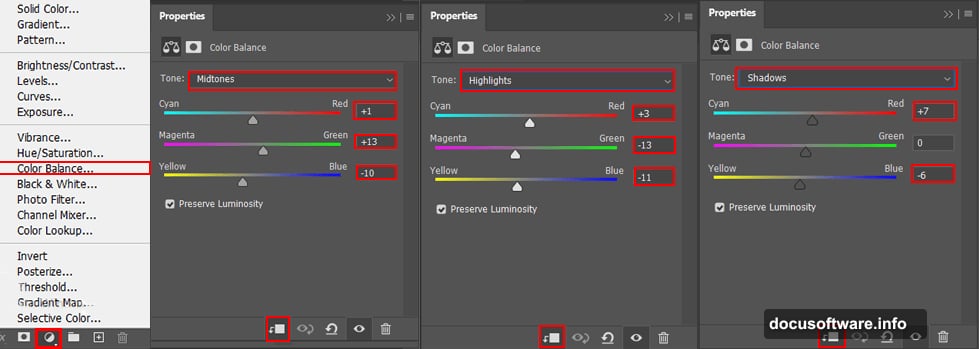
Blend the Background With Adjustment Layers
A raw background photo rarely looks like part of a painted scene. So we fix that with adjustment layers. These sit on top of your image without permanently changing the original pixels.
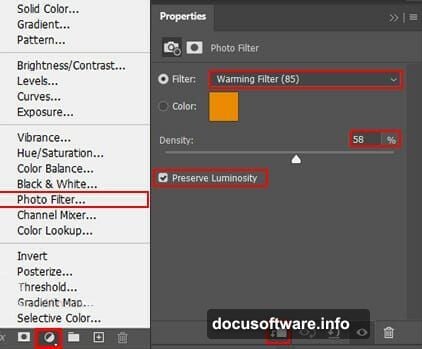
First, add a Color Balance adjustment layer. This lets you shift the tones toward warmer or cooler territory. For a cozy, golden-hour forest feel, push the midtones slightly warm.
Next, stack a Photo Filter adjustment layer on top. A warming filter (like an 85 or orange tint) ties the whole scene together beautifully. Finally, add a Curves adjustment layer to control overall brightness and contrast.
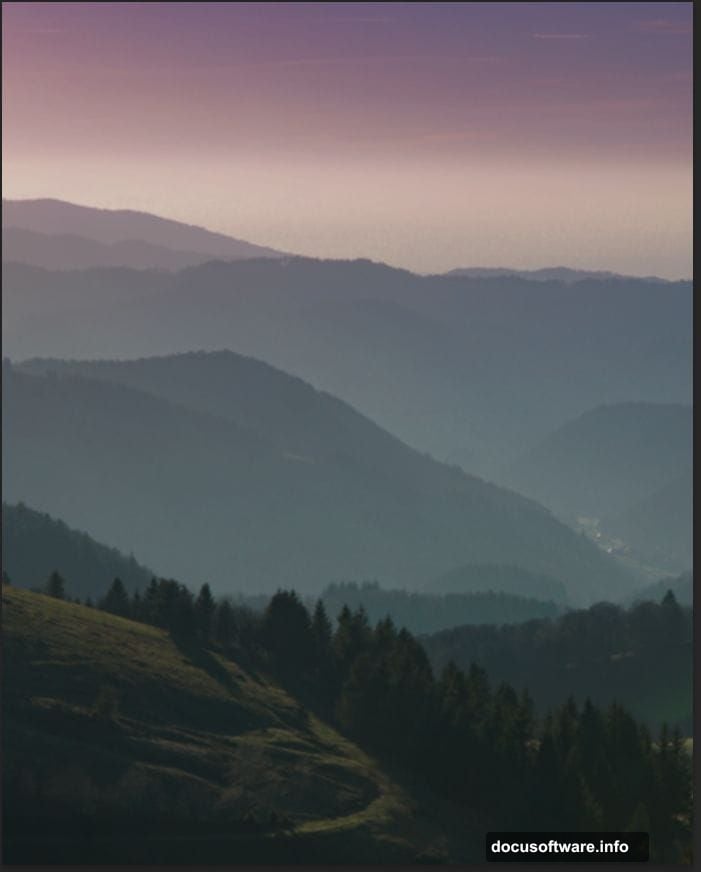
Add the Sky With a Soft Layer Mask
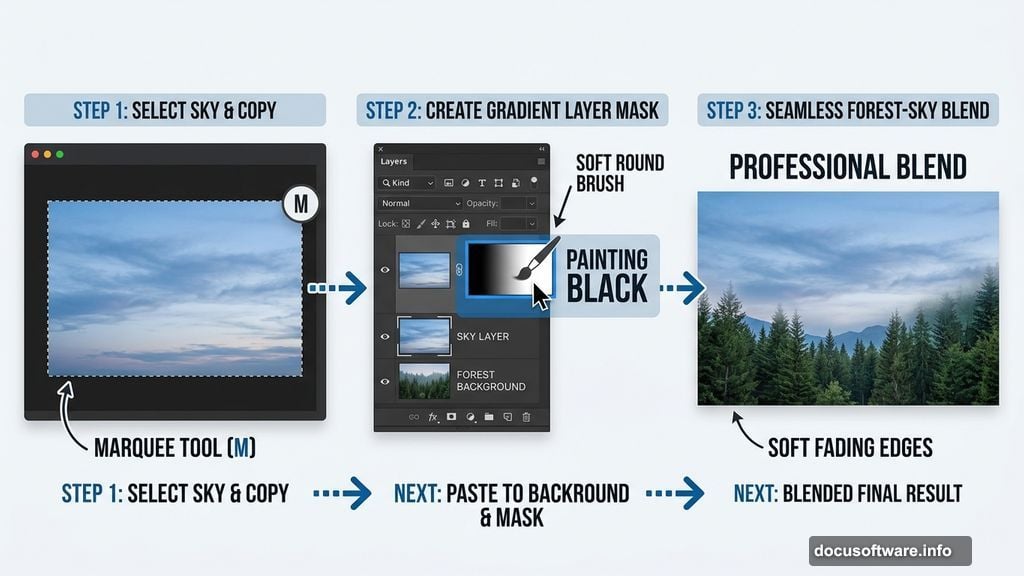
Open your sky image separately via File > Open. Then use the Rectangular Marquee Tool (press M to activate it) to select the portion of sky you want.
Drag your selection over the area you need. Hold Shift while dragging to keep the selection shape constrained. Once selected, bring it into your main composition.
Here’s where layer masks earn their reputation. Create a layer mask on the sky layer. Then grab a Soft Round Brush, set your foreground color to black, and gently paint along the bottom edge of the sky. This erases the hard edge and blends the sky into the background naturally. Set the layer opacity to 40% for a subtle, atmospheric result.
Cut Out the Deer With the Pen Tool
This is the step that separates polished composites from sloppy ones. Cutting out your subject cleanly makes the whole scene believable.
Open your deer image via File > Open. Then select the Pen Tool by pressing P. Start clicking around the outline of the deer to create anchor points. The Pen Tool draws straight lines between each click. But for curved edges, click and drag to create smooth curve handles.
Work your way around the entire animal. Take your time around the antlers and legs. Those areas need extra care. Once you’ve closed the path, right-click and choose “Make Selection.” Then create a layer mask to isolate the deer from its original background.
Add Decorative Brushwork for Atmosphere
This is where your scene gets real personality. Load your custom brush sets: spiderweb brushes, spider brushes, and moss brushes.
Create a new layer for each brush element. Spiderwebs work best in corners or stretched between branches. Moss adds wonderful texture along the ground or on rocks. Place the spider wherever tells the best story.
These small details reward viewers who look closely. Plus, they push the whole image toward something painterly and storybook-like.
Scatter Birds Across the Scene
Birds bring motion and life to landscape composites. The tutorial includes seven bird resources: two directional sets (left and right) plus four individual birds.
Open each bird image and cut them out the same way you handled the deer. Then place them at different scales across the canvas. Larger birds feel closer to the viewer. Smaller ones read as distant. That size variation creates a convincing sense of depth.
Vary the opacity on some birds slightly. A bird at 80% opacity reads as slightly further away than one at 100%. Small tricks like this make the scene feel genuinely three-dimensional.
Finish Everything With Camera Raw Filter
Camera Raw Filter is your secret weapon for pulling a composite together. Apply it as the final step on a merged or stamped layer.
Go to Filter > Camera Raw Filter. Inside, you have control over exposure, contrast, highlights, shadows, whites, blacks, clarity, vibrance, and saturation. For a warm landscape mood, try boosting the oranges and yellows in the HSL panel. Slightly crush the blacks for a cinematic look.
Also consider adding a subtle vignette. That dark edge draws the eye toward the deer and keeps focus on the center of the scene.
The Scene Comes Together
Building a composite like this teaches you something important about Photoshop: the magic lives in the small decisions. The opacity of the sky layer. The softness of that brush edge. The exact curve point you land on.
Each element you add builds on the last. And by the time Camera Raw Filter ties it all together, the scene feels like it actually exists somewhere deep in a forest. That’s what makes photo manipulation so satisfying. You build an entire world from pieces, and nobody can tell where one image ended and another began.
Give yourself time with each step. Compositing rewards patience more than speed.