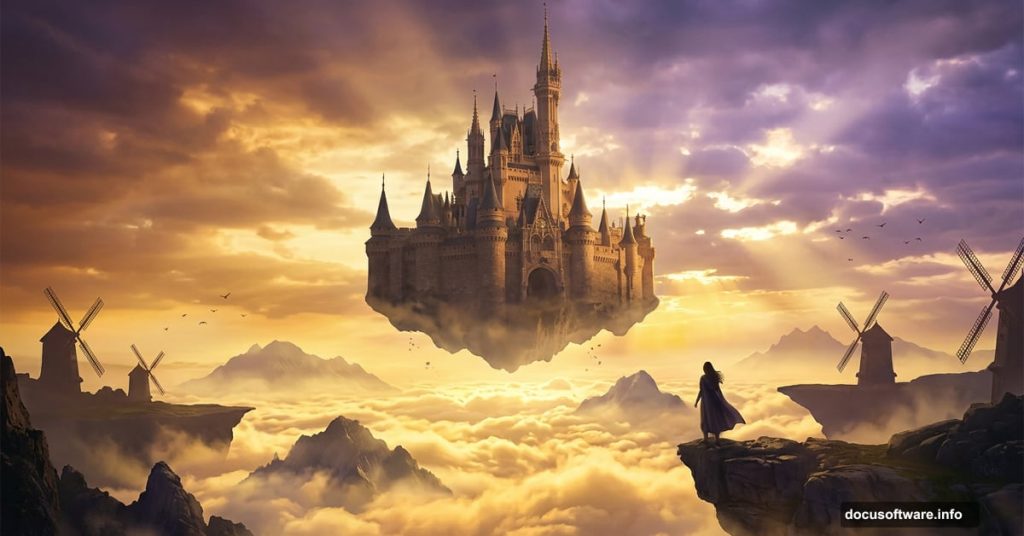
There’s something magical about photo manipulation. You take ordinary images and stitch them into worlds that never existed — misty mountains, ancient castles floating above clouds, windmills spinning in impossible skies.
This tutorial walks you through building exactly that. We’ll layer a sky background, add mountains and windmills, drop in a castle and a figure, then tie everything together with adjustment layers, light effects, and Camera Raw finishing. The result is a dreamy fantasy scene that feels like it came straight from a storybook.
Ready to build something that doesn’t exist yet? Let’s go.
What You’ll Need Before Starting
Grab these resources before opening Photoshop. Having everything ready saves a lot of back-and-forth later.
You’ll need a background sky image, windmills, mountains, a woman figure, a castle, birds or seagulls, plus cloud brushes and ray brushes. All of these are listed in the tutorial resources section above.
Also, make sure you’re working in Photoshop CC. Some transform shortcuts work slightly differently in older versions, and we’ll note those differences as we go.
Canvas Setup Gets You Off on the Right Foot
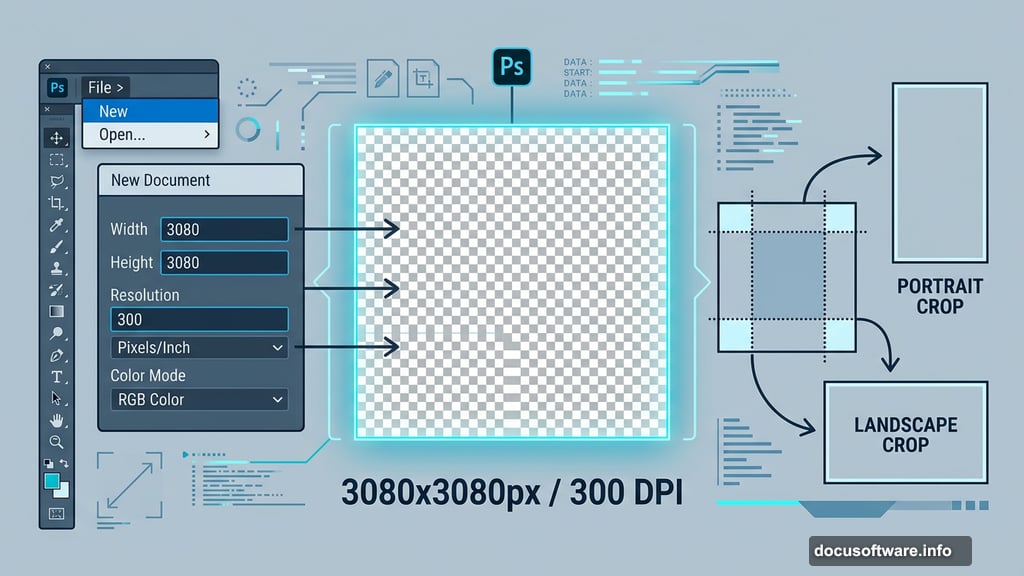
Start by creating a new file. Go to File > New and enter these exact settings:
- Preset: Custom
- Width: 3080px
- Height: 3080px
- Resolution: 300px
- Color Mode: RGB Color, 8-bit
- Background Contents: Transparent
Why 3080×3080 at 300 DPI? That resolution gives you room to print large without losing quality. Plus, working at a square canvas keeps the composition flexible if you want to crop differently later.
Placing the Sky Background
Go to File > Place and select your background image. Once it lands on the canvas, hit Ctrl/Cmd + T to bring up the transform tool.
Here’s where versions differ. In older Photoshop, hold Alt + Shift while dragging to scale proportionally from the center. In Photoshop CC, just hold Alt — it handles all sides together automatically.
Position the background so the cloud line sits roughly in the lower half of the canvas. That open sky above becomes your building space for everything else. Think of it as the stage before the actors arrive.
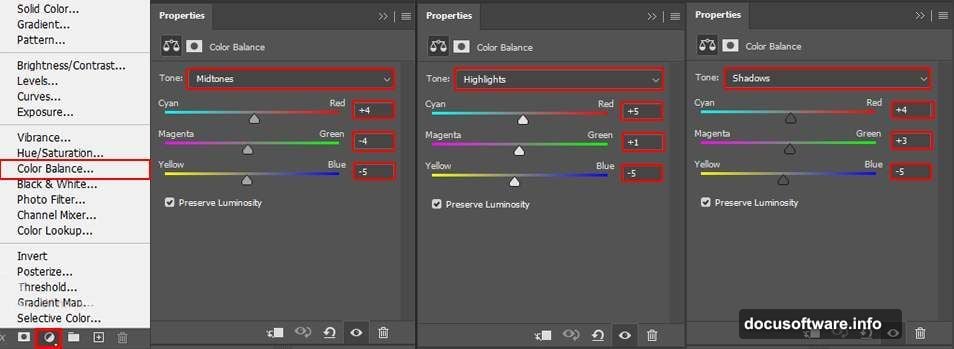
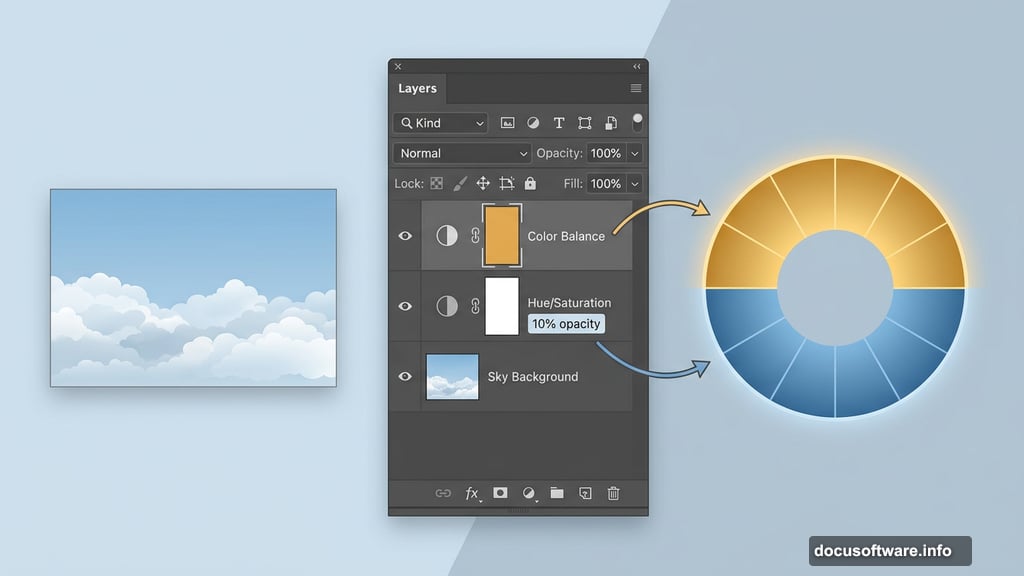
Color Balance Adjustment Layer
Add your first adjustment layer right after placing the background. Go to Layer > New Adjustment Layer > Color Balance.
This step sets the overall mood before you add any other elements. Pushing slightly warmer tones into the midtones creates a golden, late-afternoon feel. Cooler shadows add depth. Experiment here because this color direction influences every layer you add afterward.
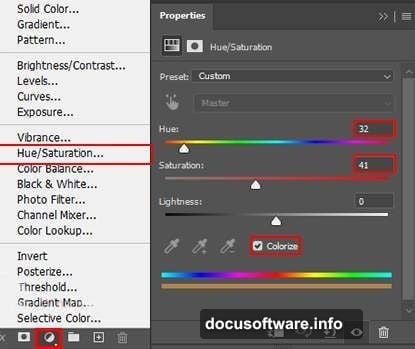
Hue/Saturation Layer at 10% Opacity
Next, add a Hue/Saturation adjustment layer. Then drop its opacity all the way down to 10%.
That sounds almost too subtle to matter. But this low-opacity saturation tweak is one of those tricks that quietly holds a composition together. It softens the raw, oversaturated look that stock images often have and nudges everything toward a more painterly feeling.
Curves Adjustment for Contrast
Add a Curves adjustment layer now. Pull the midtones up slightly to brighten the scene, then anchor the shadows so they stay rich and dark.
This creates contrast without blowing out highlights. A flat image looks digital and unconvincing. Good contrast is what makes composite work start to feel like a single, believable world.
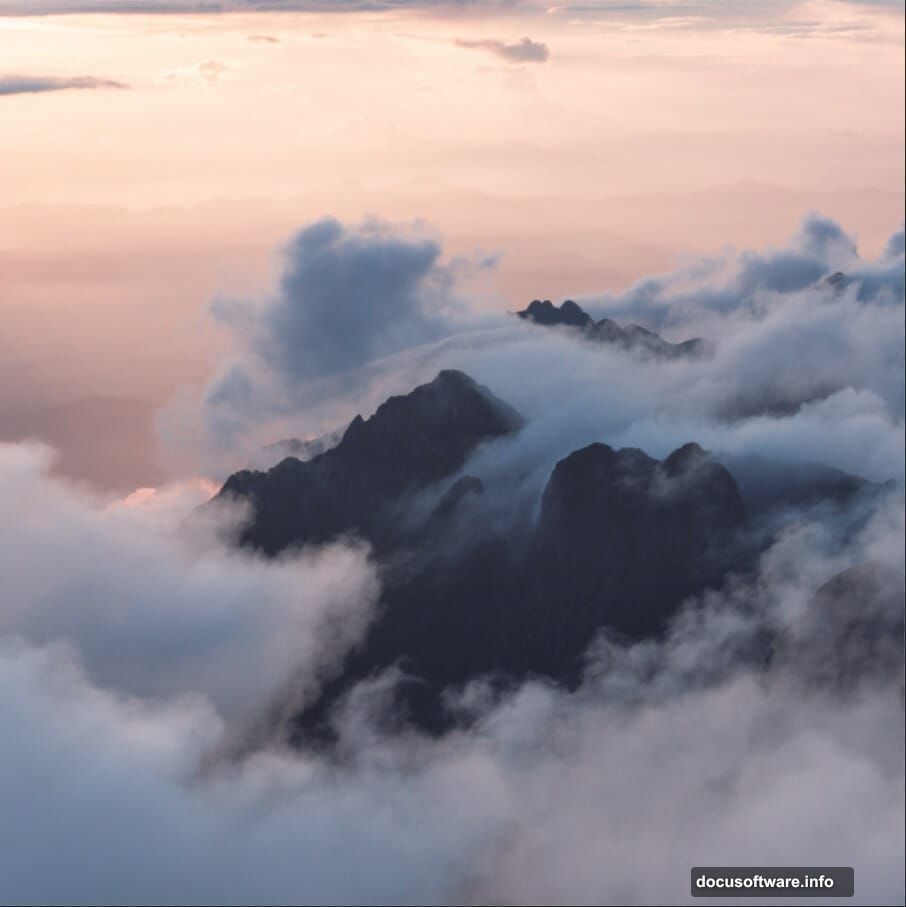
Adding the Mountains
Go to File > Place and bring in your mountains image. Use Ctrl/Cmd + T again to position and scale, using the same Alt-hold technique as before.
Here’s where layer masks become your best friend. Create a layer mask on the mountains layer, then press Ctrl/Cmd + I to invert it. That hides the mountains entirely behind a black mask.
Now grab the Brush Tool (B), pick a soft round brush, set your foreground color to white, and paint the mountains back in. This approach gives you precise control. You’re not erasing — you’re revealing. And if you reveal too much, just switch to black and paint back over.
The goal is to blend the mountain base naturally into the clouds below. No hard edges. No obvious cut lines.
Placing the Windmills
Bring in your windmills via File > Place. Scale and position them using the same transform approach.
After placing, create an inverted layer mask just like you did for the mountains. Use a soft round brush with white to paint the windmills back in, removing the original background behind them.
Set the windmill layer opacity to 95% once you’re happy with the mask. That 5% transparency reduction is small, but it helps the windmills feel embedded in the atmospheric haze rather than sitting on top of it. Small opacity tweaks like this are what separate polished composites from rushed ones.
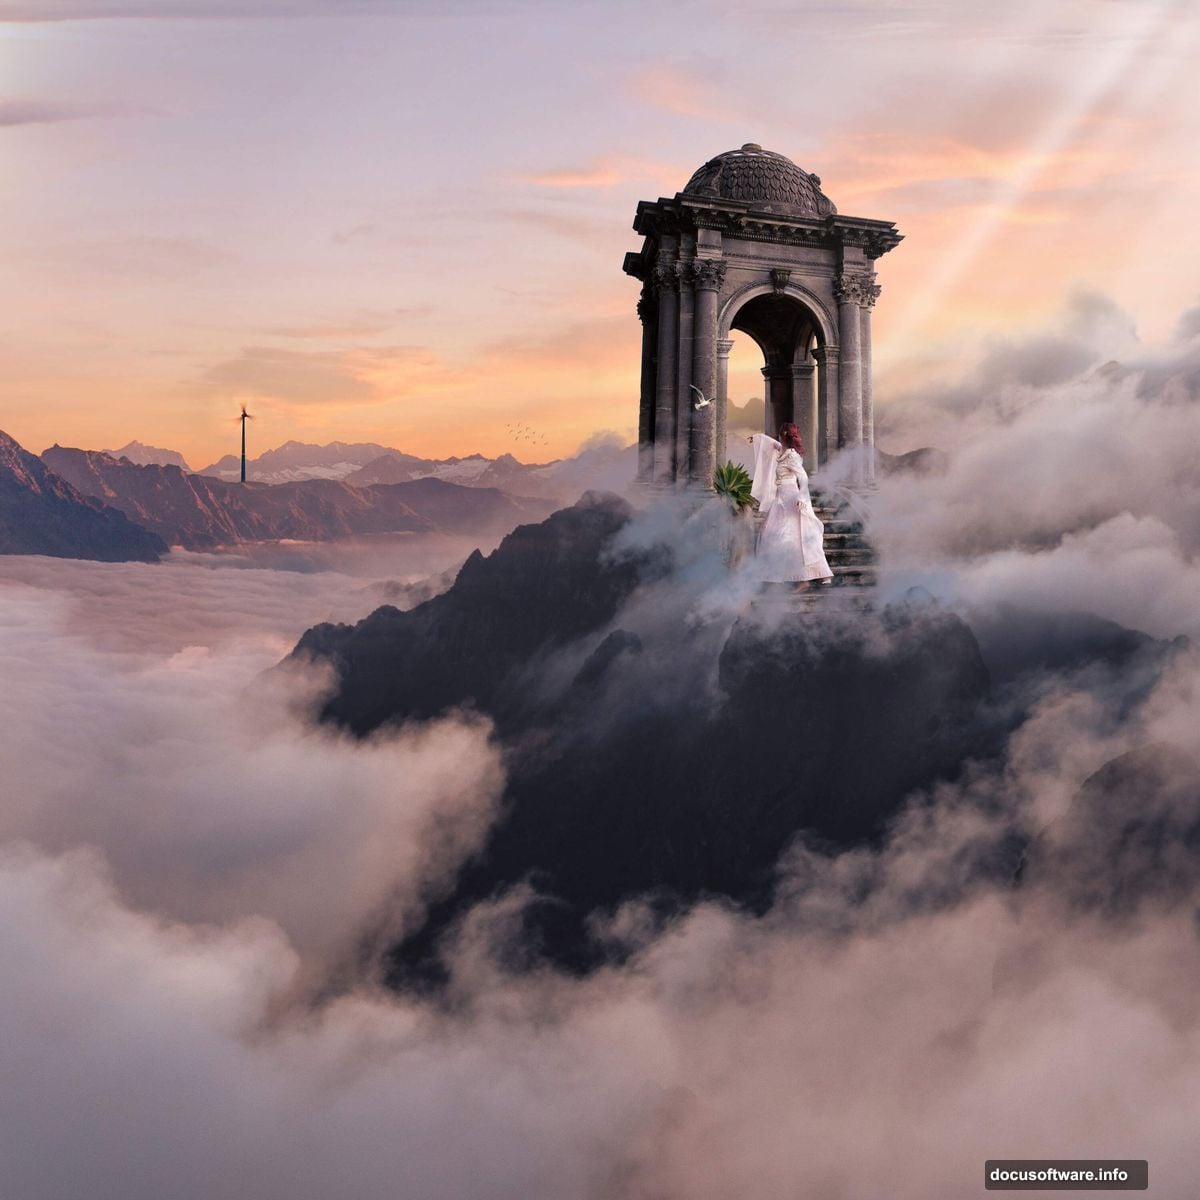
Building Up the Scene Further
The next pages of this tutorial cover placing the castle and the woman figure, blending them using the same layer mask technique, then adding a directional light source that unifies where all shadows fall.
Finally, the whole composition gets finished with the Camera Raw Filter (go to Filter > Camera Raw Filter). This is where you add that final cinematic polish — slight vignetting, dehaze adjustments, color grading in the shadows and highlights. Camera Raw on a merged stamp layer gives you non-destructive final control over the entire scene.
It’s the difference between a good Photoshop composite and one that makes people stop scrolling.
Why This Approach Produces Better Results
Every technique in this tutorial builds on one core idea: you’re not just stacking images. You’re creating a consistent world with shared light, shared atmosphere, and shared color language.
The adjustment layers set that language early. The layer masks blend elements so they feel grown into the scene rather than pasted on top. The Camera Raw finish pulls everything into a single tonal range that reads as one image, not many.
Photo manipulation at its best isn’t about fooling people. It’s about building a world convincing enough that viewers stop questioning physics and just feel the place. That’s the skill this workflow develops.
Now grab those resources, open a new canvas, and start building something impossible.