Ever looked at a photo and thought, “What if those mountains had waterfalls cascading off every ledge?” That’s exactly the kind of creative magic this Photoshop tutorial delivers.
This photo manipulation project walks you through merging multiple stock images into one breathtaking, surreal landscape — complete with dramatic waterfalls, glowing light effects, and a fully blended natural scene that feels almost otherworldly. Whether you’re fairly new to Photoshop or just looking to sharpen your compositing skills, this project is genuinely fun to work through.
So let’s break down what you’ll be building and how to pull it off.
What the Final Scene Looks Like
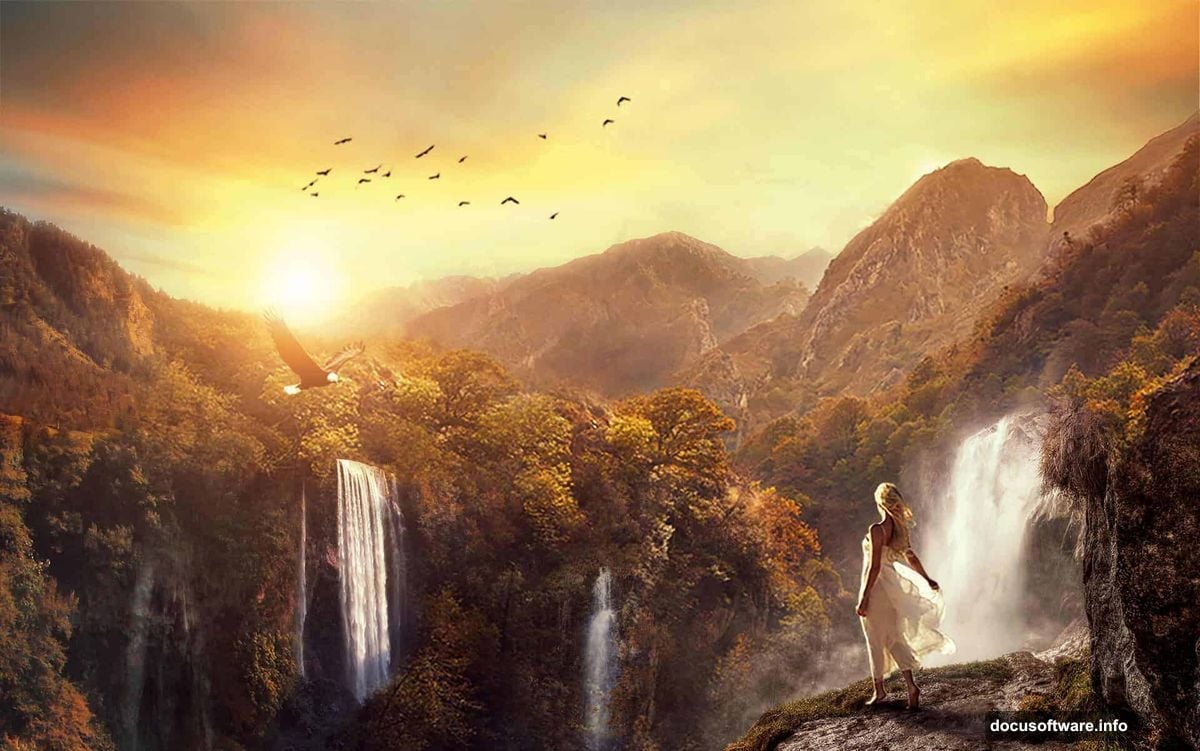
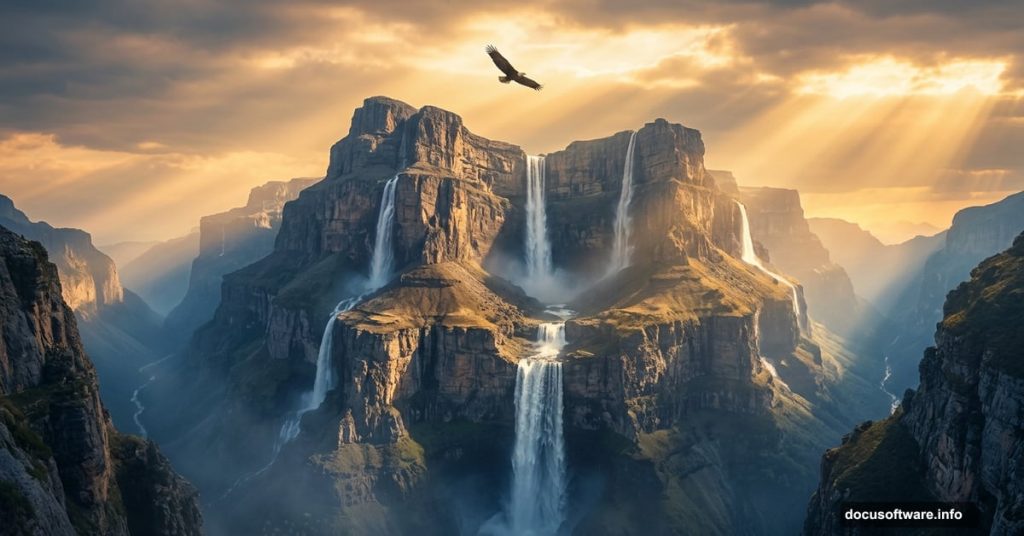
The finished composition combines cliffs, mountains, and several waterfall layers into one unified environment. Plus, there’s an eagle soaring through the scene and a model blended into the landscape for dramatic scale.
You’ll build everything in stages. First comes the basic ambient setup — mountains, waterfalls, and sky. Then adjustment layers refine each element. Finally, light effects and finishing touches tie everything together into one cohesive image.
Adobe Photoshop CC 2014 was used to create the original tutorial, but any version from Photoshop CS3 onward handles this workflow just fine.
Setting Up Your Document and Base Layers
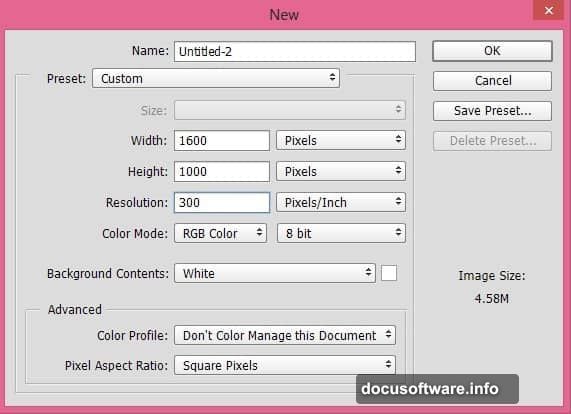
Start by creating a new document under File > New. Choose your preferred canvas dimensions or follow the tutorial’s suggested settings.
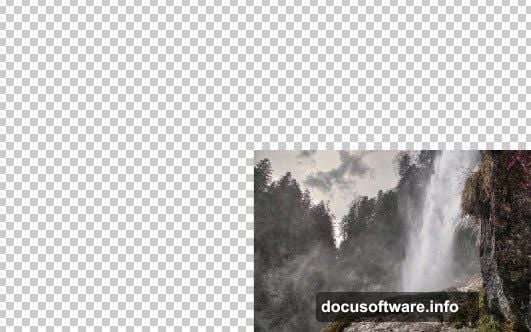
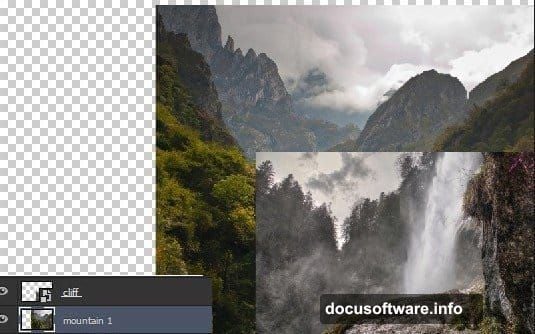
Next, place your cliff image on the right side of the canvas using File > Place Embedded. Then slide your first mountain image underneath the cliff layer. This stacking order matters — the cliff sits on top, and the mountain provides the foundation behind it.
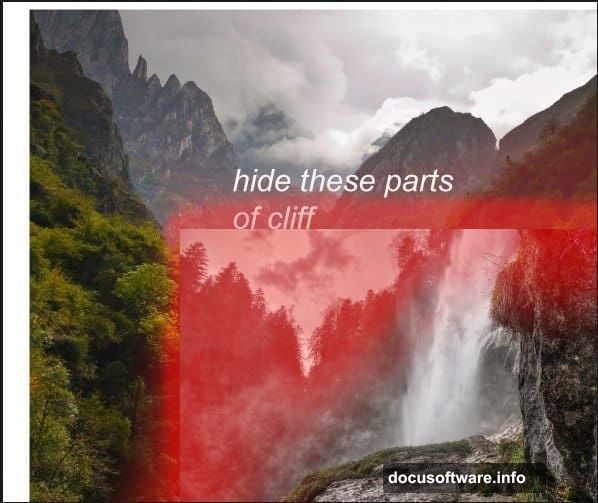
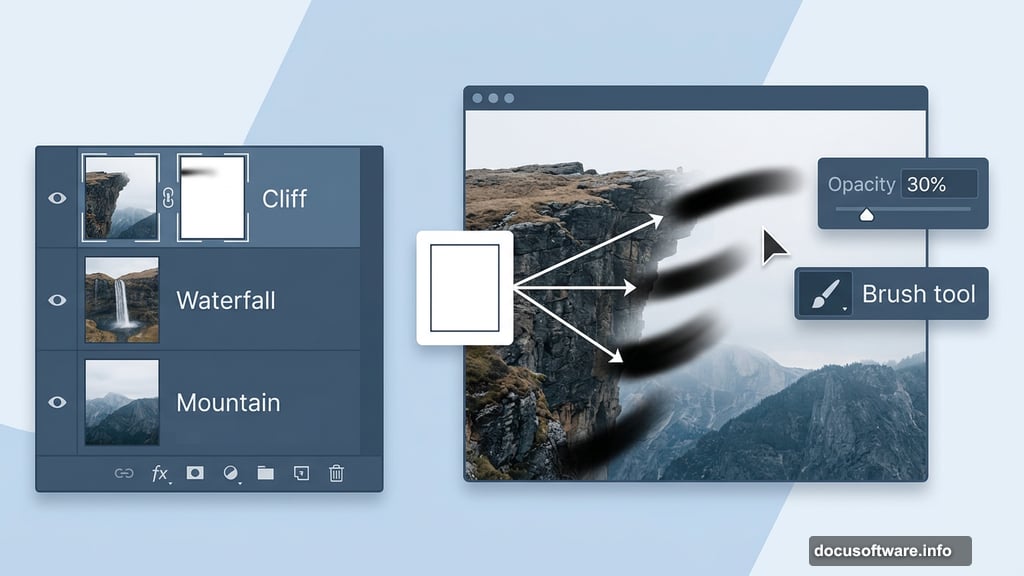
Now the real compositing begins. Add a layer mask to the cliff layer by navigating to Layer > Layer Mask > Reveal All. Grab the Brush tool (B), drop the opacity to around 30%, and use a soft round black brush to gently hide the edges of the cliff. This blends it smoothly into the mountain layer beneath.
Keep your brush strokes light here. Soft, gradual masking always looks more natural than harsh edges.
Adding Waterfalls and Blending the Terrain
Here’s where things get interesting. Once the cliff is masked, you’ll notice the natural waterfall platform on the cliff disappears during the blending process. So you need to bring in a replacement.
Place your first waterfall stock image underneath the cliff layer. This image serves double duty — it rebuilds the waterfall platform and visually continues the falling water from the cliff above. The goal is making it look like water genuinely pours off the cliffside into the landscape below.
From here, additional waterfall images layer into the scene progressively. Each one gets blended using the same masking technique. The trick is varying the opacity of your brush strokes so transitions feel gradual rather than cut-and-paste obvious.
Blending Mountains and Sky Into a Cohesive Scene
With the waterfall base established, the second mountain stock image joins the composition. Positioning and scale adjustments here can take some experimentation. Don’t expect to match the tutorial preview exactly — compositing always involves some creative problem-solving based on your specific stock images.
The sky layer rounds out the background. Place it beneath everything else. Use a layer mask to blend the horizon line where mountains meet sky. A slight blur on the mask edges helps everything feel atmospheric rather than flat.
Some readers of the original tutorial flagged that a sky resource link went offline. If you run into that issue, a quick search for dramatic cloudy sky stock photos on free resource sites turns up plenty of workable alternatives.
Light Effects and the Eagle
Two elements transform this from a competent composite into something genuinely surreal: the eagle and the light effects.
Place the eagle stock image into the scene and use a layer mask to isolate it from its original background. Scale it down so it reads as distant rather than oversized. Position it where it catches the eye without overwhelming the composition.
For light effects, the tutorial uses a Big Lens Flares Pack combined with manual painting techniques. Add light sources where the scene’s logic suggests sunlight would hit — cliff edges, waterfall mist areas, and the skyline. Blend these on Screen or Add blending modes so they glow rather than sit opaque on top of the image.
Also, bird brushes scatter additional small birds throughout the upper portion of the scene. This small detail adds enormous depth and sense of life to the environment.
Blending the Model Into the Landscape
Adding a human figure to a landscape composite requires careful shadow work and color matching. Place the model image and mask out the background. Then create a new layer beneath the model and paint soft shadows using a low-opacity black brush where the figure meets the terrain.
Adjustment layers — specifically Hue/Saturation and Color Balance — help match the model’s color temperature to the surrounding scene. The goal is making the figure feel like they were photographed in that environment rather than dropped in afterward.
Final Adjustment Layers and Polish
The last stage ties everything together. A series of adjustment layers across the entire composition — Curves, Color Lookup, and Vibrance — unify the color grading and give the scene its surreal, cinematic quality.
Curves adjustments can punch up contrast in the midtones while keeping highlights from blowing out near the waterfalls. Color Lookup tables offer fast mood shifts if you want a cooler, more ethereal feel versus a warm golden-hour look. Vibrance handles the final color pop without oversaturating skin tones or water.
Take your time with this stage. Small tweaks in adjustment layers create surprisingly large visual shifts in a complex composite like this.
Compositing projects like this one are some of the most satisfying things you can do in Photoshop. Each layer teaches you something new about how light, color, and masking interact — skills that carry directly into every future project you tackle. Start loose, experiment freely, and don’t worry if your version looks different from the tutorial preview. Different stock images produce different results, and that’s entirely the point.