Fantasy photo manipulation is one of the most satisfying things you can do in Photoshop. You start with a handful of stock photos and end up with something that feels like it belongs in a movie poster. This Valkyrie tutorial from Monika Nowakowska is a great example of that magic.
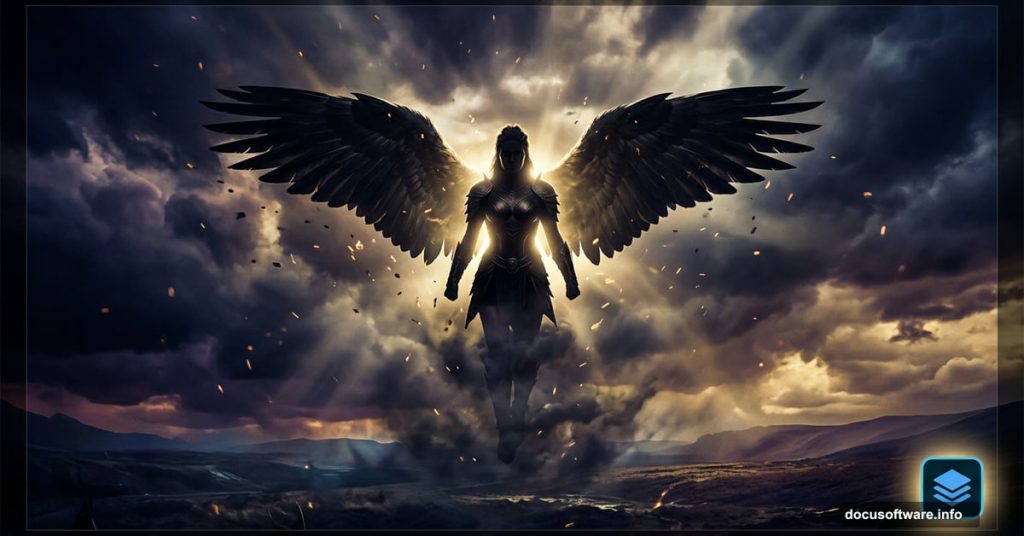
So what exactly are you building here? A dark, dramatic portrayal of a Valkyrie, the mythological Norse figure who decides the fate of warriors on the battlefield. You’ll layer together a moody background, a model with goddess-worthy props, atmospheric particles, and cinematic color grading. The result is striking.
You’ll need Photoshop CS5 or newer to follow along.
Stock Resources You’ll Need First
Before touching Photoshop, gather your source materials. The tutorial uses these free stock assets:
- Black wings from actress stock
- Misc Objects 018 by pixelchemist stock
- Water Background from fantasystock
- Gothic Bridal 4 by hellonlegs
- Particles Brush PSD by rafarod
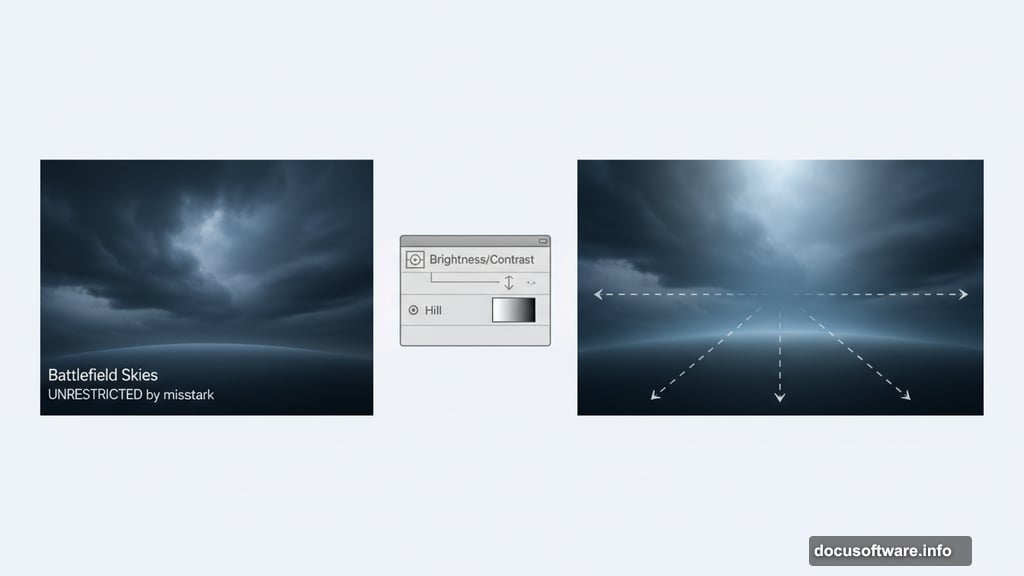
- Battlefield Skies UNRESTRICTED by missstark
- Autumn coastal hill from rgbstock
- Hair Stocks by cindysart
- Particles pack 25 free images from mediamilitia.com
- Dumitrescu Iulian 3 by tasper
Having all of these downloaded before you start saves a lot of frustration mid-tutorial.
Building the Dark Background
Start With Your Canvas and Hill
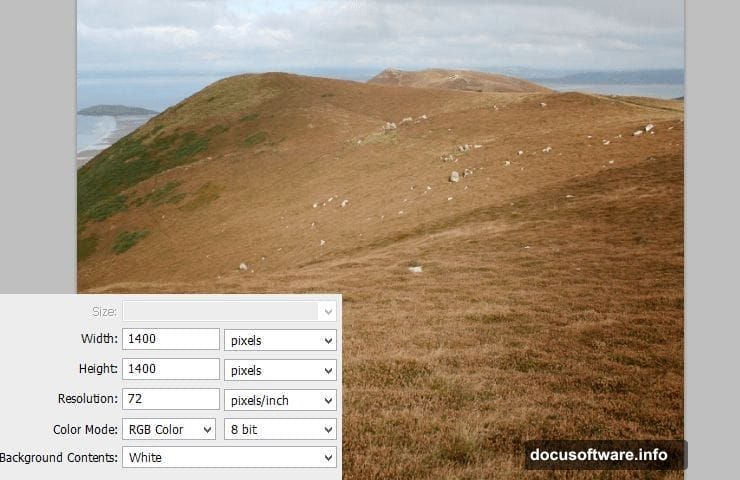
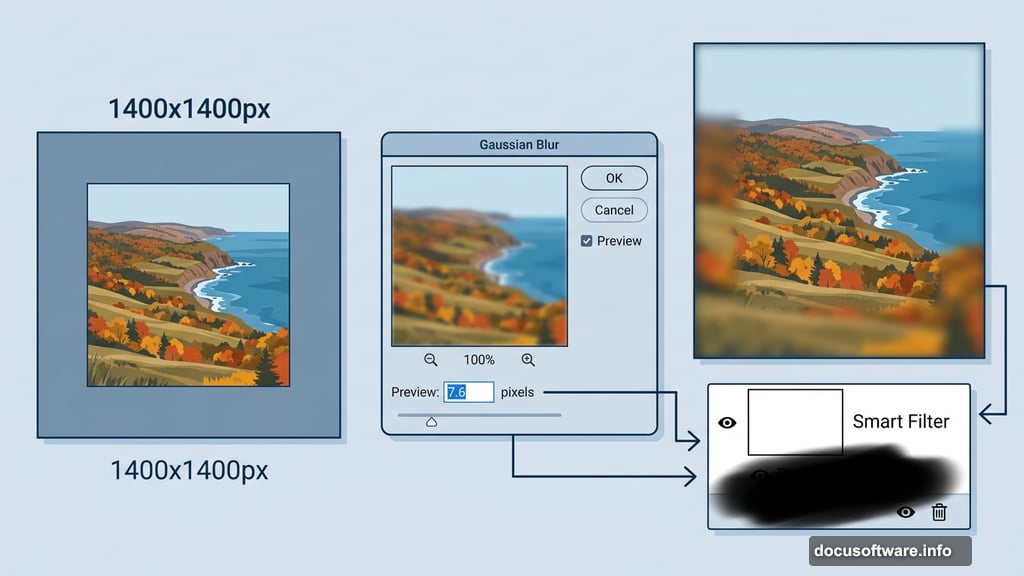
Create a new canvas at 1400×1400 pixels. Place the Autumn coastal hill stock image at the center. This becomes your base ground layer.
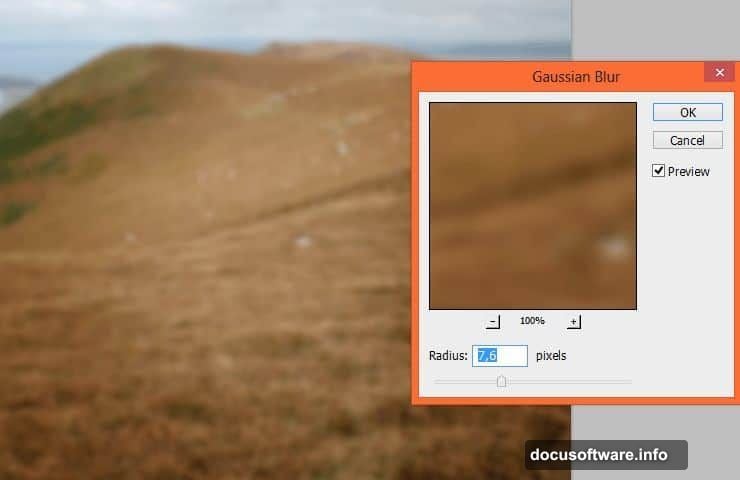
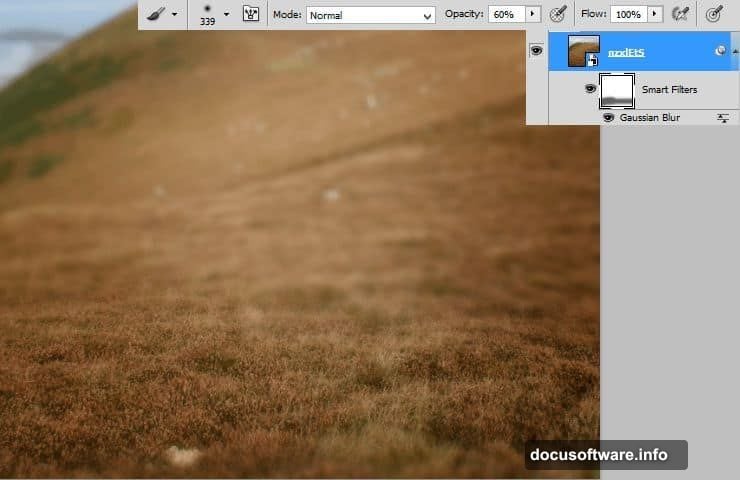
Next, go to Filter > Blur > Gaussian Blur and set it to 7.6 pixels. Since you’re working with Smart Filters, Photoshop automatically creates a white mask you can paint on. Click that white canvas in the Smart Filter line to activate it.
Creating Depth of Field With Smart Filter Masking
This is one of the cleverer techniques in the tutorial. Grab a large, soft round brush and drop its opacity to 60%. Paint over the bottom of the hill to erase the blur there, while keeping blur on the edges. The result mimics real camera depth of field, where the edges fall slightly out of focus and the center stays sharp.
Hold Alt and click the Smart Filter mask to edit just the mask in isolation. That gives you precise control without affecting the actual layer.
Adjusting the Hill’s Tone and Light
Add a Brightness/Contrast adjustment layer clipped to the hill. This brings the base exposure into the right range for a dark, overcast atmosphere.
Then add a second Brightness/Contrast layer to create highlights. Mask this one so the light concentrates in the center and top of the image. Use a big, soft brush for natural-looking falloff. This subtle push of light gives the composition a focus point before you’ve even added the figure.
Blending Sky Into the Scene
Adding the Sky Stock

Place your battlefield sky stock above the hill layers. Add a mask to this layer and either use the Gradient tool for a clean blend or work with large soft brushes for a more organic transition. Both approaches work depending on how much control you want over the horizon line.
Desaturating the Sky for Cohesion
Add a Hue/Saturation adjustment layer, set it to clip to the sky layer by right-clicking and choosing Create Clipping Mask, then pull the saturation down. A muted, grey-toned sky sells the dark mythological mood far better than anything vivid.
Final Background Adjustment
Cap the whole background with a global Brightness/Contrast adjustment layer applied without any clipping mask. This affects everything underneath and helps unify the layers into one coherent scene.
On that adjustment layer’s mask, apply a radial gradient that erases the center. The effect keeps the edges of your image naturally darker, drawing the viewer’s eye toward the middle where your Valkyrie will eventually stand.
What Comes Next
The tutorial continues across several more pages covering the model placement, wing integration, particle effects using the Particles Brush PSD, and final color grading. The particle work especially adds a lot of atmosphere. Fine, glowing dust scattered around the figure makes the whole image feel alive and magical rather than like a static composite.
The color grading at the end pulls the warm browns, cool blues, and dark shadows into a unified palette that feels genuinely cinematic.
Why This Tutorial Is Worth Your Time
What makes this project great for intermediate Photoshop users is the combination of techniques involved. Smart Filter masking, clipping masks, Hue/Saturation blending, radial gradient masking, and particle brushwork all show up here. Each skill is transferable to completely different projects.
Plus the subject matter gives you real creative flexibility. You can swap in different stock photos and still follow the same workflow. The methodology matters more than the specific assets.
If you want to push your compositing skills forward, dark fantasy scenes like this are excellent practice. They demand convincing lighting, believable atmospheric depth, and careful color consistency. Nail those three things and your composites will look professional regardless of the subject.
Give it a try, and don’t skip the depth of field step. That small detail in the background is what separates composites that look assembled from ones that feel like a real captured moment.