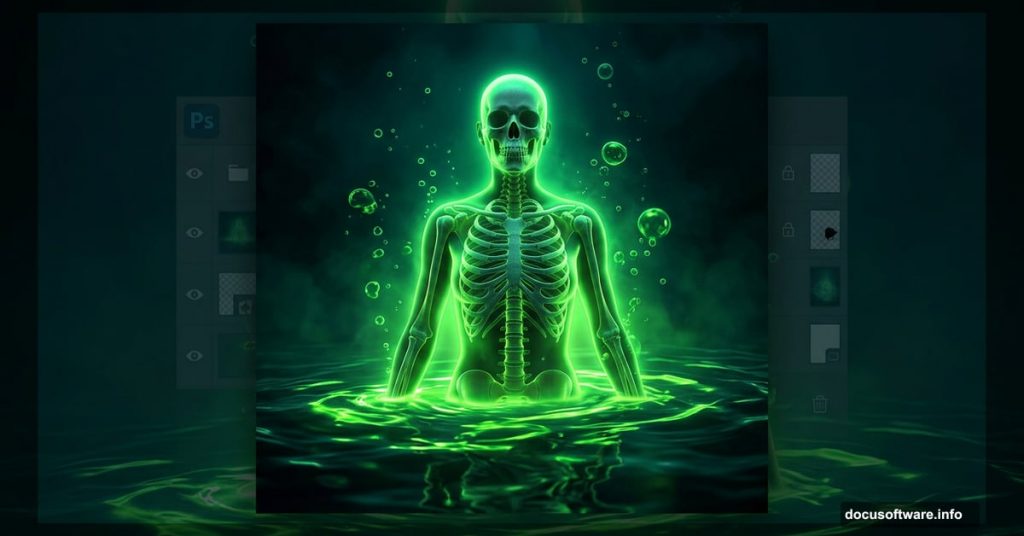
There’s something deliciously unsettling about radioactive water. That eerie green glow, the murky depths hiding skeletal figures, the bubbles rising through contaminated stillness. If that visual excites your creative instincts, this tutorial is exactly what you need.
We’ll walk through building a surreal radioactive underwater scene step by step. Starting from a blank canvas, you’ll layer underwater environments, add skeletal figures, introduce creepy marine life, and finish with a sickly green color grade using Camera Raw Filter. Ready to make something genuinely unsettling? Let’s get into it.
What You’ll Need Before Starting
First, gather your resources. Having everything downloaded before you begin saves a ton of frustration mid-tutorial.
Here’s your complete asset list:
- Skeleton Woman
- Skeleton Arm
- Fishes
- Grass
- Bermuda Underwater
- Underwater 1
- Underwater 2
- Bubbles
Also, make sure you’re running Photoshop CC for the smoothest experience. Some transform tool shortcuts work slightly differently in older versions, and we’ll flag those moments as they come up.
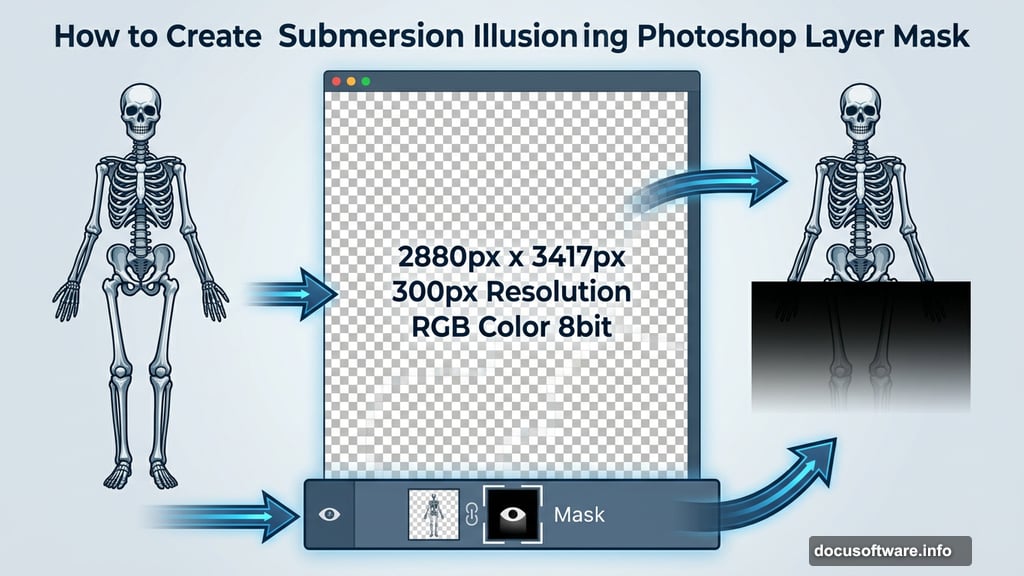
Step 1: Build Your Canvas
Every great scene starts with the right foundation. Go to File > New and enter these exact values:
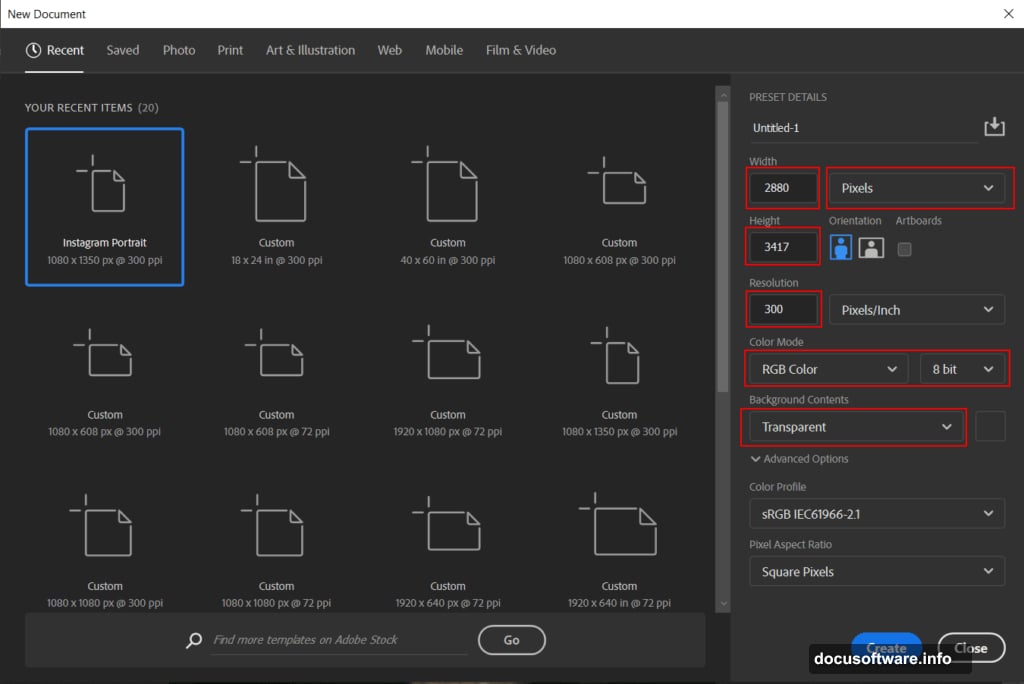
- Preset: Custom
- Width: 2880px
- Height: 3417px
- Resolution: 300px
- Color Mode: RGB Color 8 bit
- Background Contents: Transparent
The high resolution matters here. At 300px, your final image will look crisp even at large print sizes. Plus, working big gives you much more room to add fine details without losing quality.
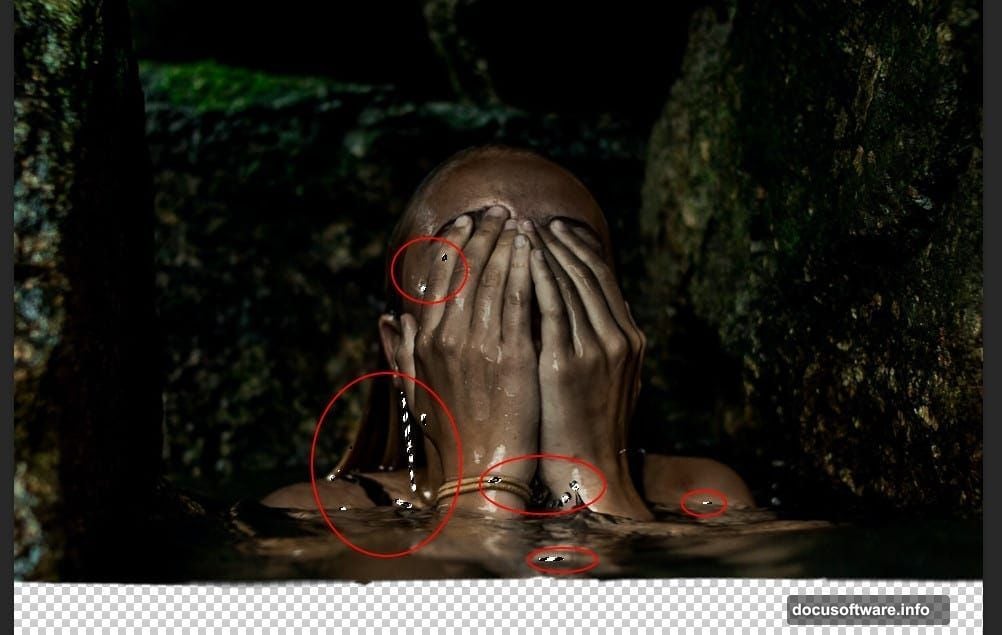
Step 2: Place Your Model and Mask the Lower Half
Go to File > Place and bring in the Skeleton Woman model. Once she’s positioned on your canvas, grab the Rectangular Marquee Tool (M) and select the lower half of the image. Then click the layer mask icon at the bottom of the Layers panel.
This creates a clean mask that hides her lower half. So it looks like she’s submerged in water. It’s a simple technique but incredibly effective for selling the underwater illusion.
Lighting and Shadow Work: Steps 3 Through 6
This is where your scene starts feeling alive. Or rather, dead in the most atmospheric way possible.
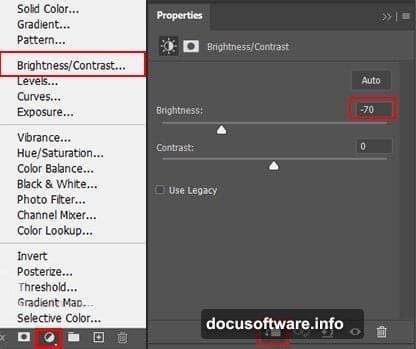
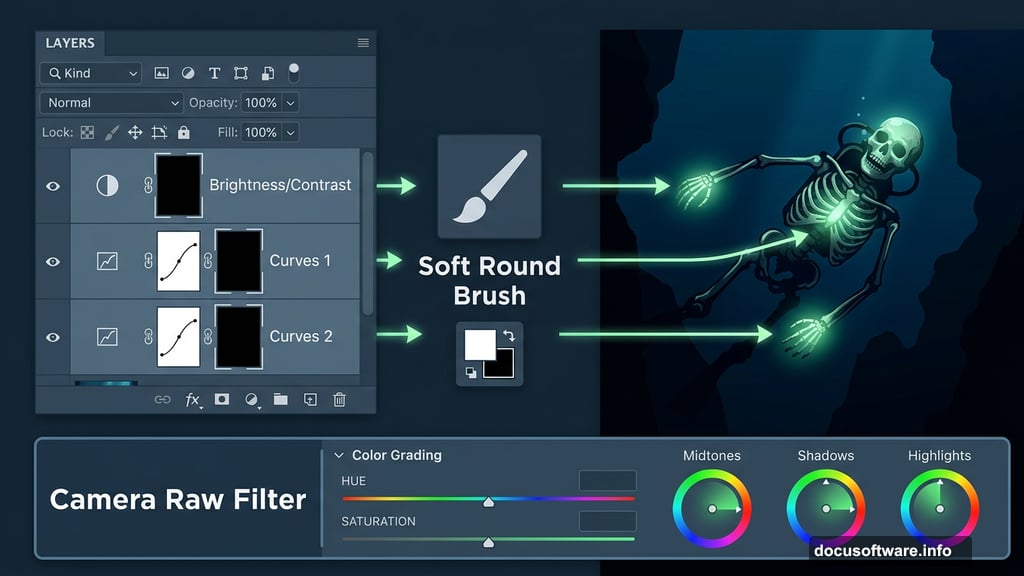
Step 3 adds a Brightness/Contrast Adjustment Layer. After adding it, press Ctrl/Cmd + I to invert the layer mask to black. Then grab your Brush Tool (B) with a Soft Round brush, set foreground color to white, and paint over the highlight areas. This lets you selectively brighten specific parts of your subject.
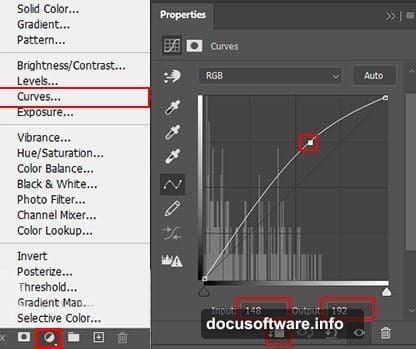
Step 4 introduces a Curves Adjustment Layer using the same technique. Invert the mask, then paint with white over highlight areas. Curves gives you much finer control over tonal range than Brightness/Contrast alone. So use this layer to punch up the mid-tones and make those highlights pop.
Step 5 adds another Curves Adjustment Layer, but this time you’re targeting the dark parts. Same process: invert the mask, paint with white over shadow areas. This deepens your shadows and creates stronger contrast. The result feels more dramatic and three-dimensional.
Step 6 creates a fresh new layer. Change the blend mode to Soft Light and drop the opacity to 70%. Then use your Brush Tool with a Soft Round tip, set the foreground color to white, and increase your brush size to a whopping 3000px. Paint gently into the right corner of the canvas.
Why so large? At that size, the brush creates a soft, diffused light source rather than a harsh spot. It adds depth and atmosphere without looking artificial.
Step 7: Adding the Underwater Environment
Now the real world-building begins. Go to File > Open and bring in your Sea image.
Grab the Rectangular Marquee Tool (M) and drag over the area you want to select. Here’s a useful trick: hold Shift as you drag to constrain the selection shape. Just remember to release the mouse button before releasing Shift to lock that shape in.
Once you’ve got your selection, copy it with Ctrl/Cmd + C and paste it directly onto your work canvas with Ctrl/Cmd + V. Then use the Transform Tool (Ctrl/Cmd + T) to position and scale it correctly.
For scaling, hold Alt + Shift to resize proportionally from the center. In Photoshop CC specifically, just hold Alt alone to resize all sides together. It’s a small but important difference.
After positioning, create a Layer Mask on your sea layer. Pick up the Brush Tool (B) with a Soft Round tip, set foreground color to black, and paint along the edges to blend the underwater environment seamlessly into your scene.
The goal here is a natural fade rather than a hard edge. Soft edges make composite images feel believable instead of cut-and-paste obvious.
Building the Full Scene
With your base environment in place, the remaining steps follow a satisfying rhythm. You’ll repeat similar masking and blending techniques to add your additional underwater layers (Underwater1, Underwater2, and Bermuda), then introduce the Skeleton Arm, Fishes, Grass, and Bubbles as separate elements.
Each element gets its own layer. Each layer gets masked and blended to feel like it belongs in the same murky water. Pay special attention to how the bubbles layer sits on top of everything. Bubbles break up the visual field and add a sense of movement to an otherwise still scene.
For the grass and fish, experiment with the layer’s placement in your stack. Fish sitting in front of your skeleton reads differently than fish partially hidden behind her. Both work, but choose intentionally based on the story you want to tell.
Green Color Grading with Camera Raw Filter
The color grade is what transforms a cool composite into something genuinely radioactive-looking. Without it, you just have an underwater scene. With it, you have something that makes viewers slightly uncomfortable in the best possible way.
Once all your elements are in place, flatten your visible layers into a merged copy. You can do this without destroying your original layers by pressing Ctrl/Cmd + Alt + Shift + E. This stamps everything visible into a new layer at the top of your stack.
Go to Filter > Camera Raw Filter. From here, push your tones toward a toxic green. Drag the HSL panel to desaturate blues and boost yellows and greens. Cool your shadows down toward teal. Add a slight vignette to darken the edges and draw focus to the center of the scene.
The specific values depend on your lighting setup, but think in terms of: “what would water look like if it genuinely glowed with radioactive contamination?” Sickly, luminous, slightly yellow-green. Not quite natural. Definitely not safe.
That discomfort is exactly what you’re after.
The Final Reveal
Good photo manipulation always tells a story. This one tells of something submerged, something forgotten, something you really shouldn’t swim toward. The combination of skeletal figures, murky water, floating bubbles, and that contaminated green palette creates genuine atmosphere.
The techniques here—layer masking, adjustment layers, Camera Raw color grading—aren’t limited to radioactive scenes either. Every skill you practiced today transfers directly to any complex composite you build next. Moody portraits, fantasy landscapes, horror scenes. The workflow stays the same.
So save your PSD file with all layers intact, experiment with the color grade until it feels right to you, and don’t be afraid to push the green further than feels comfortable. Discomfort, in this case, is the whole point.