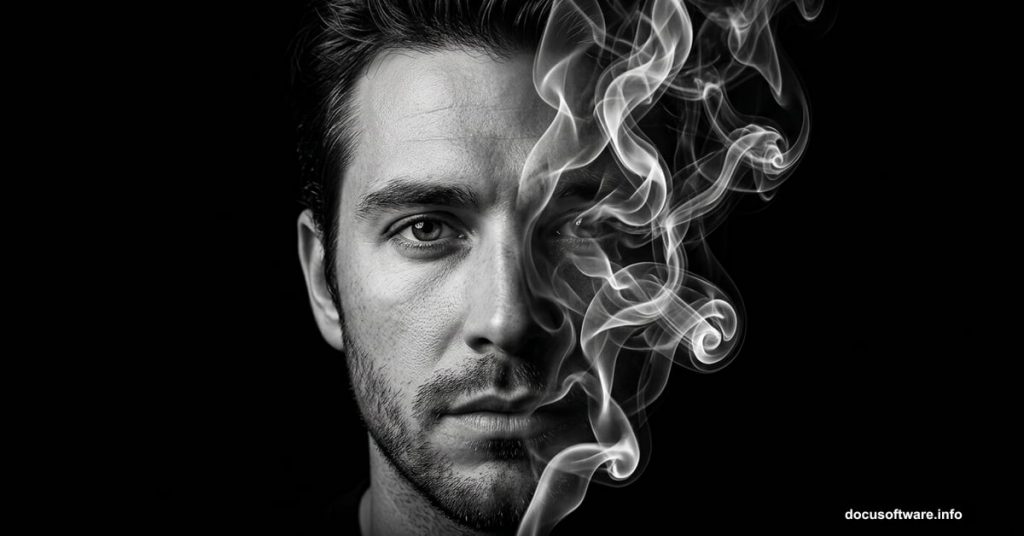
That first time you see a smoke portrait effect, it stops you cold. A face dissolving into swirling wisps of smoke, mysterious and elegant all at once. The good news? It looks far harder than it actually is.
This tutorial walks you through creating that same effect using Adobe Photoshop CS or newer. With the right smoke brushes and a bit of patience, you can pull this off in one to two hours, even at an intermediate skill level.
Ready to get started? Let’s go.
A quick note for Mac users: Every keyboard shortcut in this tutorial uses Windows keys. Swap Ctrl for CMD and Alt for Opt and everything works exactly the same.
What you’ll need:
- Adobe Photoshop CS or newer
- A model stock photo
- Real Smoke Photoshop Brushes (free download available)
Step 1: Extract Your Model and Clean the Background
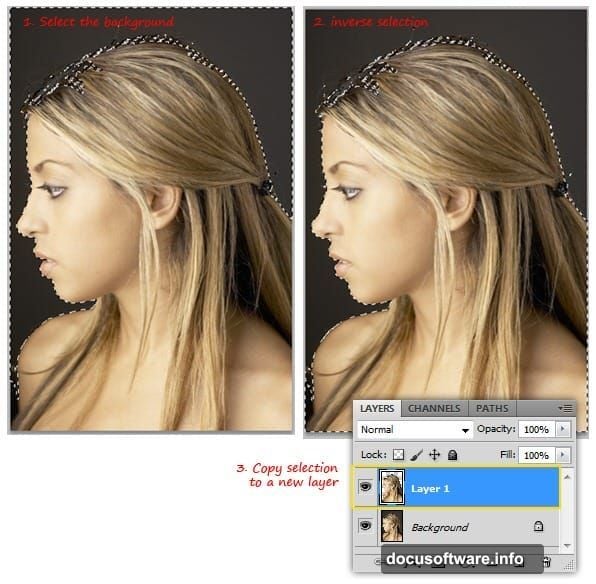
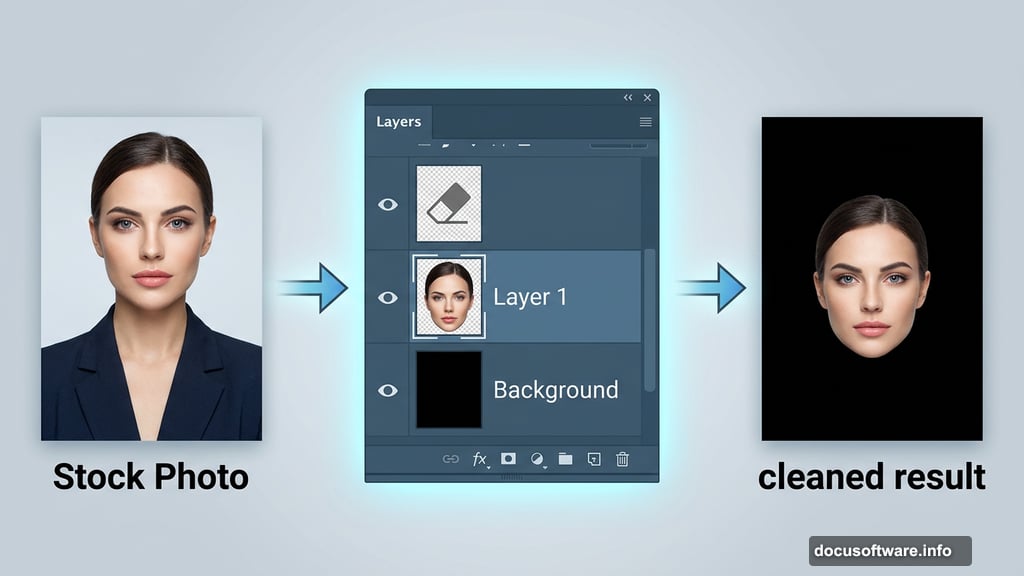
Open your stock model photo in Photoshop. Grab the Magic Wand tool and click the background to select it. Then go to Select > Inverse (Ctrl+I) to flip the selection so your subject is selected instead.
Press Ctrl+J to duplicate just the selected area onto a new layer. You’ll see that new layer appear in your Layers panel.
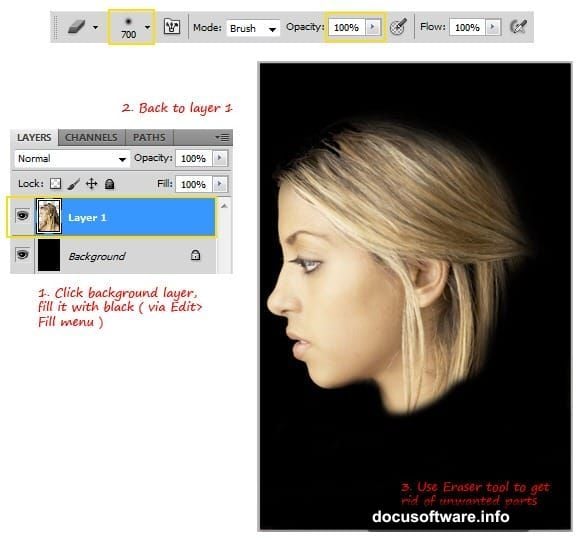
Now click back on your Background layer and fill it solid black. This dark backdrop makes the smoke effect pop dramatically later on.
Head back to Layer 1 and use the Eraser tool to clean up anything you don’t need. You want just the head remaining, nothing else. Use a soft round brush at 100% opacity for clean, smooth edges.
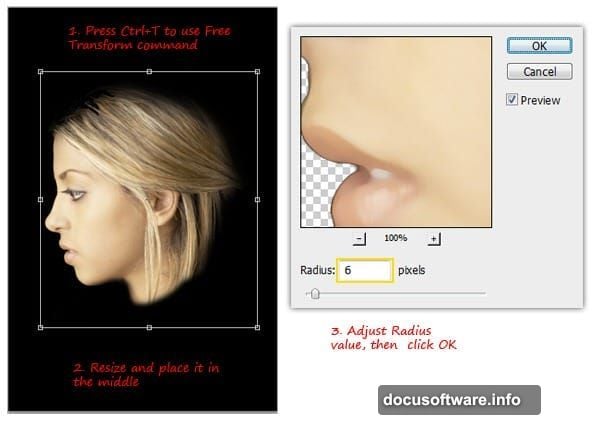
Once cleaned up, resize the head to something smaller and center it on the canvas. Then soften the image slightly by going to Filter > Noise > Median. Set the Radius somewhere between 5 and 7px and click OK. This subtle smoothing helps the effect blend more naturally.
Step 2: Build Your Smoke Guide Lines
This step creates the template that guides where your smoke brushes will flow. It sounds technical, but it’s genuinely clever once you see it work.
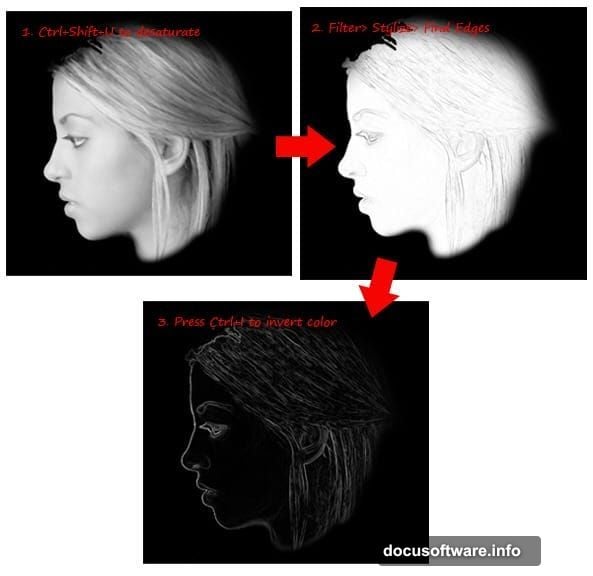
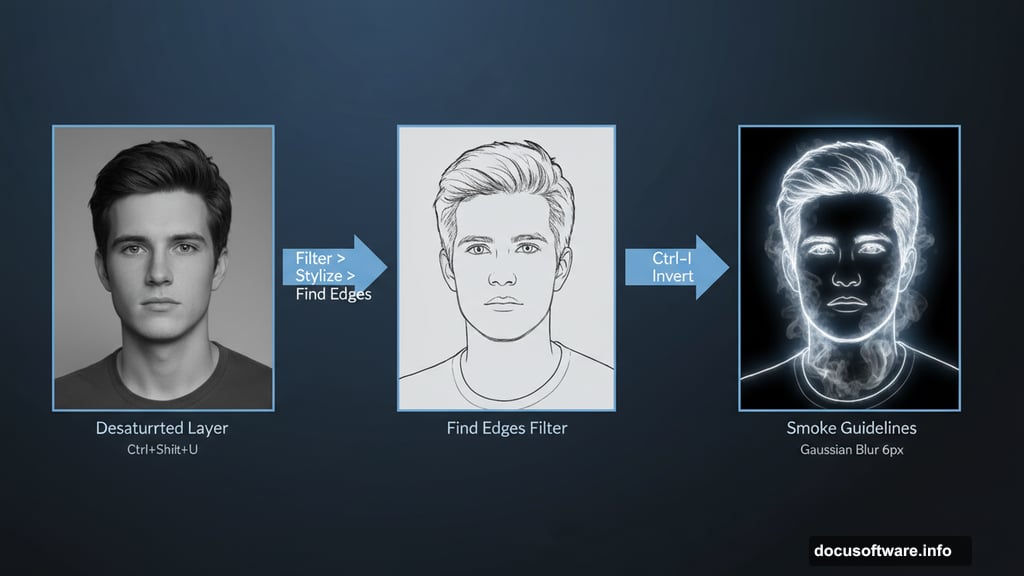
First, desaturate your layer by pressing Ctrl+Shift+U. This strips all the color, leaving you with a clean grayscale image. Then go to Filter > Stylize > Find Edges. Photoshop automatically traces the outlines of your subject, creating a sketched line effect.
Here’s the trick. The result shows dark lines on a light background, but you need the opposite. Press Ctrl+I to invert the colors. Now you have bright white lines on black. These become your smoke guidelines.
Next, blur the head slightly by going to Filter > Blur > Gaussian Blur and setting the Radius to about 6px. This softens the guide lines so they blend smoothly into the smoke effect.
Use the Eraser tool again to remove any leftover areas around the neck and hair that look messy or distracting.
Finally, press Ctrl+L to open the Levels dialog. Adjust the shadow, midtones, and highlight sliders to push the contrast harder. You want the black areas deeper and the white areas brighter. This contrast is what makes the smoke glow convincingly against the dark background.
Click OK to lock in those changes.
Step 3: Painting the Smoke
Now comes the most satisfying part. This is where it all comes together.
Create a new layer above your guide layer. Select a smoke brush from the Real Smoke Photoshop Brushes pack and set your foreground color to white.
Use your guide lines as a roadmap. Follow the edges of the face, painting soft strokes of smoke along the contours. The key is building it gradually. Start with lighter, more transparent strokes and layer them up. Think of it like sketching with fog.
Vary your brush size as you go. Larger brushes work well for broad flowing areas. Smaller ones add fine wispy details near the eyes, lips, and hairline.
Keep rotating and flipping your smoke brushes too. Smoke never repeats the same pattern twice, so mixing orientations keeps everything looking natural and organic.
Step 4: Blend and Refine
Step back and look at your whole composition. Some areas will need more smoke density. Others might feel too heavy and need softening with a low-opacity eraser pass.
Try duplicating your smoke layer and setting the blend mode to Screen. This brightens the smoke without losing the dark background, giving it that luminous, ethereal quality.
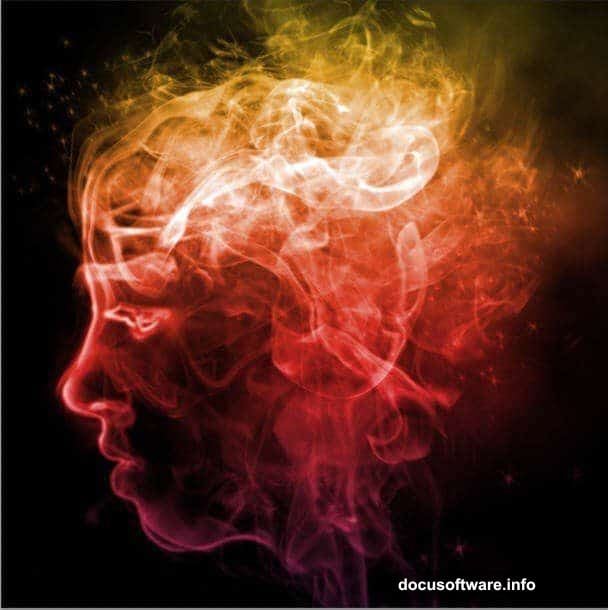
Add a touch of color if you want to push beyond pure white smoke. A subtle Hue/Saturation adjustment layer clipped to your smoke layers lets you drift toward electric blue, ember orange, or deep purple without much effort.
Finishing Touches That Make a Difference
The difference between a good smoke portrait and a great one often comes down to small details.
Check your edges. Where the smoke meets pure black background, it should feel gradual, not sharp. A very low-opacity soft eraser can feather any edges that feel too defined.
Also consider adding a very subtle Outer Glow layer effect to your smoke layers. Set it to a warm white or pale gold at around 20-30% opacity. It gives the smoke a slightly backlit quality that feels more three-dimensional.
When everything looks right, flatten the image and run a final Levels or Curves adjustment to make sure your blacks are truly black. Deep blacks are what make smoke art really sing.
The result honestly surprises most people when they finish it. Something that looks gallery-worthy takes less than two hours and mostly relies on a great brush set doing the heavy lifting for you. The smoke brushes handle the complex organic shapes. Your job is just placing them thoughtfully.
Download the smoke brushes, grab a good portrait stock photo, and give this a proper try. You’ll want to use it on everything once you see how it turns out.