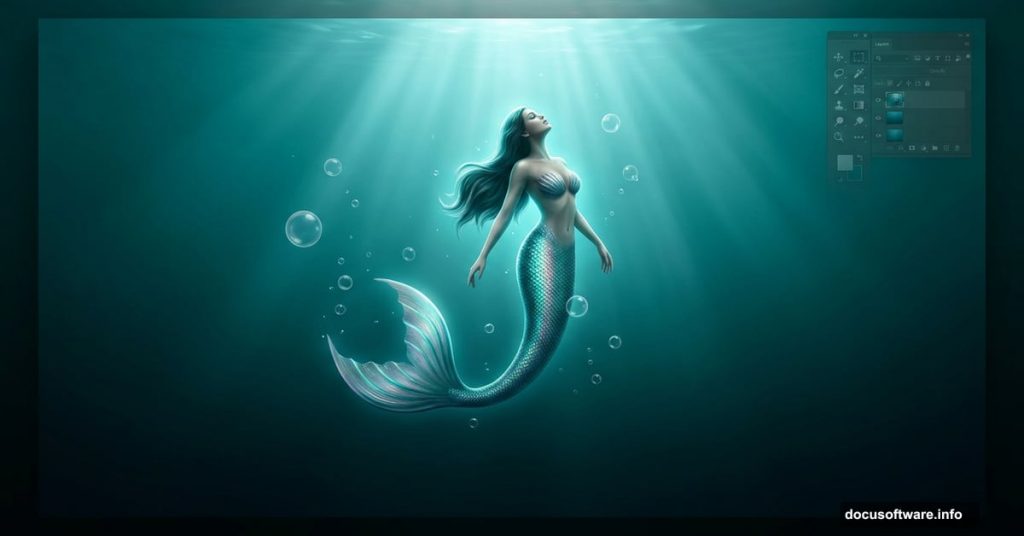
Ever stare at ocean photos and wish you could actually live in that world? This Photoshop tutorial by Monika Nowakowska gets you pretty close. You’ll build a full underwater scene from scratch, give your subject a hand-drawn mermaid tail, and even create bubbles without any special stock photos.
The best part? You only need one underwater stock image to pull the whole thing together.
Here’s what you’ll walk away with: a richly layered photo manipulation that looks like it belongs in a fantasy film. Plus, you’ll pick up skills in adjustment layers, blending modes, and brush techniques that will serve you in dozens of future projects.
You’ll need Photoshop CS5.5 or newer to follow along.
Gather Your Resources Before Starting
Before you open Photoshop, collect everything you need. Having assets ready saves you from interrupting your creative flow mid-project.
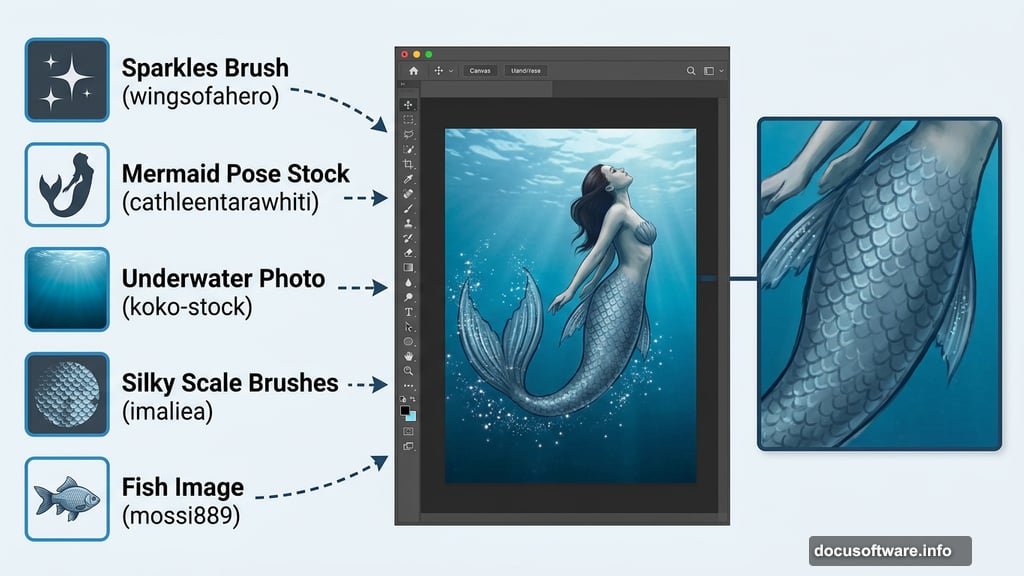
For this tutorial, you’ll use a Sparkles Brush from wingsofahero, a mermaid pose stock from cathleentarawhiti, an underwater photo from koko-stock, Silky Scale Brushes from imaliea, and a fish image from mossi889.
Download all of these first. Trust me, hunting for brushes mid-tutorial is a real momentum killer.
Build Your Underwater Background
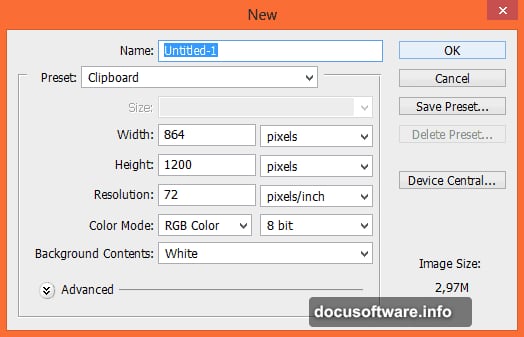
Start by creating a new file in Photoshop. Go to File, then New, and set your canvas to whatever size you’re working with.
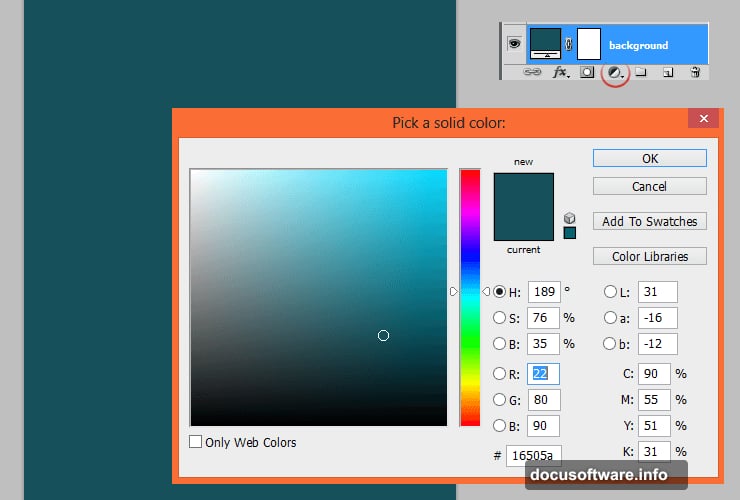
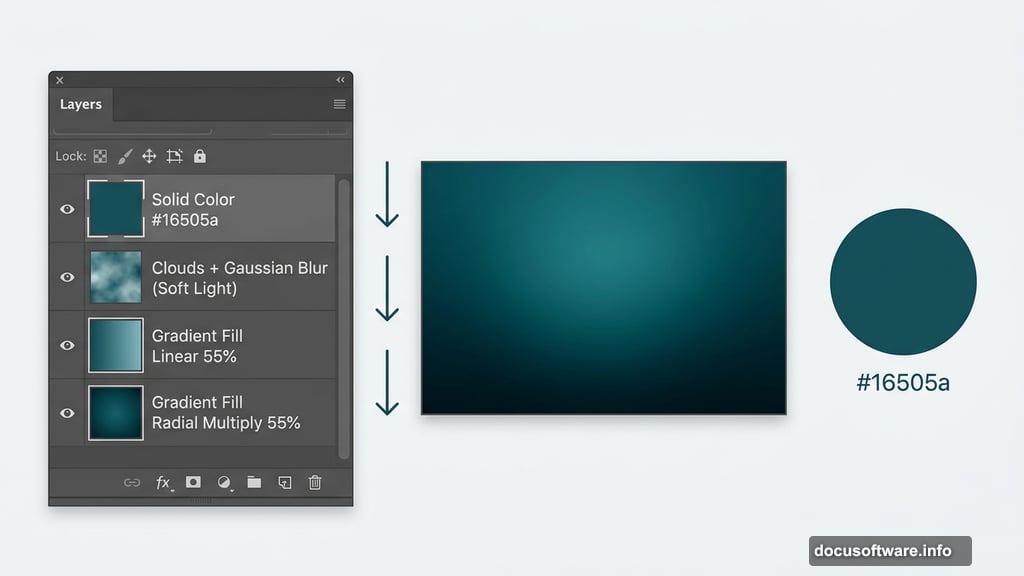
Next, add an Adjustment Layer with Solid Color. This becomes your base background. Monika used #16505a, a deep teal that reads immediately as underwater. But honestly, feel free to experiment with other deep ocean tones.
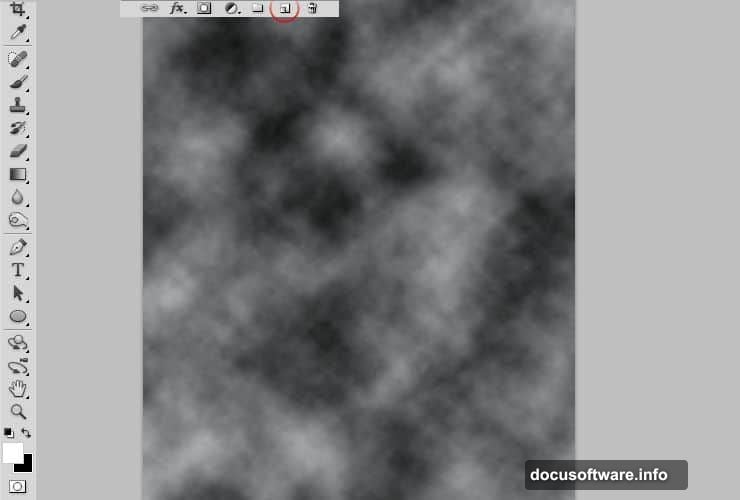
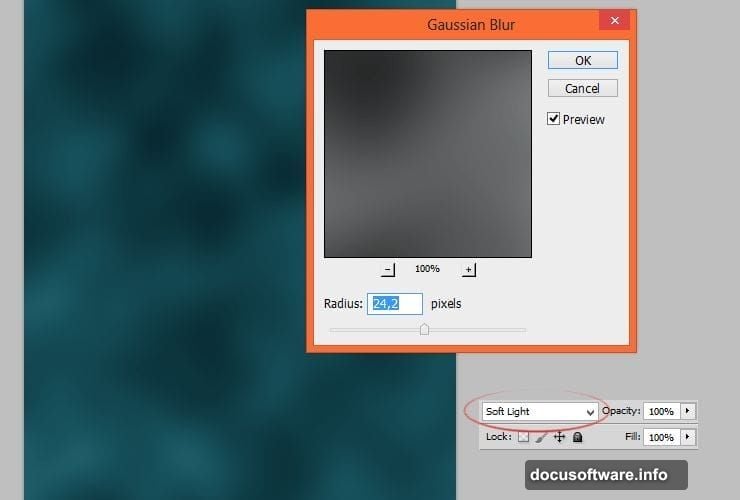
Now for a cool trick that adds atmospheric depth. Create a new layer, set your color picker to black and white, then go to Filter, Render, Clouds. This generates a random cloud texture. Then run a Gaussian Blur over it through Filter, Blur, Gaussian Blur. Change the blending mode to Soft Light. Suddenly that flat background has texture and life.
Add Realistic Light and Depth
Real underwater scenes have a very specific quality of light. It comes from above, and the deeper you go, the darker it gets. Photoshop lets you replicate this beautifully.
Add a Gradient Fill Adjustment Layer and set it to a linear black-to-transparent gradient flowing downward. Drop the opacity to 55%. This darkens the bottom of your scene without making it feel heavy or muddy.
Then add another Gradient Fill layer, but this time set it to radial. Use that same dark turquoise from your background (#16505a). Change the blending mode to Multiply and drop opacity to 55%. This focuses attention toward the center and brighter areas of your composition.
Bring In Your Underwater Stock
Place your underwater stock photo onto the canvas. Here’s where the magic happens. Change the blending mode of that layer to Color Dodge and drop the opacity to around 53%.
You’re not using this stock for the background itself. You’re using it for the floating particles and water debris that make underwater scenes feel authentic. Color Dodge at low opacity pulls exactly that detail through without overwhelming your carefully built background.
You’ll notice a rough splash of light near the top of the image. Fix that by clicking the layer mask, picking a large soft brush, and gently painting over the problem area. Short, gentle strokes work better than one big swipe here.
Create Light Rays From Scratch
This step surprises most people because it’s simpler than it looks. Add a fresh new layer. Grab a big, soft brush and choose a blue that matches your background’s color family.
Adobe’s Kuler tool is genuinely helpful here if you’re unsure which blue to pick. It suggests colors that harmonize with whatever palette you’re working in.
Paint one large soft dot on your canvas. That dot becomes the starting point for your light rays. From here, you’ll stretch, transform, and duplicate it to create that beautiful filtered-light effect that defines underwater imagery.
Shape the Mermaid Tail by Hand
This is the centerpiece of the whole project, and it’s where the Silky Scale Brushes earn their place. Position your mermaid stock photo on the canvas and mask around the figure carefully.
The tail comes from brush work rather than a stock image. Load the Silky Scale Brushes and build up the tail shape in layers. Start with the overall form, then add scale texture on top. Working in separate layers gives you flexibility to adjust the shape without starting over.
Color matching is everything here. Your tail needs to feel like it belongs in the same water as your background. Sample colors directly from your scene and paint with those rather than choosing arbitrary blues or greens.
Paint Bubbles From Nothing
Bubbles sound complicated but they’re one of the most satisfying things to create in Photoshop. Add a new layer above everything else. Pick a soft round brush and paint small circles in varying sizes scattered through the water column.
The trick is in the layer style. Add an outer glow in a light, slightly warm tone. Then reduce the fill of the layer (not the opacity) close to zero. This makes the painted circle nearly invisible while keeping the glow effect. What remains is a convincing bubble edge with a light shimmer inside.
Scatter these at different sizes. Real bubbles don’t cluster uniformly, so vary their placement. Bigger bubbles near the figure, smaller ones fading toward the edges, creates a natural-looking depth effect.
Match Colors and Finalize the Composition
This final stage ties everything together. Add a Color Balance Adjustment Layer clipped to your overall composition. Push slightly toward cyan and blue in the midtones and shadows. This unifies any elements that feel slightly off-color and reinforces the underwater atmosphere.
A gentle Curves adjustment adding contrast in the midtones makes the whole scene feel more polished. Then use the Sparkles Brush to add a few glinting light particles near your strongest light source. Keep these subtle. Three or four well-placed sparkles read as magical. Twenty reads as messy.
Step back and look at the full composition. The light should feel like it comes from above the water surface. Your mermaid should feel like she belongs in the space, not like she was dropped on top of it. If something feels off, it’s almost always a color or blending mode tweak away from working.
This kind of photo manipulation teaches you skills that transfer directly to other projects. Once you’re comfortable with underwater atmospheres, you’ll find yourself using these same gradient, blending, and masking techniques constantly. And there’s something genuinely satisfying about building an entire world from just one stock photo and a handful of brushes.