Creating moody, atmospheric lighting in a fantasy photo manipulation feels magical when it comes together. But getting there takes a clear process and the right technique for each layer.
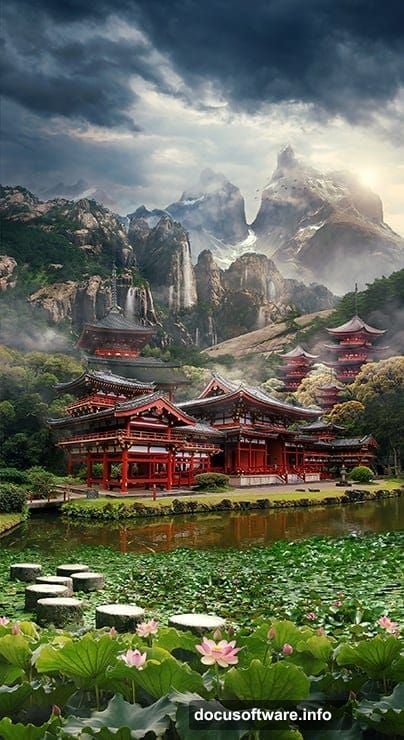
This tutorial walks you through building a dramatic fantasy scene set inside a library. You’ll learn how to blend stock photos, control saturation, and set up your layers so the lighting feels cohesive and cinematic. Plus, you’ll tackle one of the trickier challenges in photo manipulation: working with semi-transparent objects like fabric.
Let’s get into it.
What You Need Before Starting
Before opening Photoshop, gather your stock resources. This project uses a library interior, a woman with flowing hair and dress, mist brushes, sun ray brushes, a dust texture, and a light texture. Having everything ready saves time mid-process.

Also, keep your Layers panel visible throughout. Organized, named layers are the difference between a manageable project and a chaotic mess you can’t navigate later.
Setting Up Your Document and Background
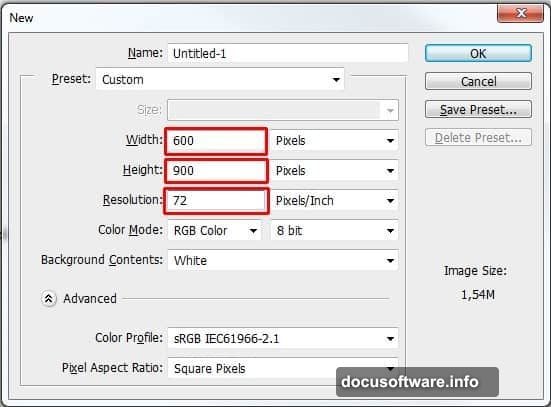
Start by creating a new document. Go to File > New and set the Width to 600px, Height to 900px, and Resolution to 72 Pixels/Inch. Hit OK.
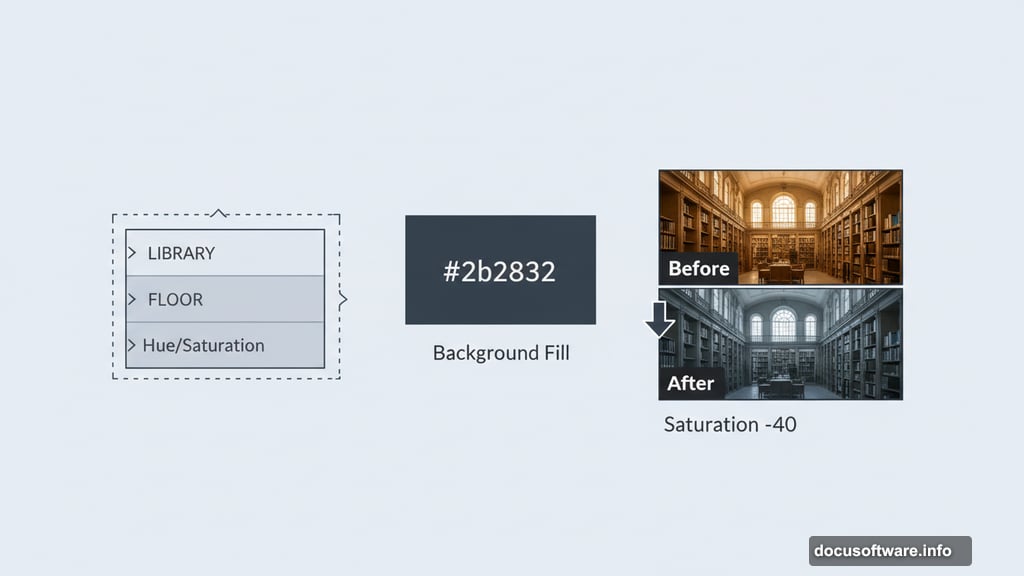
Next, grab the Paint Bucket Tool (G) and fill your background layer with a deep blue-grey. The color #2b2b32 works beautifully here. This dark base sets the atmospheric tone for everything you’ll build on top of it.
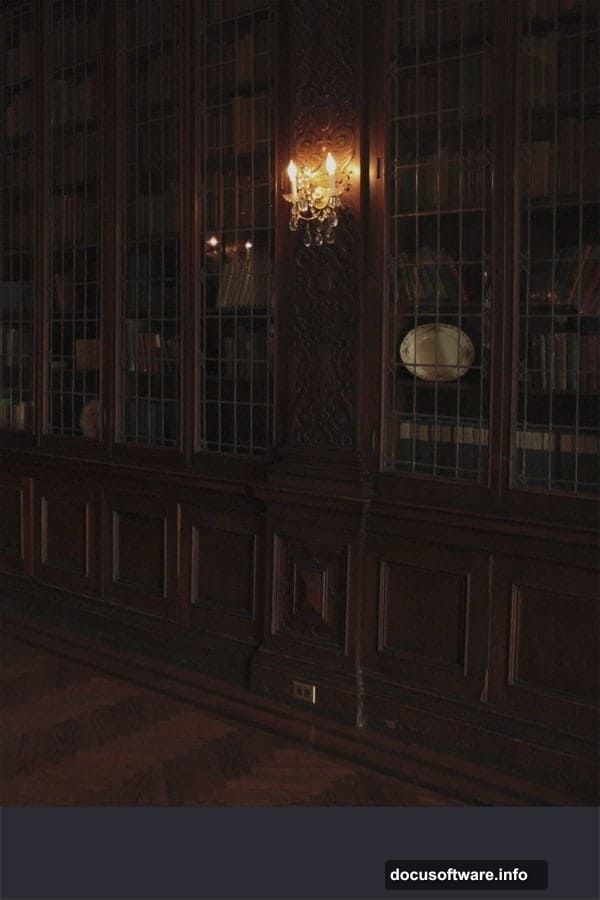
Placing and Scaling the Library
Drag your library stock photo into the document and place it above all existing layers. Name this layer LIBRARY so you can find it easily later.
Press Ctrl+T to activate Free Transform. Resize the photo to match your document dimensions. Hold Shift while dragging to keep the proportions consistent. Press Enter when you’re happy with the placement.
Hue and Saturation Adjustment Layers
Raw stock photos rarely match each other straight out of the box. The library photo likely looks too vivid compared to your dark background. So add a Hue/Saturation adjustment layer above LIBRARY and pull Saturation down to -40.
Here’s the important part. You want this adjustment to affect only the LIBRARY layer, not everything below it. Create a clipping mask from the adjustment layer by clicking the square icon at the bottom of the Hue/Saturation panel. This keeps the effect contained to the layer directly beneath it.
Handling the Floor Area
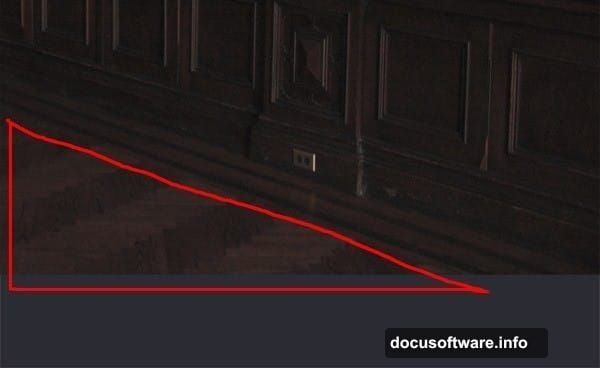
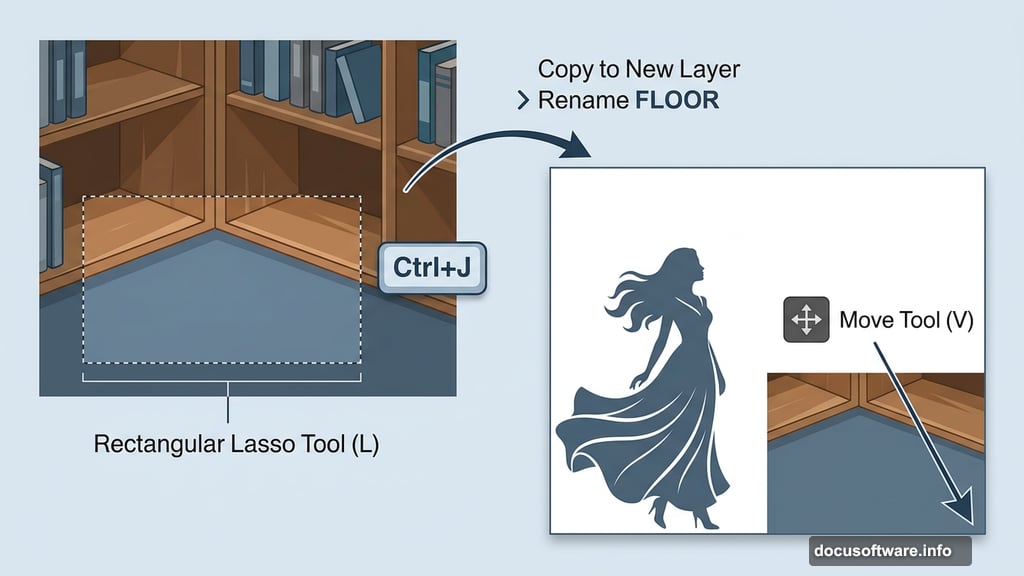
The next step involves adding a woman figure to the bottom left corner of the scene. Because of that placement, the original floor in that corner becomes unnecessary. But the bottom right corner still needs floor coverage.
Click on the LIBRARY layer. Select the Rectangular Lasso Tool (L) and draw a selection around the floor area. Press Ctrl+J to copy that selection onto its own new layer. Rename the layer FLOOR and use the Move Tool (V) to position it in the bottom right corner where you need coverage.
Matching Floor Saturation to the Scene
The duplicated floor section needs the same saturation treatment as the rest of the library. Add another Hue/Saturation adjustment layer above FLOOR and set Saturation to -40 again. Then create a clipping mask so it only affects the FLOOR layer beneath it.
At this stage, your manipulation should show a cohesive, desaturated library interior with a clean floor section ready for the figure placement coming in the next steps.
Why Clipping Masks Matter Here
If you’re new to clipping masks, here’s the quick version. A clipping mask tells an adjustment layer to only affect the single layer directly below it. Without clipping masks, every Hue/Saturation change would shift the entire image. That makes selective color control nearly impossible.
For a scene like this with multiple stock elements blended together, clipping masks are essential. Each element can have its own color correction without interfering with anything else.
Working With Semi-Transparent Fabric
One of the trickiest parts of any fantasy manipulation is blending fabrics realistically into a scene. Flowing dress material or sheer fabric catches light differently than solid objects.
The key is blending mode experimentation. Screen and Overlay modes often work well for light fabric. Screen removes dark tones and lets the fabric feel airy. Overlay adds contrast while preserving the fabric texture underneath.
Also, use a soft brush with low opacity when erasing fabric edges. Hard edges break the illusion immediately. Build opacity gradually by making multiple light strokes rather than one heavy pass.
Adding Atmospheric Light Effects
Dramatic fantasy lighting usually comes from a directional source: sunlight through a window, glowing magic, or a beam cutting through mist. Sun ray brushes work perfectly here. Apply them on a new layer set to Screen mode above your base scene.
Keep your light source consistent. If rays come from the upper right, your shadows should fall to the lower left throughout the entire image. Inconsistent lighting is one of the most common mistakes in photo manipulation, and viewers notice it even when they can’t articulate why.
Dust texture layers add another dimension. Set them to Screen or Soft Light mode at low opacity. They catch the light realistically and make the scene feel inhabited rather than artificially assembled.
Mist and Depth
Mist brushes help create depth and separate foreground from background. Apply mist on a layer between your library background and your figure. Use a large, soft brush at 20-30% opacity and build the effect slowly.
This atmospheric haze mimics how real environments look. Distance naturally desaturates and softens objects. So mist reinforces the sense of scale and depth in your scene.
Fantasy manipulations often fail because everything sits at the same level of sharpness and saturation. Adding mist and intentional blur to background elements immediately makes a scene feel three-dimensional.
Bringing It All Together
The final result should feel like a single, believable world rather than separate photos stacked on top of each other. Your saturation adjustments keep the colors unified. Your lighting comes from one clear source. Your mist creates depth. And your figure feels grounded in the scene through careful masking and blending.
Take a step back from the finished piece and look at it fresh. Does the light feel consistent? Does the figure belong in the space? Does the overall mood match your original vision?
If something feels off, it’s usually the lighting. Check your layer order and blending modes first. Most blending problems in photo manipulation trace back to those two things.
Fantasy photo manipulation in Photoshop rewards patience. Each step builds on the last, and the dramatic lighting that makes a piece feel cinematic is the result of many small, careful decisions rather than one clever trick.