Creating a dramatic samurai photo manipulation sounds intimidating. But with the right techniques, you can build a stunning, cinematic scene that looks completely professional.
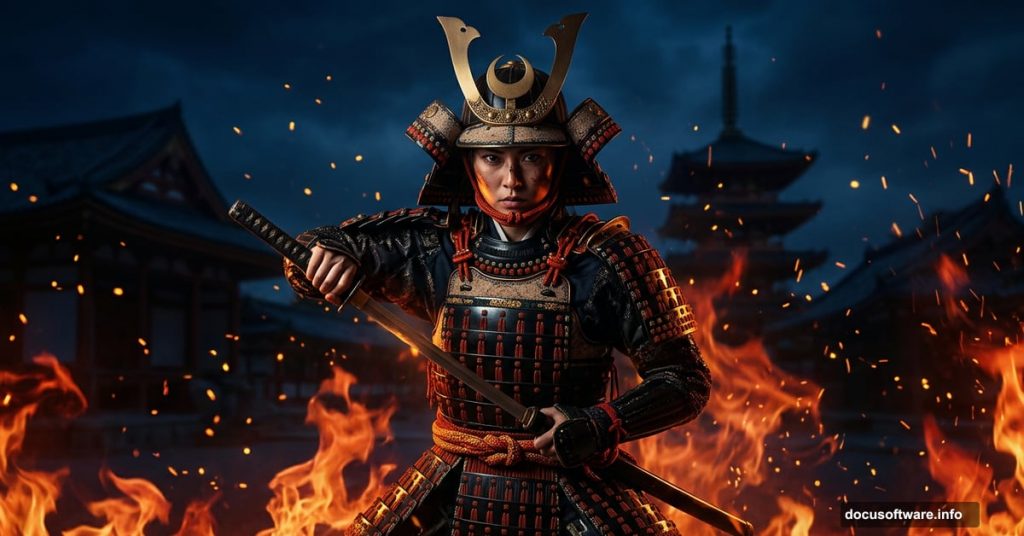
This tutorial walks you through how to combine stock images into a cohesive fiery nighttime scene featuring a samurai woman. You’ll work with adjustment layers, masking, fire effects, and light to pull everything together.
Let’s get into it.
What You’ll Need Before Starting
First, gather your stock resources. For this project, you need a sky image, a temple photo, a model shot, two fire images, a sparks texture, and a light element.
Plus, you’ll want a solid grasp of Photoshop’s basic tools. Specifically the Move Tool, Brush Tool, and layer panel. Nothing too advanced, though. These techniques are approachable even if you’re relatively new to photo compositing.
Setting Up the Canvas and Sky
Start by creating a new document. Set it to 1500 x 2100 pixels and fill it with white.
Next, open your sky image and drag it onto the canvas using the Move Tool. Place it in the upper half of the document. This becomes the foundation for your nighttime atmosphere.
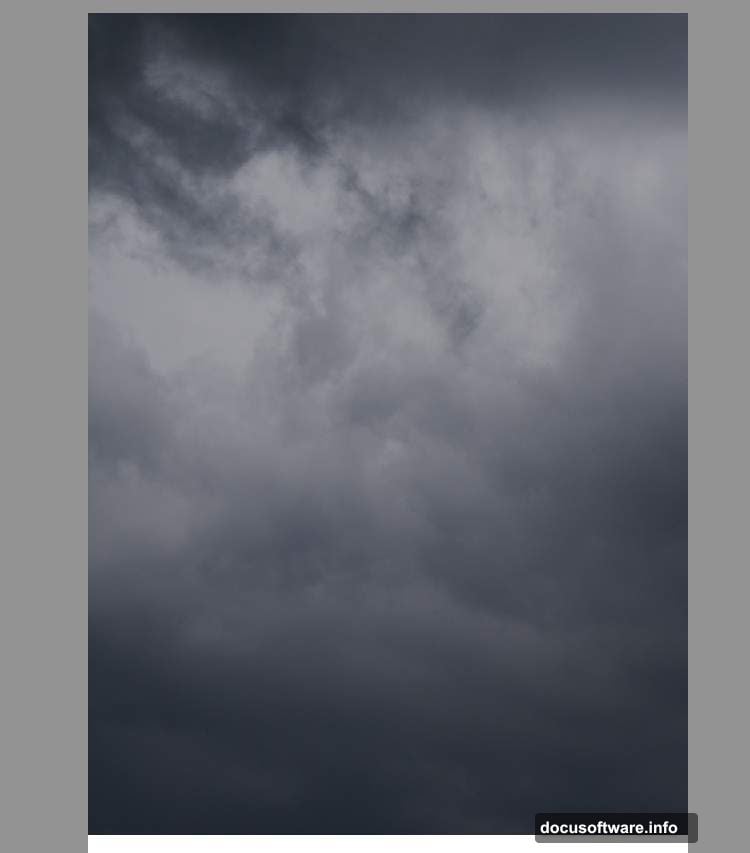
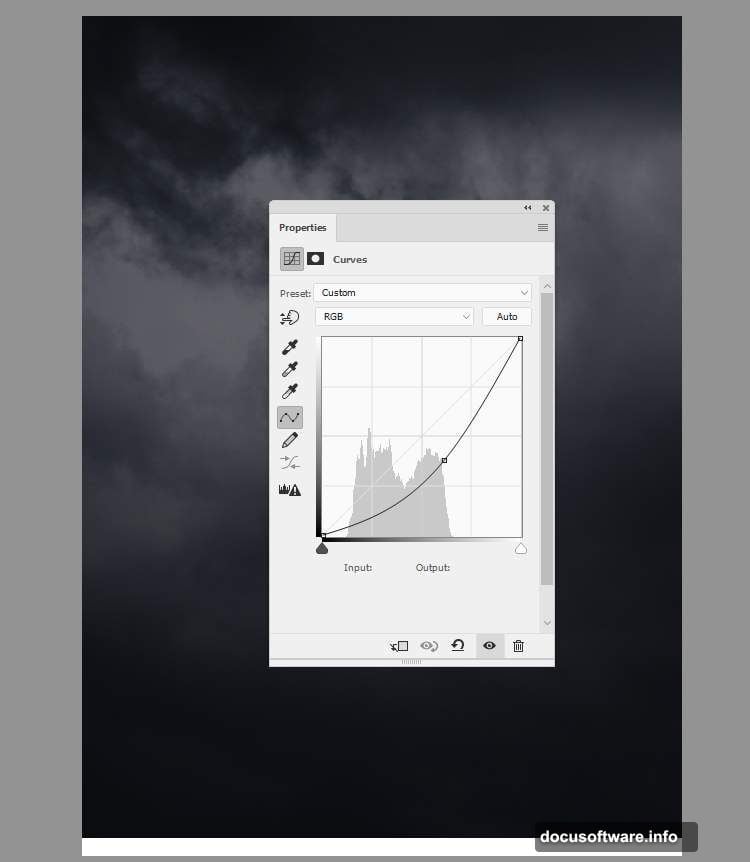
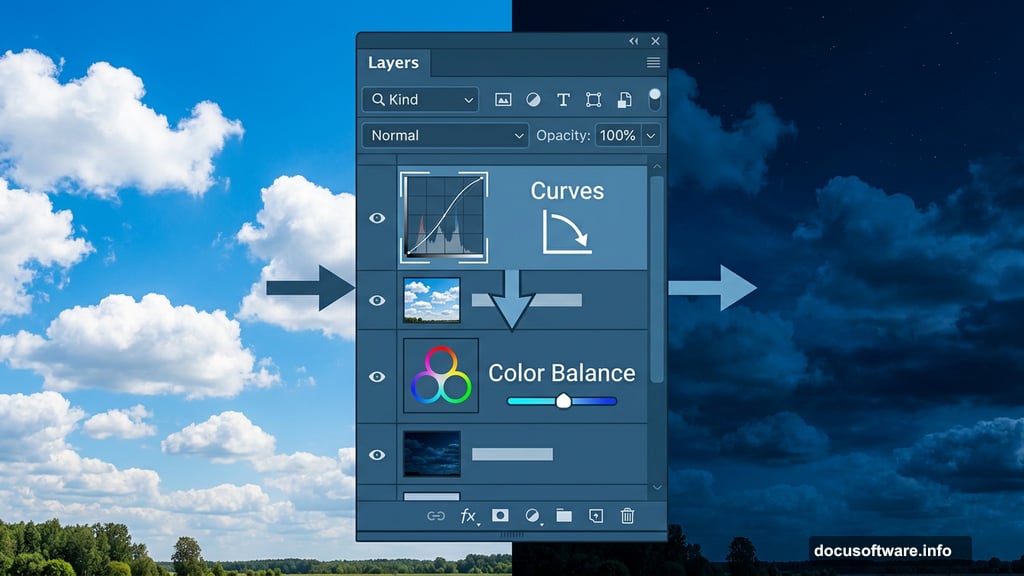
Now add a Curves adjustment layer. Decrease the lightness to darken the sky significantly. This immediately shifts the mood toward a moody, nighttime feel.
Then create a Color Balance adjustment layer above that. Adjust the Midtones settings to push some blue into the sky. Blue tones read as nighttime to the viewer’s eye almost instantly.
Placing and Blending the Temple
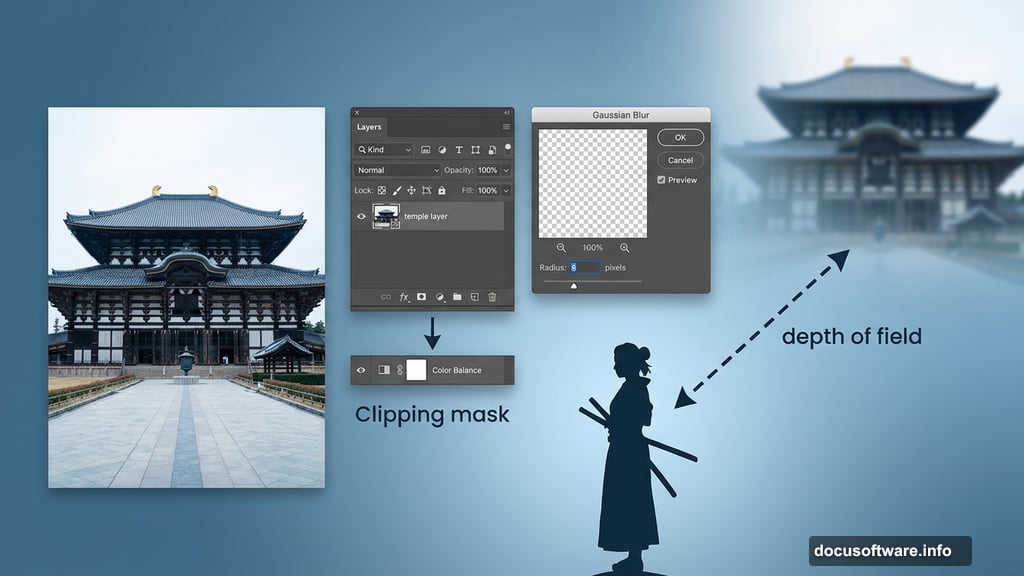
Cut out your temple image and position it in the top right corner of the canvas. This placement creates natural visual balance once the model goes in the foreground.
Here’s a trick most beginners skip. Apply a Gaussian Blur to the temple layer at around 8 pixels radius. This soft blur separates the background elements from your foreground subjects. It mimics depth of field and makes the whole scene feel more three-dimensional.
After blurring, add a Color Balance adjustment layer clipped directly to the temple layer. Adjust the Midtones so the temple’s color blends naturally with the blue-tinted sky behind it. Clipping masks keep this adjustment from affecting other layers, which makes your workflow much cleaner.
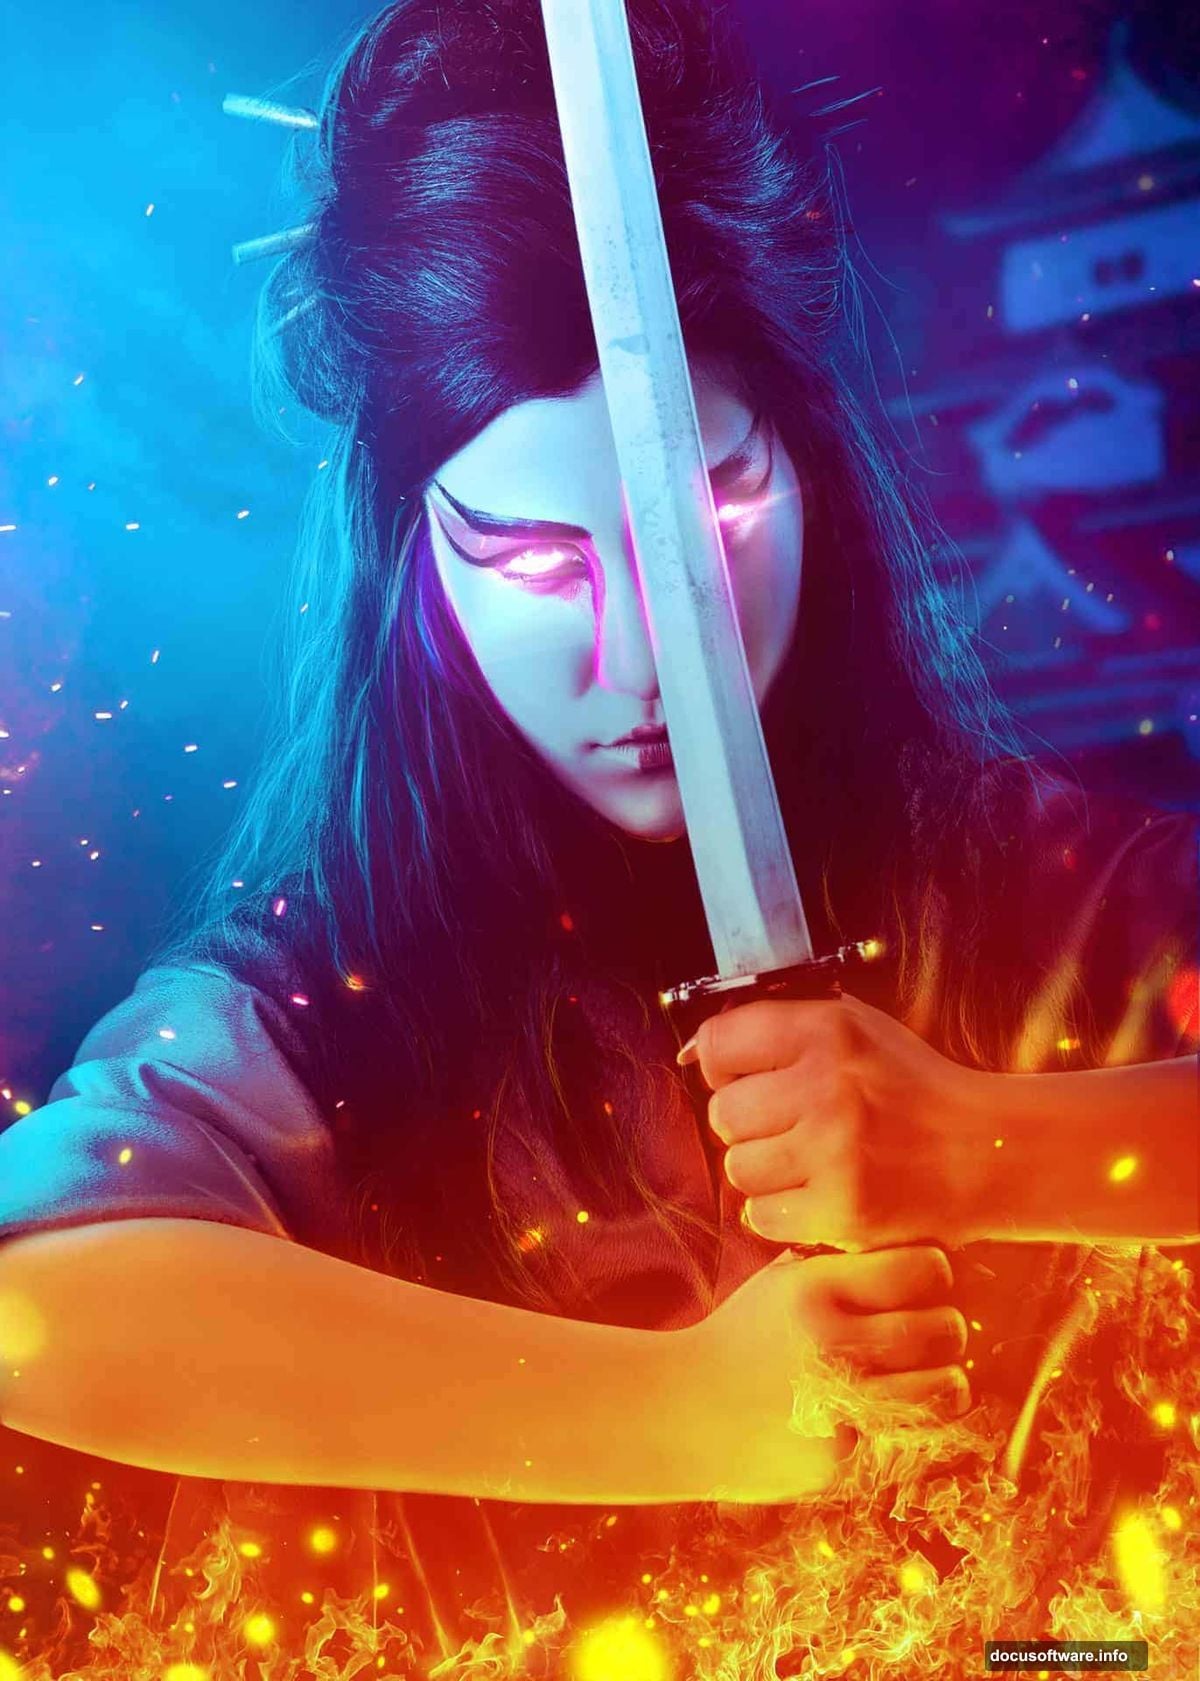
Isolating and Positioning the Model
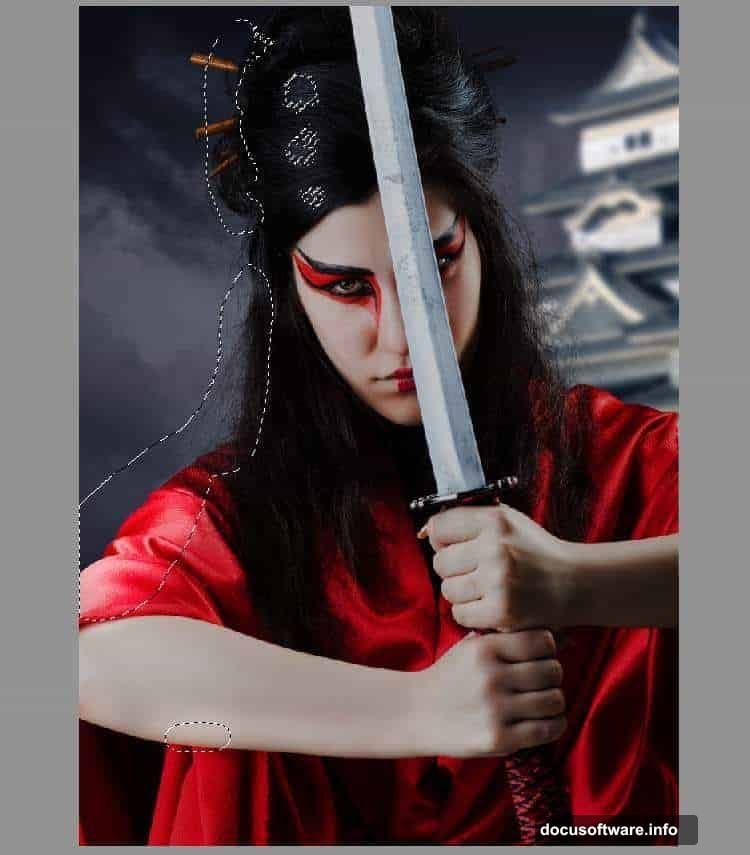
Cut out your model using whichever selection method you prefer. Pen Tool gives the cleanest edges, but Select Subject works surprisingly well for complex outlines too.
Place her in the middle of the foreground. She becomes the focal point, so her position matters a lot for composition.
Shaping Light and Shadow on the Model
This is where photo manipulation gets genuinely exciting. You’re essentially painting light onto a flat photograph.
Create a Curves adjustment layer clipped to the model and pull the lightness down. Then grab a soft round brush set to black. Paint on the layer mask along the left side of the model from the viewer’s perspective. This reveals the lightness you just reduced, because you’re masking it back out in strategic areas. The goal is to preserve the left side as the primary light source location.
Add another Curves adjustment layer and this time increase the lightness. Paint on the layer mask over any areas that should stay dark or shadowed. This way, deep shadow areas won’t get blown out by the brightening adjustment. You’re essentially sculpting the light with two opposing Curves layers working together.
Color Grading the Model
Next, add a Hue/Saturation adjustment layer clipped to the model. Drop the Saturation value down to -61. This desaturates her slightly, which helps her blend into the scene rather than looking like a sharp photo pasted onto a painting.
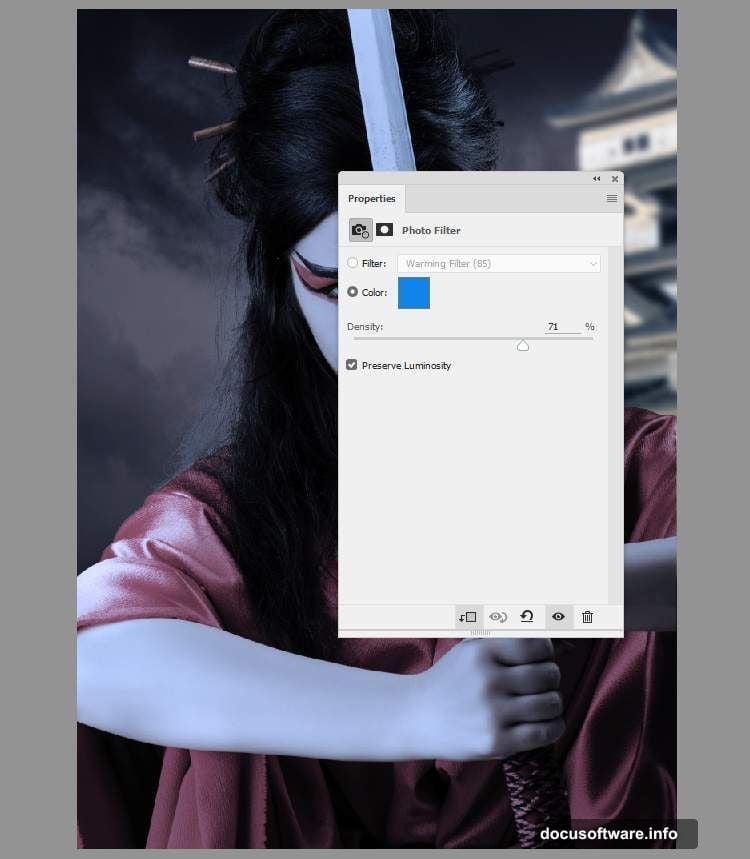
Follow that with a Photo Filter adjustment layer. Pick the color #0185ec, a cool blue tone. This ties the model’s color palette to the blue-tinted sky and temple you established earlier. Consistency in color temperature is what makes composites feel believable.
Adding Dodge and Burn with Overlay
Create a new empty layer and set its blending mode to Overlay at 100% opacity. Fill it with 50% gray.
This is a classic dodge and burn technique. Because the layer sits in Overlay mode, the neutral gray becomes invisible. But when you paint white or black onto it, you brighten or darken the image below non-destructively. It gives you incredibly fine control over where highlights and shadows fall across the model.
Bringing in the Fire Elements
Fire is what makes this scene dramatic. Add your fire images one at a time and set each layer’s blending mode to Screen. Screen mode drops out the dark pixels and keeps only the bright flames visible, which makes fire blend naturally onto almost any background.
Position the flames around the model strategically. Think about where fire would realistically cast light. Then add your sparks texture the same way. Sparks in Screen mode create gorgeous floating embers that add serious depth and energy to the composition.
Adjust the opacity of each fire layer to control intensity. Softer fire elements in the background help push depth, while stronger elements near the model feel more immediate and powerful.
Final Color and Mood Refinements
Once all your elements sit in place, work on the overall color grade. Add a Curves adjustment layer at the very top of your layer stack, affecting everything below.
Pull the shadows slightly blue and push the highlights slightly warm. This split-toning effect, cool shadows against warm highlights, is a cinematic staple. It makes fire-lit scenes look visually rich and intentional.
A final Hue/Saturation layer on top lets you boost overall saturation slightly to make the flames pop without making the whole image look oversaturated.
The whole process teaches you something valuable beyond this one project. Every composite boils down to the same core skills. Match your color temperatures. Shape your light consistently. Use blending modes to merge elements naturally. Master those three things and you can build virtually any scene you imagine.