Warm tones, soft bokeh, and moody lighting all in one image. That’s the magic of a well-crafted autumn portrait composite in Photoshop. And the best part? You don’t need to be a pro to pull it off.
This tutorial walks you through every step of building a beautiful autumn portrait from scratch. You’ll blend a model photo into a warm background, adjust colors and contrast, and layer atmospheric effects to create something that genuinely looks like fine art.
Let’s get into it.
Download Your Tutorial Resources First
Before anything else, grab the assets you’ll need. This composite uses four main resources:
- Background by Anarasha-Stock
- Model by Bugidifino
- Birds by Madetobeunique
- Bokeh by Regularjane
Having everything downloaded and organized before you start saves a lot of frustration. Trust me on that one.
Setting Up the Background
Open Background number 5 from the pack in Photoshop. First thing to do is double-click the layer to unlock it. Then flip the image horizontally using CTRL + T, right-clicking and choosing Flip Horizontally. Crop down to just the section you want as your base composition.

Now let’s add some punch to this background. Duplicate the layer twice with CTRL + J.
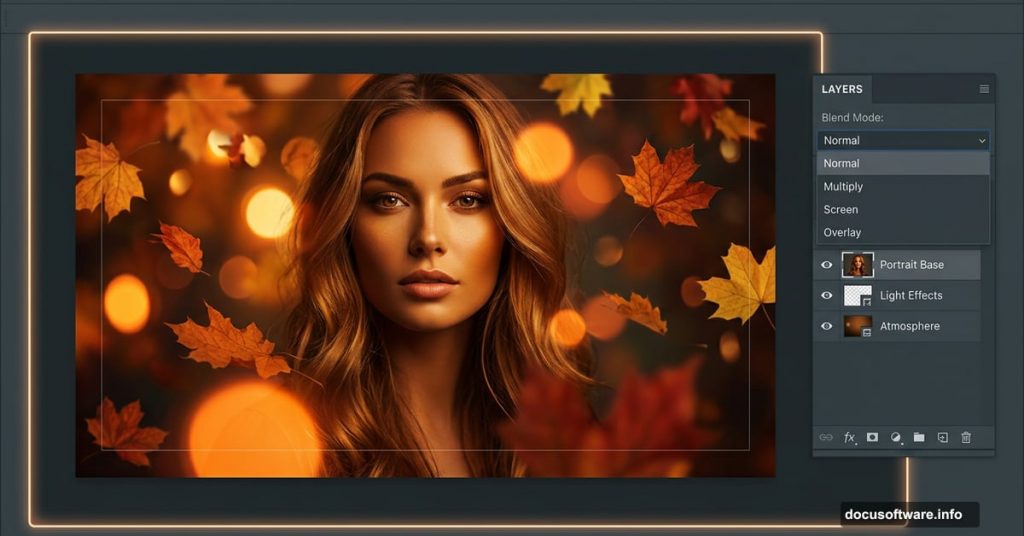
Set the first duplicate to Screen blend mode. This lifts the highlights and brightens the image overall. Set the second duplicate to Multiply. That deepens the shadows and adds richness. Together, these two blend modes create natural-looking contrast without flattening the image.
Extracting and Placing the Model
Extract your model from her original photo background. The Quick Selection Tool combined with Refine Edges works well here, but use whatever extraction method you’re most comfortable with. The goal is a clean cutout, especially around the hair.
Place her on a new layer sitting above all three background layers.
Right now she probably looks a bit too bright and colorful compared to the moody background. That’s normal. The next few steps fix exactly that.
Blending the Model Into the Scene
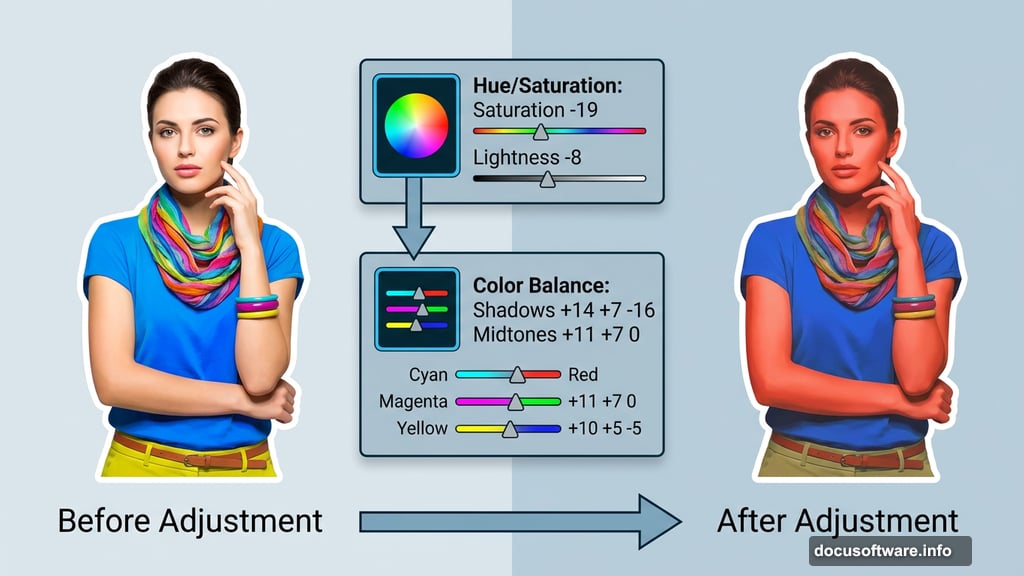
Add a Hue/Saturation Adjustment Layer clipped to the model layer only. Set Saturation to -19 and Lightness to -8. This tones her down just enough to feel like she belongs in the autumn scene rather than being pasted on top of it.
Next, add a Color Balance Adjustment Layer clipped to the model as well. These settings push warm autumn tones into her skin and clothing:
- Shadows: +14, +7, -16
- Midtones: +11, +7, 0
- Highlights: +10, +5, -5
Those red and yellow shifts in the shadows and midtones are doing a lot of heavy lifting. They tie the model’s colors to the warm amber and orange tones already in the background.

Adding Bokeh for Atmosphere
Open the bokeh pack and place bokeh number 2 on a new layer above everything else. Rotate it using CTRL + T to sit naturally in the frame.
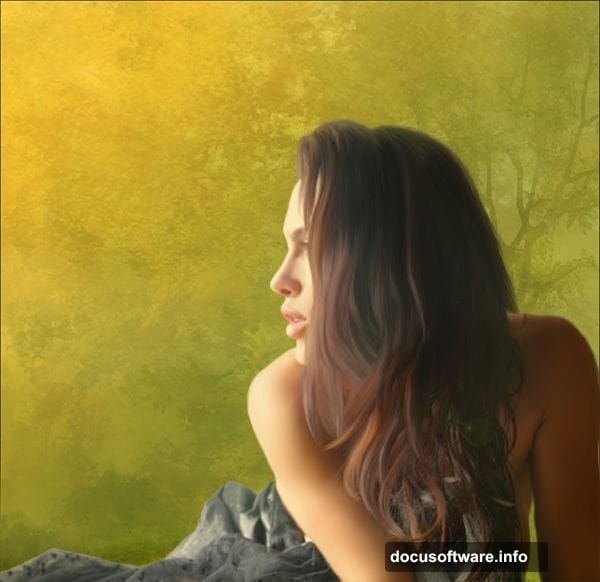
Set the blend mode to Soft Light, then drop both Opacity and Fill to 75%. Soft Light at this opacity adds a gentle glow without overwhelming the image. It makes the whole scene feel warmer and more cohesive.
Gradient Maps for Color Grading
This is where the image really starts to sing.
Add a Gradient Map Adjustment Layer using the preset shown in the tutorial. Set it to Soft Light with Opacity and Fill both at 80%. Then add a second Gradient Map with different settings, also at Soft Light and 80%.
Gradient maps used this way aren’t fully colorizing your image. They’re shifting the tonal relationships subtly. The result is that rich, slightly cinematic color palette that makes autumn composites feel cohesive rather than assembled.
Shaping the Light and Shadow
Now for the finishing touches on depth and dimension.
Add a Brightness/Contrast Adjustment Layer above the three background layers but below the model. Set Brightness to -54 and Contrast to +48. This darkens the background significantly while keeping the edges crisp. Your model will start to feel like the natural focal point of the scene.
Create a new empty layer below the model layer. Paint with a soft white brush under and around her edges. This simulates ambient light bouncing back onto the subject from the background. It’s a small detail, but it’s the difference between a cutout that floats awkwardly and one that feels grounded in the scene.

Why These Techniques Work So Well
The core logic behind this whole tutorial is simple. Autumn light is warm, directional, and high-contrast. So every adjustment here nudges the image in that direction.
The dual Screen/Multiply background trick creates natural-looking contrast without using a single adjustment layer. The Color Balance shifts match the model’s skin tones to the background palette. The gradient maps unify everything under a consistent color temperature.
Plus, the bokeh overlay adds depth and context. It tells the viewer’s brain that this is a real environment, not a studio cutout.
Building Your Own Variations
Once you’ve completed the basic steps, this technique opens up a lot of creative options.
Swap the background for a different season and adjust the Color Balance settings accordingly. Cool blues and greens with different Hue/Saturation values can shift the whole mood to winter or spring. The blend mode stack of Screen, Multiply, and Soft Light works for almost any outdoor composite.
Also worth experimenting with: adjusting the Gradient Map Opacity. Pushing it higher creates a more stylized, almost vintage film look. Pulling it back keeps things more natural and photorealistic.
The bones of the technique stay the same. What changes is how far you push each adjustment.
Photoshop compositing like this feels intimidating at first glance. But when you break it down step by step, it’s really just a series of small, logical adjustments that build on each other. Each layer does one specific job. Together they create something that looks far more complex than the individual steps suggest.
Start with the background setup, get your extraction clean, and then work through the color adjustments in order. By the time you hit the gradient maps, you’ll already see the image coming to life. That’s the best part of this kind of work — the moment the pieces start to feel like they belong together.