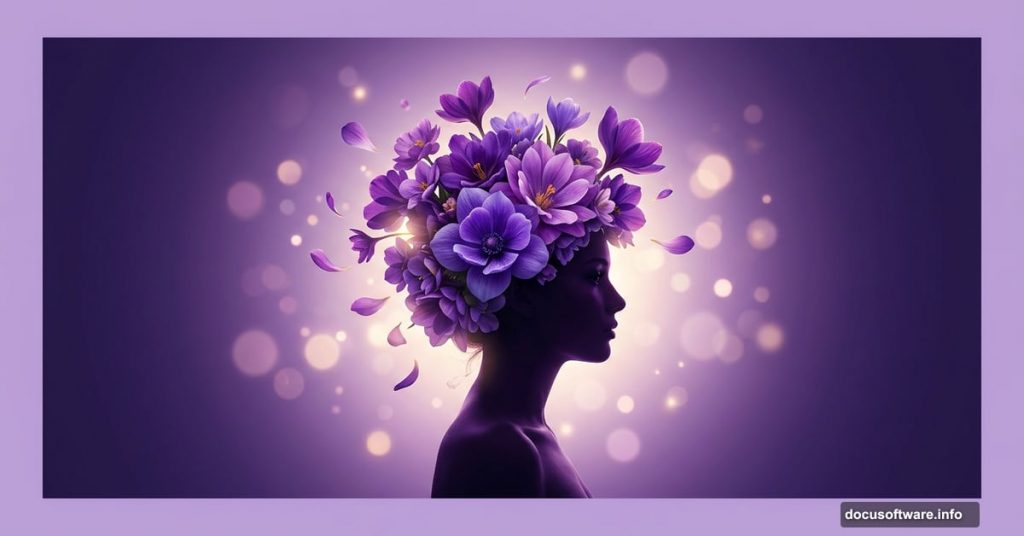
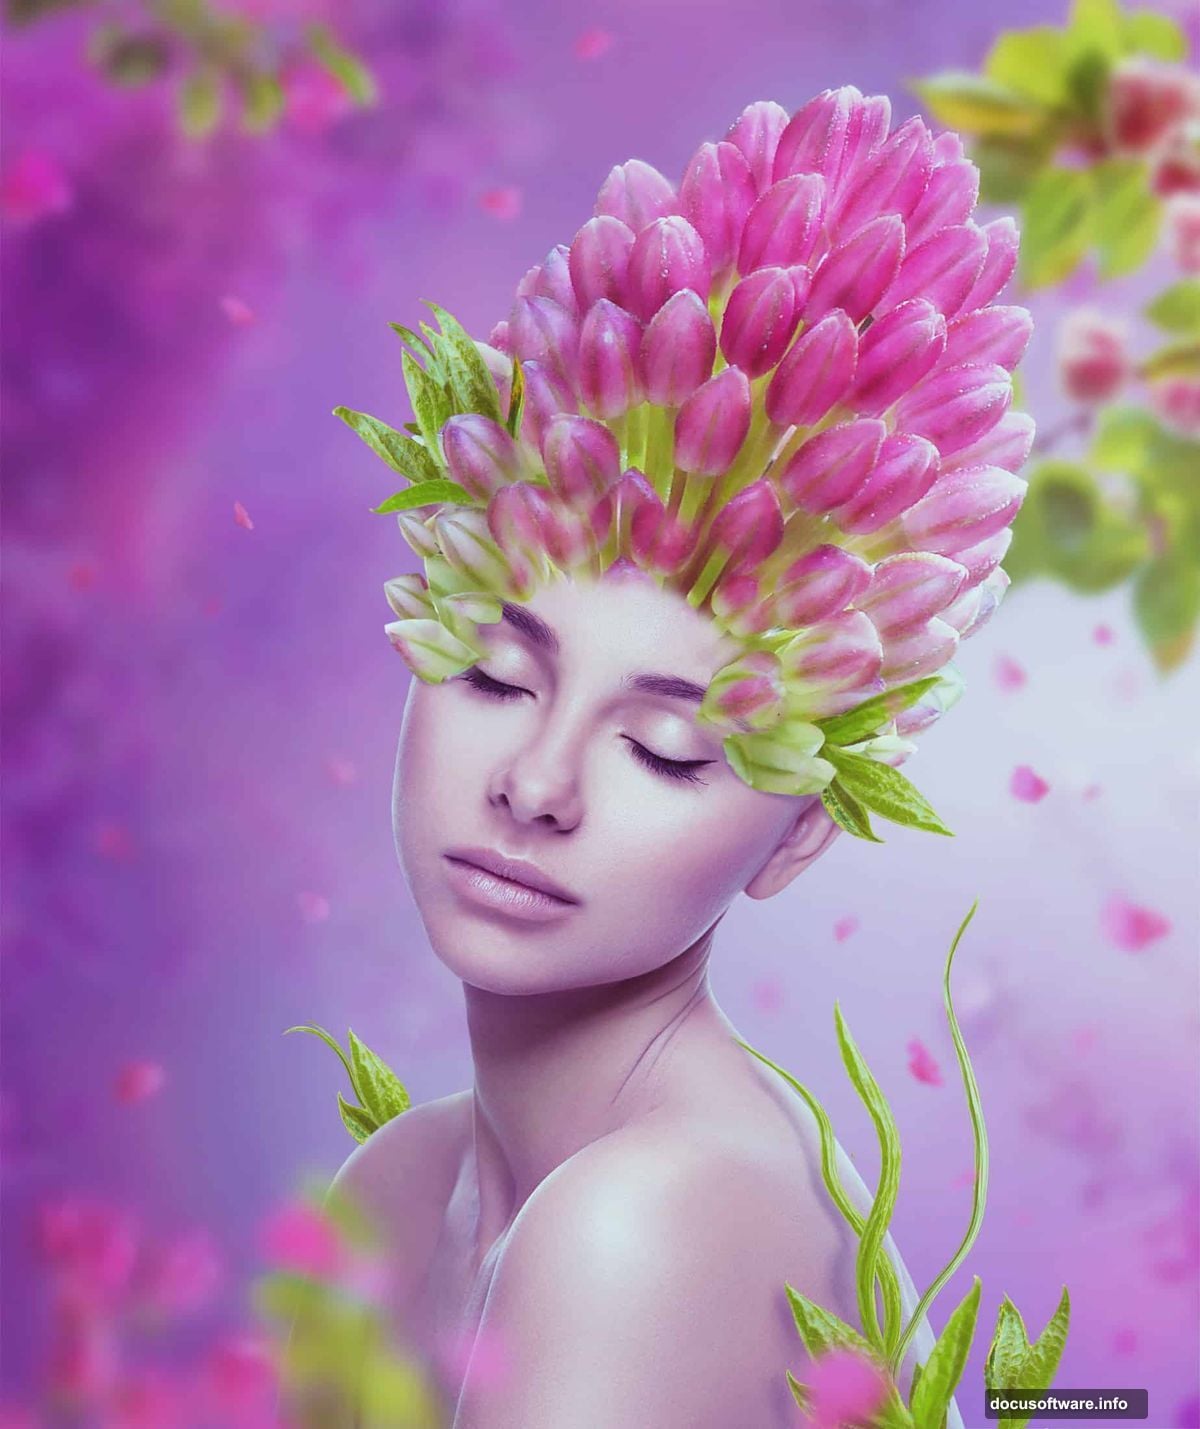
Creating a lush, purple-hued portrait with flowers blooming from a model’s head sounds complex. But with the right steps, it’s totally achievable — even if you’re not a Photoshop wizard.
This tutorial walks you through the whole process. You’ll learn how to blend flowers onto a portrait, build a soft dreamy background, and polish everything with color grading. The final result is a fantasy-style floral portrait dripping in purples and soft light.
Let’s get into it.
Setting Up Your Purple Gradient Background
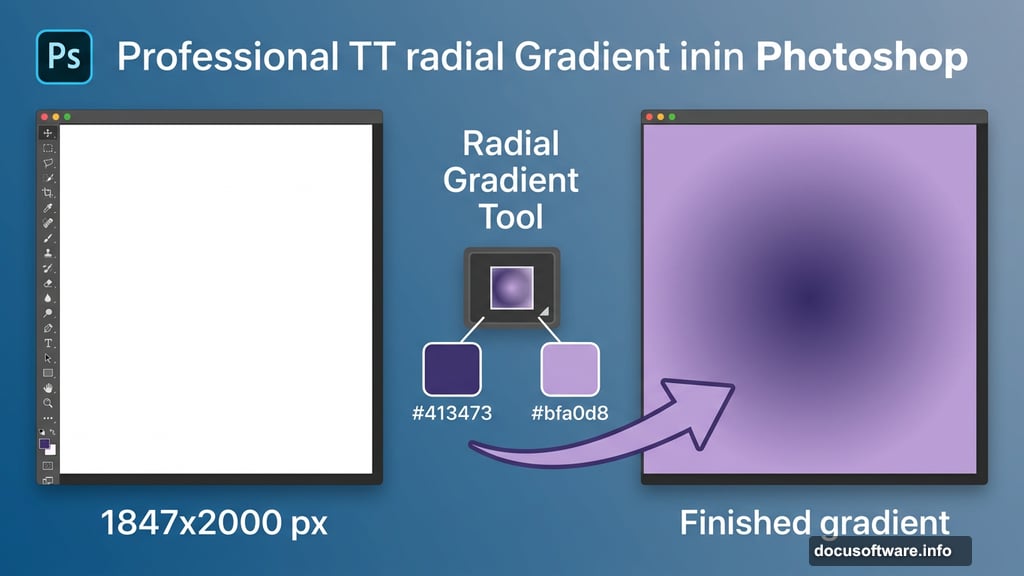
Start fresh. Create a new document in Photoshop at 1847 x 2000 pixels and fill it with white.
Next, hit Ctrl+Shift+N to make a new layer, then press G to grab the Gradient Tool. Choose the Radial Gradient option and set your two colors to #413473 (a deep purple) and #bfa0d8 (a soft lilac). Drag from left to right across the canvas. You’ll get a rich, moody purple backdrop that gives the whole composition its fantasy feel.

That gradient is your foundation. Everything else builds on top of it.
Curves and Color Balance Adjustment Layers
Now it’s time to shape the light. Go to Layer > New Adjustment Layer > Curves and pull the curve upward to brighten the canvas. But you don’t want even brightness everywhere — so grab a soft round brush in black (press B) and paint on the layer mask to reduce the brightening effect on the right side and the bottom left.
Then add a Color Balance adjustment layer to warm things up slightly. Paint with a soft black brush on that layer mask to dial back the warm tones on the top and bottom edges. This keeps the warm glow focused in the middle where your subject will sit.
Add another Curves layer to brighten things further. Use the layer mask again to protect the left side and top right from getting too washed out. Finally, make a new empty layer and use a soft white brush at about 50% opacity to paint a gentle glow around the middle right and bottom of the canvas. That creates your main light source — and it makes a huge difference in how natural the final image feels.
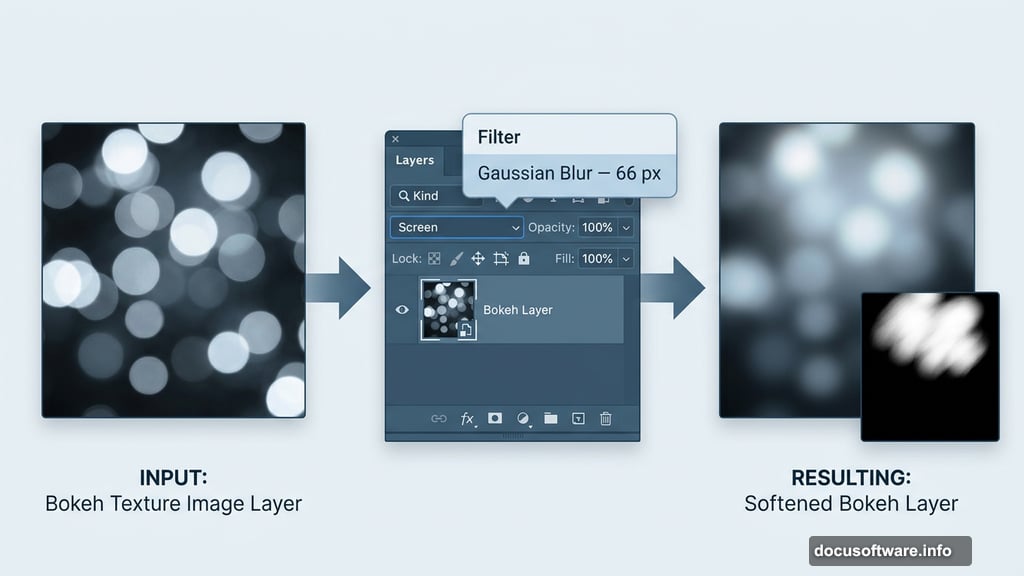
Adding Bokeh for a Soft, Dreamy Atmosphere

Open your bokeh image and drag it into the main document using the Move Tool (V). Change the layer blending mode to Screen at 100% — this makes the dark areas invisible and lets only the light sparkle through.
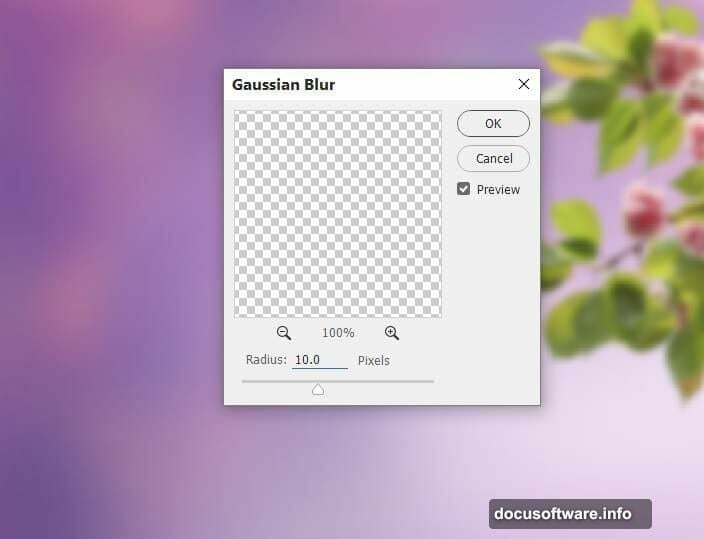
Convert the layer to a Smart Object, then go to Filter > Blur > Gaussian Blur and set the radius to 66 px. That softens the bokeh into gentle, blurry light orbs rather than harsh circles.
Add a mask to this layer by clicking the second icon at the bottom of the Layers panel. Use a soft black brush to reduce the bokeh on the lower part and both sides of the canvas. You want the sparkle concentrated toward the top and center, not competing with your subject.

Add a Color Balance adjustment layer set as a Clipping Mask over the bokeh. Tweak the Midtones and Highlights settings to match the overall purple tone of your composition.
Placing and Blurring Branch Elements
Here’s where the magic starts. Isolate branch 1 from its background and place it in the top right of your canvas. Convert it to a Smart Object, then apply a Gaussian Blur of 10 px. That slight blur pushes the branch into the background visually, making it feel like it belongs in the scene rather than sitting on top of it.
Add a Curves adjustment layer as a Clipping Mask over the branch layer. Brighten the lower portion of the branch, then paint on the upper part of the layer mask to preserve the natural darkness there. This subtle shading trick makes the branch look three-dimensional instead of flat.
From here, the tutorial continues with placing the remaining branches, adding the model, blending flowers onto the head, and finishing with final color grading. Each stage follows the same logic — mask carefully, adjust light with Curves, and use Color Balance to keep everything in that gorgeous purple harmony.
Why This Technique Produces Such Smooth Results
The secret behind this kind of photo manipulation is working non-destructively. Smart Objects let you apply blurs and adjustments that you can always go back and change. Clipping Masks keep your adjustments tied to specific layers. And layer masks mean you never permanently erase anything — you just hide it.
Plus, building your light source in the background before adding any subjects means every element you add later already fits naturally into the lighting environment. That consistency is what separates polished photo manipulations from ones that look “pasted together.”
Adjustment layers also stack beautifully. Each one nudges the color or brightness just a little further in the direction you want. Rather than making one dramatic change, you’re guiding the image with many small touches — and the result looks far more natural.
Photo manipulation in Photoshop rewards patience. Take your time with each mask, check your blending modes carefully, and don’t skip the color grading steps at the end. That’s where a good composition becomes something genuinely striking.