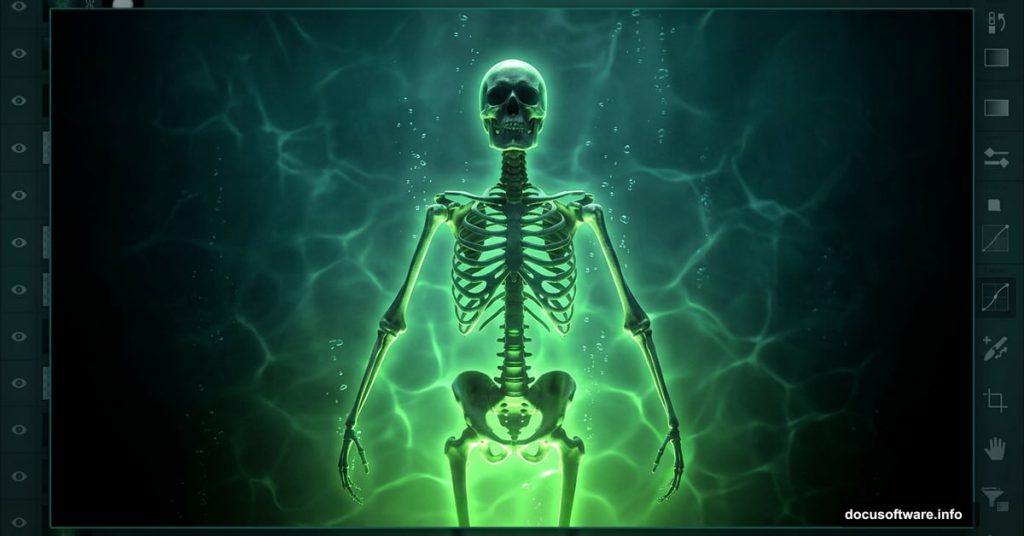
There’s something wonderfully unsettling about radioactive aesthetics. That sickly green glow, the murky water, the sense of something lurking beneath the surface. If you’ve ever wanted to create a surreal, post-apocalyptic underwater scene in Photoshop, this tutorial walks you through every step.
By the end, you’ll have a fully composited image complete with an eerie green color grade, a skeleton figure, underwater elements, and a polished final look straight out of a sci-fi horror film.
What You Need Before Starting
Grab these resources before diving in. You’ll need a skeleton woman, a skeleton arm, fish, grass, and several underwater photo assets including Bermuda Underwater, Underwater1, Underwater2, and a Bubbles image. You’ll also need a Bubbles layer and a Sea photo. Having everything ready upfront saves a lot of back-and-forth during the build.
Also, make sure you’re running Photoshop CC for the best experience. A couple of steps reference CC-specific shortcuts that make resizing much smoother.
Setting Up Your Canvas
First, create a new document. Go to File > New and enter these settings exactly:
- Width: 2880px
- Height: 3417px
- Resolution: 300px
- Color Mode: RGB Color, 8 bit
- Background Contents: Transparent
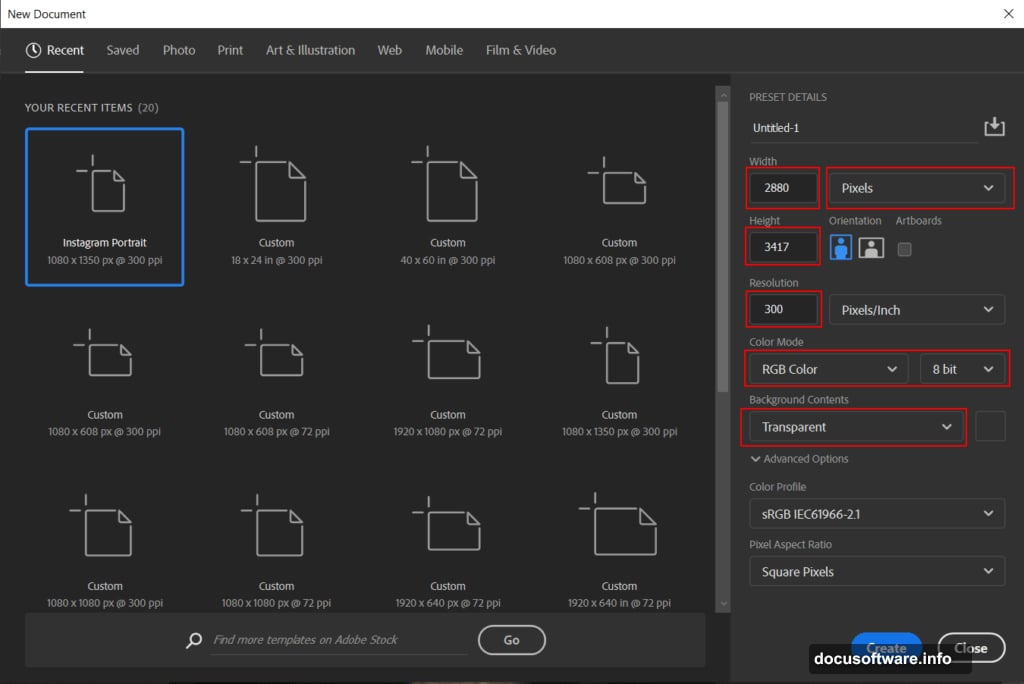
This gives you a tall, portrait-style canvas that works beautifully for the composition you’re building. The high resolution also ensures your final export looks sharp.
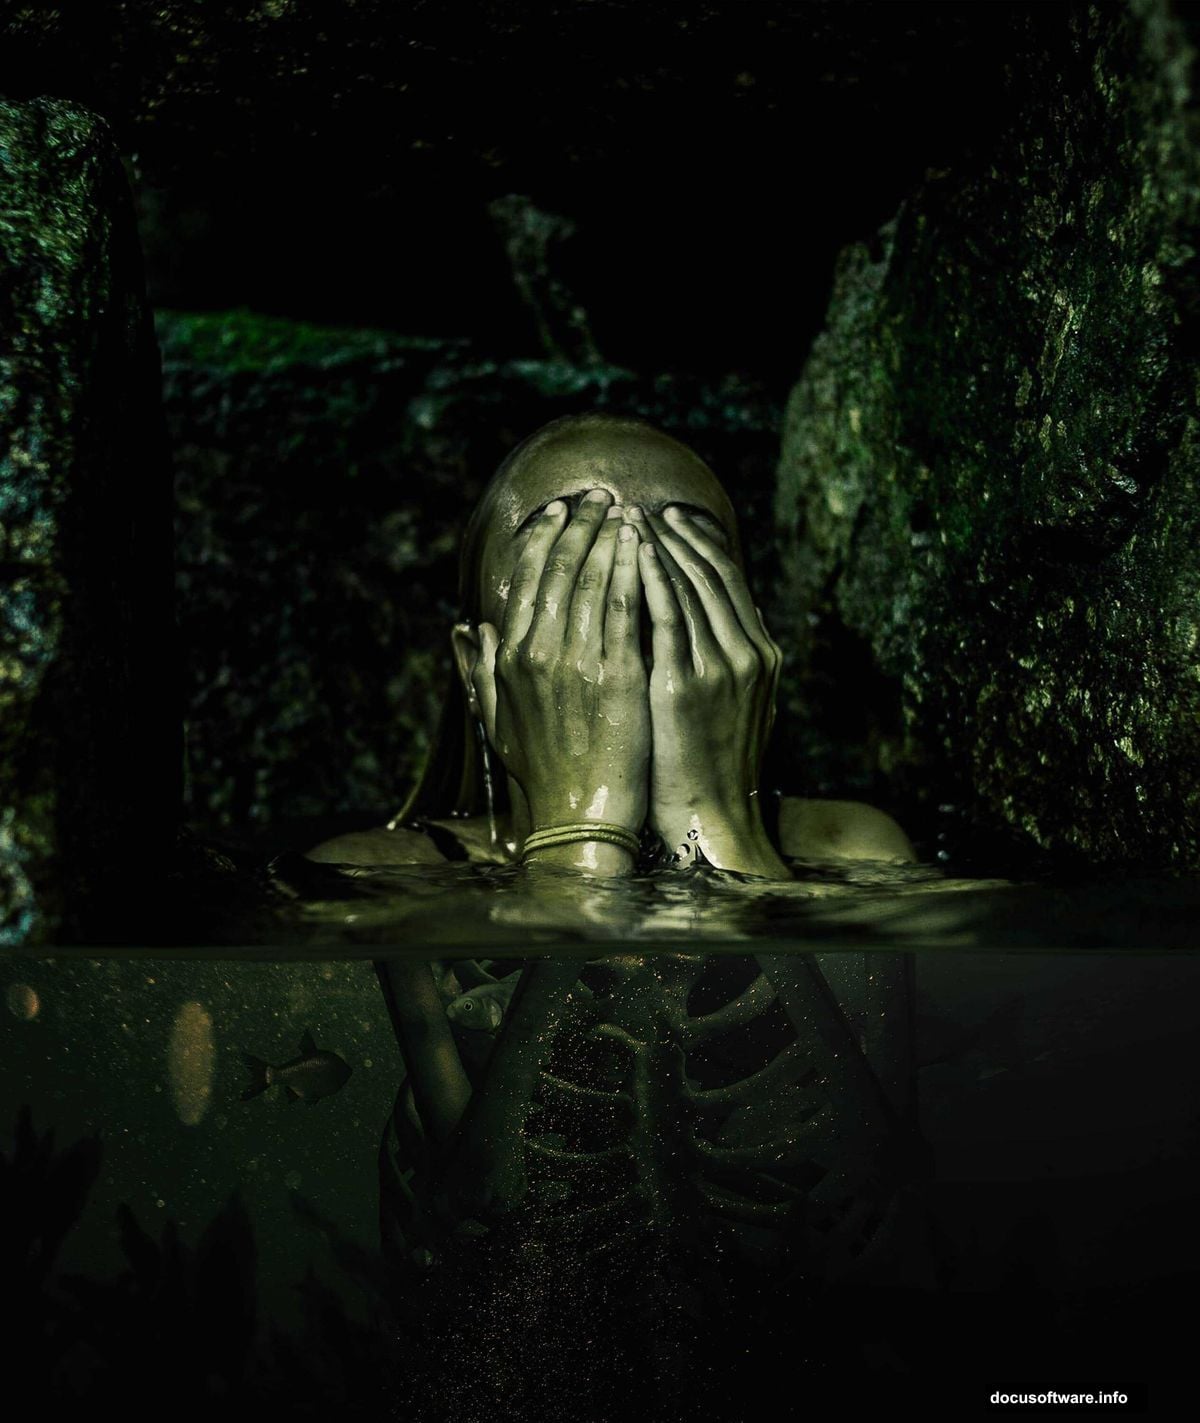
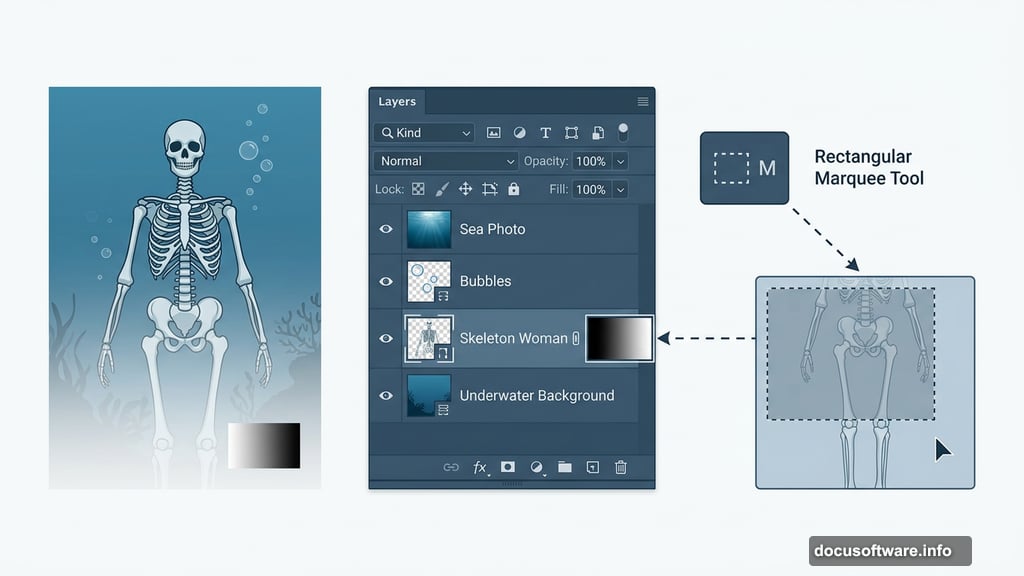
Placing and Masking Your Model
Go to File > Place and bring in the skeleton woman image. Once placed, grab the Rectangular Marquee Tool (M) and select the lower half of the figure. Click the layer mask icon at the bottom of the Layers panel. This hides the lower portion cleanly, which sets you up perfectly for the underwater blending later.
The mask approach keeps everything non-destructive. So if you need to adjust the mask edge later, you can without starting over.
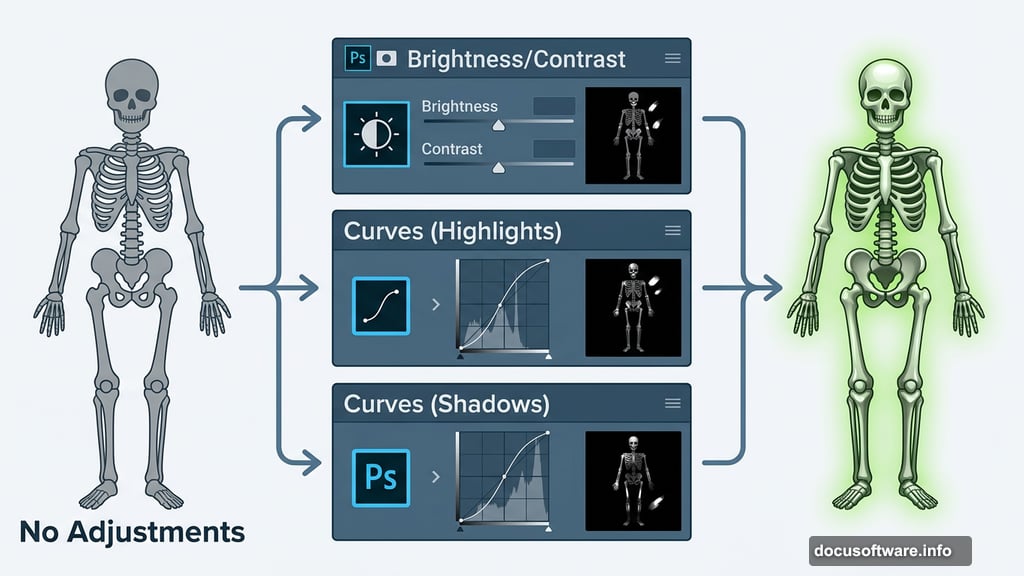
Sculpting Light and Shadow With Adjustment Layers

This is where the scene starts feeling alive. Add a Brightness/Contrast Adjustment Layer, then immediately press Ctrl/Cmd + I to invert the mask. This hides the adjustment everywhere by default. Now pick the Brush Tool (B) set to Soft Round with white as your foreground color, and paint over the highlight areas of the skeleton. You’re selectively brightening only the parts you choose.
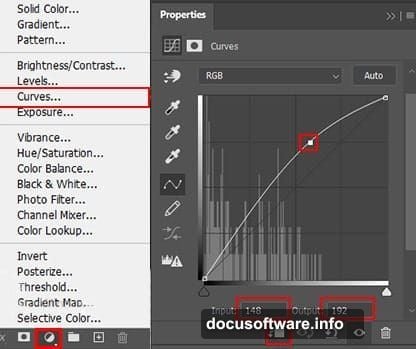
Next, add a Curves Adjustment Layer and repeat the same process. Invert the mask, then paint white onto the highlight areas to boost them further. Follow that with a second Curves layer, but this time paint white onto the darker parts of the figure to deepen the shadows.
These three targeted adjustments give the skeleton real dimension. Without them, the figure looks flat and pasted-on.
Adding the Atmospheric Glow
Create a fresh new layer and set its blend mode to Soft Light with opacity at 70%. Grab the Brush Tool again with a white foreground color and crank the size up to around 3000px. Paint a single soft stroke in the upper right corner of the canvas.
This large, subtle light source ties the whole scene together and creates that dreamy, underwater light effect. It’s a small step but makes a huge difference in the final mood.
Building the Underwater Environment
Go to File > Open and bring in the Sea image. Use the Rectangular Marquee Tool to select the area you want, holding Shift as you drag to keep the selection constrained. Copy (Ctrl/Cmd + C) and paste (Ctrl/Cmd + V) it onto your main canvas.
Use the Transform Tool (Ctrl/Cmd + T) to position and resize it. If you’re on Photoshop CC, hold Alt to resize all sides simultaneously. Then add a layer mask to this layer, switch to a Soft Round brush with black as your foreground color, and paint away the edges to blend it smoothly into the scene.

Repeat similar placement steps for your other underwater assets including Underwater1, Underwater2, and Bubbles. Each layer adds depth and realism to the water environment.
Adding the Skeleton Arm, Fish, and Grass
Place the skeleton arm asset and position it so it reaches naturally into the scene. The outstretched arm adds a narrative element and makes the composition feel dynamic rather than static.
Bring in the fish next. Scatter them naturally through the water space. Vary their size slightly to create a sense of depth. Larger fish appear closer, smaller ones recede into the background.
Add the grass layer at the base of the composition. This grounds the scene and reinforces the idea that you’re looking at an actual underwater environment, not just a floating backdrop.
The Green Radioactive Color Grade
This step is what transforms a regular underwater scene into something genuinely unsettling. Use Curves adjustment layers targeting the individual RGB channels to push the image toward that toxic green. Boost the green channel, pull down the red and blue channels slightly, and watch the whole scene take on that sickly radioactive hue.
You can also add a Color Balance or Hue/Saturation layer to fine-tune the exact shade of green. The goal is that specific shade that looks somewhere between bioluminescent and poisonous.
Finishing With Camera Raw Filter
Once the composition is complete, flatten or merge your layers into a smart object. Then go to Filter > Camera Raw Filter. This is your final polish pass.
Adjust the exposure, highlights, shadows, and clarity to add depth and contrast. Use the HSL panel to fine-tune the greens specifically. A touch of vignetting around the edges focuses attention on the skeleton figure and adds to the creepy atmosphere. Finally, bump the texture and clarity sliders slightly to make the underwater details crisp and detailed.
The Camera Raw Filter does in one step what would otherwise take multiple adjustment layers. It’s the best way to unify all your elements into a cohesive, finished image.
Pulling off a scene like this is genuinely satisfying. What starts as a blank transparent canvas becomes something that feels like a still from a post-apocalyptic film. The key is layering your adjustments carefully and using masks aggressively so every element blends rather than just sits on top of everything else.
If the PSD download link gives you any trouble, the comments section on the original tutorial page is active and the team responds quickly. And once you nail the technique here, the same workflow applies to any kind of atmospheric photo manipulation you want to tackle next.