Ever wanted to transform basic photos into dramatic wildlife art? This Photoshop technique turns separate images into a cohesive landscape scene. No professional photography equipment required.
I’ve walked through this exact workflow dozens of times. What seems complex actually breaks down into manageable steps. Plus, you’ll learn blending techniques that work for any composite project.
Let’s build something beautiful.
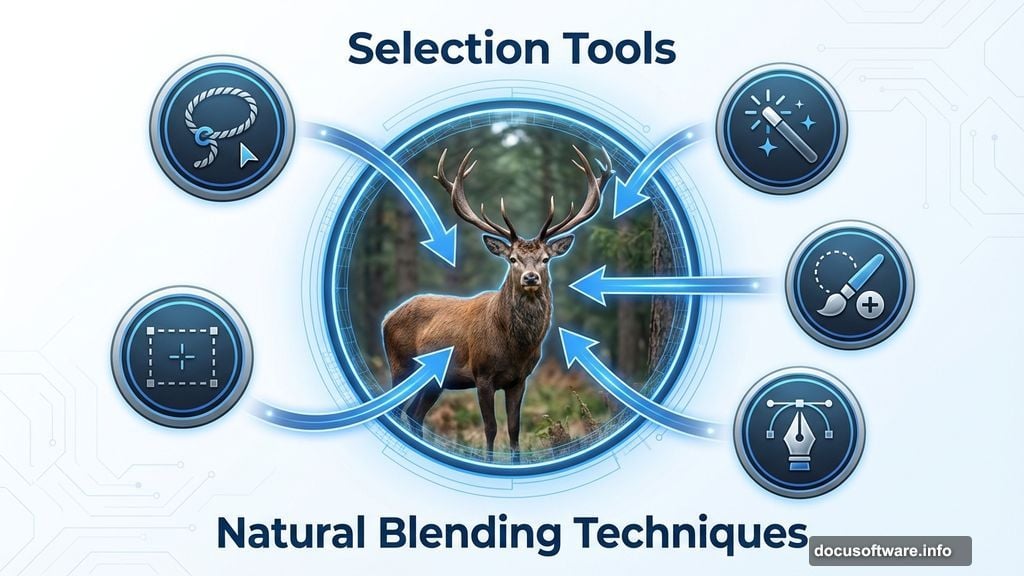
What You’ll Actually Learn
This tutorial covers practical compositing skills that translate beyond just deer scenes. You’ll master selection tools, adjustment layers, and natural blending techniques.
The process takes about 45 minutes once you understand the workflow. First-timers might need 90 minutes. But the techniques become muscle memory fast.
Here’s what makes this approach effective: we layer elements gradually, checking blend quality at each stage. That prevents major revisions later when you’ve already invested hours.
Setting Up Your Canvas Correctly
Start with proper dimensions from the beginning. Wrong canvas size forces awkward cropping decisions later.
Open Photoshop and create a new file with these specs:
- Width: 3080 pixels
- Height: 3850 pixels
- Resolution: 300 DPI
- Color Mode: RGB, 8-bit
- Background: Transparent
Why these numbers? The 3080×3850 dimension provides vertical portrait orientation perfect for wildlife subjects. Plus, 300 DPI ensures print-quality output if you want physical copies.
Keep the background transparent. That gives flexibility for later adjustments without fighting a locked background layer.
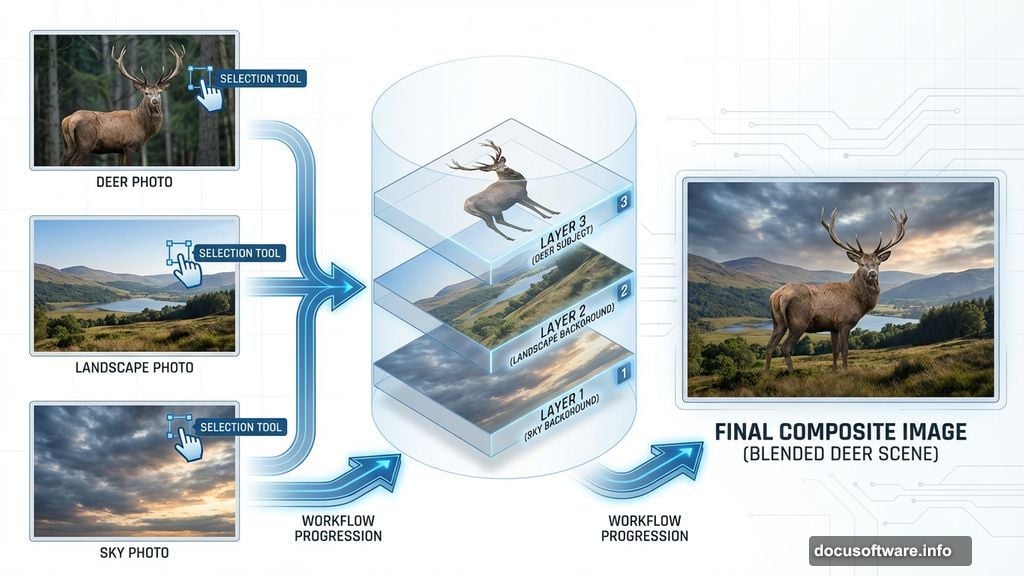
Building the Foundation Landscape
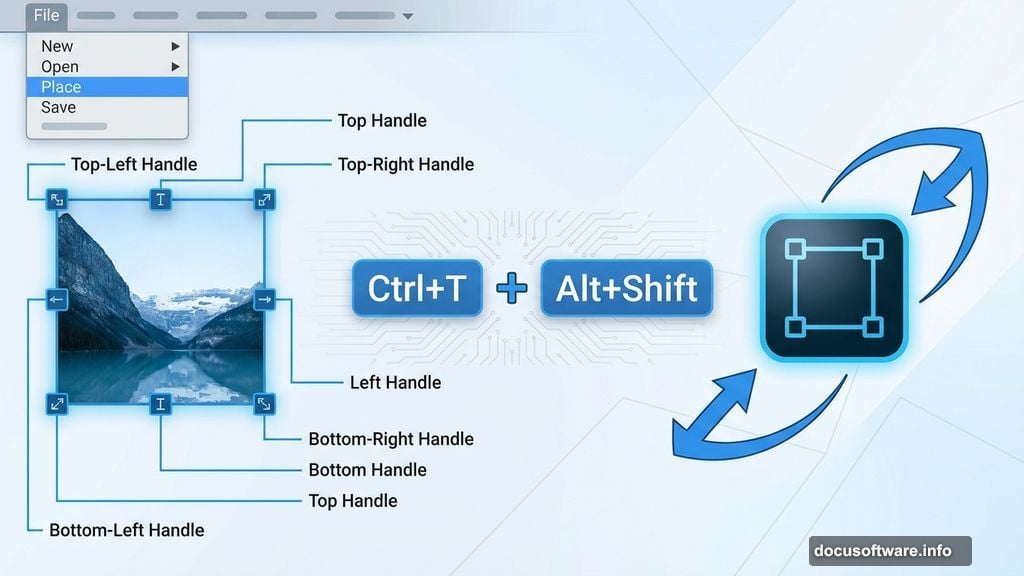
Now place your background image. Go to File > Place and select your landscape photo.
Position it carefully using the Transform tool (Ctrl/Cmd + T). Hold Alt + Shift while dragging corner handles to resize proportionally. In Photoshop CC, Alt alone maintains proportions from all corners.
The background establishes your scene’s mood and lighting. Choose images with interesting elements but avoid overly busy compositions. Simpler backgrounds let your deer subject stand out.
Don’t worry about perfect placement yet. We’ll refine everything through adjustment layers next.
Color Grading for Atmosphere
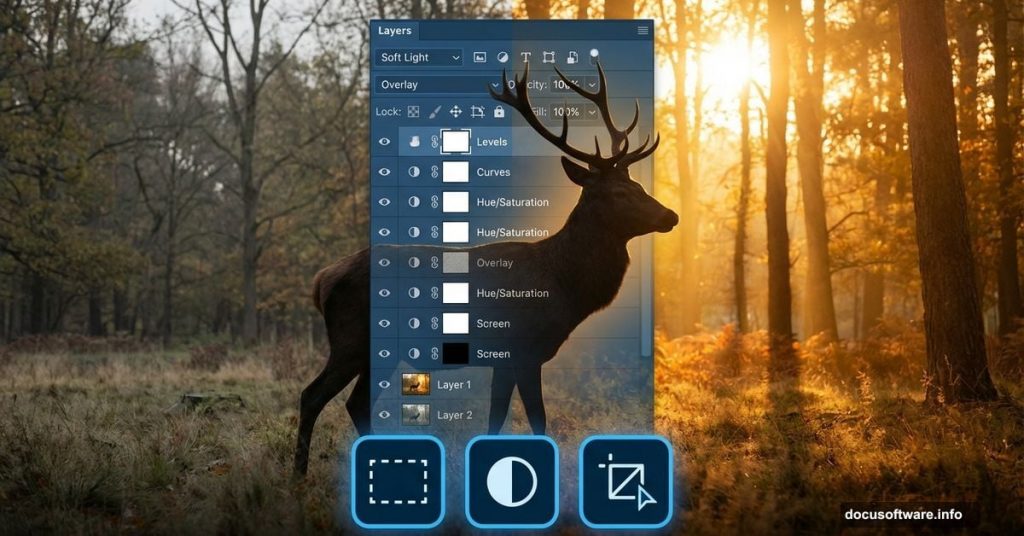
Raw photos rarely match perfectly out of camera. So we use adjustment layers to create cohesive color harmony.
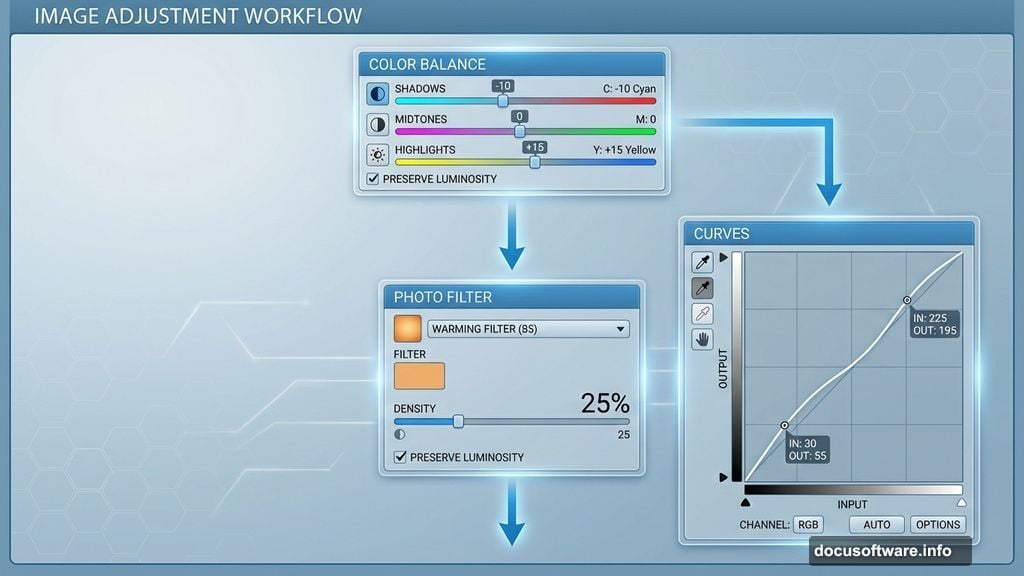
Add Color Balance adjustment:

This controls overall color temperature. Push midtones slightly warm for golden hour lighting. Keep shadows neutral to prevent muddy tones.
Add Photo Filter adjustment:
Warming filters (like 81 series) enhance sunset moods. Cooling filters work for morning scenes. Keep intensity around 25% to avoid oversaturation.
Add Curves adjustment:
Curves give precise control over brightness and contrast. Lift shadows slightly for detail. Pull down highlights to prevent blown-out areas.
These three adjustments transform flat images into dimensional scenes. But use subtlety. Overdone color grading screams amateur hour.
Integrating Sky Elements
Boring skies kill otherwise great composites. So we replace them with more dramatic options.
Open your sky image separately. Use the Rectangular Marquee Tool (M) to select the interesting cloud formations. Hold Shift while dragging to maintain straight edges.
Copy this selection and paste into your main composition. Position it at the top of your canvas.
Create a layer mask on the sky layer. Use a soft round brush with black foreground color to paint away hard bottom edges. This blends the sky naturally into your landscape.
Set the sky layer opacity around 40% initially. You can adjust this later once other elements are in place.

Selecting Your Deer Subject
Subject selection makes or breaks composite realism. Sloppy selections scream “fake photoshop job.”
Open your deer image. Grab the Pen Tool (P) for precise selection. Click around the deer’s outline, creating anchor points that follow the edge exactly.
Take your time on fur edges. Zoom in close. Create extra anchor points where the outline curves sharply. This prevents jagged selection edges that look unnatural.
When you complete the path, right-click and choose “Make Selection.” Set Feather Radius to 0.2 pixels for slightly soft edges. Then click OK.
Apply a layer mask to isolate just the deer. Now paste this into your main composition.
Positioning Your Wildlife Subject
Place the deer thoughtfully within the scene. Consider natural composition principles like rule of thirds.
Position the subject off-center for visual interest. Leave space in the direction the deer faces. This creates implied movement and prevents cramped compositions.
Use Transform (Ctrl/Cmd + T) to resize if needed. But avoid excessive scaling which degrades image quality. Try to use source images close to your final size.
Check edge quality at 100% zoom. Refine the mask if you see harsh outlines or leftover background artifacts.
Adding Atmospheric Elements
Real nature scenes contain depth-building details. We add these through brushes and small elements.
Spider webs and moss:
These small details suggest age and natural environment. Use custom brushes to paint them on dedicated layers. Keep opacity low (20-30%) so they enhance rather than dominate.
Flying birds:
Birds add life and scale reference. Place multiple bird layers at varying distances. Distant birds should be smaller and slightly blurred to simulate depth of field.
Position birds naturally. They shouldn’t form perfect lines or geometric patterns. Scatter them organically like real flocks.
Butterflies (optional):
Butterflies work for spring/summer scenes. Place them near the foreground, slightly larger than background elements. Add subtle motion blur to wings for realism.
These atmospheric elements transform static compositions into living scenes. But restraint matters. Too many competing details create visual chaos.
Creating Natural Light Integration
Lighting consistency separates amateur composites from professional work. Your deer must match the scene’s light direction and quality.
Study your background’s light source. Is it coming from upper right? Lower left? Note the angle.
Add a new layer set to Overlay blend mode. Use a soft brush with warm color (light orange or yellow) to paint gentle highlights on the deer matching the background light direction.
Create another layer set to Multiply mode. Paint cool shadows on the opposite side using dark blue or purple. Keep opacity around 20%.
These lighting layers make subjects feel integrated rather than pasted on. The effect is subtle but crucial.
Final Polish with Camera Raw Filter
Camera Raw Filter provides powerful finishing adjustments. Access it through Filter > Camera Raw Filter.
Adjust these key settings:
Exposure and Contrast:
Boost overall contrast slightly. This adds punch without crushing blacks or blowing highlights.
Clarity and Texture:
Increase clarity to enhance midtone contrast. Add texture to bring out fine details in fur and foliage.
Vibrance vs Saturation:
Use vibrance to boost muted colors while protecting already-saturated tones. Avoid saturation slider which affects everything equally.
Sharpening:
Apply moderate sharpening (Amount: 40-50, Radius: 1.0). This compensates for slight softness from layering and blending.
Color Grading:
Use the Color Grading panel for split-toning effects. Warm highlights and cool shadows create dimensional, cinematic looks.
Preview your adjustments by toggling the preview button. Make sure changes enhance rather than overpower your carefully built composite.
Common Mistakes to Avoid
Inconsistent lighting directions:
If background light comes from the right, your subject’s highlights must match. Mismatched lighting instantly breaks believability.
Over-sharpening:
Excessive sharpening creates harsh halos and unnatural edges. Use restraint. Slightly soft beats artificially sharp.
Neglecting shadows:
Floating subjects without grounding shadows look pasted on. Even subtle shadow contact points dramatically improve realism.
Identical edge treatment:
Some edges should be sharp, others soft. Fur facing camera can be sharper, while distant edges slightly blur for depth.
Color temperature mismatches:
If your background is warm sunset light, don’t paste in a deer shot under cool overcast conditions. Match color temperature first.
These issues seem obvious in hindsight. But they’re incredibly common when you’re deep in the creative process.
Why This Technique Works
This composite workflow succeeds because it mimics how we perceive real scenes. We build depth through layering. We establish atmosphere through color harmony. We add dimension through careful lighting.
The result? Images that feel photographed rather than assembled. Your brain accepts the scene as plausible because all elements follow consistent visual rules.
Plus, these same principles apply to any composite project. Master them here, and you’ll create better photo manipulations across every genre.
Start with quality source images. Take time on selections. Blend thoughtfully. Polish subtly. That formula produces consistently impressive results.