I’ve been using Adobe Illustrator for over a decade. And honestly? I just discovered tools last month that would’ve saved me countless hours if I’d known about them earlier.
That’s the thing about dense software. You learn what you need to get work done, then stop exploring. Deadlines pile up. Curiosity fades. You stick with what works, even if better options exist right under your nose.
So I spent the past few weeks clicking through Illustrator like a curious beginner again. What I found genuinely shocked me. These aren’t obscure power-user features. They’re practical tools hiding in plain sight that solve everyday frustrations.
Let me share what I wish I’d learned years ago.
Optical Kerning Fixes Wonky Fonts Instantly
Free fonts often come with terrible spacing. You know the type – letters crash into each other or float miles apart.
My old solution? Manually adjust each letter pair using OPT + SHIFT + Arrow keys. Tedious doesn’t begin to describe it.
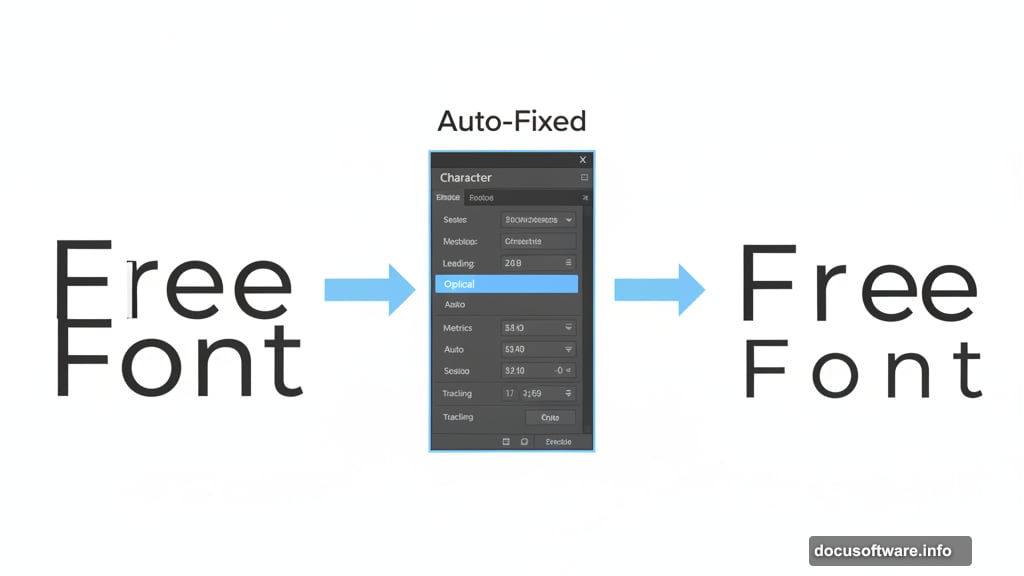
But Illustrator has built-in optical kerning in the Character panel. It analyzes letter shapes and adjusts spacing automatically. Has this existed forever? Since 2003, apparently. Better late than never.
Toggle it on for any text that looks off. The difference is immediate. Plus, it works way faster than manual adjustments for those sketchy freebie typefaces.
True Size View Shows Actual Print Dimensions
Designing for print means working blind. You never truly know how big something looks until it arrives from the printer.
Illustrator solves this with True Size View. Go to Preferences > General and check “Display Print Size at 100% Zoom.”
Now when you zoom to 100%, your artwork displays at actual print size. That business card on screen? It’s literally business card sized. Game changer for print designers who need to judge scale before sending files.
Just remember to disable this when designing for digital. Otherwise your screen layouts will look comically wrong.
Recolor Artwork Tool Is Pure Magic
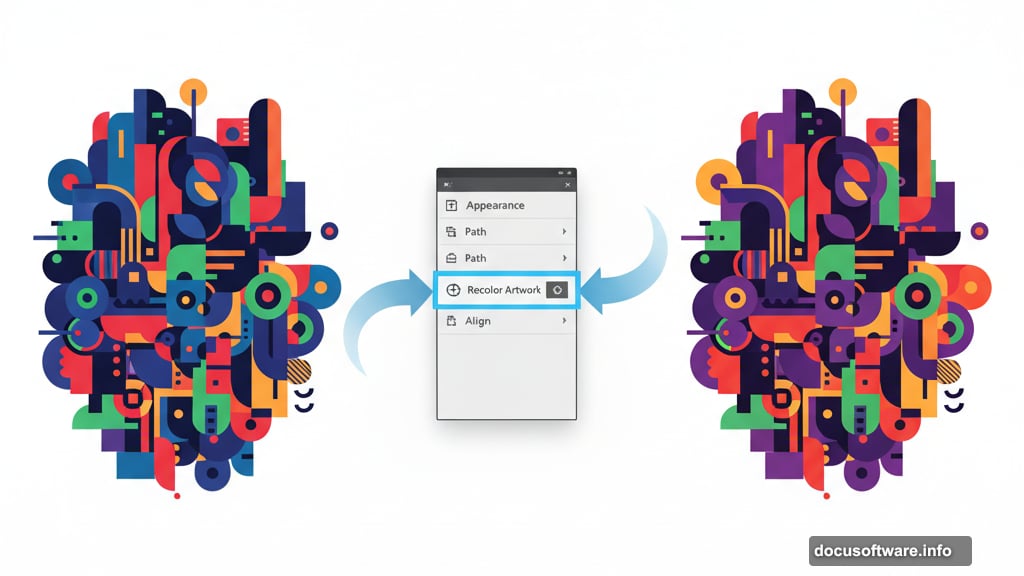
This tool devastated me when I discovered it. The hours I’ve wasted clicking through clipping masks trying to find one specific colored element buried in complex artwork.
Select anything you want to recolor. Click “Recolor” in the Properties panel. Done.
You can swap individual colors, link colors to shift them together, reorder your palette, or randomize colors within specific harmonies. Made a mess? The eyedropper icon resets everything instantly.
This one feature alone transforms how quickly you can iterate on color variations. Absolute must-know.
Auto Spell Check Saves Embarrassment
I’ve published work with spelling errors. Not proud of it. My brain moves faster than my proofreading catches.
Illustrator didn’t help because I kept forgetting to manually spell check before exporting. Then I discovered Auto Spell Check hidden under Edit > Spelling > Auto Spell Check.
Turn it on once. Never think about it again. Those red squiggles appear automatically now, just like every other app you use.
“Porland Orgeon” won’t appear on my client work anymore. Small victories.
Scissors and Eraser Tools Beat Manual Deletions
Full disclosure – I used to add three anchor points to a line, then delete the middle one just to split paths. Every. Single. Time.
The Scissors tool does this in one click. The Eraser tool removes path segments effortlessly. Both have been there forever.
Am I embarrassed? Absolutely. Did other designers admit they also ignored these tools? Yes, surprisingly many. So if you’re in that boat, welcome aboard. We’re all learning together.
Simplify Cleans Up Messy Anchor Points

I sketch on iPad then trace in Illustrator. This creates wonky anchor points everywhere – way more than needed.
The Simplify tool (Object > Path > Simplify) used to be pretty rough. But recent updates transformed it completely. Now you get real-time previews and granular control over how aggressively it reduces points.
The result? Cleaner paths that are easier to edit and render faster. Especially valuable if you work from hand-drawn sketches or import complex vectors.
Play with the settings until you find the sweet spot between simplification and maintaining your intended shape.
Select Menu Finds Matching Elements Instantly
Complex illustrations bury elements under layers of clipping masks and groups. Finding every instance of a specific stroke width or blend mode becomes archaeological work.
Here’s the shortcut: Select one element with the attribute you want to change. Then go to Select > Same > [Your Choice].

Illustrator instantly highlights everything sharing that feature. Want to change all Multiply blends to Overlay? Or increase every 2pt stroke to 3pt? This finds them all at once.
No more drilling through layer hierarchies hunting for matching elements. Just select, match, modify.
The Common Thread Here
These tools share something important – they eliminate repetitive manual work. That’s time you could spend designing instead of clicking.
Sure, you can accomplish the same results the hard way. But why? Your creative energy matters more than proving you can manually kern an entire paragraph.
Software should work for you, not the other way around. So take an hour this week to explore features you’ve ignored. Click some unfamiliar menu items. Try tools you’ve scrolled past hundreds of times.
Chances are, something useful is hiding there. Something that’ll make your workflow faster and your deadlines less stressful. You just have to be curious enough to look.