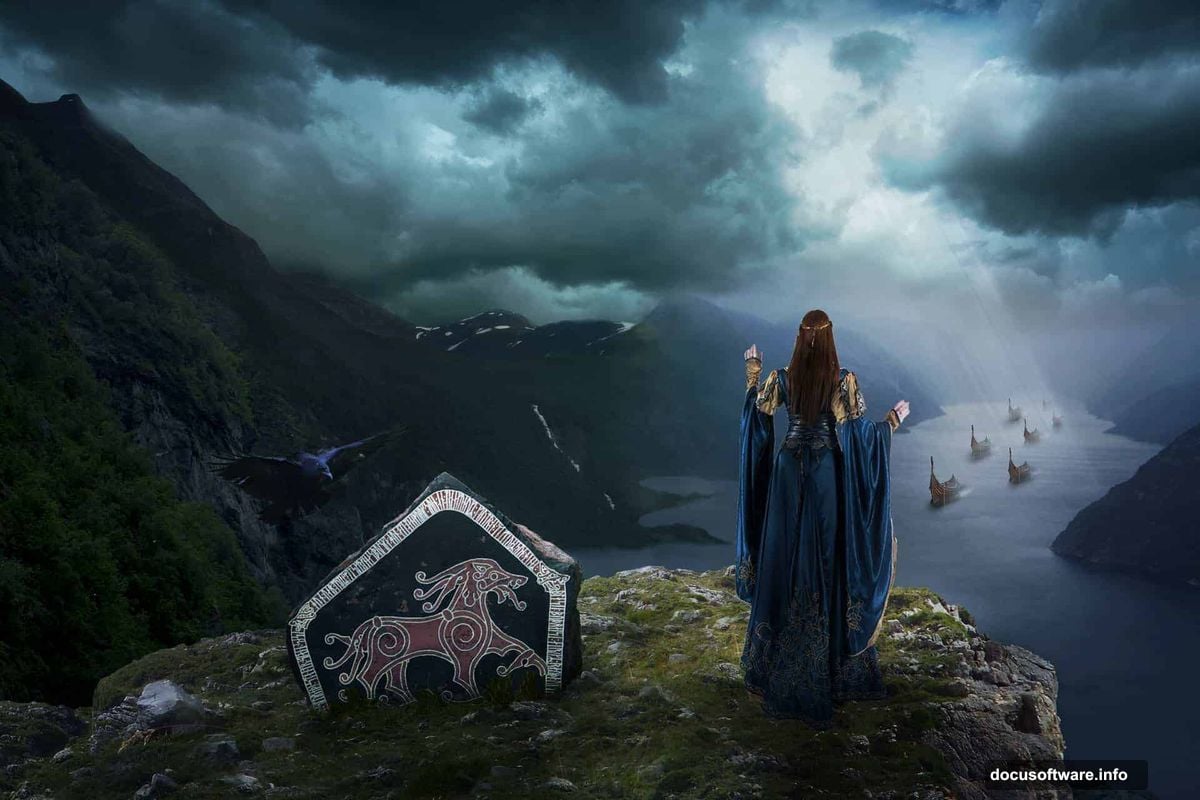
Photoshop manipulation breathes life into mythical scenes. This tutorial transforms stock photos into an epic Viking landscape complete with warriors, ships, and dramatic atmosphere.
You’ll master critical techniques that separate amateur composites from professional photo manipulation. Plus, these methods work across countless other fantasy and historical projects beyond Nordic themes.
Let’s build this atmospheric scene from scratch.
Gather Your Viking Arsenal First
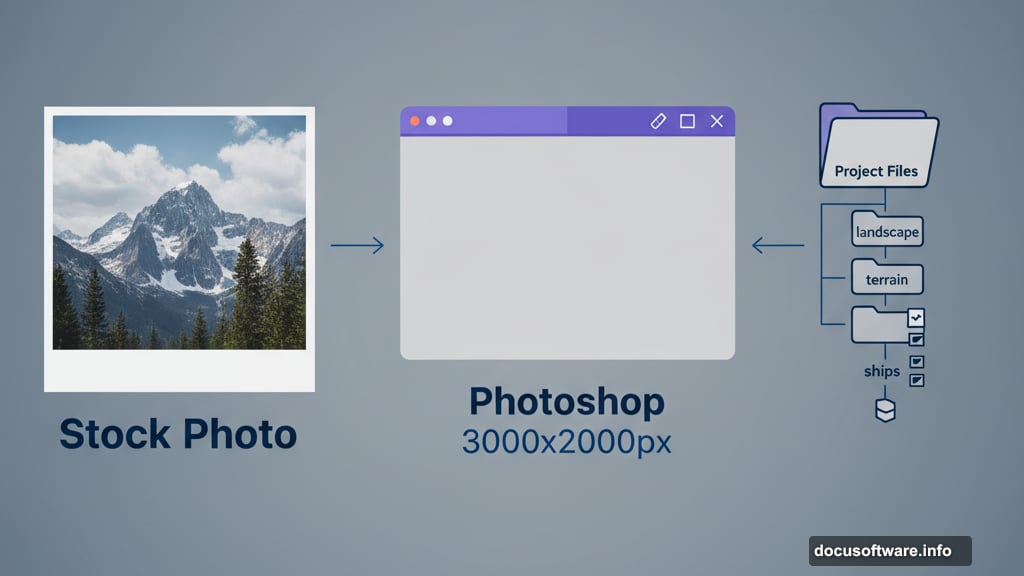
Before touching Photoshop, download all stock images. Nothing kills creative momentum faster than hunting for missing files mid-project.
You need specific elements. Sky photos set the mood. Mountain landscapes provide dramatic backdrops. Ships and warriors populate your scene. Ravens add authentic Nordic symbolism.
Organize everything into one folder. Name it clearly. Trust me, this saves massive frustration later when you’re deep into layer management.
Build Your Foundation Canvas
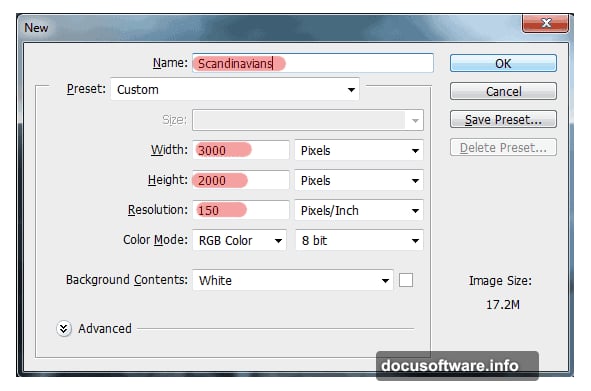
Start with a large workspace. Create a new document at 3000×2000 pixels. This size gives breathing room for detailed work without slowing down your computer.
Name your file immediately. Something descriptive like “VikingFjordScene” prevents confusion when you inevitably create variations.
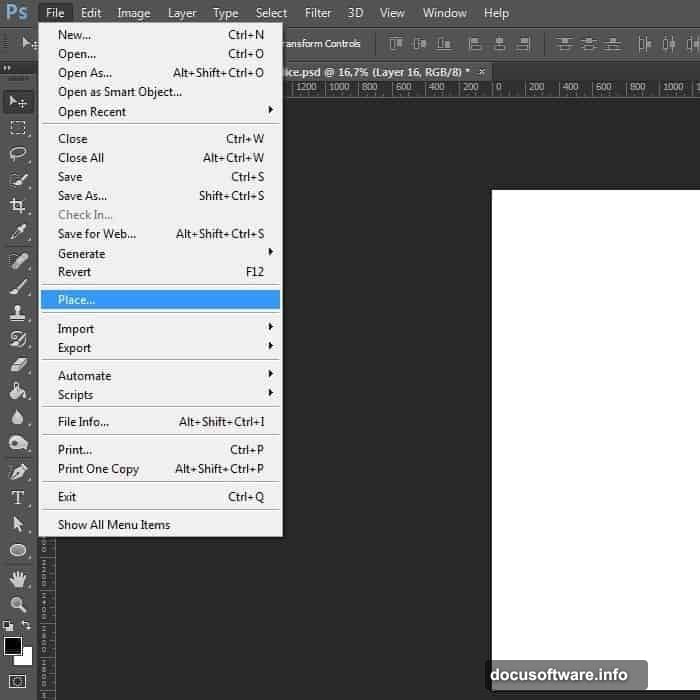
Now place your base landscape image. This acts as your compositional skeleton. It guides where elements belong even though you’ll likely hide or remove it later.
Construct the Mountainous Backdrop
Mountains create depth and drama. They make viewers feel the scale of your scene.
Create a new layer group named “landscape” or “terrain.” Groups keep your layer panel organized as the project grows complex. Without them, you’ll drown in dozens of unlabeled layers.
Place your foggy landscape photo. Transform it to fill the canvas using Cmd/Ctrl+T. Don’t worry about perfect placement yet. You’ll refine everything as you build.
The fog adds natural atmosphere. Nordic landscapes often feature mist rolling through valleys. This stock photo gives you that effect without manual painting.
Layer Multiple Landscape Elements
One landscape photo rarely provides everything you need. Professional manipulations combine multiple images seamlessly.
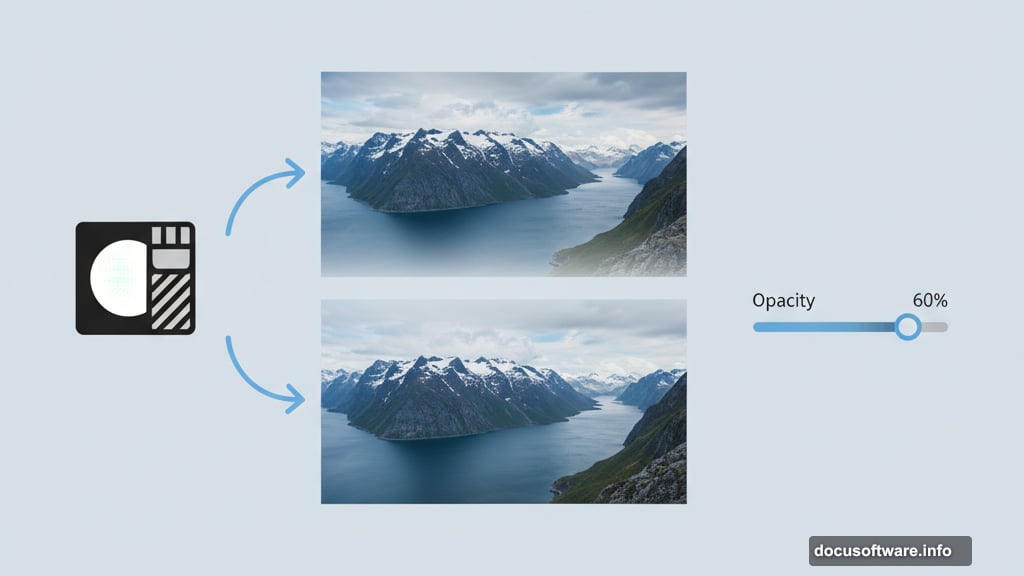
Add fjord images next. These provide water surfaces and additional mountain formations. Place them strategically to build a cohesive environment.
Use layer masks to blend elements together. Hard edges scream “fake composite.” Soft, gradual transitions between images create believable scenes. Mask edges with a soft brush set to low opacity.
Blend modes help too. Try Multiply or Overlay on landscape layers. Adjust opacity until elements merge naturally rather than sitting on top of each other.

Add Ships to Populate Your Waters
Empty landscapes feel lifeless. Ships suggest human presence and storytelling possibilities.
Place ship stock images on the water. Scale them appropriately. Distant ships appear smaller than close ones. This sounds obvious but many beginners miss proper size relationships.
Match lighting direction across all ships. If sunlight hits one ship from the right, every ship needs consistent lighting. Inconsistent light sources destroy realism instantly.
Add subtle shadows beneath ships on the water surface. This anchors them to the environment. Floating objects without shadows look pasted on.
Position Your Viking Warriors
Now the main characters enter. Place your model images carefully. Consider composition rules like the rule of thirds.
Warriors need proper scale relative to landscape elements. A giant figure standing next to a tiny mountain ruins the illusion. Check proportions constantly.
Blend figures into the environment using adjustment layers. Match their color temperature and saturation to the landscape. Cool blue tones work well for misty Nordic atmospheres.
Add atmospheric haze in front of distant figures. This creates depth perception. Objects farther away appear hazier due to atmospheric perspective.
Enhance Atmosphere With Ravens
Ravens carry deep Norse mythology symbolism. They add authentic cultural flavor plus dynamic motion to static scenes.
Place crow stock photos at various depths. Some close, some distant. This reinforces your scene’s dimensional depth.
Motion blur on wings suggests movement. A tiny blur makes ravens feel alive rather than frozen in place. Don’t overdo it though. Subtle effects work best.
Adjust raven brightness based on position. Closer objects appear brighter and more detailed. Distant objects fade and lose contrast.
Refine Lighting and Color Harmony
Your composite probably looks disconnected at this stage. Unified lighting pulls everything together.
Add adjustment layers that affect your entire composition. Curves, Levels, and Color Balance work wonders. These global adjustments create cohesive color schemes.
Selective Color adjustment layers let you fine-tune specific hues. Boost blues in shadows for that cold Nordic feeling. Warm highlights slightly to suggest distant sunlight breaking through clouds.
Dodge and Burn layers add dimension. Lighten areas where light naturally hits. Darken shadowed regions. This manual lighting sculpts form and directs viewer attention.
Add Final Atmosphere and Drama
Atmosphere separates good composites from spectacular ones. Mist, fog, and light rays transform scenes dramatically.
Create new layers set to Screen blending mode. Paint soft white fog using a large, soft brush at low opacity. Build up fog gradually in multiple passes. This looks far more natural than one heavy application.
Add light rays if your composition needs them. They suggest divine presence or dramatic weather. Just don’t overuse them. Too many light rays looks cheesy rather than epic.
Sharpen selectively. Don’t sharpen everything equally. Sharpen your main subjects more than backgrounds. This mimics how cameras naturally capture depth of field.
Smart Techniques Worth Remembering
Transform tools are your friends. But watch out. Too much transformation degrades image quality. Always work with high-resolution stock photos when possible.
Layer masks beat eraser tools every time. Masks preserve original image data. You can always refine or restore masked areas later. Erasers destroy data permanently.
Work non-destructively whenever possible. Use adjustment layers instead of applying adjustments directly to image layers. This keeps your options open throughout the creative process.
Save frequently. Save multiple versions. Nothing hurts worse than losing hours of work to a crash or mistake.
Make This Technique Your Own
This tutorial provides a roadmap. But your best work comes from experimentation and personal style.
Try different color schemes. Warm sunset tones create completely different moods than cool blues. Storm clouds add menace. Clear skies suggest hope or victory.
Swap Vikings for other historical figures. These techniques work for ancient Rome, medieval Europe, or fantasy worlds. The principles stay consistent even when subjects change.
Build your stock photo library. Collect atmospheric elements, skies, terrains, and figures. Having resources ready accelerates future projects dramatically.