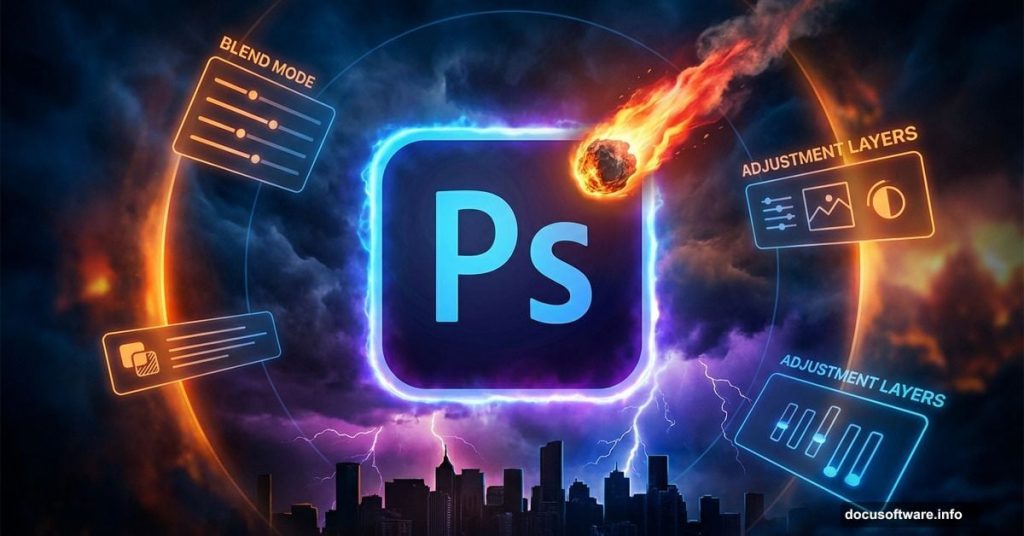
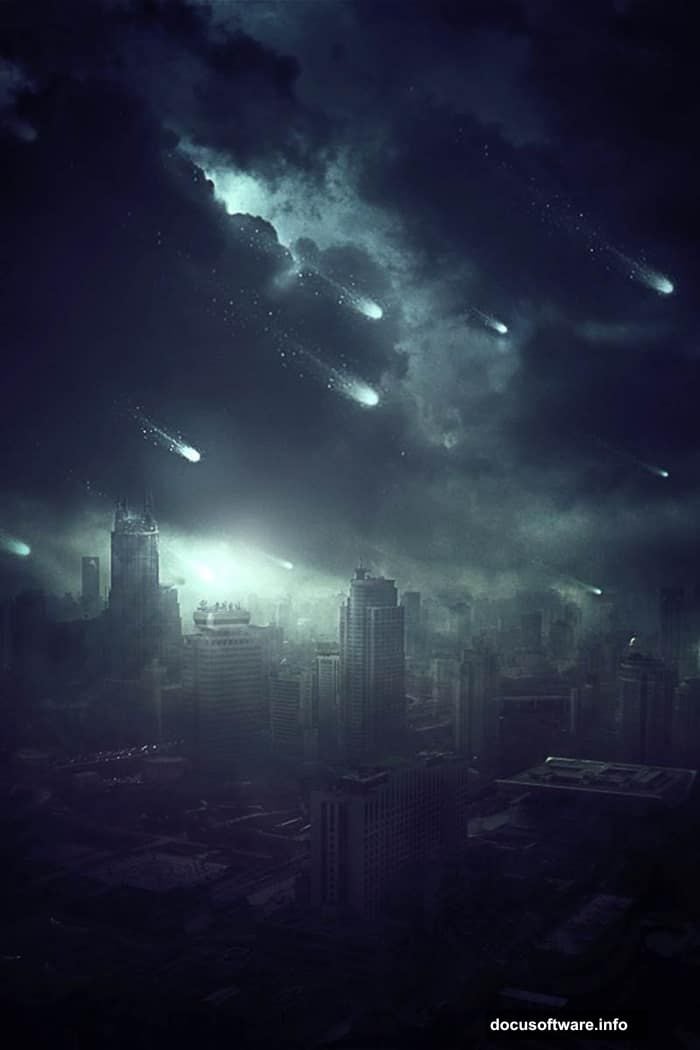
Want to create dramatic sci-fi scenes without spending hours on complex masking? This tutorial shows you how to blend photos into an apocalyptic cityscape with flying meteors and moody lighting effects.
You’ll learn practical blending techniques that work fast. Plus, I’ll show you several ways to add atmospheric lighting that makes your scene feel cinematic. No advanced skills required.
What You’ll Need Before Starting
Grab these free resources before diving in:
- Sky photo by Pelleron-Art
- City photo by Almudena Stock
- Meteor brushes by redheadstock
- Photoshop CS6 or newer
The entire project takes about 45-60 minutes. So set aside an hour and let’s build something cool.
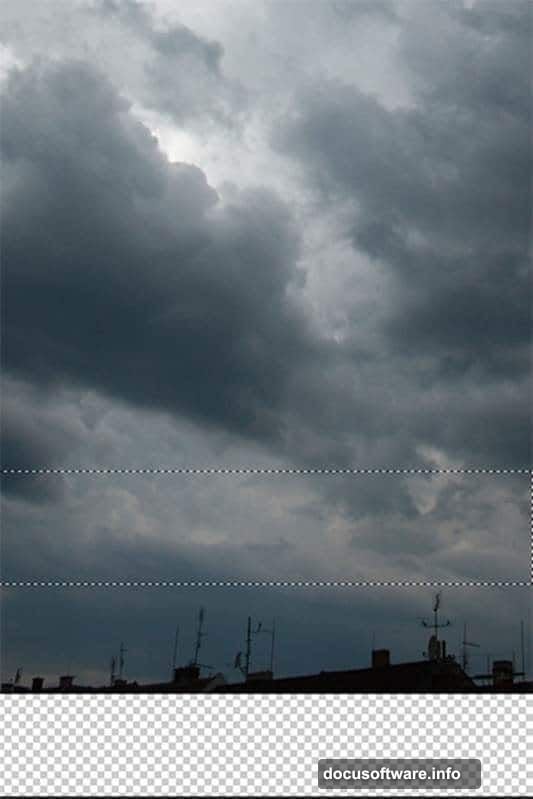
Set Up Your Canvas
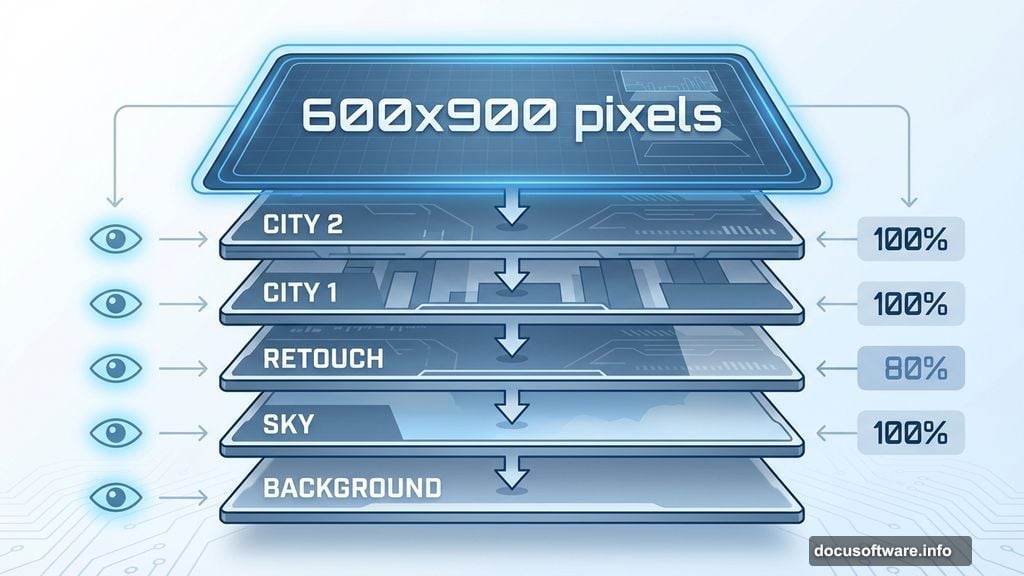
Start with a new Photoshop document at 600×900 pixels. This gives you room to work without massive file sizes slowing you down.
Drag your sky photo into the document. Name this layer “SKY” right away. Trust me on this—naming layers as you go saves massive headaches later when you’re juggling 20+ layers.
Here’s a quick trick for the background. Grab the Marquee Tool (M) and select the lower portion of the sky without the rooftops. Press Ctrl+C to copy, then Ctrl+V to paste. Place this new layer under SKY and name it “BACKGROUND.”
Now transform that background layer. Hit Ctrl+T to activate Free Transform. Drag the bottom edge down to fill your canvas. It looks weird right now. That’s fine—you’re building a base that the city will cover.
Remove Unwanted Elements Fast
Create a new empty layer on top of everything. Name it “RETOUCH.”
Select the Stamp Tool (S). Clone out those rooftops from the original sky photo. Work in small sections for cleaner results. This step takes patience but makes everything else easier.
Your base should look clean now. No rooftops. Just sky and that stretched background layer waiting for the city.
Blend the City Without Complex Masking
Here’s where things get interesting. Download the city photo and drag it into your composition. Place it on top of all layers and name it “CITY 1.”
Right-click this layer and choose Duplicate Layer. Name the copy “CITY 2” and place it above CITY 1. Why two layers? Because you’ll blend each one differently to create seamless integration.
Make CITY 2 invisible for now (click the eye icon). You’ll work with CITY 1 first.
Change CITY 1’s blend mode to Multiply. This darkens the layer and lets the sky show through naturally. Adjust the opacity until it looks right—usually around 60-80% works well.
Now make CITY 2 visible again. Change its blend mode to Lighten or Screen. This brings back the bright areas of the city buildings. Lower the opacity to taste.
See what happened? The dark and bright parts of the city blend separately with the sky. No tedious masking required. The two layers working together create depth and atmosphere automatically.
Add Layer Masks for Fine Control
Both city layers probably extend beyond where you want them. Add layer masks to each one (click the mask icon at the bottom of the Layers panel).
Grab a soft black brush. Paint on the masks to hide edges and blend the city into the sky gradually. Focus on the horizon line especially—that’s where viewers notice harsh transitions.

Use a lower opacity brush (30-50%) for subtle blending. Build up the effect gradually rather than painting with 100% opacity.
The city should look like it belongs in this apocalyptic sky now. Not pasted on top, but integrated into the scene.
Create Flying Meteors
Load those meteor brushes you downloaded earlier. Go to the Brush panel and select a meteor shape.
Create a new layer above everything. Name it “METEORS.” Pick an orange or red-orange color for the brush. Click a few times across your canvas to add meteors in different sizes.
Vary the brush size between clicks. Some meteors should look closer (bigger), others farther away (smaller). This creates depth in your scene.
Don’t overdo it. Three to five meteors usually looks better than twenty. Less is more for maintaining focus.
Add Atmospheric Lighting
This step brings everything together. Create a new layer above your meteors. Name it “LIGHT EFFECTS.”
Set the layer blend mode to Linear Dodge (Add) or Screen. Grab a soft brush with low opacity (10-20%). Use warm colors like orange, yellow, or red.
Paint gentle glows around your meteors. The light should feel like it’s bouncing off the buildings and sky. Build up the effect slowly with multiple brush strokes.
Create another new layer for rim lighting on the buildings. Use a bright yellow or white. Paint thin lines along the edges of skyscrapers to make them pop against the dark sky.
This rim lighting sells the apocalyptic mood. It suggests fires burning or intense sunlight breaking through the destruction.
Enhance Depth With Color Grading
Add a Curves adjustment layer at the top of your layer stack. Push the blue channel up slightly in the shadows. This creates that cinematic teal-and-orange look.
Add a Color Balance adjustment layer next. Push the shadows toward blue. Push the highlights toward orange or yellow. These opposing colors create visual tension that feels dramatic.
Finally, add a Levels adjustment layer. Crush the blacks slightly by moving the left slider inward. This adds contrast and makes the scene feel grittier.
Polish With Final Details
Zoom in and look for areas that need refinement. Common issues:
- Hard edges where the city meets the sky
- Meteors that look too uniform
- Lighting that feels flat
Fix hard edges with layer masks and soft brushes. Vary meteor brightness—some should glow more than others. Add more atmospheric light where shadows feel too dark.
Create a new layer and add subtle dust or particle effects with a scatter brush. Set the layer to Screen blend mode at low opacity. This adds atmospheric haze that sells the apocalyptic vibe.
Save Multiple Versions
Here’s something nobody tells you. Save three versions:
- PSD file with all layers (for future edits)
- High-res JPG at 100% quality (for prints)
- Web-optimized JPG at 70-80% quality (for posting online)
The PSD preserves everything. But those JPG versions load faster and work better for sharing your awesome apocalypse scene.
Common Mistakes to Avoid
Using identical meteors everywhere. Rotate, scale, and adjust the opacity of each one. Real meteors don’t look copy-pasted.
Forgetting atmospheric perspective. Objects farther away should be hazier and less saturated. Add a subtle blue tint to distant buildings.
Over-sharpening the final image. Apocalyptic scenes work better slightly soft. Too much sharpness kills the atmospheric mood.
Matching lighting direction inconsistently. Pick one main light source (like the sun or largest meteor). Make sure all shadows and highlights respect that direction.
Why These Techniques Work
The double-layer city blending trick works because blend modes process light and dark values separately. Multiply darkens. Lighten or Screen brightens. Together they preserve detail from both the city and sky photos.
Layer masks let you refine where those blend modes apply. So you get both speed and control.
The lighting layers use additive blend modes (Linear Dodge, Screen). These simulate how real light behaves—it adds to existing light, it doesn’t replace it. That’s why painting glows on these layers looks realistic.
Color grading with complementary colors (teal and orange) creates visual interest. Your eyes notice the contrast even if you don’t consciously register it. That’s what makes professional work feel different from amateur edits.
Take It Further
Once you nail this technique, experiment with different source photos. Try:
- Ruined buildings instead of intact cities
- Storm clouds instead of clear skies
- Lightning bolts instead of meteors
- Different color grades for various moods
The blending method stays the same. But swapping source images gives you infinite variations. Save that PSD file and swap elements later when inspiration hits.
This approach works for any scene that combines multiple photos—fantasy landscapes, sci-fi environments, or surreal concepts. Master the fundamentals here and you can create any atmosphere you imagine.