Most photo manipulation tutorials make things way harder than they need to be. You spend hours masking tiny details, wrestling with blend modes, and wondering why your scene looks flat.
This guide cuts through that noise. You’ll learn how to blend apocalyptic cityscape elements quickly, add dramatic meteor effects with brushes, and nail the lighting that sells the whole scene. Plus, I’ll show you a clever layering trick that skips tedious masking entirely.
Grab Your Source Materials First
Before diving in, download these specific resources. Trust me, using the right base images saves hours of adjustments later.
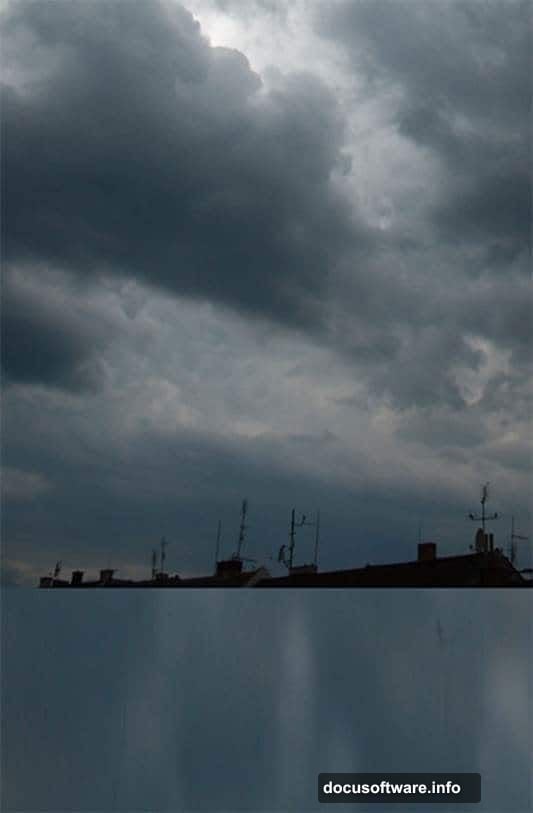
You’ll need a dramatic sky photo with good cloud definition. The tutorial recommends Pelleron-Art’s sky stock images. For the cityscape, grab Almudena Stock’s urban photos with clear building silhouettes. Finally, get redheadstock’s meteor brushes to avoid painting debris from scratch.
Having these ready prevents workflow interruptions. Nothing kills creative momentum like stopping mid-project to hunt for assets.
Set Up Your Canvas and Sky Base
Create a new Photoshop document at 600×900 pixels. This vertical format works perfectly for dramatic cityscape compositions.
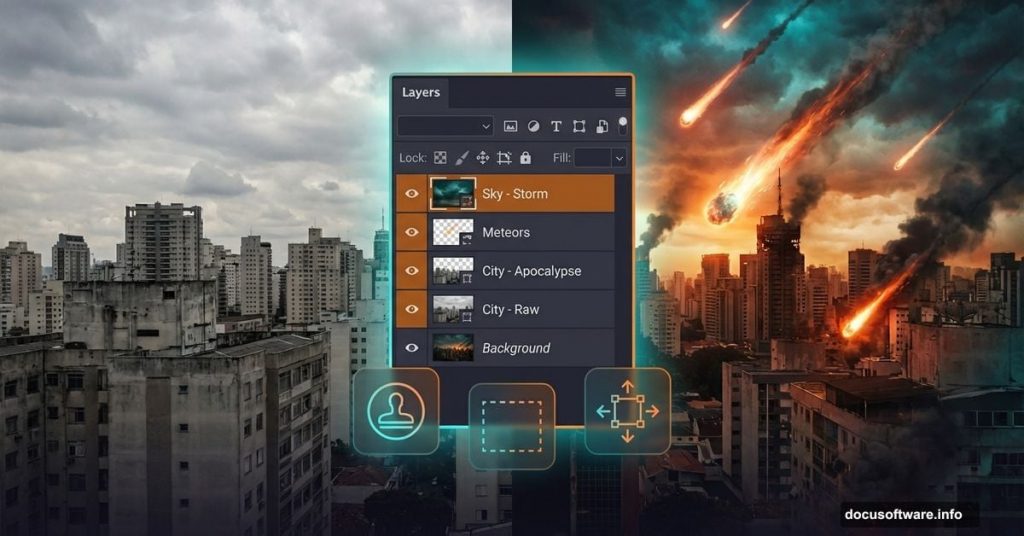
Drag your sky photo into the document and name this layer SKY. Yes, naming layers feels tedious. But once you’re juggling 20+ layers, you’ll thank yourself for this habit.
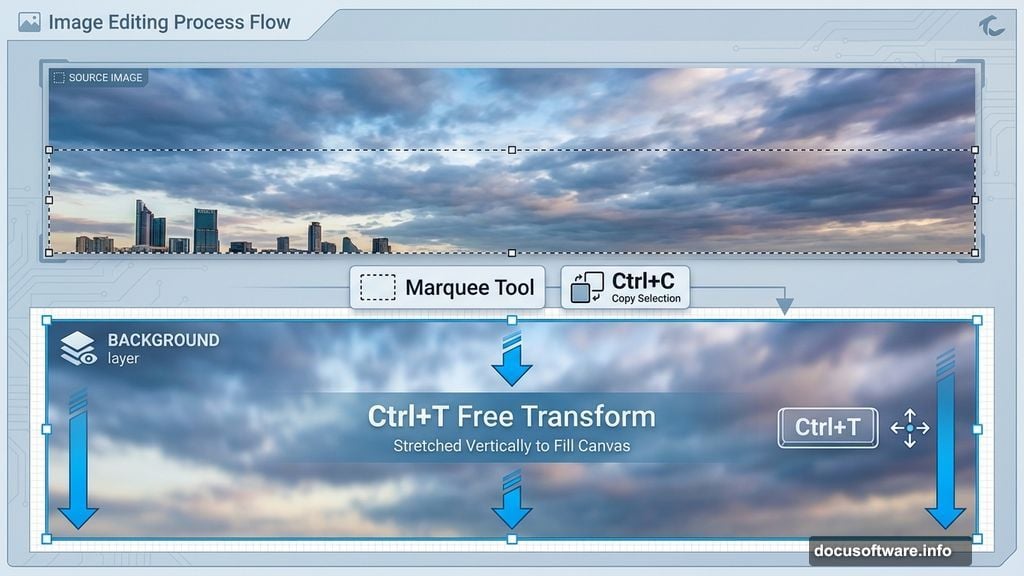
Here’s where things get interesting. Grab the Marquee Tool (M) and select the lower portion of the sky without any rooftops or buildings. Copy it with Ctrl+C, then paste with Ctrl+V.
Move this new layer below your SKY layer. Name it BACKGROUND. Now press Ctrl+T to activate Free Transform and stretch this layer down to fill your canvas bottom.
This creates a seamless base without complicated masking. The upper sky stays detailed while the bottom provides clean space for your city elements.
Clone Out Unwanted Elements Fast
Add a new empty layer above everything else. Name it RETOUCH.
Select the Clone Stamp Tool (S) and carefully remove any rooftops or buildings from your original sky photo. Work in small sections and sample nearby cloud textures frequently. This prevents obvious repeating patterns.
The goal here is clean sky from top to bottom. You’re creating a blank canvas for your apocalyptic cityscape. So don’t rush this step. Sloppy cloning shows up immediately in the final image.
After retouching, your document should show dramatic sky with no building interruptions. Perfect.
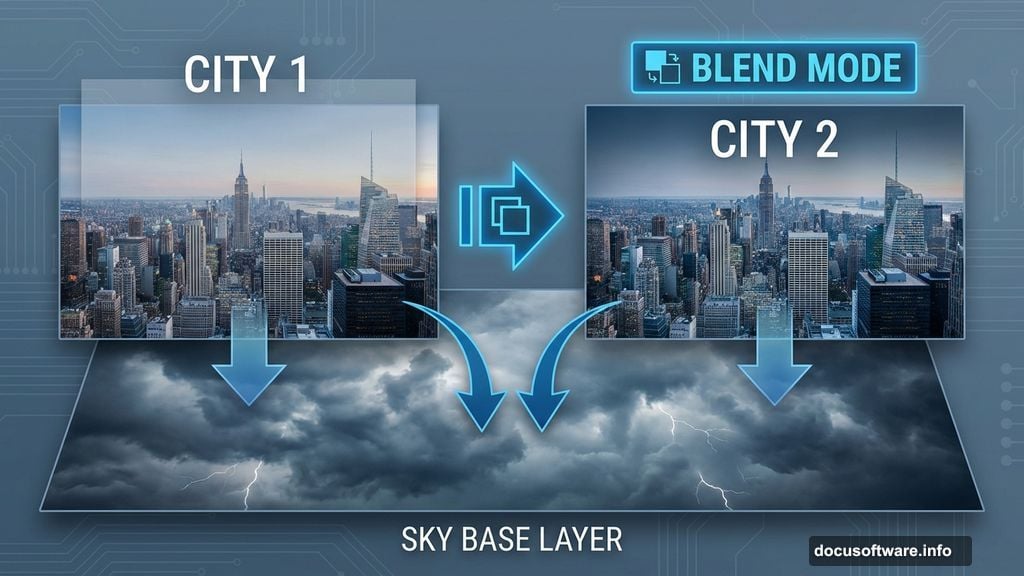
The Double-Layer City Blending Trick
Here’s that clever technique I mentioned earlier. Instead of spending an hour masking a single city layer perfectly, you’ll use two identical layers blended differently.
Drag your city photo into the composition. Place it on top of all existing layers and name it CITY 1. Right-click this layer and select Duplicate Layer. Name the duplicate CITY 2.
Now comes the magic part. You’ll blend CITY 1 and CITY 2 using different methods to achieve seamless integration without manual masking.
Click the eye icon next to CITY 2 to hide it temporarily. You need to see only CITY 1 for now.
Change CITY 1’s blend mode to Multiply. This darkens the city buildings and allows the sky texture to show through naturally. But it also makes everything too dark.
So add a Layer Mask to CITY 1. Grab a soft brush with low opacity (around 30%). Paint black on areas that look too dark or unnatural. This reveals the original sky underneath while keeping city silhouettes intact.
Now make CITY 2 visible again. Change its blend mode to Screen. This brightens highlights and adds atmospheric haze. But it washes out too much detail.
Add another Layer Mask to CITY 2. Paint black over areas that look too bright or lose important building details. The combination of Multiply and Screen layers creates realistic integration automatically.
This double-layer approach adapts to different lighting conditions without tedious manual selection. Plus, you can adjust each layer’s opacity independently for precise control.
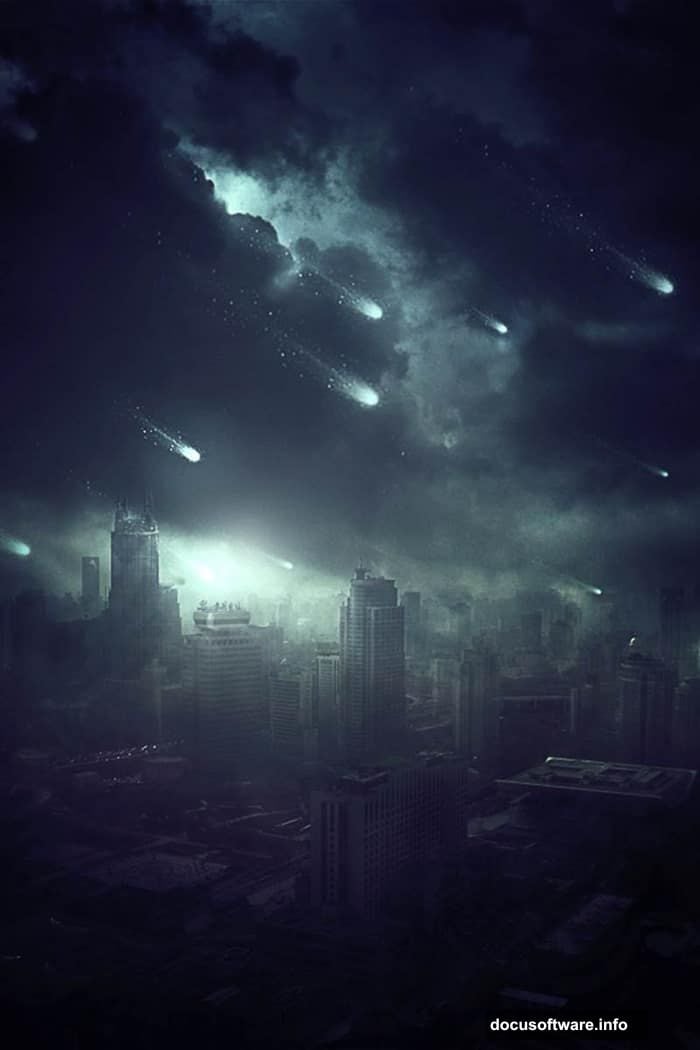
Add Meteor Brushes for Instant Drama
Load the meteor brushes you downloaded earlier. Go to the Brush panel and select a large, irregular meteor shape.
Create a new layer above your city layers. Name it METEORS. Set your foreground color to bright orange or yellow-white.
Click once with the meteor brush to stamp it onto your canvas. Press Ctrl+T to transform and position it. Rotate and scale until it looks like it’s falling toward the city at a believable angle.
Repeat this process with different brush shapes and sizes. Place meteors at various depths to create dimensional space. Larger meteors appear closer while smaller ones seem distant.
Here’s a key detail most tutorials skip: vary the opacity and color of each meteor. Distant meteors should be cooler (bluer) and more transparent. Closer meteors should be warmer (orange-red) and more opaque.
This color and opacity variation sells the depth and atmospheric perspective. Without it, your meteors look pasted on.
Build Lighting That Sells the Apocalypse

Lighting makes or breaks photo manipulations. Flat, even lighting destroys believability instantly.
Create a new layer above everything and name it LIGHT SOURCE. Set the blend mode to Overlay or Soft Light.
Grab a soft brush with orange-red color. Paint gently over areas where meteor light would hit buildings. Focus on the tops of structures and any surfaces facing the meteors.
Keep opacity low (around 20-30%) and build up gradually. Multiple light passes look more natural than one heavy application.
Next, add rim lighting to separate your city from the sky. Create another layer named RIM LIGHT and set it to Screen blend mode.
Use a bright yellow-white color and paint thin lines along building edges. This simulates backlight from explosions or meteor impacts beyond the frame.
Finally, add ambient glow around each meteor. Create a layer named GLOW beneath your METEORS layer. Use a large, soft brush with bright orange. Paint circular glows around each meteor, then blur them heavily with Gaussian Blur.
These lighting layers transform flat composites into dimensional scenes. The warm meteor light contrasts beautifully with cool sky tones.
Add Atmospheric Depth With Color Grading
Your scene probably looks decent now. But color grading pushes it from decent to cinematic.
Add a Curves adjustment layer at the top of your layer stack. Create a gentle S-curve to increase contrast. Drag the shadows down slightly and lift the highlights up.
Then add a Color Balance adjustment layer. Push the shadows toward blue and the highlights toward yellow-orange. This creates that apocalyptic color scheme where warmth and coolness battle for dominance.
For extra atmosphere, add a Photo Filter adjustment layer. Select Warming Filter (85) and set opacity around 30%. This unifies all your elements with a consistent color cast.
Finally, add a subtle vignette. Create a new layer at the top and fill it with black. Add a layer mask and use a large, soft brush to reveal the center. Set this layer to Soft Light mode at low opacity.
The vignette draws eyes toward the center action and adds that cinematic letterbox feel.
Polish Details With Dodge and Burn
Create a new layer at the top named DODGE BURN. Fill it with 50% gray and set the blend mode to Overlay.
Grab the Dodge Tool (O) and set it to Highlights, 20% exposure. Paint over the brightest parts of meteors and building highlights. This intensifies bright areas without blowing them out.
Switch to the Burn Tool and set it to Shadows, 20% exposure. Darken the deepest shadows in buildings and cloud formations. This adds punch and dimension.
Work subtly here. Overdoing dodge and burn creates a muddy, overworked look. Light touches with multiple passes work better than heavy-handed adjustments.
Final Touches That Matter
Sharpen your image selectively. Create a merged copy of all layers by pressing Ctrl+Alt+Shift+E. Apply a High Pass filter (Filter > Other > High Pass) at around 2-3 pixels radius.
Set this layer to Overlay blend mode. This sharpens details without amplifying noise. If it’s too strong, reduce opacity.
Add a subtle grain texture for that cinematic film quality. Create a new layer and fill with 50% gray. Go to Filter > Noise > Add Noise and apply around 5-10% monochromatic noise.
Set this layer to Soft Light at 30-40% opacity. The grain ties all elements together and hides minor blending imperfections.
Finally, flatten your image and export. Your apocalyptic scene should now have convincing depth, dramatic lighting, and that cinematic atmosphere that makes viewers stop scrolling.
The key to strong photo manipulation isn’t complicated techniques. It’s understanding how light, color, and atmosphere work together. Master those fundamentals and even simple compositions look professional.