So you want to make a vibrant retro-style poster that looks like it came straight from an 80s arcade? Great choice. This Photoshop tutorial walks you through creating a wallpaper packed with shiny textures, dramatic lens flares, and bold colors that pop. The whole project is more approachable than it looks, and the results are seriously satisfying.
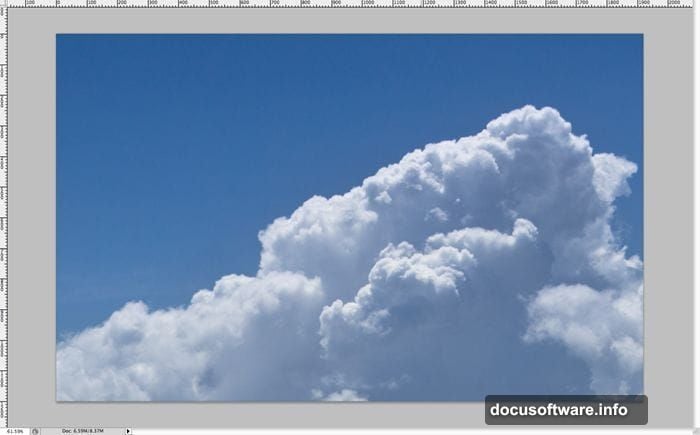
Before you dive in, grab two resources: a clouds background image and a lens flare brush set. You’ll need both later in the process.
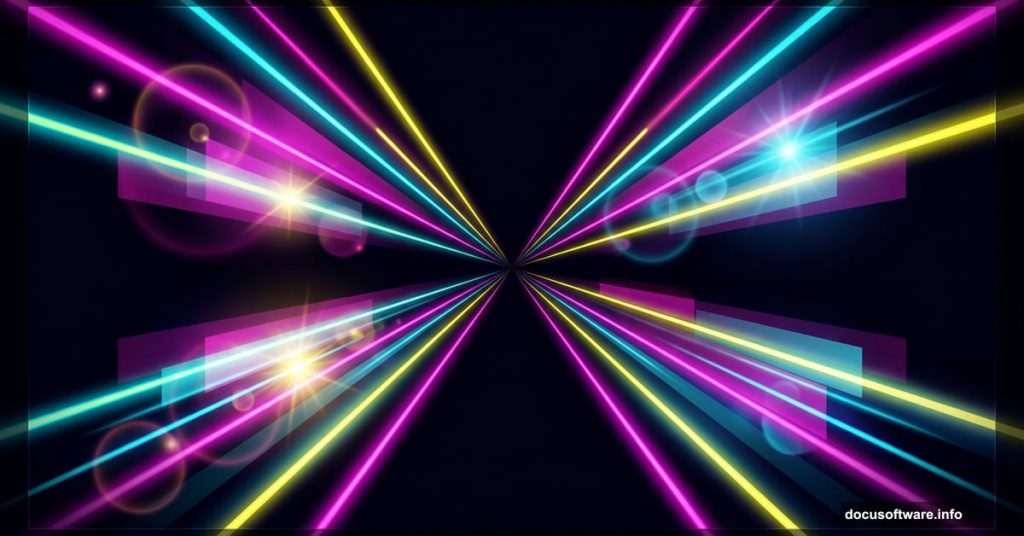
![A bold retro-style Photoshop wallpaper featuring diagonal light rays, lens flares, and vivid colors against a dark background]
Start With a Solid Dark Foundation
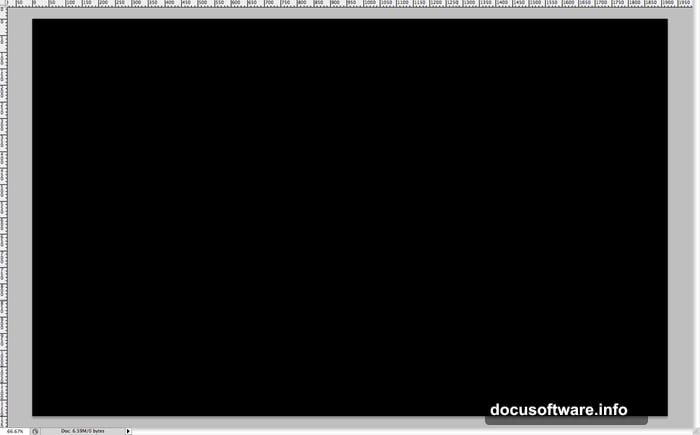
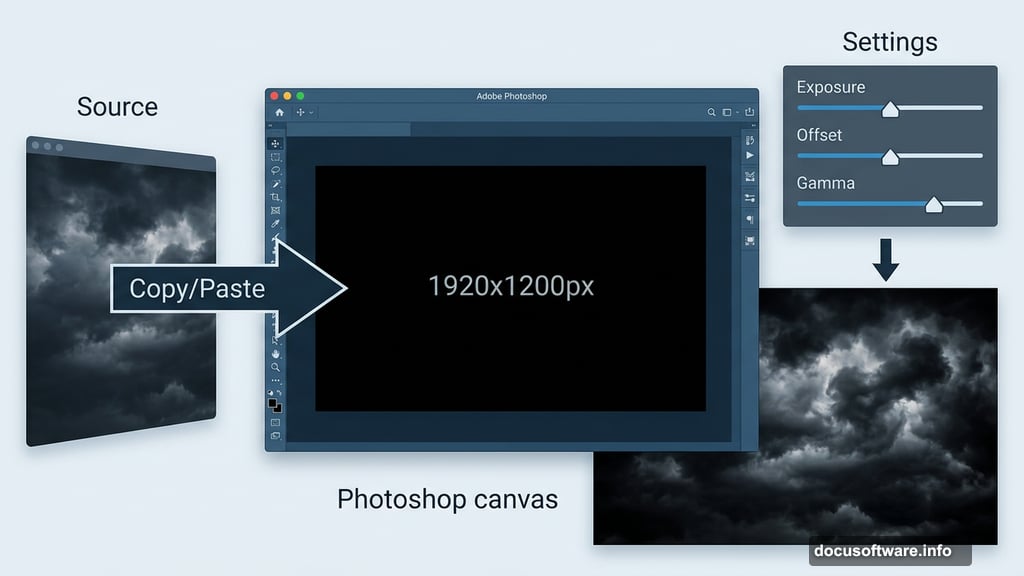
First, open Photoshop and create a new document. Set it to 1920 by 1200 pixels, which is the standard HD wallpaper size. Then fill the entire canvas with black.
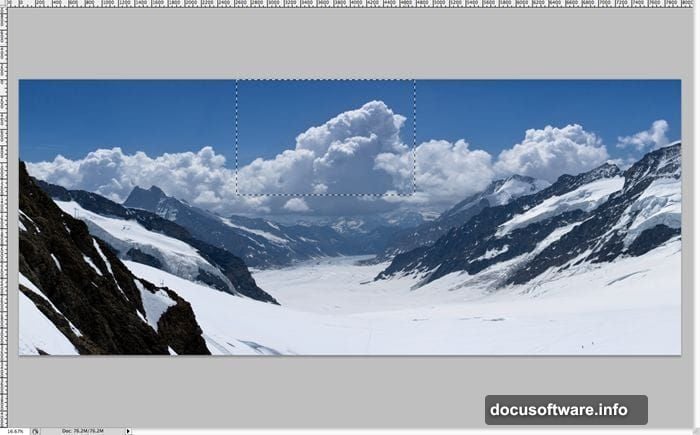
Next, open your mountain or clouds photo. Select the portion of clouds you want to use as your background element. Copy and paste that selection into your new black document.
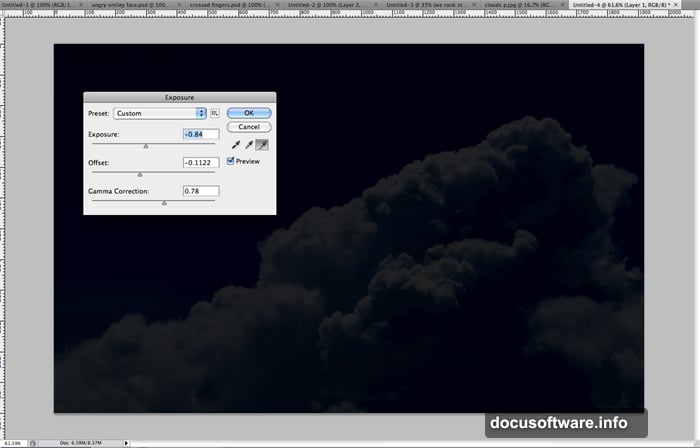
Now adjust the exposure. Go to Image, then Adjustments, then Exposure. Pull down both the exposure and offset values, and bump the gamma up slightly. This combination darkens the image and adds punchy contrast. Your background should feel dramatic and moody at this point.
Build the Diagonal Rectangle Collage
This section creates the retro “light ray” effect that defines the whole design. It takes a few steps but becomes very intuitive once you see it taking shape.
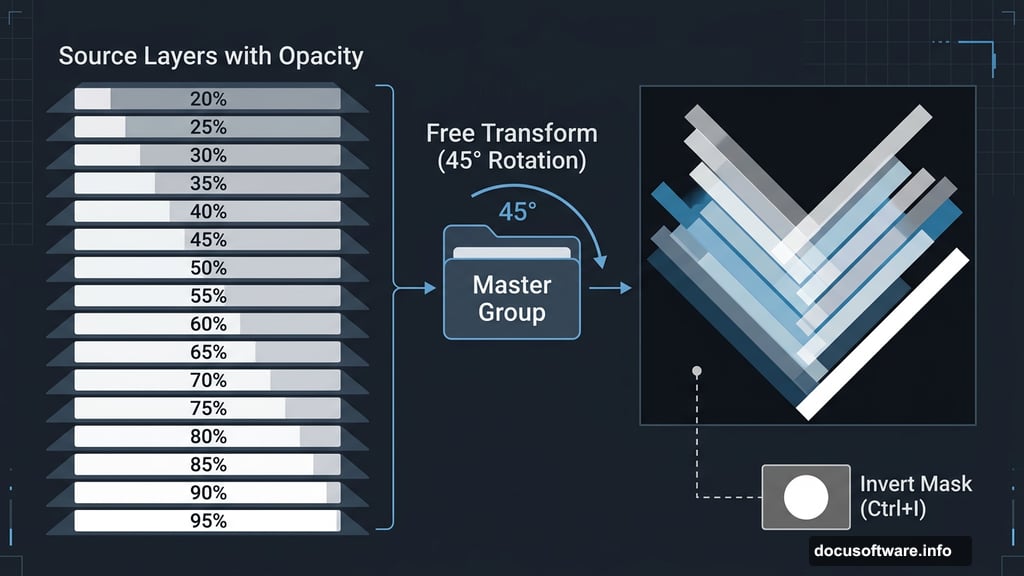
Create a new layer. Use the Marquee tool to draw a rectangle, then fill it with white. Duplicate this white rectangle layer somewhere between ten and twenty times. For each duplicate, set a different opacity at random. Some layers might be 20% opacity, others 60% or 80%. The randomness is the whole point here.
Once you have your stack of varied-opacity rectangles, group all of them together by selecting them and pressing Ctrl or Cmd plus G. Then duplicate that group a couple of times. Spread the duplicated groups across your canvas by clicking and dragging them. This shortcut saves significant time compared to placing every single rectangle individually.
When you’re happy with the collage layout, group everything into one master group. With that master group selected, press Ctrl or Cmd plus T to enter Free Transform mode. Rotate the entire group 45 degrees to one side.
Mask the Shape Into a V Formation
Here’s where the design starts looking intentional. The goal is a V shape that points toward the center of the canvas.
Select exactly one half of the wallpaper on the opposite side from the direction you rotated your rectangles. With that half selected, add a layer mask. This hides the selected portion. Then press Ctrl or Cmd plus I to invert the mask, which reveals the diagonal rectangle arrangement and hides everything outside the V shape.
Alternatively, select the half you want to keep and click the mask button directly. Both methods produce the same clean result.
![Step-by-step Photoshop layers panel showing grouped rectangle layers with diagonal rotation and mask applied for retro V-shape composition]
Add Lens Flares and Shiny Highlights
This is where the retro energy really comes alive. Load your lens flare brushes into Photoshop and start placing flares at the points where your light rays converge. The bottom of the V shape is usually the strongest focal point, so concentrate your largest flares there.
Create a new layer above your rectangle group for the lens flare elements. Set the blending mode on this layer to Screen. This makes the black portions of the brush invisible and lets only the bright flare elements show through. Experiment with brush size and opacity to build up a convincing glow effect gradually.
For the highlight layer, duplicate your top layer. Remove any layer styles by going to Layer, then Layer Style, then Clear Layer Styles. Change the blending mode to Linear Dodge or Add. You’ll immediately see major bright highlights appear across the design. These highlights push the retro energy up considerably.
Duplicate that Linear Dodge layer one more time. Drop the opacity on the first duplicate to around 50%, and keep the second at 100%. This builds up a layered glow that feels organic rather than flat.
Bring in the Color
At this stage your design is mostly white, black, and grey. Now it’s time to inject that bold retro color palette.
Add a Color Balance adjustment layer above everything. Push the highlights toward cyan and the shadows toward magenta or purple. Retro designs typically lean into high-contrast complementary colors, so don’t be shy with the sliders.
You can also add a Gradient Map adjustment layer set to a low opacity. A gradient running from deep purple through hot pink to electric blue gives the whole composition an immediately retro character without overwhelming the detail underneath.
Finally, add a subtle vignette by creating a new layer, filling it with black, and masking out the center. Set this layer to Multiply at around 30-40% opacity. It draws the eye toward the center of the design and gives the poster a finished, polished look.
Finishing Touches That Matter
Step back and look at the overall composition. If the rectangles feel too rigid, try adding a very slight motion blur to the group. If the colors feel too saturated, pull back the Color Balance adjustment. If the lens flares feel weak, duplicate them and try Screen blending mode again.
The beauty of this design approach is how forgiving it is. Almost every element can be tweaked non-destructively because you’ve been working with layers and adjustment tools throughout.
Save your final version as a PSD to keep all the layers intact for future edits. Then export a flattened JPEG or PNG at full resolution for actual use as a wallpaper.
Retro poster design rewards experimentation. The steps above give you a solid framework, but the best results come from pushing the values further than feels comfortable. Crank up the contrast, saturate the colors more, pile on additional lens flares. That’s what makes a design feel genuinely retro rather than just vaguely nostalgic.