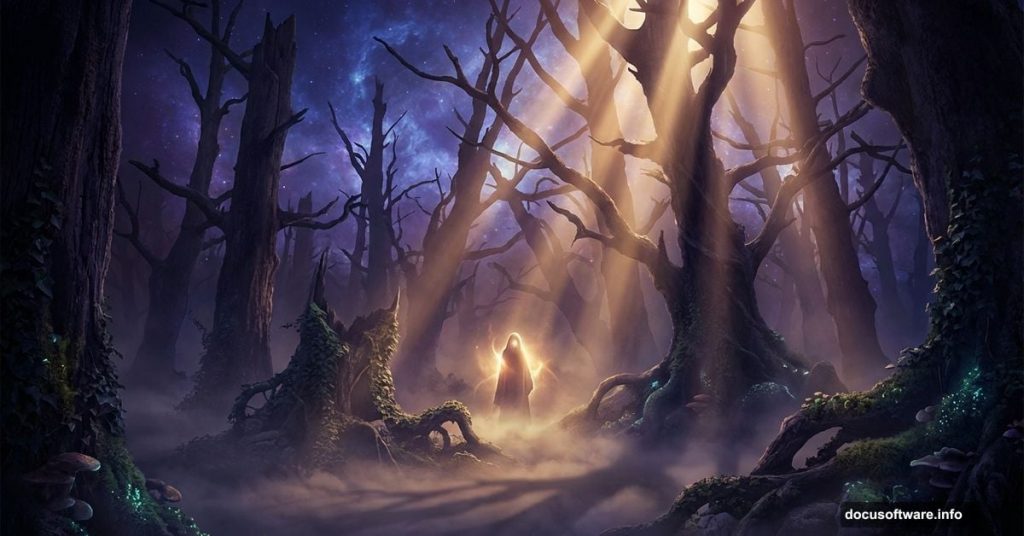
Ever looked at those hauntingly beautiful digital artworks where a dark, fog-filled forest seems to pulse with magic? That’s exactly what we’re creating today. This tutorial walks you through building a full photo manipulation from scratch, turning a bright daytime forest into a mysterious, shadow-drenched scene with glowing atmospheric light.
Along the way, you’ll pick up some genuinely useful skills. We’re talking advanced blending techniques, working with tree branches and ivy, and color grading tricks that take a flat composition and make it feel alive. Ready? Let’s build something magical.
What You’ll Need Before Starting
Grab these free resources before opening Photoshop:
- Model – mjranum-stock
- Forest stock – HumbleBeez
- Ivy – Black-B-o-x
- Dead Tree 2 – gd08
- Dead Tree 1 – Pixabay
- Sky – Pixabay
- Fog brush – Brusheezy
- Ray Light brush – Brusheezy
Download everything first. Having all your assets ready before you start saves a lot of frustration mid-process.
![A dark, mystical forest photo manipulation in Photoshop showing a foggy, blue-toned enchanted forest scene with light rays filtering through the trees]
Step 1: Set Up Your Document
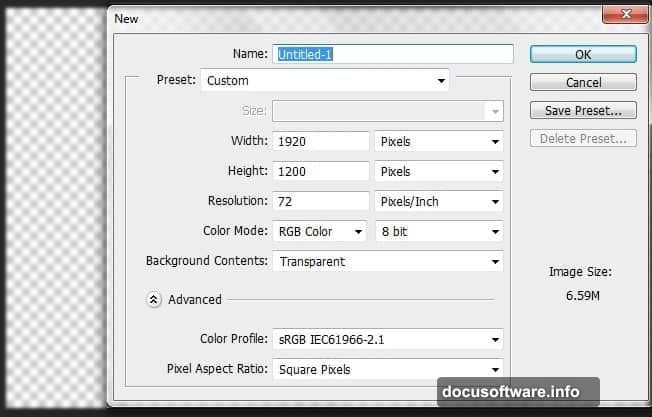
Open Photoshop and create a new document with these settings:
- Width: 1920 pixels
- Height: 1200 pixels
- Background Contents: Transparent
This gives you a widescreen canvas with plenty of room to work. The transparent background matters here because you’ll be building up layers rather than painting over a solid color.
Step 2: Extract the Forest with Color Range
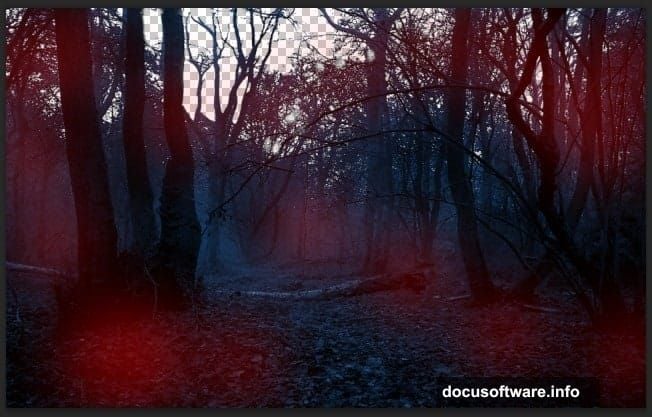
Open your forest stock image. Right away, you’ll notice a problem. The sky is bright and cheerful, which is the opposite of the dark, mystic mood we’re going for. Instead of trying to darken it later, just cut it out entirely.
Here’s the clever part. Go to Select > Color Range. Hold Shift and click on different areas of the sky until all the forest sections show as black in the preview window. This tells Photoshop exactly what to keep.
Keep your Fuzziness setting below 80. Higher values cause Photoshop to grab parts you don’t want selected. The Color Range tool is ideal for detailed extractions like forests, tree branches, and hair because it reads tonal relationships rather than simple outlines.
Once you’re happy with the selection, hit OK. Your forest is now cleanly extracted and ready to place.
Step 3: Turn Day into Night
Drag your extracted forest into the main document. Resize it to fill most of the canvas, leaving room at the edges for the elements you’ll add later.
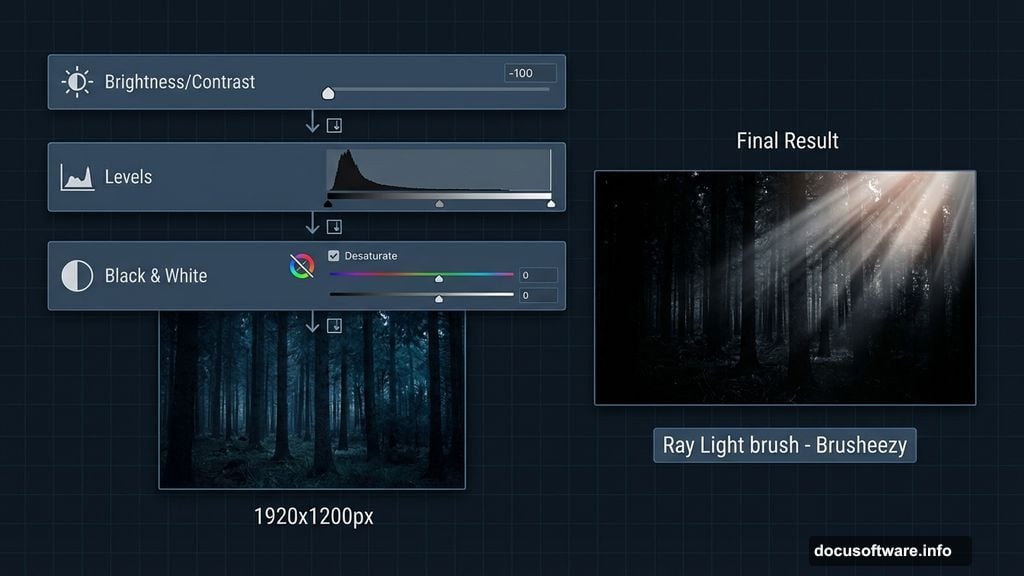
Now stack these Adjustment Layers on top of the forest layer. Critically, tick Create Clipping Mask on each one so they only affect the forest and nothing else:
- Brightness/Contrast – Pull the brightness down significantly
- Levels – Crush the shadows to deepen the blacks
- Black & White – Desaturate the image to strip away the natural greens
- Photo Filter – Add a cool color cast to shift the tone toward blue
After this chain of adjustments, your once-bright forest should look dramatically different. Darker, moodier, and stripped of its daytime warmth.
Step 4: Paint in Extra Shadow
The adjustment layers get you most of the way there. But some areas still need a push deeper into darkness.
Create a new layer above the forest. Grab a soft round brush set to black and paint over the areas where you want heavier shadows, typically the outer edges and deeper recesses between the trees.
Then change the layer’s Blend Mode to Soft Light and drop the Opacity to 75%. This blends your painted shadows naturally into the scene rather than sitting as a flat black overlay. The result feels organic rather than edited.
Step 5: Add the Dark Blue Color Theme
Dark blue is the emotional anchor of this whole piece. It’s what makes the final image feel cold, mysterious, and slightly otherworldly.

Go to Layer > New Fill Layer > Solid Color and choose #4273b0. Set the Blend Mode to Color, Opacity to 77%, and Fill to 78%.
That single step wraps the entire forest in a cohesive blue tone. But some areas will swing too heavily blue. Add a Layer Mask to the Solid Color layer and paint back any spots that look oversaturated. The goal is a natural-feeling cool color wash, not a full color replacement.
![Close-up detail of Photoshop layers panel showing adjustment layers, solid color fill, and fog brush strokes being applied to the dark forest manipulation]
Step 6: Build the Base Fog
This is where the scene starts feeling genuinely magical. Download the fog brush pack from Brusheezy, install it in Photoshop, and pick a fog brush shape you like.
Create a new layer and start painting fog across the forest floor and between the trees. Work in multiple passes at low opacity rather than one heavy stroke. Build the fog gradually so it looks like it’s drifting through the trees rather than sprayed on.
Light gray and off-white work best for the fog color. Pure white can look too stark against the blue tones. Experiment with different brush shapes from the pack to create variety and movement in the fog layer.
This step sets up the atmosphere that all the remaining elements will sit within. Spend real time here. Good fog makes everything else look more believable.
—
From this foundation, you’ll continue building the scene by adding the model, dead trees, ivy, and light ray effects. Each element slots into the blue-toned, fog-filled environment you’ve established. The adjustment layer approach you used on the forest works just as well on every stock image you bring in, making it easier to keep the whole composition cohesive.
What makes this technique powerful is how it teaches you to think in layers and moods rather than just placing elements. Every adjustment serves the final feeling you’re chasing. Once you internalize that workflow, building complex photo manipulations gets a lot less intimidating and a lot more fun.