
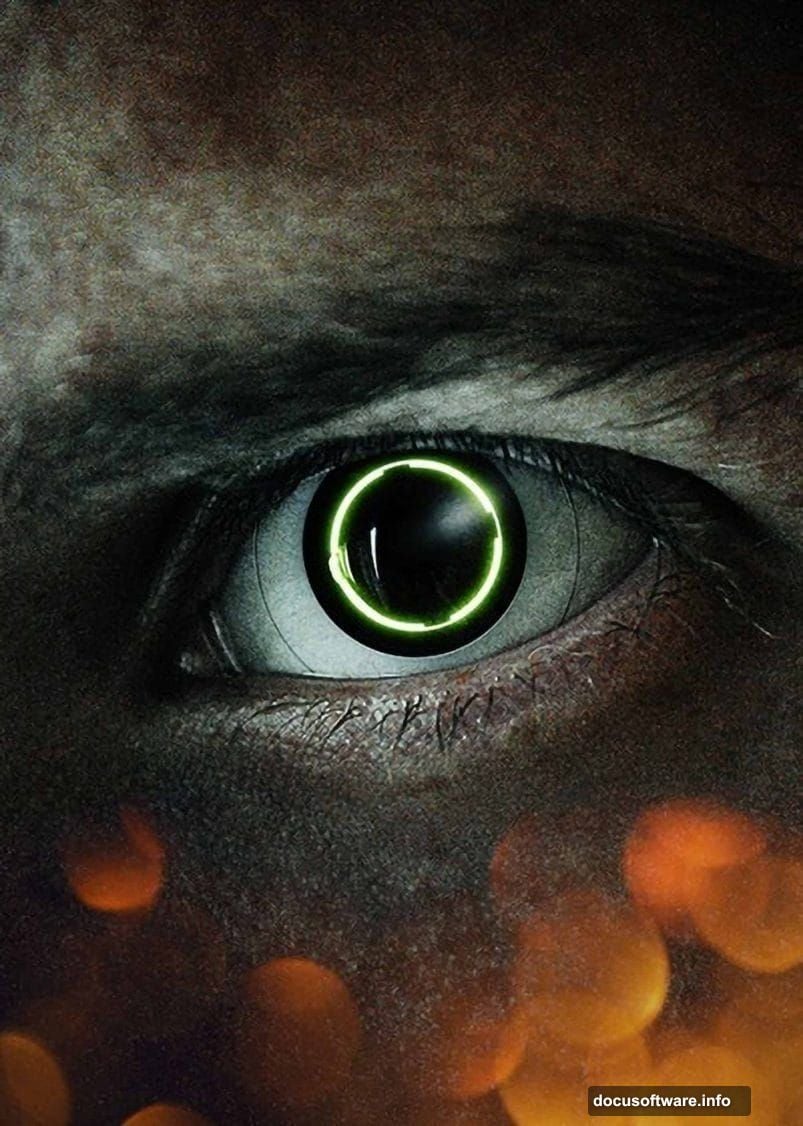
Ever wanted to make a photograph look like it came straight out of a sci-fi video game? This tutorial walks you through creating a futuristic, high-tech eyeball inspired by the Deus Ex universe. Think glowing irises, sleek shape layers, and that unmistakable cyberpunk blue-green glow.
The best part? You don’t need to be a Photoshop expert. Each step builds on the last, and the results look seriously impressive.
What You’ll Need Before Starting
Grab two resources before diving in. First, find an eye stock photograph. Second, download a bokeh pack for atmospheric background effects. Both are freely available online and linked in the original tutorial resources.
Also, make sure you’re working in Photoshop with a decent eye photo. Close-up shots with visible iris detail work best. The more texture in the eye, the more convincing your final result.
Crop and Clean Up the Base Photo
Start simple. Select the Crop Tool (keyboard shortcut C) and trim about half an inch from the bottom of your photo. This small adjustment balances the composition and gives your eye more visual prominence.
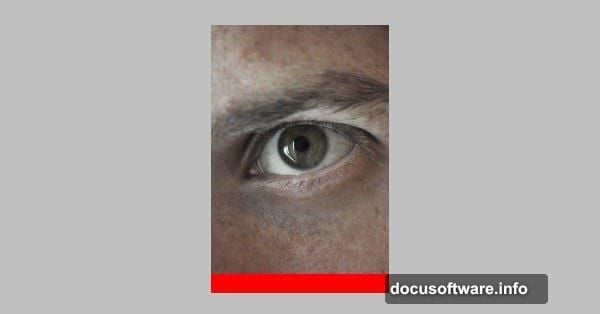
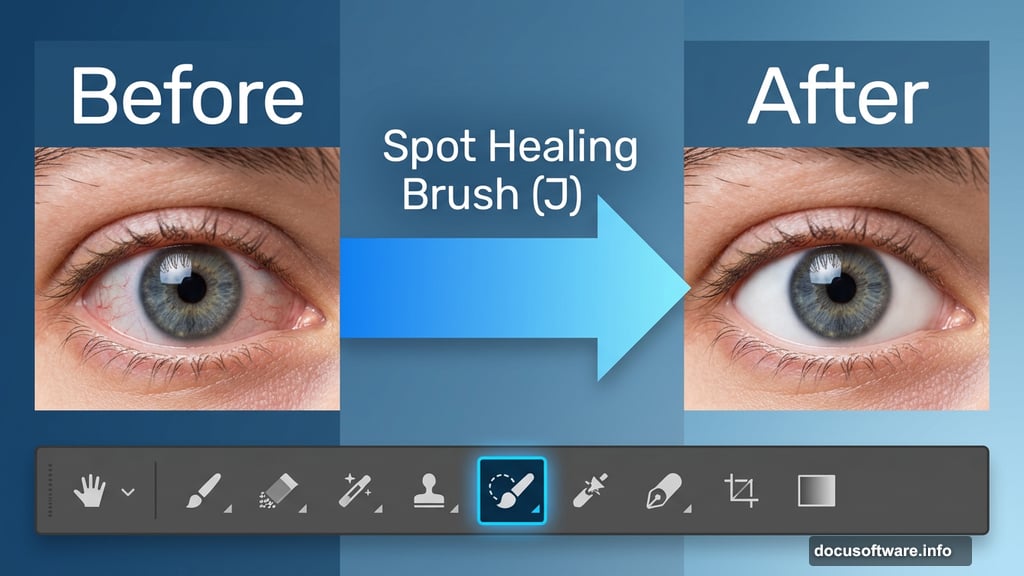
Next, clean up the eyeball itself. Because you’re creating a futuristic prosthetic eye, those natural red veins need to go. Grab the Spot Healing Brush (shortcut J) and paint over any veins or imperfections on the whites of the eye.
Don’t stress about being perfect here. Later color correction steps might reveal a few remaining dark spots. You can clean those up at the end.
Set Up Your Texture Layer
Create a copy of your photograph layer. Rename this copy “Texture.” This layer serves a specific purpose later on. It helps hard-edged shape layers blend naturally into the photo rather than looking pasted on.
Set this Texture layer’s Blending Mode to Soft Light. Then drop the Opacity to 50%. Simple change, big payoff.
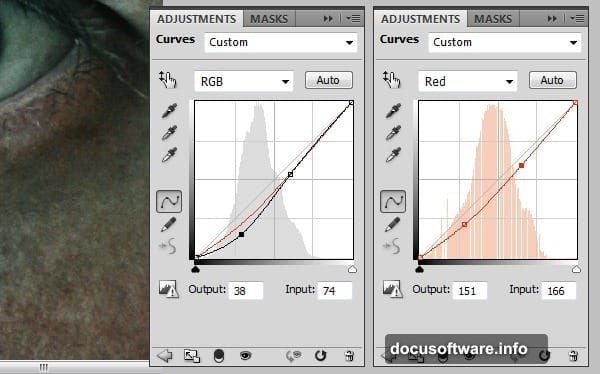
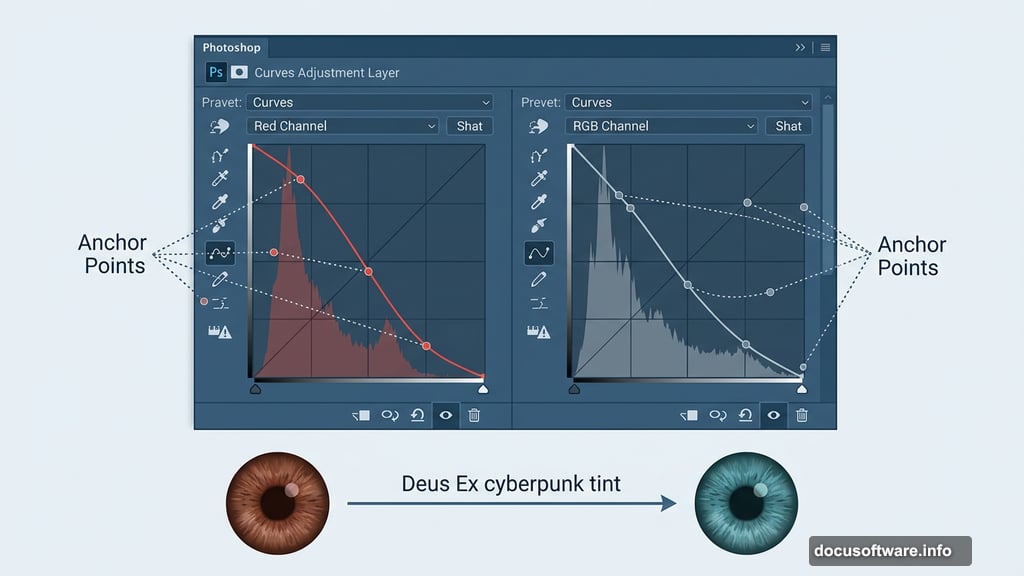
Add That Futuristic Blue-Green Color
This is where your photo starts feeling like Deus Ex. Add a Curves Adjustment Layer above your base photograph.
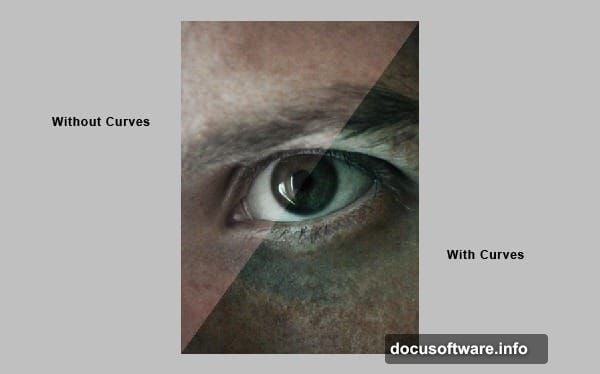
Switch to the Red channel first. Add anchor points to pull the red tones down slightly. Then switch to the default RGB channel and make a similar adjustment. Together, these curve tweaks introduce the cool blue and green tint that screams high-tech augmentation.
Play around with the exact curve shapes until you get a tint you love. Every eye photo responds a little differently.
Sharpen Everything with Unsharp Mask
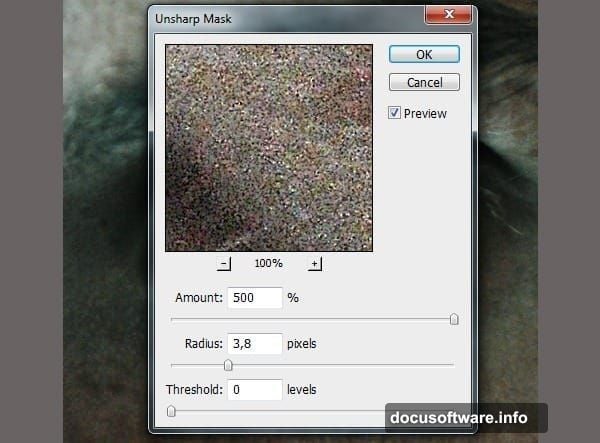
Cinematic images need crisp, punchy sharpening. But before applying any filter, you need to protect your layers first.
Right-click your photograph layer and select “Convert to Smart Object.” Do the same for the Texture layer. Smart Objects let you apply filters non-destructively, meaning you can tweak or remove the effect anytime without damaging your original photo.
With your Background layer selected, go to Filter > Sharpen > Unsharp Mask. Set Amount to 500 and Radius to 3.8. Yes, that sounds extreme. But at these settings, the sharpening creates that hyper-detailed, almost mechanical look that fits the cyberpunk aesthetic perfectly. Repeat the exact same settings on your Texture layer.
Organize Your Layers for the Eyeball Work
Before building the futuristic iris, set up a clean workspace. Create a new folder in your Layers panel and name it “Eyeball.” Place this folder below the Texture layer.
Here’s an important habit to build right now. Whenever you’re working on eyeball elements, make sure you’re creating layers inside this Eyeball folder. Staying organized here saves a lot of confusion later when your layer count starts climbing.
From this point, the tutorial continues with building the iris using Shape layers and Layer Styles. You’ll use geometric shapes to construct a mechanical iris ring, add glowing edge effects through Layer Styles, and gradually build up the futuristic look that defines the Deus Ex visual style.
The retouching and color correction work you’ve done in these first six steps sets the foundation for everything ahead. Get these right and the rest of the effect comes together naturally.
—
Photoshop photo manipulation like this is one of those projects that sounds intimidating but rewards patience. Each step is actually quite manageable on its own. The combination of subtle color grading, smart sharpening, and layered shape work is what creates that convincing sci-fi result.
If you’re a fan of the Deus Ex games, the finished image will feel genuinely satisfying. And even if you’re new to photo manipulation, this project teaches techniques like Smart Object filters, Curves adjustments, and layer organization that you’ll use in countless future projects.