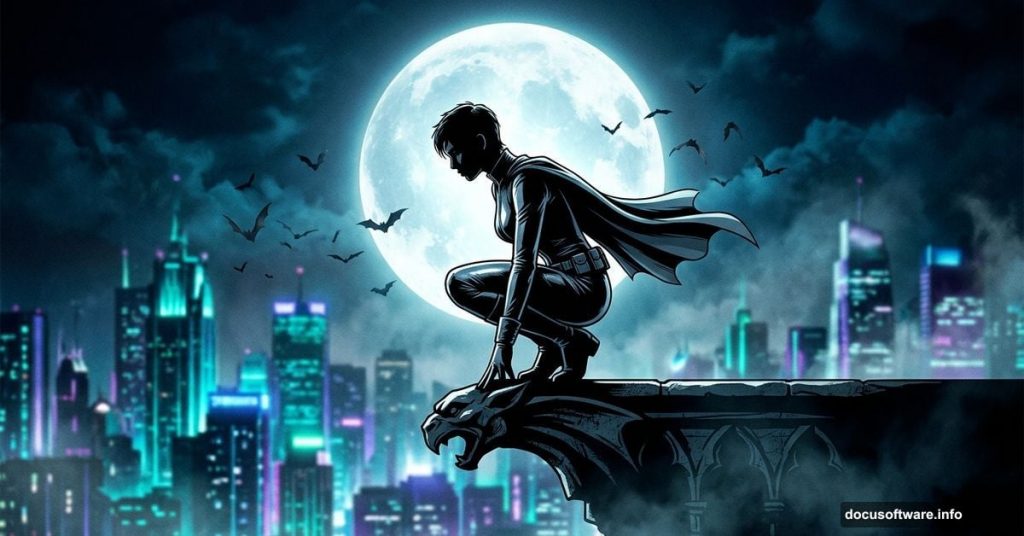
Creating a moody superhero poster sounds intimidating. But with the right stock images and a few key Photoshop techniques, you can pull off a stunning Catwoman artwork that looks genuinely cinematic.
This tutorial walks you through building a dark night city scene, adding atmospheric lighting, and compositing a model into the scene. Plus, you’ll pick up retouching skills and adjustment layer tricks that work across countless other projects.
You’ll need Photoshop CS3 or newer to follow along.
Stock Images You’ll Need Before Starting
Gather these resources first so you’re not hunting mid-tutorial:
- Catwoman model photo by photographer David MacKenzie
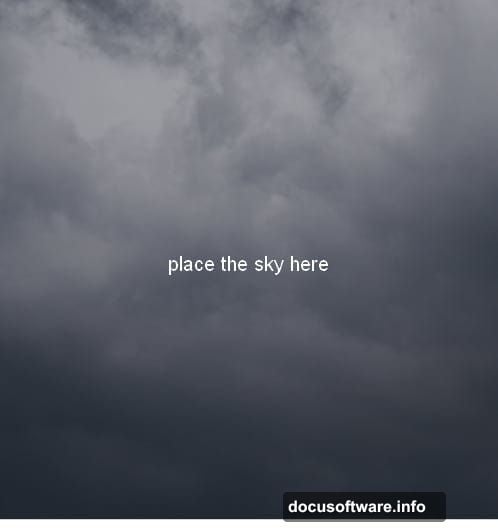
- Sky image
- City photo
- Moon image
- Wall 1 and Wall 2 textures
- New York skyline photo
- Bat brushes
Having everything ready before you open Photoshop saves a lot of frustration. Trust me on that one.
Building the Dark Night Sky Background
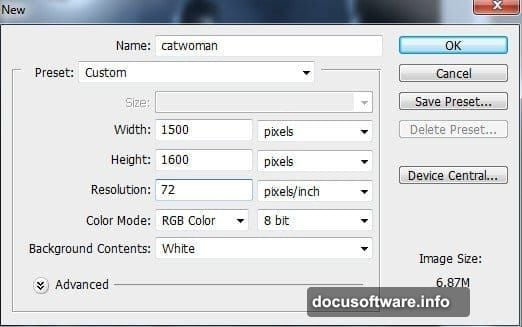
Start by creating a new document with your chosen canvas settings. Then open the sky image and drag it onto your white canvas using the Move Tool.
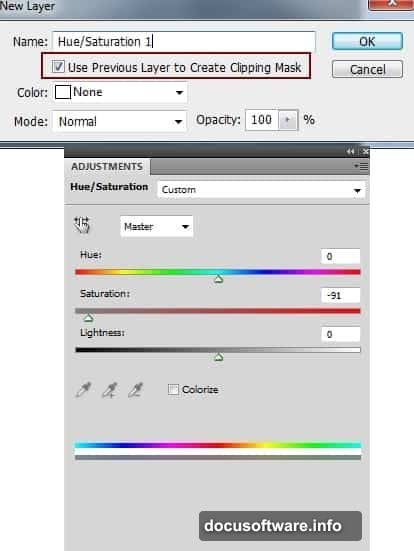
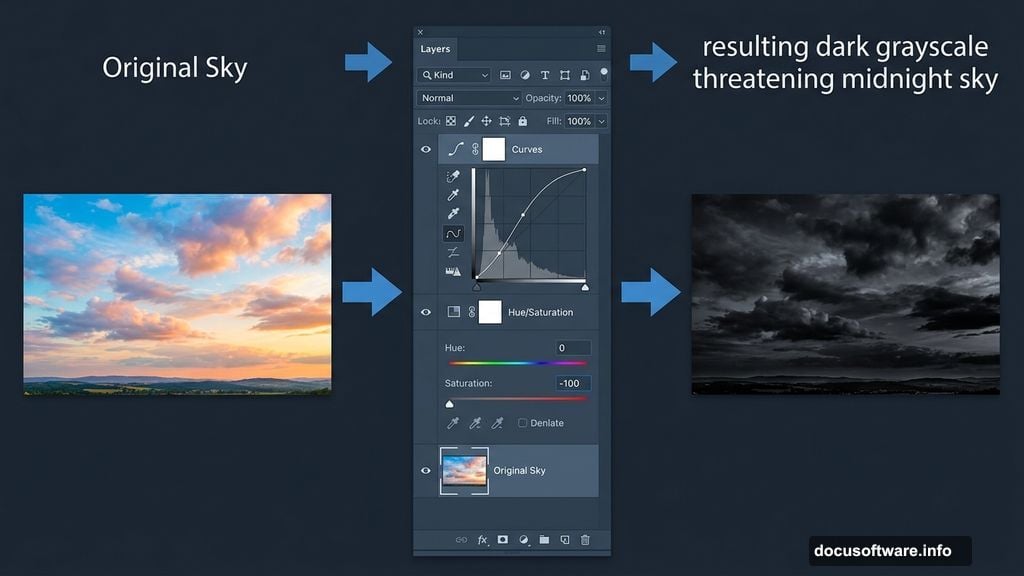
Now the sky probably looks too colorful and bright for a brooding Catwoman scene. So clip a Hue/Saturation adjustment layer to the sky layer and drag the saturation slider all the way down. This strips out the color and gives you that dramatic grayscale atmosphere.
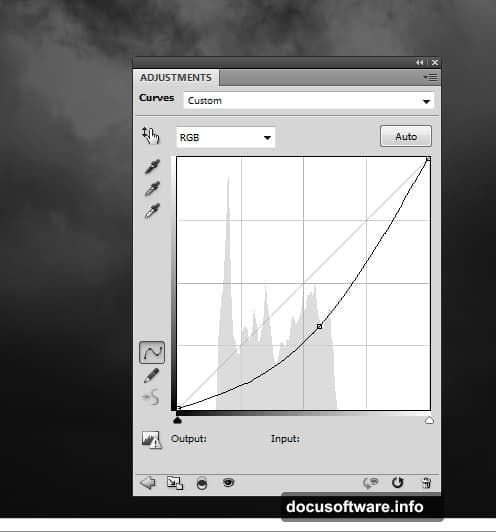
Next, clip a Curves adjustment layer to the sky as well. Pull the curve downward to darken the sky significantly. You want it to feel like a threatening midnight sky, not a pleasant evening.
Adding the City Skyline With Layer Masking
Place the city image into your document. Use Free Transform (Cmd/Ctrl+T) to rotate it slightly. A small tilt adds visual energy and keeps the composition from feeling too static.
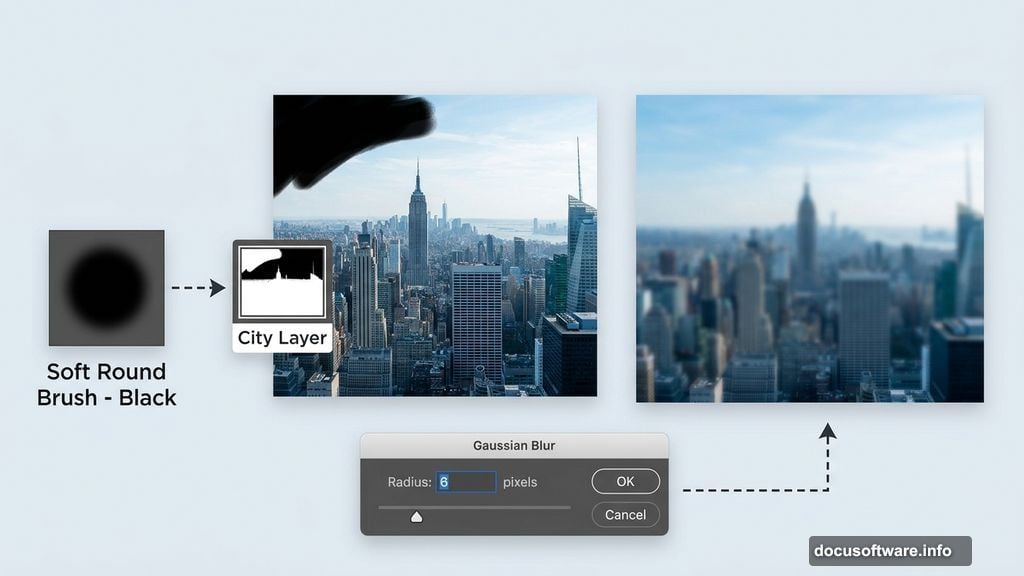
Click the mask icon at the bottom of the Layers panel to add a layer mask to the city layer. Then grab a soft round brush set to black and paint over the sky portion of the city image. This reveals the dark sky you built underneath. The key here is using a soft brush so the edge between city and sky blends naturally.
After masking, go to Filter > Blur > Gaussian Blur and set the radius to 6 pixels. This subtle blur pushes the city into the background and creates a sense of depth. Sharp foreground, blurry background — that’s how our eyes read distance in real life.
Correcting the City’s Color Balance
The city probably has a blue cast that clashes with your intended color palette. Clip a Hue/Saturation adjustment layer to the city layer and reduce the blue tones in the large background building.
Then add a Color Balance adjustment layer to shift the overall scene color toward your desired mood. Cooler, slightly greenish tones work beautifully for a dark urban night scene. But feel free to experiment here — this is where your personal artistic choices really come through.
Creating a Glowing Moon
Place the moon image in the top left area of your sky. Remove its background using a layer mask, then set the layer blend mode to Screen at 100% opacity. Screen mode drops out the black background perfectly and lets the moon sit naturally against the sky.
Apply a Gaussian Blur of 4 pixels to soften the moon slightly. This makes it feel like it’s glowing rather than sitting as a hard cutout.
Now double-click the moon layer to open Layer Styles. Add both an Outer Glow and an Inner Glow effect. These layer styles create that beautiful hazy luminescence around the moon that sells the nighttime atmosphere.
For even more light, create a new empty layer above the moon. Pick a soft round brush and set your color to a pale blue-gray — something like #d5dae2 works well. Paint gently over the moon area, then set that layer’s blend mode to Screen at 100%. This adds a second, diffused ring of light that makes the moon feel truly alive in the scene.
Bringing In the Walls and Architecture
Place your wall textures into the composition and blend them using the same masking and adjustment layer techniques from the city steps. Consistency matters here. If you use different blending approaches for each element, the composite will feel disjointed.
Match the color tone of each wall to the rest of the scene using Hue/Saturation and Color Balance adjustments clipped to each layer. The goal is making every element feel like it was photographed under the same moody city light.
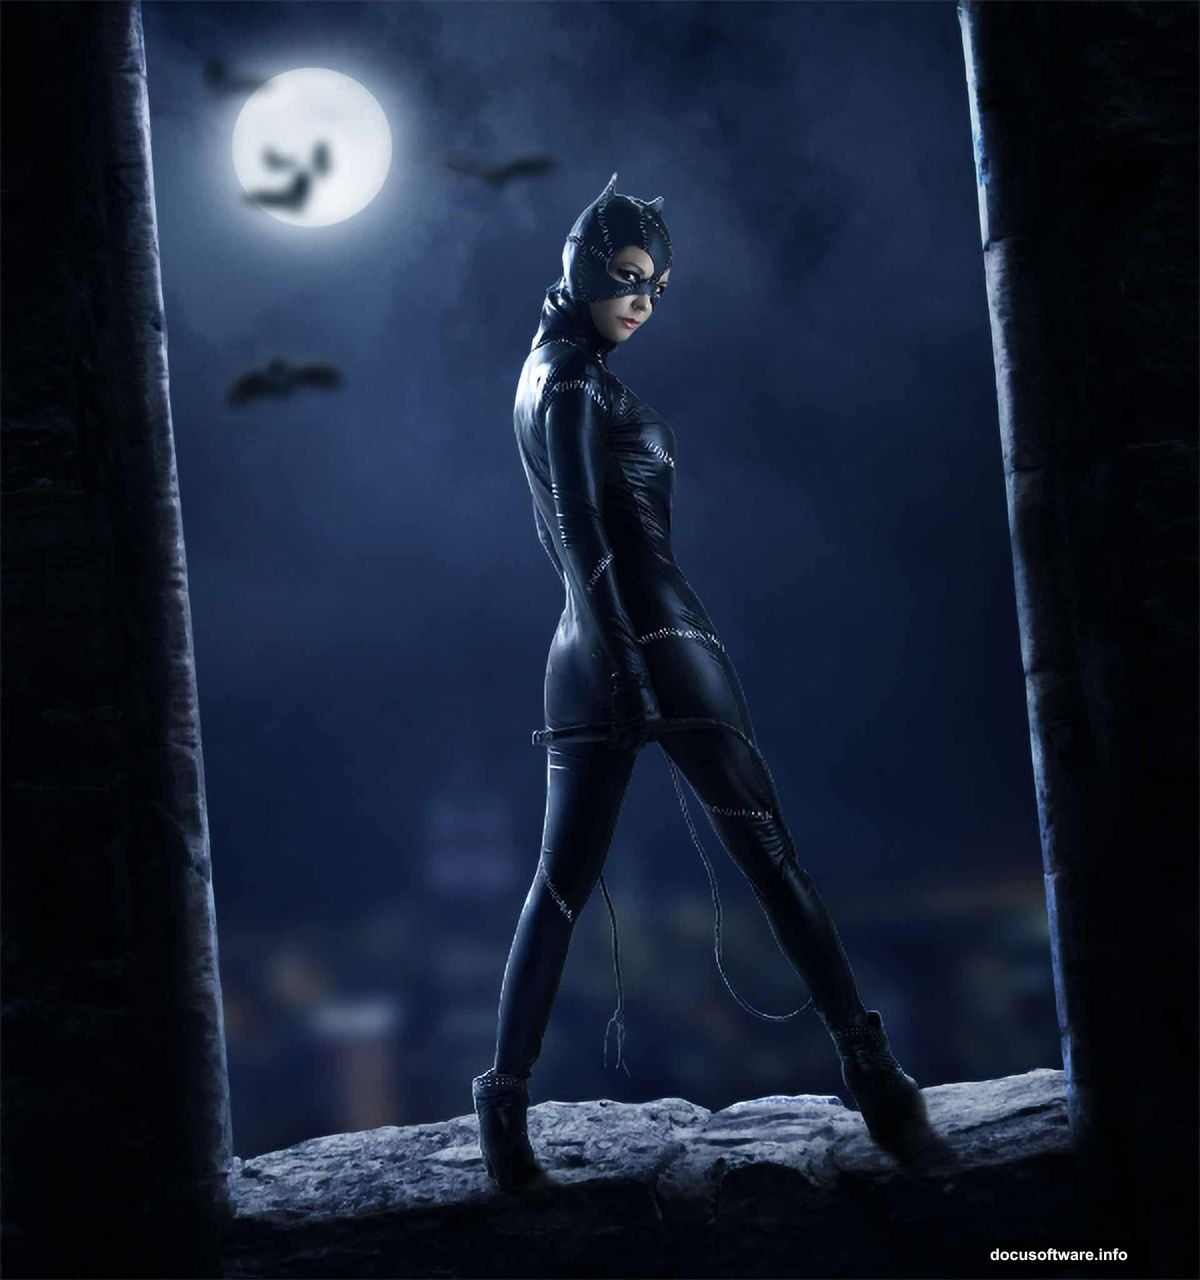
Adding and Retouching the Model
Place the Catwoman model into your document above the background layers. Mask out her background carefully — this step deserves patience. A sloppy mask will ruin an otherwise polished composite.
Once placed, do some retouching work on her to match the scene’s lighting. Dodge and burn to emphasize shadows and highlights that align with your moon light source. Add a Color Balance or Selective Color adjustment layer clipped to the model to pull her skin tones into the cooler, darker palette of the scene.
This is where the composition really comes together. A well-blended model feels like she belongs in the world you’ve built. A poorly blended one always looks pasted in.
Using Bat Brushes to Build Atmosphere
This is one of my favorite touches in this whole project. Load the bat brushes into Photoshop and scatter bats across the scene on a new layer.
Keep the bats subtle — they’re atmosphere, not the focus. Dark values near black work well. Place clusters near the buildings and let a few drift toward the moon. This small addition dramatically increases the dark, gothic feel of the poster and ties the whole Catwoman theme together visually.
Final Adjustment Layers to Tie Everything Together
Once all your elements are in place, add global adjustment layers at the top of your layer stack. A Curves layer to add final contrast punch, a Color Balance layer to unify the overall tone, and possibly a slight vignette created with a soft brush on a new layer set to Multiply mode.
These finishing touches are what separate a good composite from a great one. They make every element feel like part of the same scene rather than a collection of separate photos.
Stand back, squint at your canvas, and check for anything that looks oddly bright or out of place. Your eyes are your best quality control tool at this stage.
This project is genuinely one of the more satisfying Photoshop exercises out there. You practice masking, adjustment layers, blend modes, layer styles, and retouching all in one session. Every skill you use here transfers directly to professional work. So even if your first attempt isn’t perfect, you’re building a toolkit that will serve you for years.