Creating a moody, atmospheric photo manipulation sounds intimidating at first. But once you break it down into manageable steps, the whole process becomes surprisingly fun. This tutorial walks you through building a dramatic rainy lake scene entirely in Photoshop — from swapping out a flat sky to adding cinematic lighting, birds, and rain effects.
Whether you’re new to photo manipulation or looking to sharpen your matte painting skills, this project covers techniques you’ll use again and again.
Planning Your Matte Painting First
Before you open Photoshop, stop and plan. Seriously, this step matters more than most tutorials admit.

Matte painting has a sneaky way of pulling you deeper and deeper into effects. You add one thing, then another, then another — and suddenly you’ve lost the original vision completely. Planning prevents that trap.
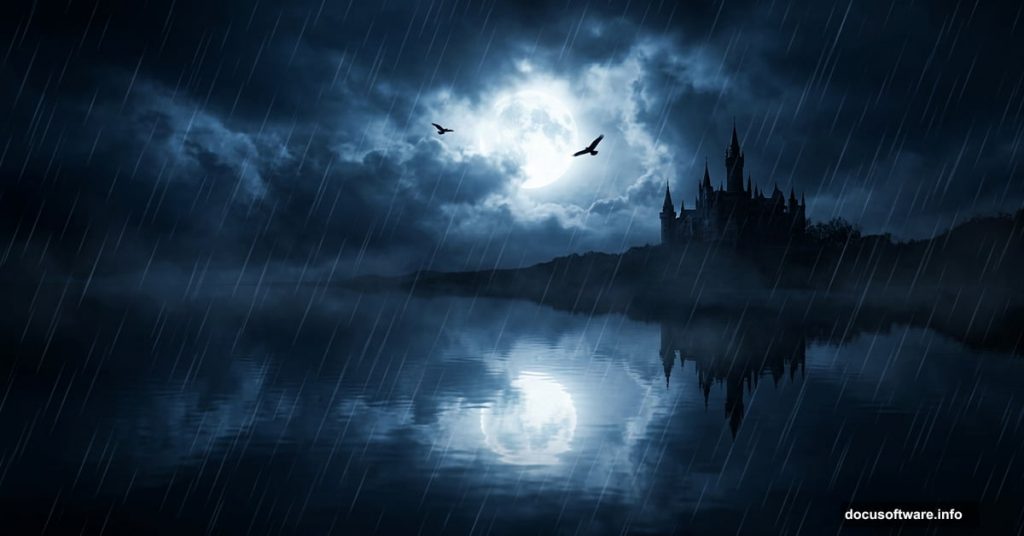
Sketch out your composition roughly. Decide where the light source sits, what the mood feels like, and which elements you need. For this scene, we’re building a dark, rainy lake with a dramatic moonlit sky, a castle, and some birds in the distance.
Once you have that mental picture locked in, the technical steps become much easier to execute.
Setting Up Your Document
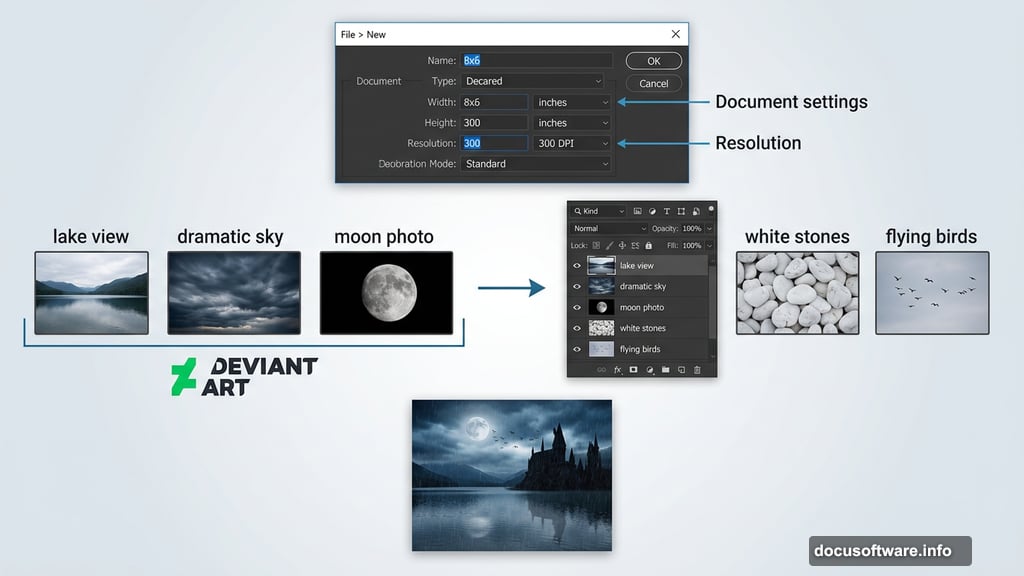
Start by creating a new document. Go to File > New and set the dimensions to 8×6 inches at 300 DPI. This resolution ensures your final image looks sharp whether you print it or display it digitally.

Now gather your source images before starting. For this tutorial, you’ll need a lake view photo, a dramatic sky image, a moon photo, white stones, and flying birds — all available through DeviantArt. Having everything ready before you start keeps your workflow smooth.
Replacing the Sky with a Dramatic Alternative
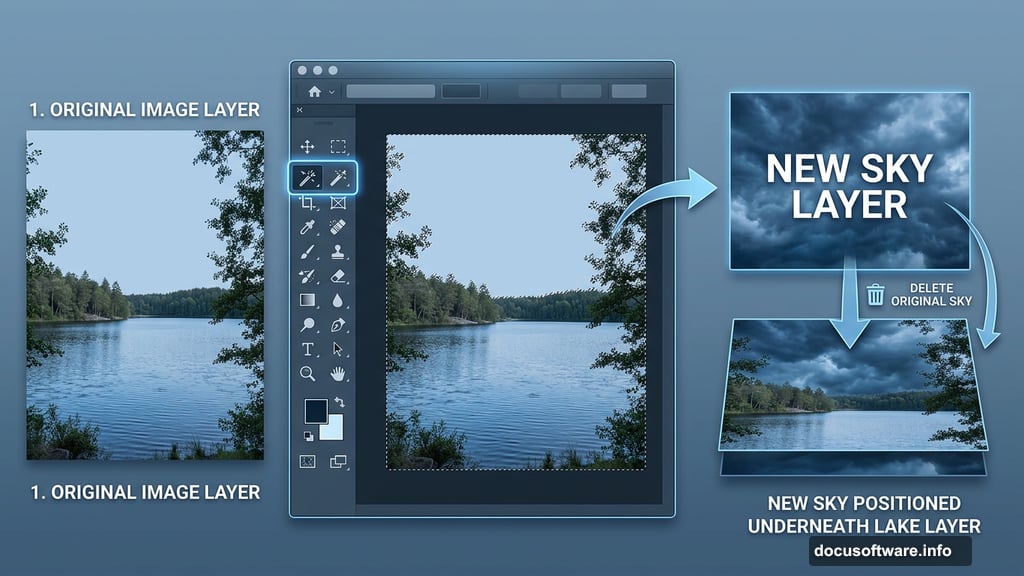
The original lake photo likely has a flat, natural-looking sky. That won’t cut it for the moody atmosphere we’re after. So the first major task is a sky replacement.
Grab the Magic Wand Tool and carefully select the sky portion of your lake image. Pay close attention to the spaces between trees — those tricky gaps where the sky peeks through. Missing those spots will look obviously wrong later.
Once selected, delete that portion and slide your dramatic new sky layer behind the main lake layer. The transformation is immediate and satisfying.
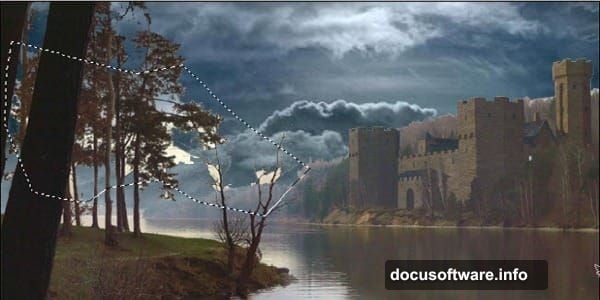
Cleaning Up the Tricky Tree Edges
After the basic sky swap, you’ll almost certainly notice problem areas. Little patches of the original sky still showing between branches and leaves are common at this stage. Don’t worry — there’s a clean fix.
Use the Polygonal Lasso Tool to select just the problematic area. Then head to Select > Color Range. This tool is genuinely clever. It selects a specific color range within your existing selection, so you can target exactly that leftover sky color without affecting anything else.
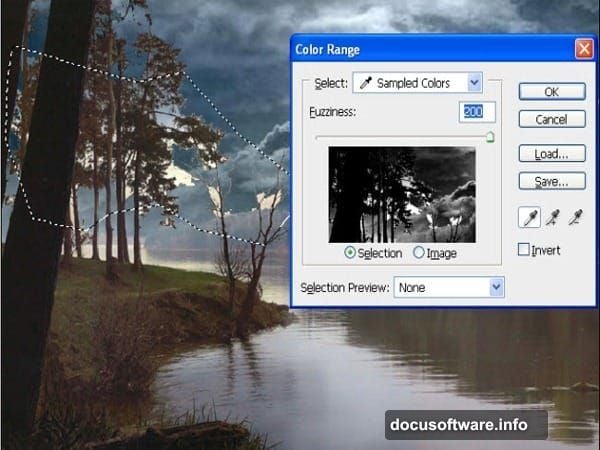
Set Selection Preview to None, then use the eyedropper to click the color you want to remove. Hit OK, and Photoshop generates a tight selection of just those problem spots. Delete twice, and the background sky bleeds through naturally.
Blending the Scene Together
With the sky in place, the scene needs to feel unified rather than pasted together. This is where Gaussian Blur becomes your best friend for certain elements.
Apply a subtle blur to distant trees and background elements. This mimics natural depth of field and makes your foreground elements feel grounded in the scene. A common mistake here is accidentally blurring your entire image — make sure you have the right layer selected before applying any blur.
Adjust the hue and saturation of individual elements to match the overall color mood. A cold, slightly desaturated palette works perfectly for a rainy scene. Pull blues and grays forward, and push warm tones back.
Adding the Moon and Atmospheric Light
The moon becomes your primary light source in this scene. Place it carefully — the position you choose determines where highlights and reflections fall across the entire composition.
This is also where composition decisions start mattering a lot. Think about how moonlight would realistically fall on the water surface, the castle, and the treeline. Consistency in lighting direction makes photo manipulations feel believable rather than random.
Blend the moon into the sky using layer blending modes. Soft Light or Screen modes work well for luminous effects without harsh edges.
Building Rain Effects
Rain is mostly suggestion rather than literal droplets. A subtle diagonal line texture across the entire scene, reduced in opacity, sells the effect beautifully without looking cartoon-like.
Create a new layer filled with black. Add noise through Filter > Noise > Add Noise, then use Motion Blur at a slight diagonal angle to turn those noise dots into streaks. Change the blending mode to Screen so only the light rain streaks show. Lower opacity until it reads as atmospheric rather than overwhelming.
For extra realism, duplicate the rain layer and scale one copy slightly larger. This creates the illusion of rain at different distances from the viewer.
Finishing Touches That Tie Everything Together
Adding birds in the distance takes surprisingly little effort but adds enormous life to the scene. Place your bird images high in the composition, scale them down, and use Overlay or Multiply blending to integrate them into the atmosphere.
Finally, add an overall color grade using Curves or Color Balance adjustment layers. Pushing the shadows slightly blue and adding a touch of green to midtones creates that distinctive moody, cinematic feel that makes matte paintings compelling.
Step back and assess the whole image at this point. Do the lighting angles feel consistent? Does the reflection in the water match the sky above? Small inconsistencies pull viewers out of the illusion, so take time to get these details right.
Photo manipulation rewards patience. The techniques here — sky replacement, Color Range selections, atmospheric rain, and consistent lighting — apply to almost any dramatic scene you want to build. Once you get comfortable with this workflow, creating your own moody environments becomes a genuinely exciting creative process.