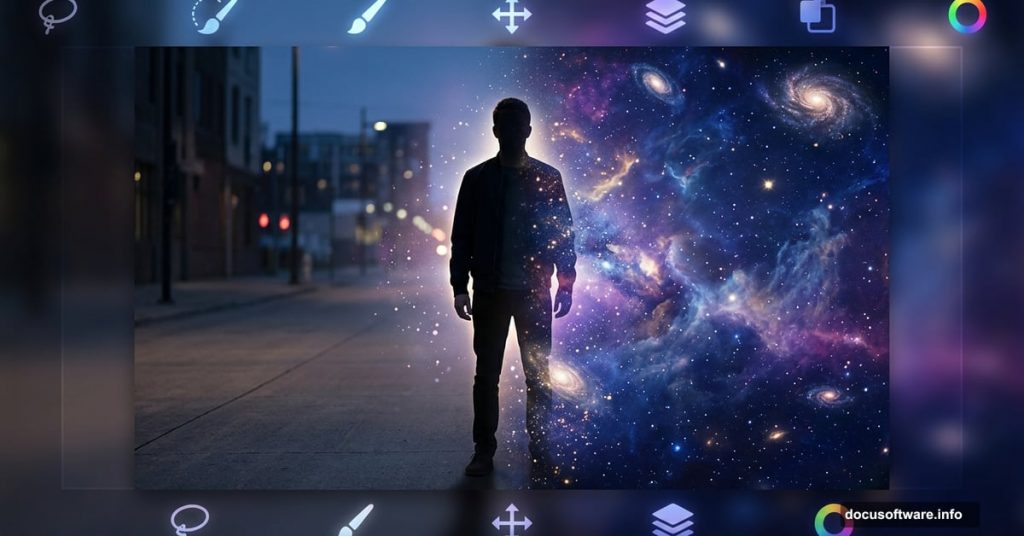
There’s something magical about taking ordinary photos and transforming them into scenes that could never exist in the real world. Photo manipulation in Photoshop is exactly that kind of creative superpower. And the “Dreamer” project is a perfect place to start.
This tutorial walks you through combining multiple stock photos into one seamless, dreamlike composition. You’ll work with adjustment layers, masking, the Pen tool, and even import custom brushes. By the end, you’ll have a solid foundation for creating your own surreal photo art.
Let’s get into it.
Setting Up Your Canvas First
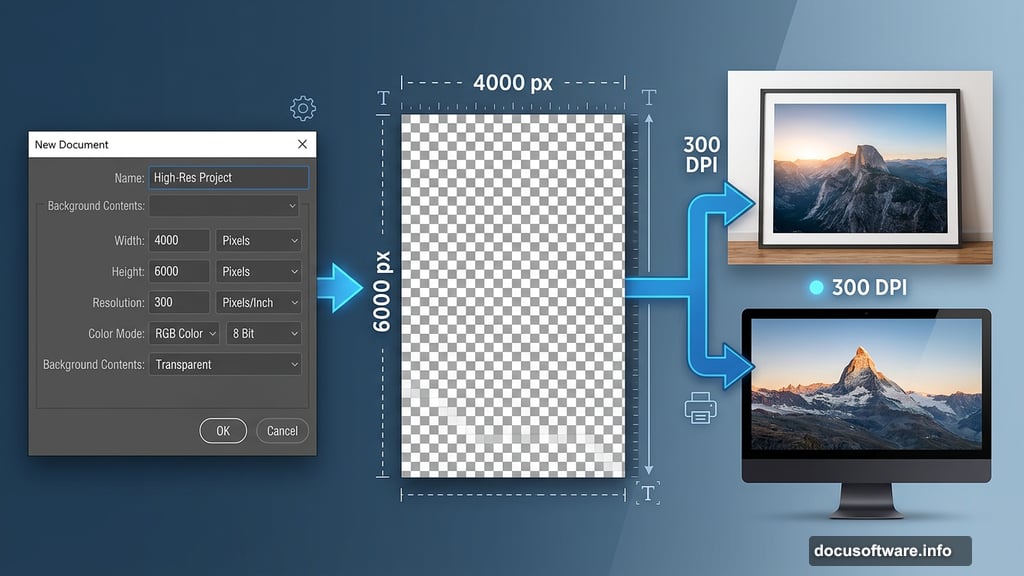
Every great photo manipulation starts with a solid document setup. So before touching any photos, you need to create your workspace.
Go to File > New in the Menu bar. Then enter these values exactly:
- Preset: Custom
- Width: 4000px
- Height: 6000px
- Resolution: 300
- Color Mode: RGB Color 8-bit
- Background Contents: Transparent
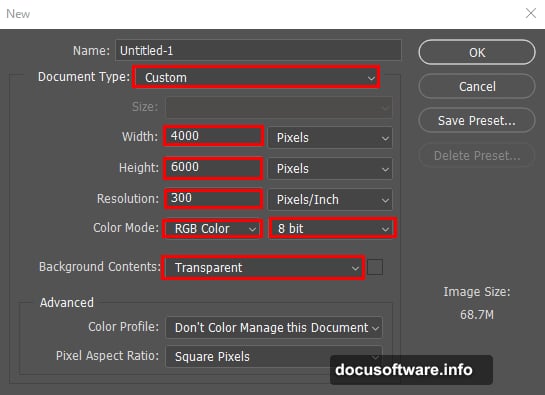
That high resolution matters. At 300 DPI, your final image stays sharp whether you print it large or display it on screen. Starting low and scaling up later never works as well.
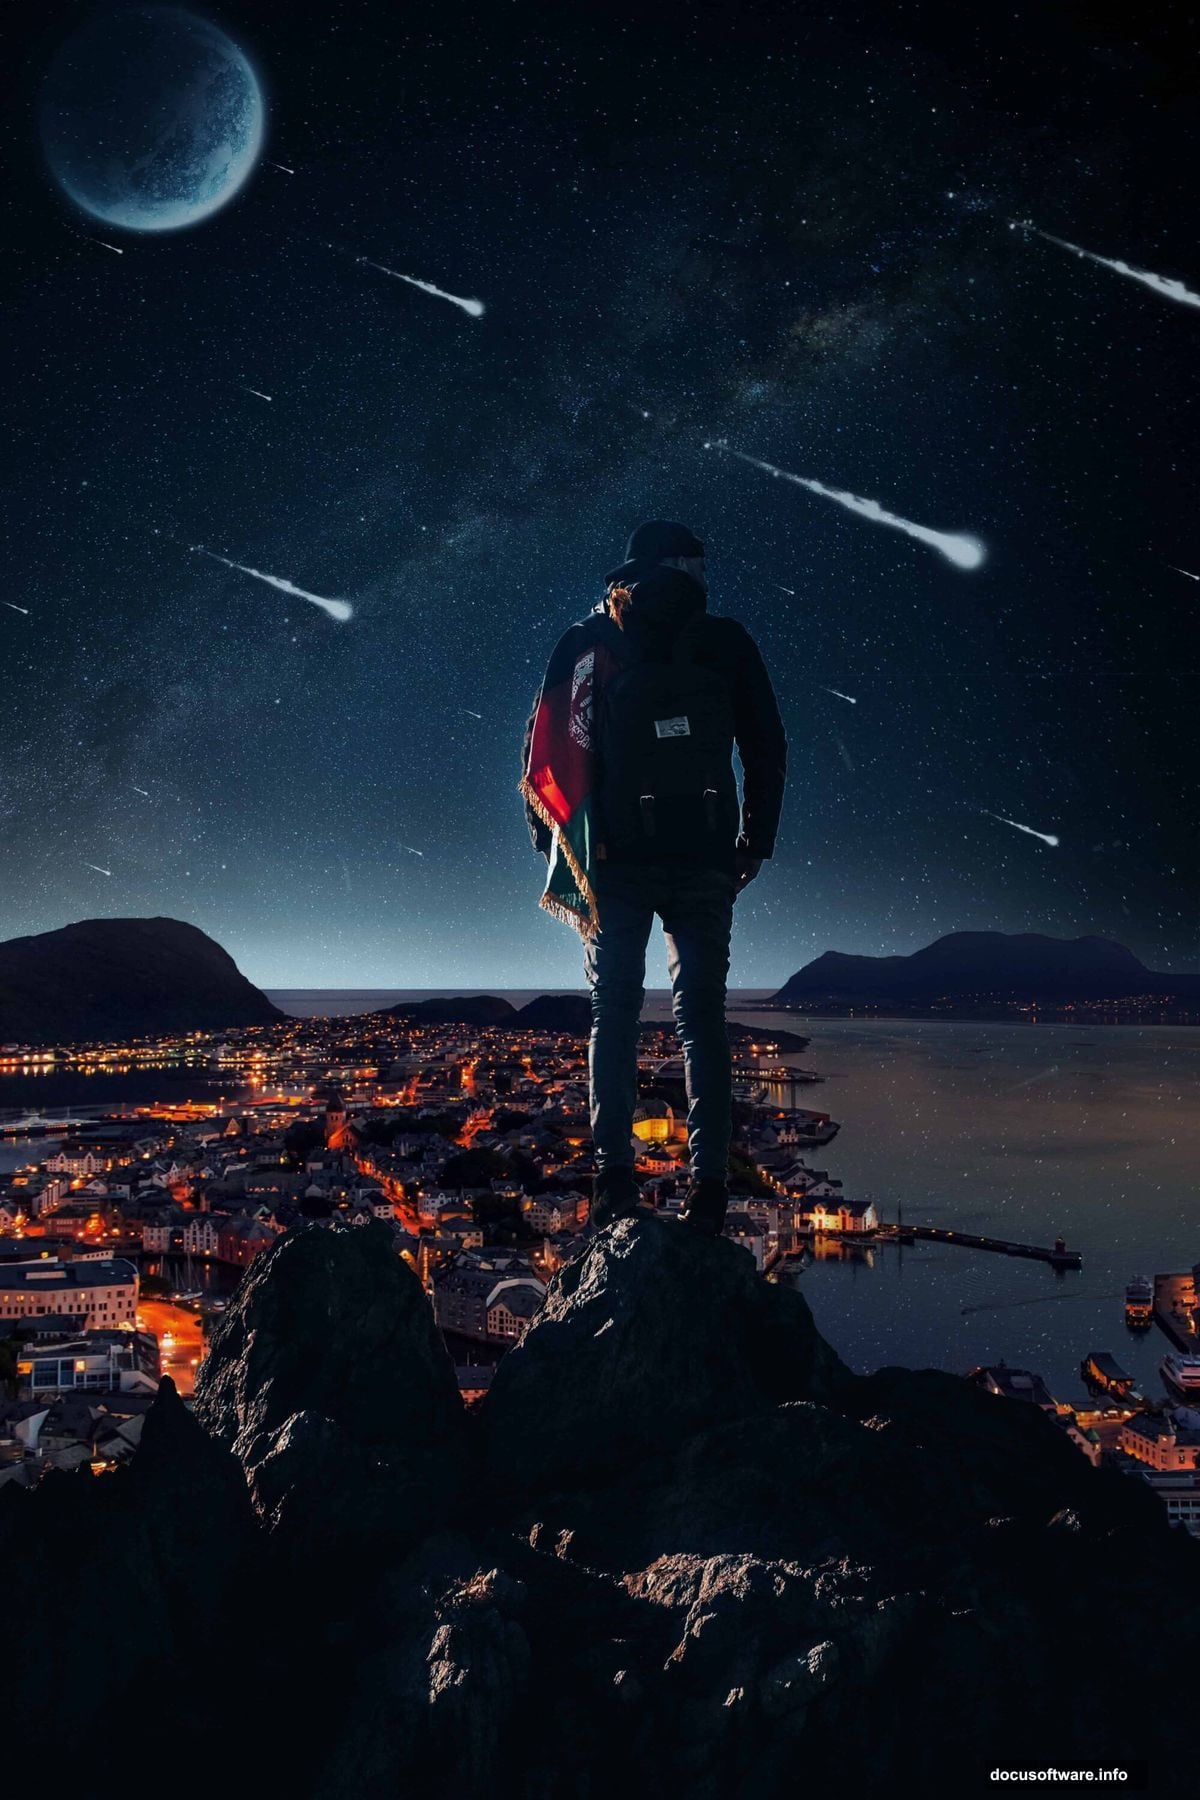
Placing Your Man Stock Photo
Next, go to File > Place and select your man stock photo. Photoshop drops it onto your canvas as a Smart Object. That’s good — it keeps the image non-destructive so you can resize freely without quality loss.
Position it where you want on the canvas. Don’t worry about perfection yet. You’ll refine placement as other elements come in.
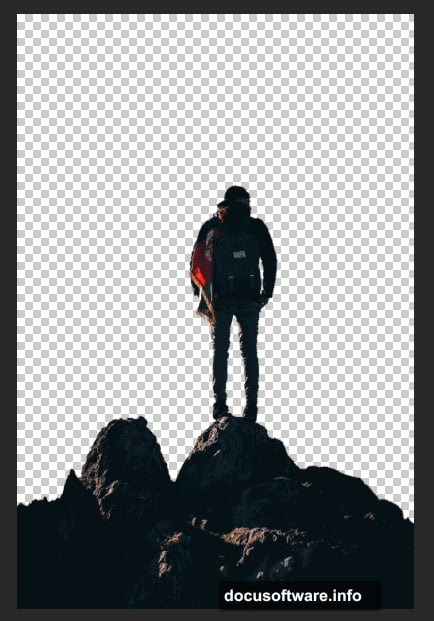
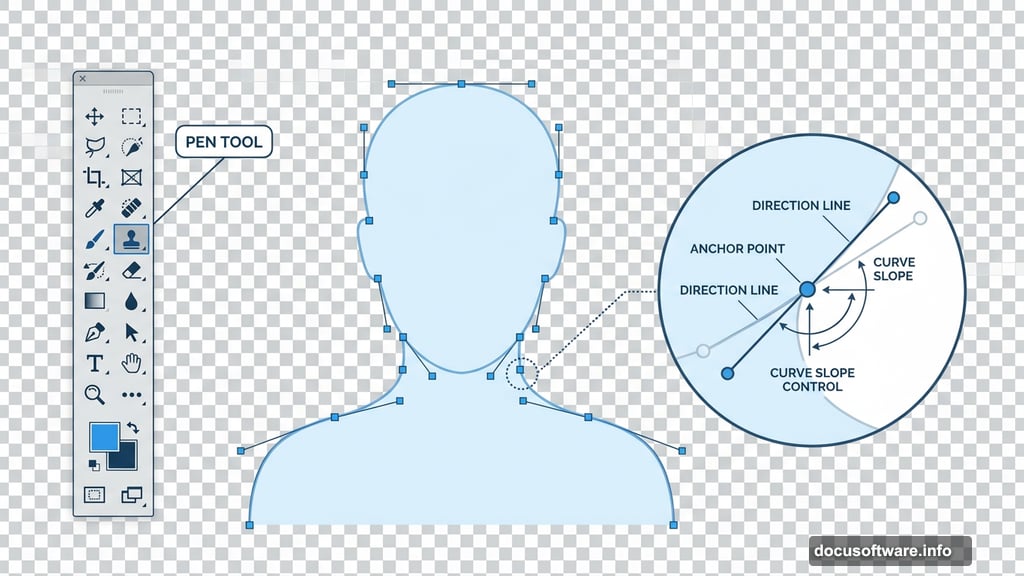
Pen Tool Masking: Cutting Out Your Subject
This is where the real work begins. Precise masking separates good photo manipulations from great ones.
Select the Pen tool from the toolbar. Position it at the edge of your subject where you want to start cutting. Click and hold, then drag to create a curved anchor point. The direction handles that appear control the slope of your curve.
A useful trick here: extend each direction line about one-third of the distance to your next planned anchor point. That ratio gives you smooth, natural-looking curves without overshooting.
Work your way around the entire subject, placing anchor points at every change in direction. Once your path is complete, right-click and choose Make Selection. Set these values in the dialog:

- Feather Radius: 0.5
- Anti-Aliased: Checked
- Operation: New Selection
Hit OK. Now press Ctrl + J (Cmd + J on Mac) to duplicate just your selected subject onto a new layer. Label this layer “Man Copy” so you stay organized.
Adding Stars for That Dreamy Atmosphere
Select your original Man layer in the Layers panel. Now go to File > Place again and bring in your stars stock photo.
Use the Transform tool (Ctrl/Cmd + T) to resize and position it. Hold Alt + Shift while dragging a corner handle to scale proportionally from the center. Get it covering the area you want.
Here’s the key step that makes this work: change the Blend Mode of your stars layer to Soft Light with Opacity at 100%. Soft Light is one of the most useful blend modes in photo manipulation. It brightens highlights and deepens shadows while letting the layer underneath show through. Your stars will glow naturally over the image rather than sitting on top like a sticker.
To fine-tune positioning, you can type exact X and Y values in the options bar. X controls horizontal distance from the left edge. Y controls vertical distance from the top. That precision helps when you need elements aligned perfectly.
Selecting the City Background
Now it’s time to bring in your city stock photo. Open it via File > Place or directly in Photoshop.
Grab the Rectangular Marquee tool by pressing M on your keyboard. Click and drag across the portion of the city image you want to use. If you need a perfectly square selection, hold Shift while dragging before releasing the mouse button.
The city element grounds your composition. It gives the dreamy foreground subject a world to exist in. How much of the city you include shapes the entire mood of the final image.
Why These Techniques Build On Each Other
Notice the pattern here. Each step creates structure that the next step depends on. Clean Pen tool masking makes your subject look believable. Soft Light blending integrates the stars without harsh edges. Careful marquee selection gives you clean city material to work with.
Photo manipulation rewards patience at every stage. Rushing the mask or slapping a texture on with the wrong blend mode shows immediately in the final result. But when each piece is handled carefully, the composite feels like it always existed as one image.
The tutorial resources — including the Man stock photo, City stars package, Cosmos Comet brushes, and Particles brushes — give you everything you need to follow along exactly. Importing those custom brushes opens up even more creative options for adding atmospheric detail to the final composition.
Start with this foundation, then experiment. Change the blend modes. Try different opacity levels on the stars layer. Push the composition somewhere unexpected. The quote that inspired this project says it best: “I dream things that never were and I say, why not?”