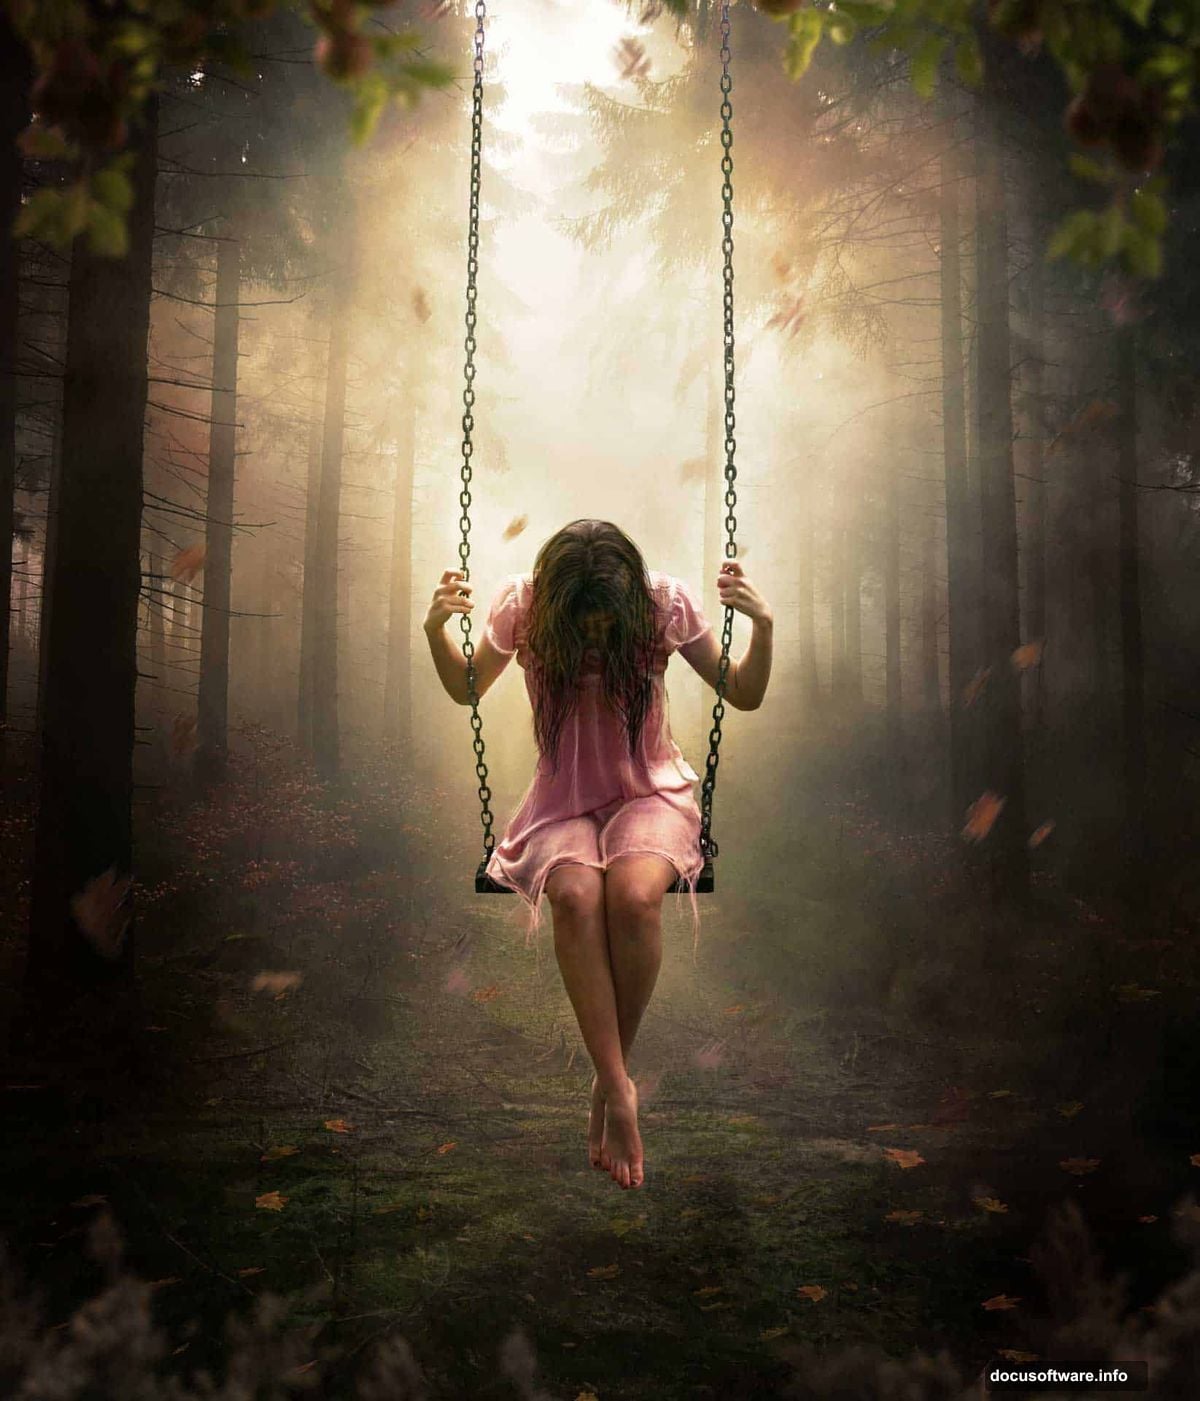
Photo manipulation is one of Photoshop’s most exciting capabilities. And this particular project takes things to a whole new level.
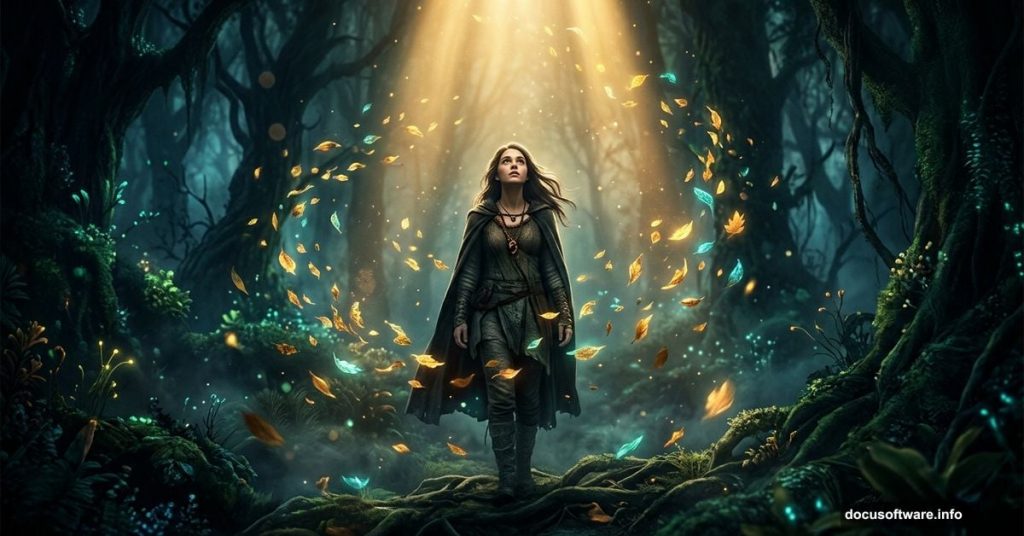
This tutorial walks you through creating a stunning, emotionally charged image of a girl in a mystical forest setting. The concept draws from the story of the seven deadly sins, with the girl representing Eve — caught in a moment of shame and vulnerability. It’s a gorgeous piece of storytelling through visual art.
By the end, you’ll know how to build dramatic lighting from scratch, add convincing motion to floating leaves, and use non-destructive techniques that keep your workflow clean and flexible. You can follow along using Photoshop CS6 or any CC version. Having a digital tablet helps too, though it’s not required.
Start with a Strong Forest Background
First, open your forest stock image as the base. The working resolution for this project is 3000 x 3503 pixels. That’s large enough to give you plenty of detail to work with.
Think of this forest as your stage. Everything else — the model, the leaves, the atmospheric lighting — sits on top of this foundation. So picking a moody, atmospheric forest image makes the whole composition stronger from the start.
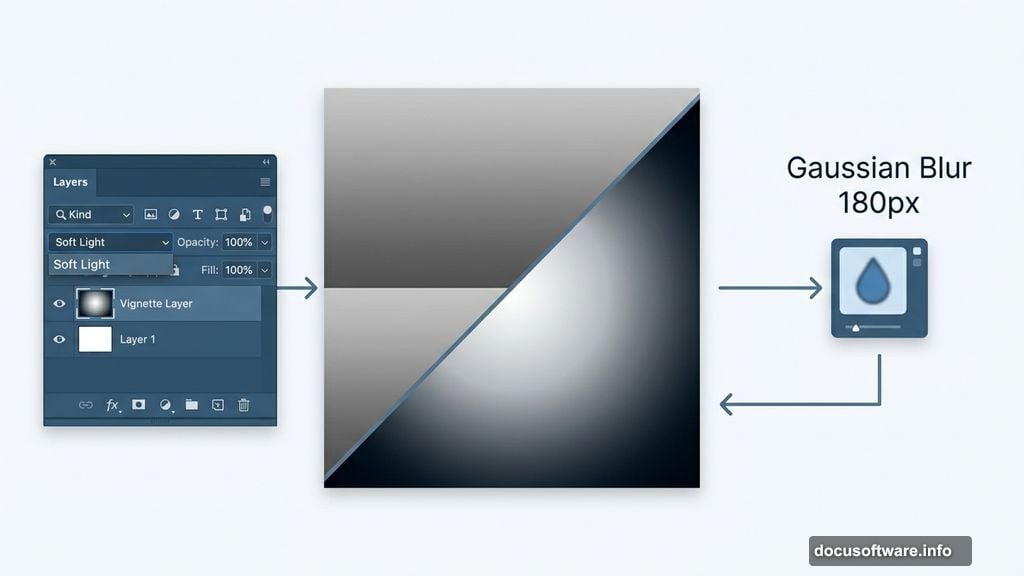
Create Dramatic Lighting with Soft Light Blending
Here’s where the magic begins. Create a new layer using Shift + Control + N. Then paint the center of the canvas with a light gray (hex code #deded8) and fade toward a darker gray (#545563) near the edges.
Next, apply a Gaussian Blur of 180 pixels. Find this under Filter > Blur > Gaussian Blur. This softens the gradient so it looks natural rather than painted.
Finally, change the layer blending mode from Normal to Soft Light. Instantly, the center brightens and the edges darken. That’s your dramatic vignette effect — pulling the viewer’s eye straight toward the center of the composition.
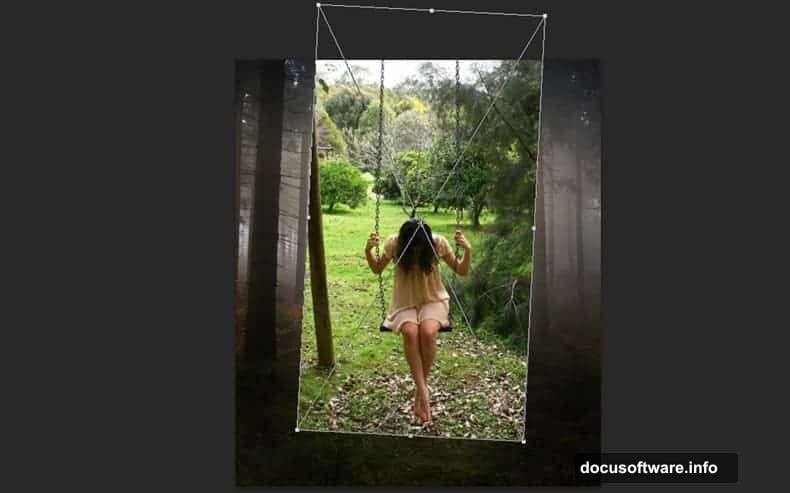
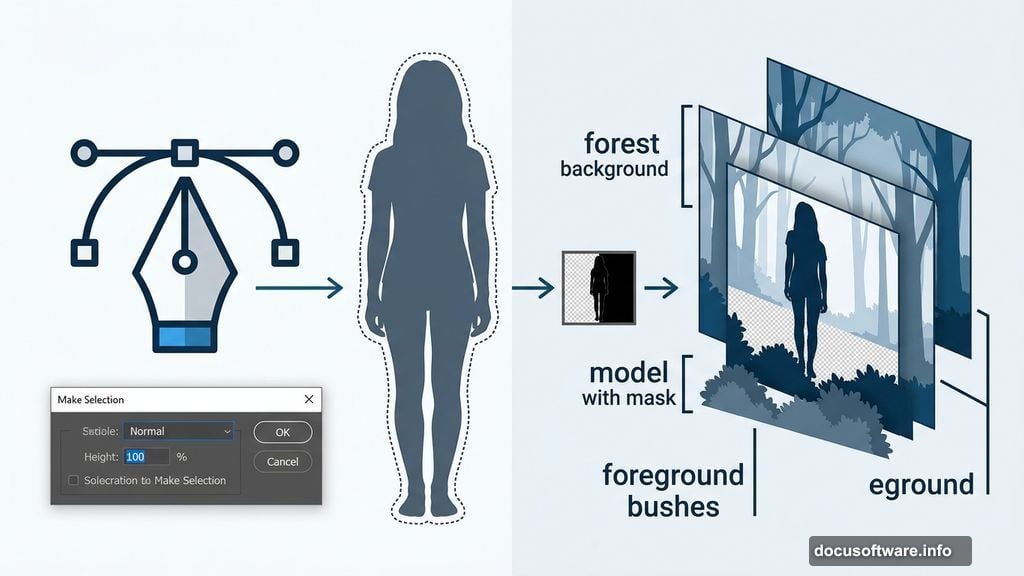
Place and Mask Your Model with the Pen Tool
Place the model image into your document. Now comes the part that separates clean composites from messy ones — cutting the model out precisely.
Select the Pen Tool and make sure the top menu shows “Path,” not “Shape.” Click around the edges of the model, tracing every curve carefully. Patience here pays off enormously. A rushed selection means visible edges that break the illusion later.

Once you complete the path, right-click and choose Make Selection, then click OK. Add a layer mask by clicking the Add Layer Mask button in the Layers panel, or go to Layer > Layer Mask > Reveal Selection. Your model now sits cleanly in the forest scene.
Build Depth with Bushes, Trees, and Layered Elements
A flat composite never feels convincing. To fix that, add stock images of bushes and trees in front of and behind the model. This creates a sense of real depth — like she’s actually standing inside the forest rather than pasted on top of it.
Place darker foliage elements toward the foreground. Lighter, hazier elements work better in the background. Plus, overlapping layers of greenery around the model’s edges helps her blend naturally into the environment.
Bring the Scene to Life with Motion Blur on Leaves
Floating leaves add energy and movement to the image. Place several leaf stock images throughout the composition, scattering them at different angles and sizes.
Apply motion blur to individual leaves to sell the effect. Go to Filter > Blur > Motion Blur, then adjust the angle and distance to match the direction you want the leaves to travel. Some leaves moving quickly with strong blur, others with subtle blur — this variation makes the motion feel organic rather than artificial.
Apply Color Grading and Texture for a Unified Mood
Raw composites almost always look disconnected. Colors don’t match, tones clash, and nothing feels cohesive. Color adjustments fix all of that.
Add adjustment layers for Color Balance, Curves, and Hue/Saturation above everything else in your layer stack. Pull the shadows cooler and the midtones warmer to create that moody, cinematic contrast. Then place a texture layer on top and set it to Overlay or Soft Light mode at reduced opacity. This ties the whole image together and gives it a painterly, dreamlike quality.
Non-Destructive Techniques Keep Your Workflow Flexible
One of the best lessons this tutorial teaches is working non-destructively. Use adjustment layers instead of applying edits directly to image layers. Convert layers to Smart Objects before applying filters like Gaussian Blur or Motion Blur. This way, every effect stays editable right up until your final export.
Think of it like working in pencil before ink. You can always go back, adjust the blur amount, tweak the color, or reposition elements without starting over.
This project is genuinely rewarding to build. The combination of atmospheric lighting, layered depth, and careful masking creates something that feels like genuine digital fine art. Take your time with the pen tool selections and the lighting gradients — those two elements do most of the heavy lifting in making the final image feel believable. Once you understand this workflow, you’ll find yourself applying these same non-destructive techniques and dramatic lighting effects to every composite you create going forward.