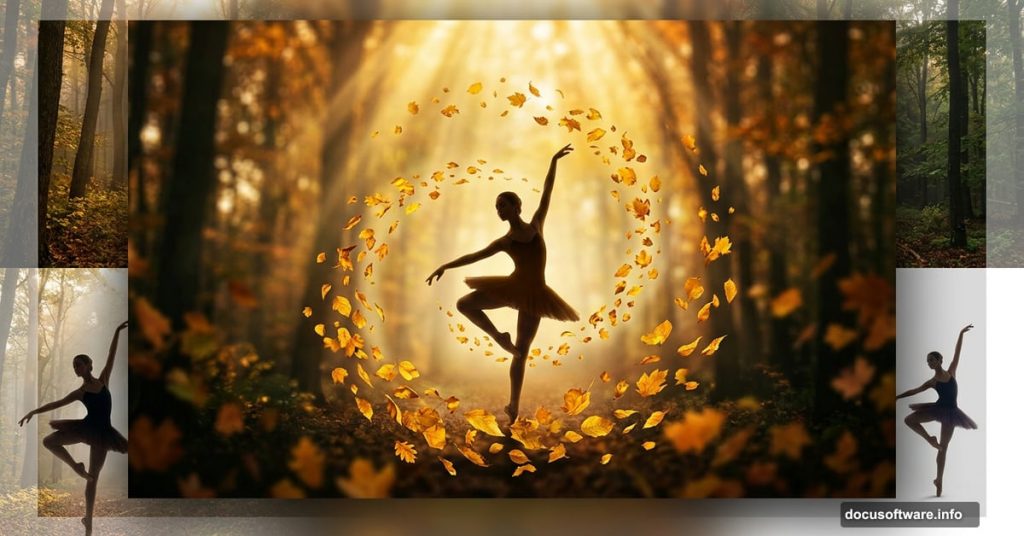
Few things feel more satisfying in Photoshop than watching separate stock photos transform into one unified, emotional scene. This tutorial walks you through creating exactly that — an autumn forest setting with a dancer at its heart, wrapped in light, atmosphere, and mood.
By the end, you’ll know how to blend stock images convincingly, manage lighting with adjustment layers, and add that dreamy, cinematic quality that makes photo manipulations sing. You’ll need Photoshop CS3 or newer to follow along.
Here’s what the finished piece involves: an autumn forest built from two stock photos, a dancer seamlessly composited into the scene, custom lighting effects, and final color grading to tie everything together.
Setting Up Your Forest Background
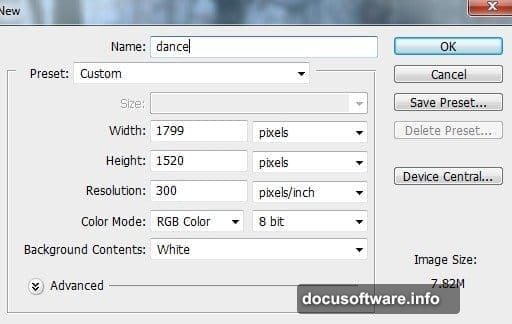
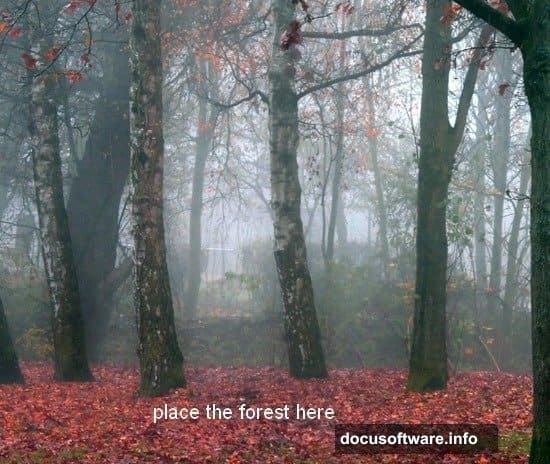
Start fresh. Create a new document in Photoshop with your preferred canvas size, then open your forest stock photo.
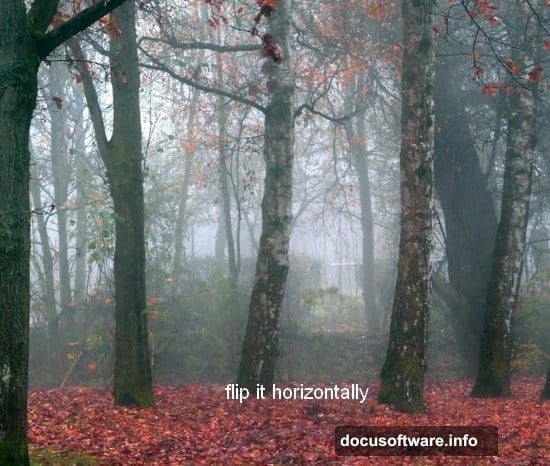
Use the Move Tool (V) to drag the forest onto your white canvas. Then flip it horizontally by going to Edit > Transform > Flip Horizontal. This small change often improves the scene’s natural composition without any obvious reason why — it just works.
Next, add depth. Go to Filter > Blur > Gaussian Blur and set the radius to 6px. Blurring the background mimics the way cameras naturally defocus distant scenery. So your viewer’s eye automatically focuses toward the center of the frame, where your dancer will eventually stand.
Shaping Light and Shadow in the Background
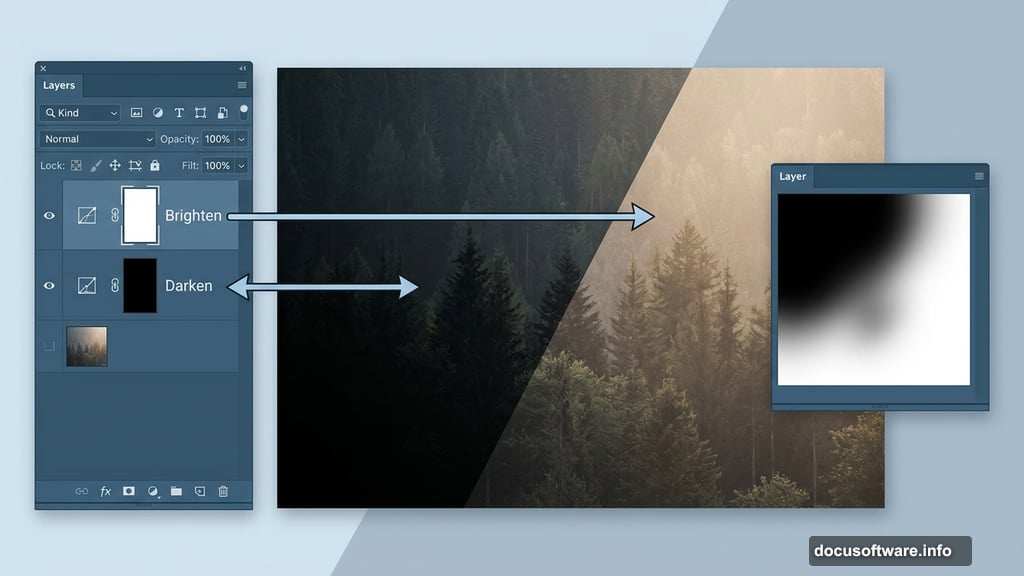
Here’s where the scene starts feeling alive. Go to Layer > New Adjustment Layer > Curves and pull the line upward to brighten the background. On the Curves layer mask, paint with a soft black brush to protect the left side of the image from the brightening effect.
Then add a second Curves adjustment layer, this time pulling the line downward to darken things. Use a soft black brush on its mask to protect the right side. The result is a background with natural-feeling variance — darker on one side, lighter on the other — which gives the scene directionality and draws the eye inward.
This two-layer lighting technique is simple but effective. Plus, you can revisit these layers anytime to adjust the balance.
Bringing in the Ground
Open your ground stock photo. Before moving it into your main document, create a new layer and use the Clone Stamp Tool (S) to remove any distracting branches cluttering the ground surface.
Once you’re happy with the cleanup, press Cmd/Ctrl+Option/Alt+Shift+E to merge your layers. Then drag the merged result into your main canvas.
Add a layer mask to the ground layer by clicking the second button at the bottom of the Layers panel. Paint with a soft black brush along the edges where the ground meets the background trees. The goal is a smooth, invisible blend — no harsh lines, no obvious seams.
Softening and Color-Matching the Ground
Apply Gaussian Blur at 4px to the ground layer. This matters because a sharply detailed foreground against a blurred background looks inconsistent. But use the Filter Mask to paint back the sharpness in the closest foreground areas — the ground right at your feet should stay crisp while the middle distance softens.
Finally, add a Hue/Saturation adjustment layer with a Clipping Mask (Layer > New Adjustment Layer > Hue/Saturation). Clipping it to the ground layer means your color changes only affect that layer, not everything below it. Shift the hues toward warm autumn tones so the ground matches the forest’s seasonal palette.
Adding the Model and Refining the Composite
With your environment built, bring in your dancer. Extract her carefully from the original photo using whichever method suits the image — a clean extraction makes everything downstream much easier. Position her within the scene where the lighting reads most believably.
Spend real time on this stage. Adjust her color temperature and saturation to match the forest’s warm, golden tones. Check where light falls in the background and make sure her highlights and shadows align. A dancer lit from the left in a scene where light comes from the right will always look pasted in, no matter how clean the cutout.
Add subtle shading around her edges using soft brushes at low opacity. This grounds her in the environment and removes that telltale “floating” quality that plagues quick composites.
Building the Lighting Effects
Two additional stock photos create the magical lighting layer that gives this manipulation its emotional punch. Place each light stock over your composite and experiment with blend modes — Screen and Soft Light both work beautifully depending on the stock.
Position the light sources so they interact naturally with the dancer and the surrounding trees. Mask away any parts that feel too strong or land in the wrong place. The goal is glowing, organic light that feels like it belongs to the forest, not something dropped in afterward.
This step is where you can really personalize the piece. Push the light warmer, add a cool rim light from behind, or keep it minimal and ethereal. Trust your eye.

Final Adjustments and Color Grading
Pull everything together with a few final adjustment layers sitting above your entire layer stack. A subtle Color Balance shift toward warm midtones deepens the autumn atmosphere. A Selective Color adjustment lets you push the greens and yellows in specific directions without affecting skin tones. A gentle Curves layer adds final contrast and lifts the shadows just enough to preserve detail.
Step back and look at the whole image. Does the dancer feel like she belongs in that forest? Does the light make sense? Does the mood read as emotional and cinematic? If anything still feels disconnected, revisit your masking or tweak the color balance between foreground and background.
Photo manipulation is patient work. But each small adjustment compounds, and the final result is always worth the process. Start with these techniques, experiment freely, and make this scene your own.