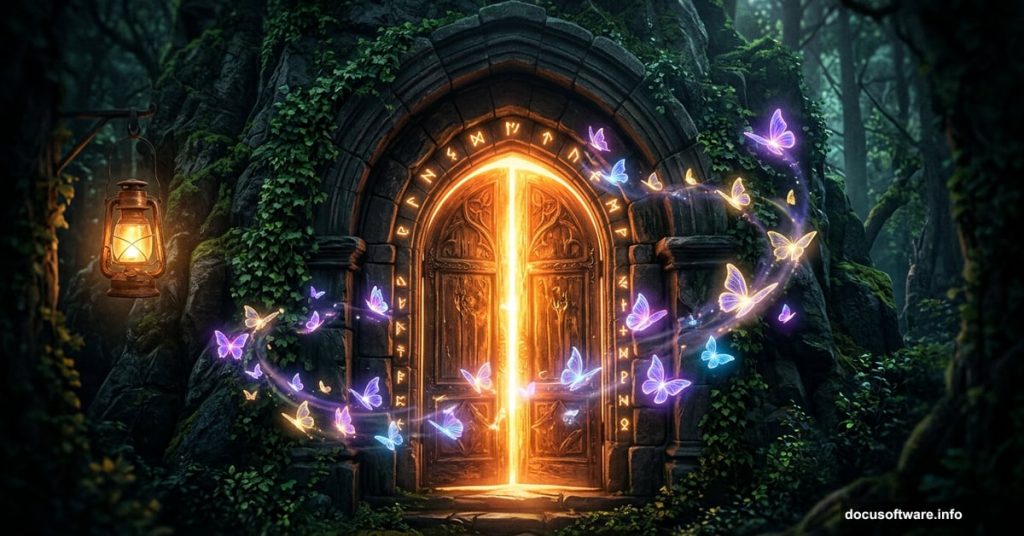
Ever look at those dreamy, magical photo manipulations online and wonder how people actually make them? The ones with glowing butterflies, moody doorways, and light that seems to come from nowhere? Good news — they’re not as mysterious as they look.
This tutorial walks you through building one of those scenes yourself. We’ll combine two door images, add a glowing lamp, and fill the whole thing with magical butterflies. Along the way, you’ll get comfortable with adjustment layers, masking, and painting light effects that really sell the fantasy mood.
Grab these free resources before you start: Door 1, Door 2, a lamp image, and a butterflies stock photo. Once you have those ready, let’s build something magical.
Set Up Your Canvas and Drop In the First Door
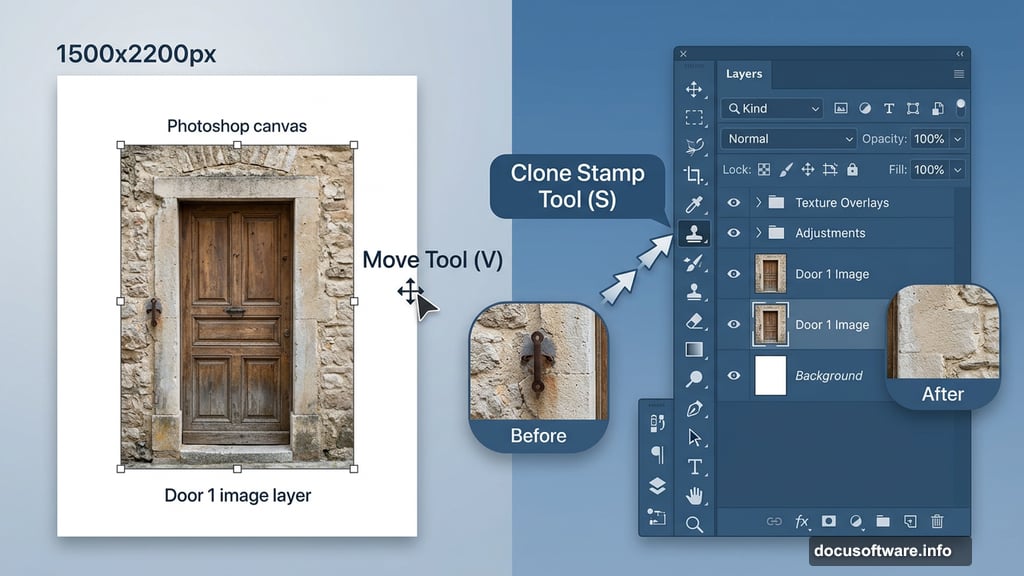
Start by creating a new document in Photoshop. Set the dimensions to 1500 x 2200 pixels and fill the background with white. This tall, portrait-style canvas gives the scene that dramatic, cinematic feel right from the start.
Open your Door 1 image and drag it onto the canvas using the Move Tool (V). Position it so it fills the frame nicely. Don’t stress about perfect placement just yet — you’ll refine everything as layers build up.
Clean Up the Wall With Clone Stamp
Here’s where the real editing starts. Hit Ctrl+Shift+N to create a fresh new layer, then grab the Clone Stamp Tool (S).
Look at the iron fixture on the wall beside the door. That detail doesn’t fit the fantasy vibe we’re going for. Use the Clone Stamp to sample the surrounding wall texture and paint over it. Work in small strokes and vary your sample point often. That way the repair looks natural instead of smeared.
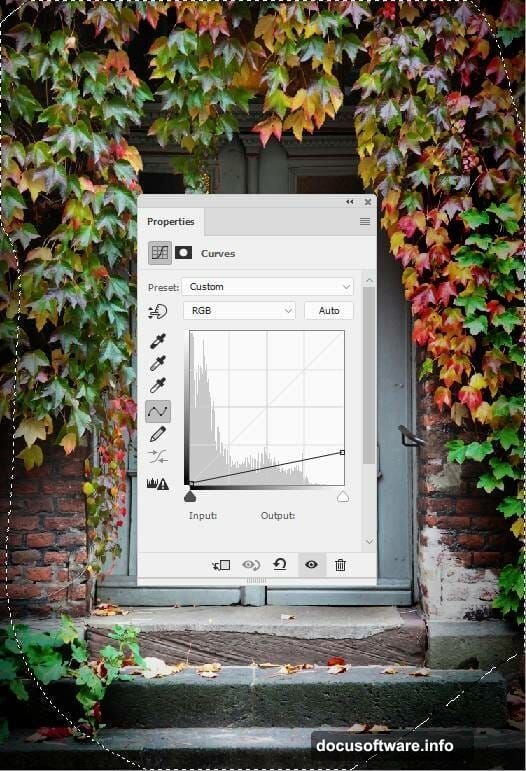
Shape the Mood With Curves Adjustment Layers
Now comes the fun part — building atmosphere with light and shadow.
Go to Layer > New Adjustment Layer > Curves. Push the contrast up and deepen the shadows. This immediately makes the scene feel more dramatic. But you don’t want the whole image to go dark, so grab the Brush Tool (B), select a soft round brush, and paint with black on the layer mask. Mask off the center of the door and the steps below it. This keeps the middle bright while the edges darken naturally.
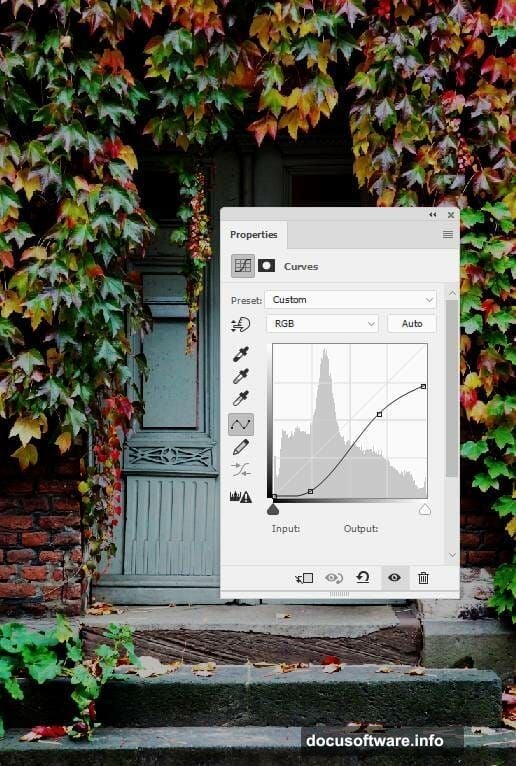
Add a second Curves adjustment layer for even more depth. This one targets the sides and corners specifically. Again, paint black on the mask over the center area so only the outer edges feel the darkening effect. Think of it like vignetting — it draws the eye inward and creates a sense of mystery.
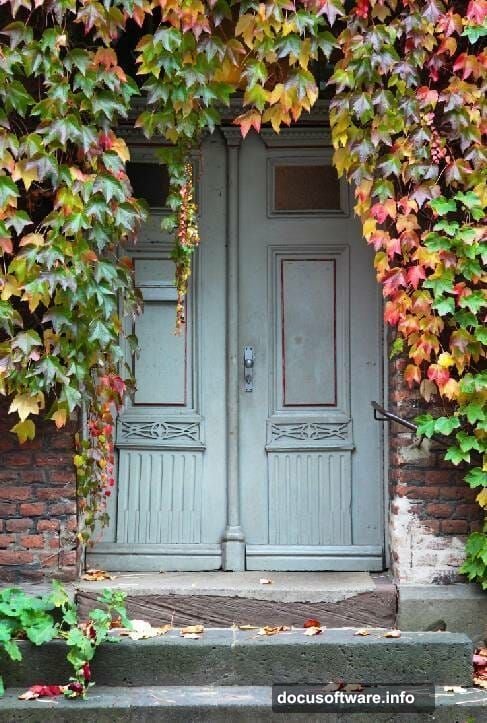
Blend In the Second Door
Open Door 2 and drag it into your composition. Use Free Transform (Ctrl+T) to resize and position it so it lines up with the existing door beneath it.
Now comes the masking work. Click the mask icon at the bottom of the Layers panel to add a layer mask to Door 2. Switch between hard and soft black brushes to blend the two doors together seamlessly. Pay extra attention around the ivy details — those organic edges need careful, patient masking to look convincing.
Add a Curves adjustment layer directly above Door 2 and set it as a Clipping Mask. This means it only affects that one layer. Use soft and medium-hard black brushes on the mask to soften the dark effect along the lower portion of the door and around the ivy on both sides.
Add Color Grading for That Fantasy Feel
A fantasy scene needs a unified color palette. Two adjustment layers handle this beautifully.
First, create a Gradient Map adjustment layer at the top of your layer stack. Set the gradient colors to #e10019 (a rich red) and #00601b (a deep forest green). These two tones together create an otherworldly, slightly eerie warmth. Drop the layer opacity to 20% — subtle is the goal here. You want a color influence, not a full color wash.
Next, add a Color Balance adjustment layer. Tweak the Midtones and Highlights settings to push the colors toward your fantasy palette. Warmer midtones and cooler highlights work beautifully for this kind of scene. Experiment until the whole composition feels cohesive rather than like two separate photos stitched together.
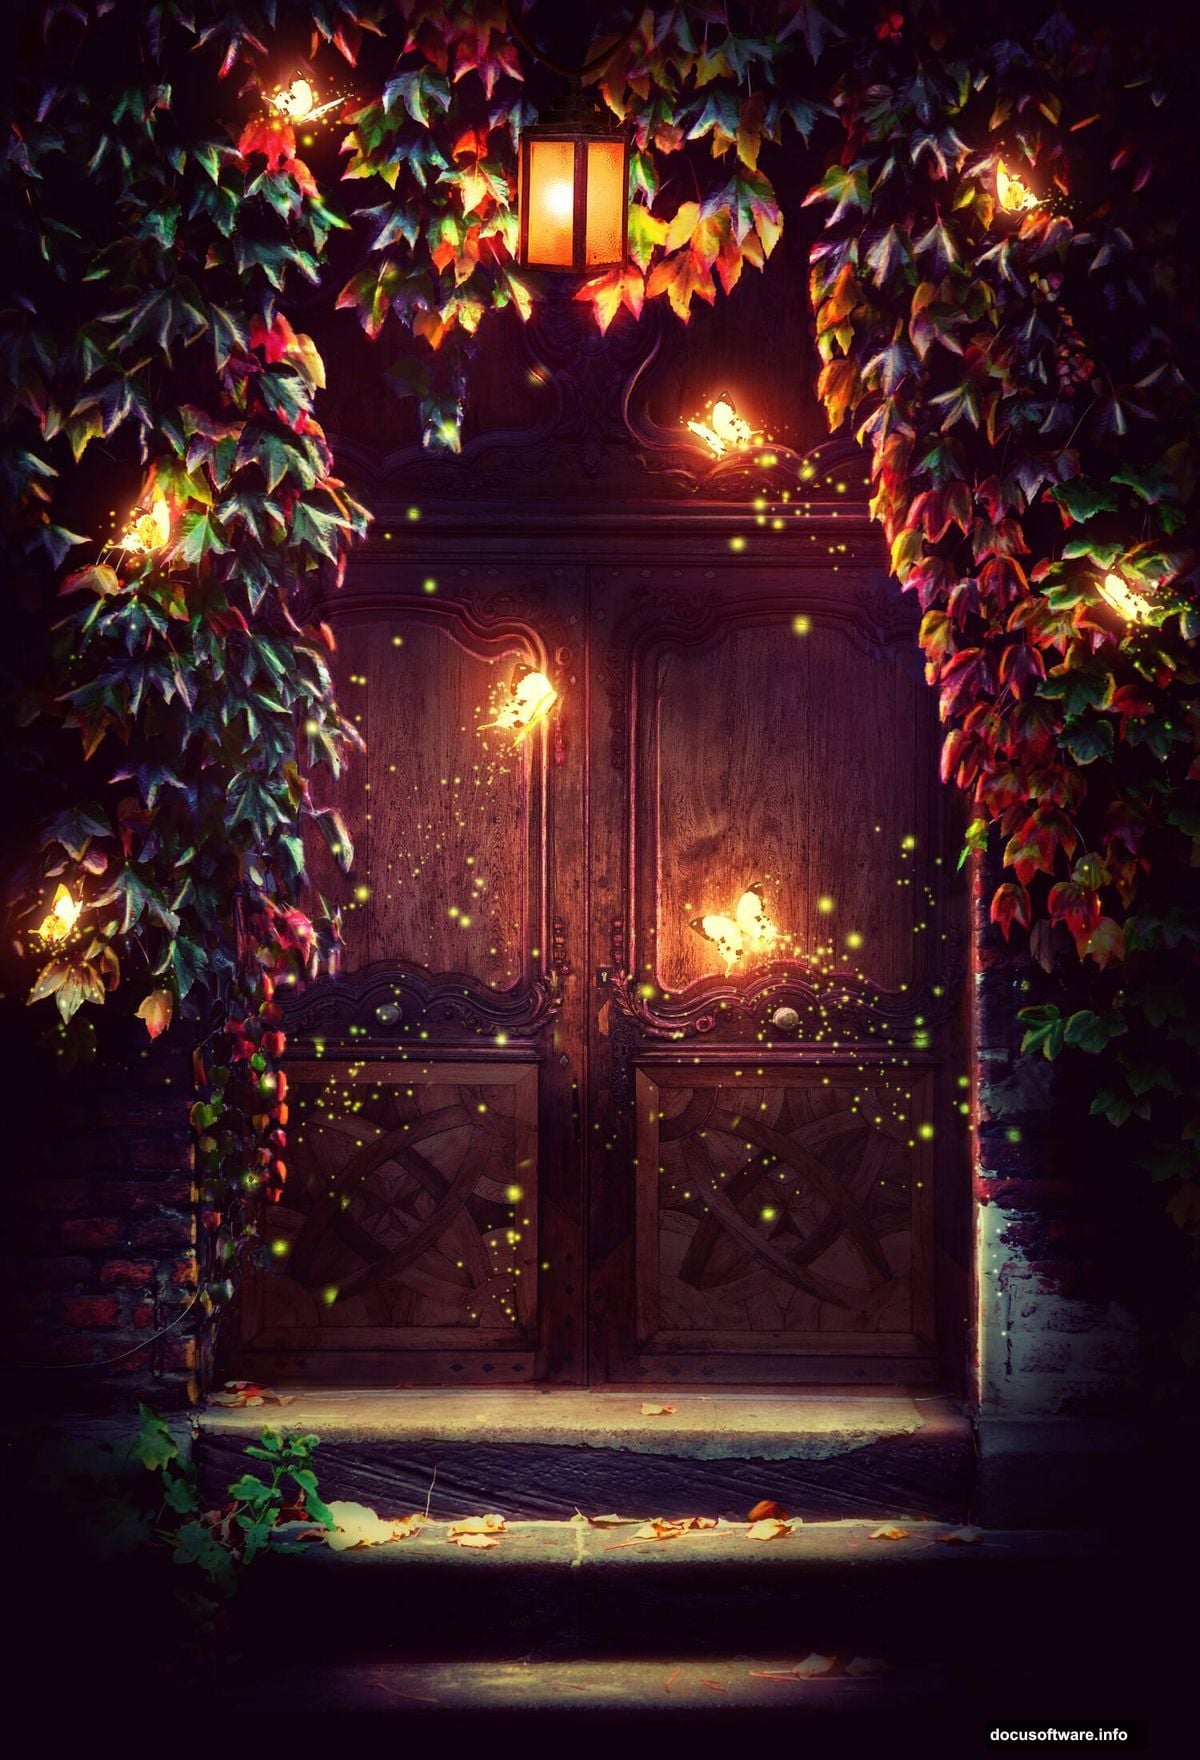
Bring In the Lamp and Paint the Light
With your doors blended and color-graded, it’s time to add the lamp. Place it in a natural position near the door frame where a real lamp might hang. Scale it down with Free Transform until it fits convincingly in the scene.
This is where the magic literally starts. Create a new layer and set it to Screen blending mode. Pick a warm yellow-orange color and use a very soft, large round brush at low opacity to paint a glow around the lamp. Build it up slowly with multiple strokes rather than one heavy application. The goal is a soft, radiant halo that bleeds outward naturally.
Add another layer set to Overlay mode and paint a brighter, tighter glow right at the lamp’s light source. This two-layer approach — Screen for the wide ambient glow, Overlay for the tight hot spot — sells the illusion incredibly well.
Place the Butterflies and Make Them Glow
Open your butterfly stock image and extract the butterflies from their background. Scatter them across your scene, varying their sizes to create depth. Butterflies closer to the viewer should be larger. Ones farther back should be smaller and slightly blurred.
For each butterfly cluster, add a Curves adjustment layer clipped to that group. Push the luminosity up to make them feel like they’re lit from within. Then create a new Screen mode layer and paint soft colored glows around individual butterflies using the same technique as the lamp. Warm golds, pale blues, and soft greens all work well together here.
Paint Magical Dots and Refine the Light
This final step transforms a nice composite into something genuinely enchanting. Create a new layer and set it to Screen mode. Choose a small, soft brush and pick a bright warm color. Paint tiny dots scattered around the butterflies and lamp area. Vary the brush size between strokes. Some dots should be tiny pinpoints, others slightly larger soft blobs.
These dots mimic floating particles and magical dust catching the light. They’re simple but wildly effective.
Finally, do one last pass with a large soft brush on a new Overlay layer. Lightly paint warm light across the center of the scene to push the viewer’s eye toward the door and lamp. This ties every element together under one consistent light source and gives the whole image a polished, finished quality.
Building fantasy photo manipulations like this is mostly about patience with masking and confidence with light painting. Once you understand how adjustment layers stack and interact, you can apply these same techniques to any scene. Start simple, work in small steps, and trust that the atmosphere builds gradually — just like real magic.