
There’s something genuinely magical about transforming a simple portrait into a dramatic celestial scene. This tutorial walks you through building a flying angel photo manipulation from scratch — complete with moody storm clouds, glowing feathered wings, and floating particles that give the whole composition an otherworldly feel.
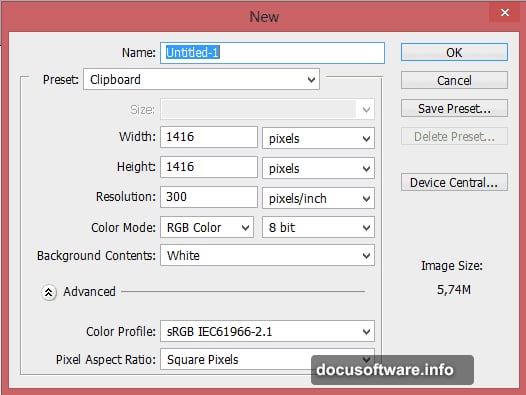
The final result is a 1416×1416 pixel image sized perfectly for a CD cover. So you’ll end up with something polished enough to actually use.
Here’s what you’ll need before getting started:
- Dark Clouds Ahead — stock photo for background
- A Slow Fall — mjranum-stock model image
- Wing PNG 1 — evelivesey wing resource
Got everything? Let’s build this thing.
Setting Up Your Dramatic Cloud Background
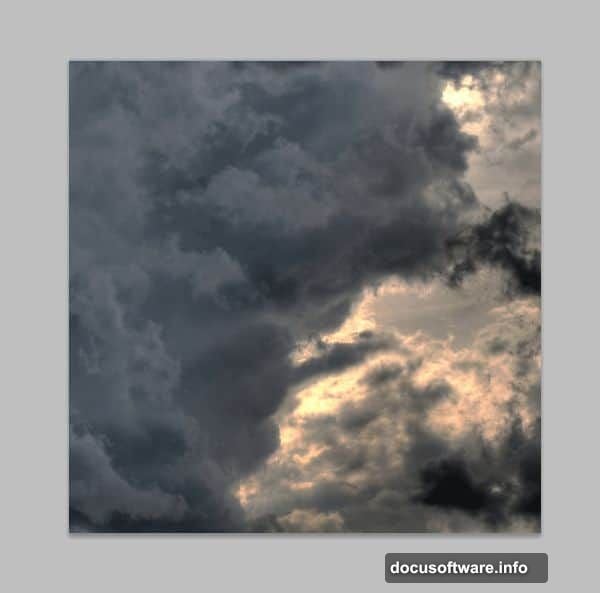
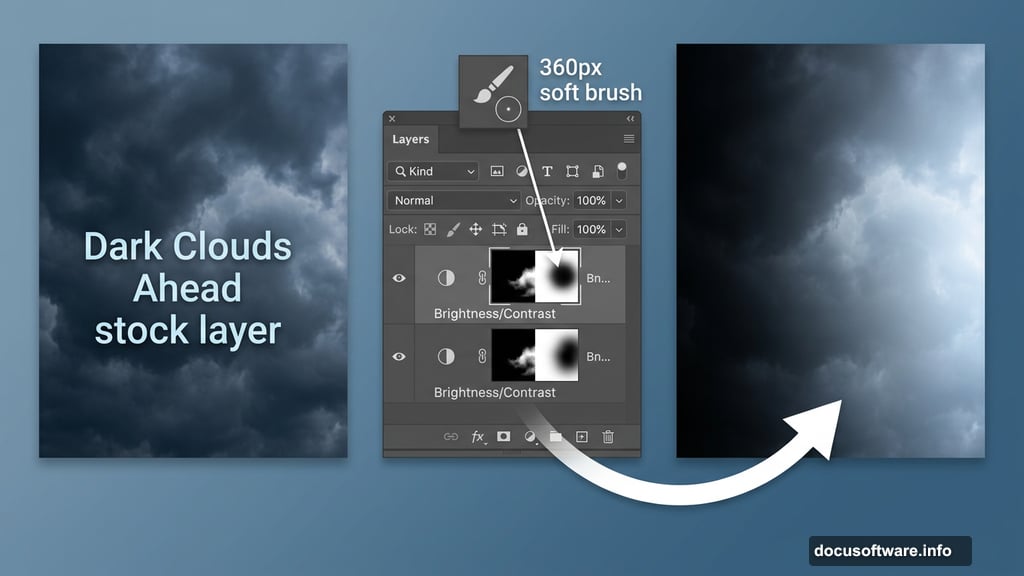
First, create a new document at 1416×1416 pixels. Then paste your “Dark Clouds Ahead” stock photo as the base layer.
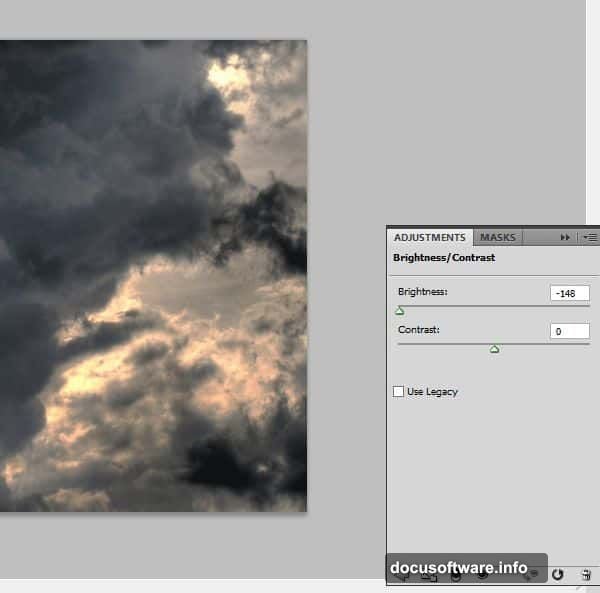
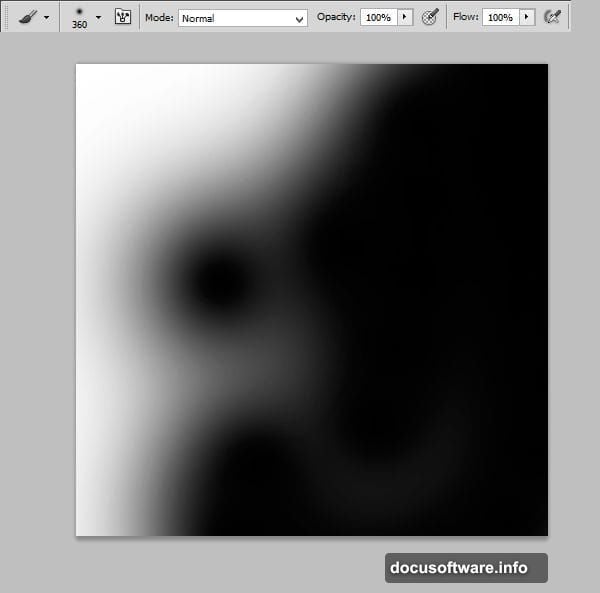
Right away, the background needs some tonal work. Add a new adjustment layer via Layer > New Adjustment Layer > Brightness/Contrast. Apply your settings, but here’s the important part: the image will look too dark overall. So you’ll need to paint a mask.
Select the mask thumbnail on that adjustment layer. Grab a soft, rounded brush at about 360 pixels and gently paint along the right side of the image. This brings light back into that area while keeping the dramatic darkness on the left. The goal is a natural gradient feel, not a hard edge.
Still not quite right? Add a second Brightness/Contrast adjustment layer and fine-tune from there. Two subtle adjustments beat one heavy-handed one every time.
Adding Warm Light to the Background
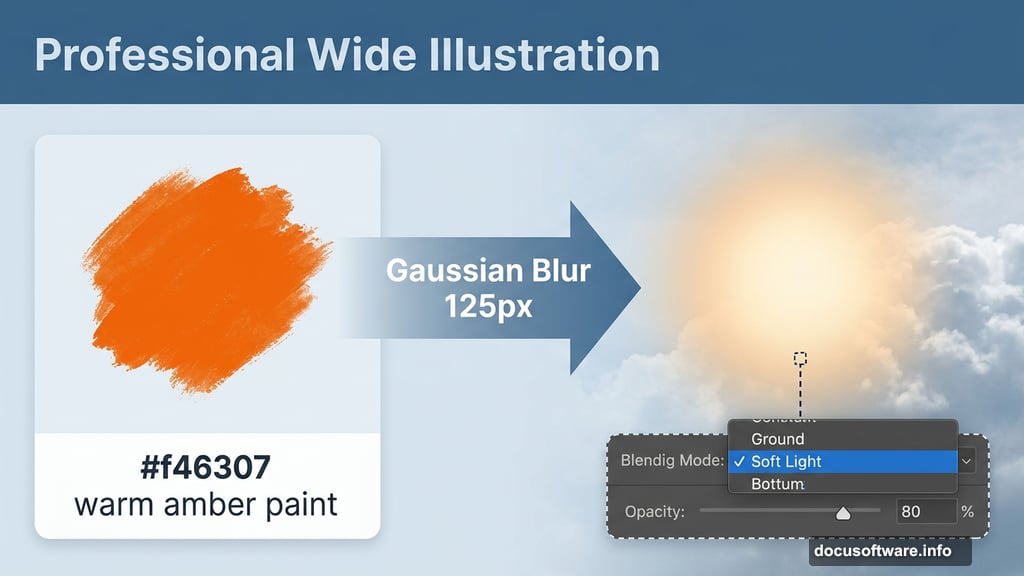
Now for one of the most satisfying steps in the whole process. Create a new empty layer above your adjustments.
Using that same soft brush, paint with #f46307 — a warm amber-orange — wherever you want light to appear to glow through the clouds. Don’t worry about it looking messy right now.
Next, go to Filter > Blur > Gaussian Blur and set it to 125 pixels. That turns your rough brush strokes into a beautiful soft glow. Then change the layer’s blend mode to Soft Light and drop the opacity to 80%.
The result is a warm, fiery light source that feels completely natural. It also sets up the color story for the rest of the composition.
Placing and Masking the Model
Paste your “A Slow Fall” stock image and mask the model carefully from the background. Standard stuff, but take your time here. Clean edges pay off in every step that follows.
The silk or drapery material deserves special attention. Switch to a 38-pixel soft brush and reduce its opacity to about 40%. Gently paint over the lighter areas of the fabric, varying both the opacity and the brush size as you go. Use less opacity on the folds and more on the broader flat surfaces.
This technique catches highlights the way fabric actually behaves in real light. It’s subtle, but it’s what separates a convincing composite from something that looks obviously assembled.
Preparing Edges for Particle Effects
Before moving on to the wings, prep the model’s edges for the particle effect coming later. Select a rough round bristle brush in black, switch to the model’s mask layer, and loosely paint along the edges of the drapery.
This breaks up the silhouette in a natural way. When you add particles later, they’ll feel like they’re genuinely dissolving off the material rather than floating randomly in front of it.
![Step-by-step breakdown showing cloud background setup, model masking, and wing placement in the Photoshop angel manipulation tutorial]
Color Grading the Model with Clipping Masks
Here’s where the lighting really comes together. Add a Color Balance adjustment layer directly above your model layer. Then right-click it and choose Create Clipping Mask so the adjustment only affects the model below.
Remember that warm orange light source you painted on the right side? Now mirror that logic in the Color Balance mask. Paint the mask so the warm tones affect the right side of the model and fade naturally toward the left.
This step makes the model actually look like she belongs in that lighting environment. Without it, even a perfect cutout feels pasted on.
Building the Glowing Wings
Time for the most visually dramatic part of the whole project.
Paste your first wing image beneath the model layer. Use Free Transform to scale and position it, then switch to Edit > Transform > Perspective to angle it naturally as if it’s extending from the model’s back. Repeat the process with the second wing, mirroring the placement on the opposite side.
Once both wings are positioned, hold Ctrl and click both wing layers to select them simultaneously. Right-click and choose Convert to Smart Object. This keeps all your wing content in one editable container and — crucially — lets you apply non-destructive Smart Filters.
Now go to Filter > Filter Gallery. Navigate to Stylize > Glowing Edges and apply the effect. The Smart Object approach means you can go back and adjust these settings anytime without destructive changes to your original wing images.
The glowing edges filter transforms the feather outlines into luminous streaks of light. Combined with the warm background glow, the wings look like they’re radiating their own energy.
Bringing It All Together
At this point your composition has a moody atmospheric background, a naturally lit model with flowing drapery, and wings that genuinely glow. The particle work builds on top of all of this to add movement and magic.
The real lesson hidden inside this whole process is how much the lighting story carries the image. Every decision — the orange glow, the Color Balance clipping mask, the Glowing Edges filter — points back to that single warm light source on the right. Consistency in lighting is what makes a composite feel believable rather than assembled.
If you’re working through this for the first time, don’t rush the masking steps. Spend time on those edges. The particle effects and glowing wings are dramatic and fun, but they only work when the foundation underneath them is solid.
Work carefully, save often, and keep experimenting with blend modes. The Soft Light mode especially rewards curious exploration.