Mixed media artwork sounds intimidating. But combining photography, textures, and abstract design elements is more approachable than you might think.
This tutorial walks you through building a moody matte portrait composite from scratch. You’ll blend a landscape, a model, and a deer together using masks and adjustment layers. Then you’ll add abstract effects created in Illustrator. Finally, you’ll pull everything together with color grading. All you need is Photoshop CS3 and Illustrator CS or newer.
Let’s get into it.
What You Need Before Starting
Grab these stock resources before opening Photoshop:
- Landscape image
- Paper texture pack
- Female model photo
- Deer image
- Forest render
- Flower images (two variations)
- Circles graphic
- Splatter brushes
Having everything ready saves you from stopping mid-flow. Trust me, interrupting your creative momentum to hunt for assets is the fastest way to lose your focus.
Building the Background Scene
Step 1: New Document Setup
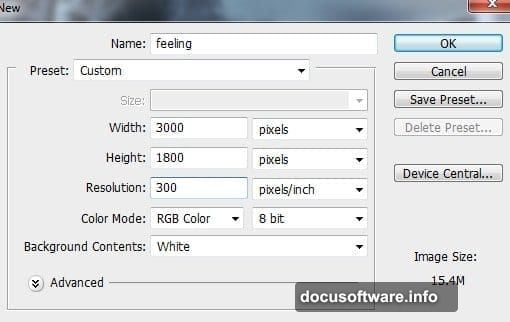
Create a new Photoshop document using your preferred canvas settings. Think about your final output size here. Bigger is better if you plan to print or display at large scale.
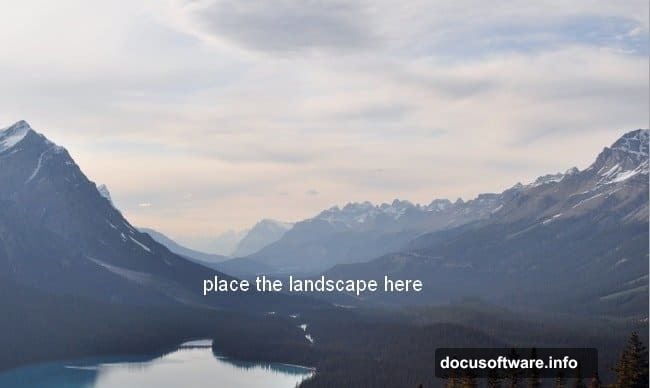
Step 2: Drop in the Landscape
Open your landscape image. Use the Move Tool (V) to drag it onto your canvas. Then hit Cmd/Ctrl+T to open Free Transform and resize it to fill the frame the way you want.
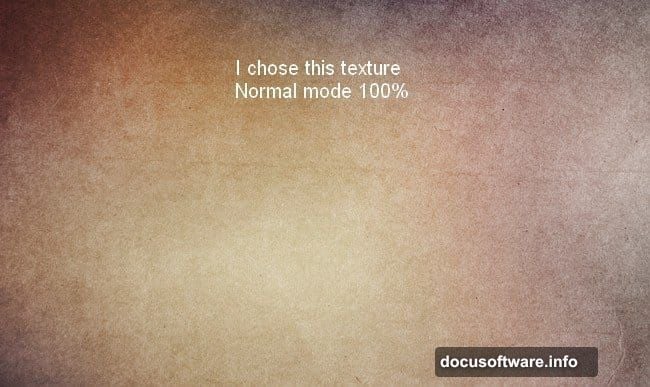
Step 3: Add the Paper Texture
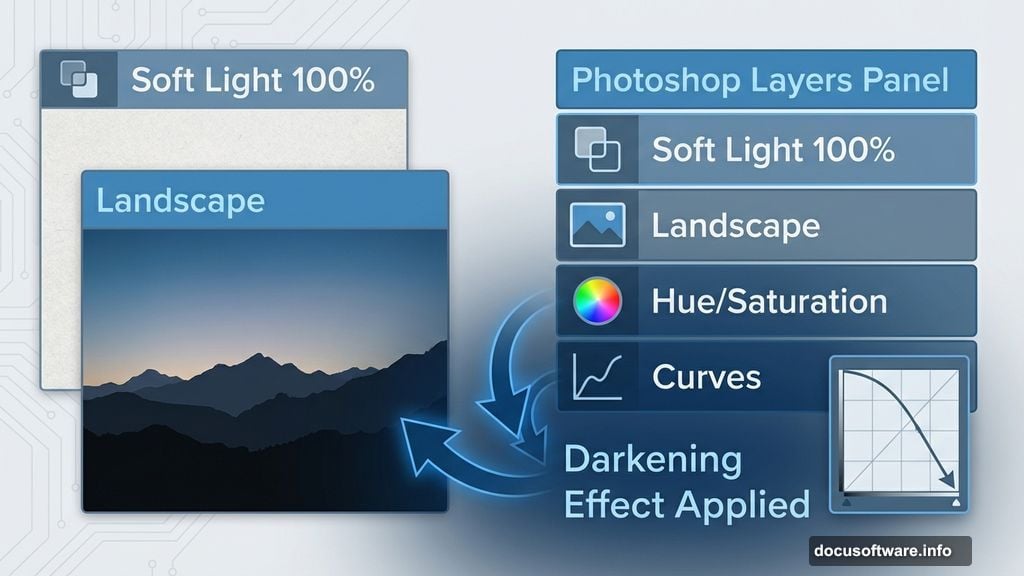
Open your paper texture pack and pick the one that feels right for the mood you’re going for. Place it over the landscape layer. Change the blend mode to Soft Light at 100%. This adds subtle grain and warmth without overwhelming the photo underneath.
Step 4: Adjust Contrast and Color
Now add two adjustment layers to set the overall tone. Go to Layer > New Adjustment Layer > Hue/Saturation to shift the color mood. Then add a Curves adjustment layer and drag the center point downward to darken the scene. These two layers working together give you far more control than simply lowering brightness.
![A Photoshop workspace showing a landscape background with paper texture overlay and Curves adjustment layer panel visible]
Placing and Masking the Model
Step 5: Bring in the Model
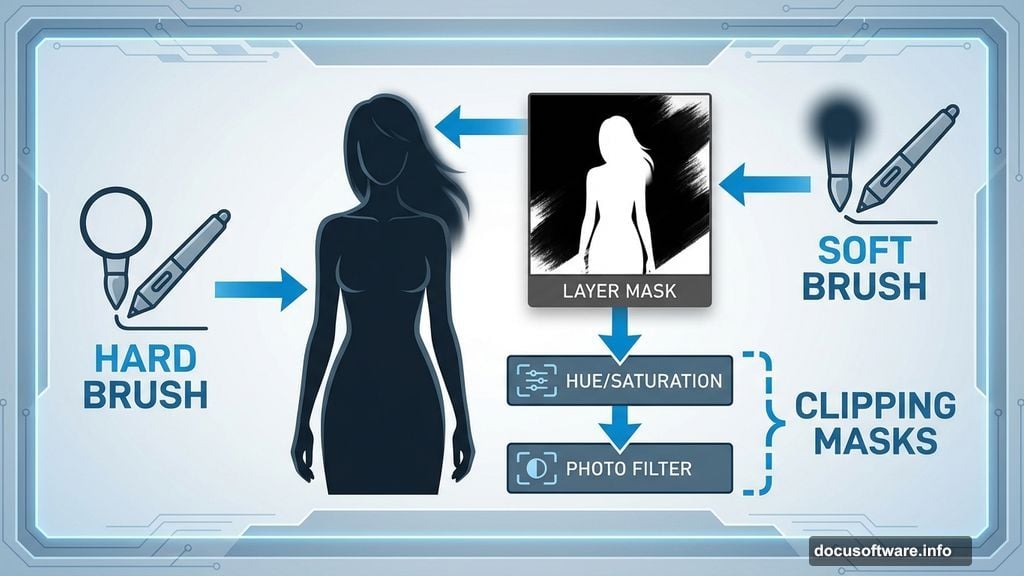
Place the woman image in the center of your canvas. To remove the background, add a layer mask by clicking the mask icon at the bottom of the Layers panel. Use a hard brush with black paint to carefully erase the background around her. Switch to a softer brush near hair and fine edges for cleaner results.
Step 6: Color Match the Model to the Scene
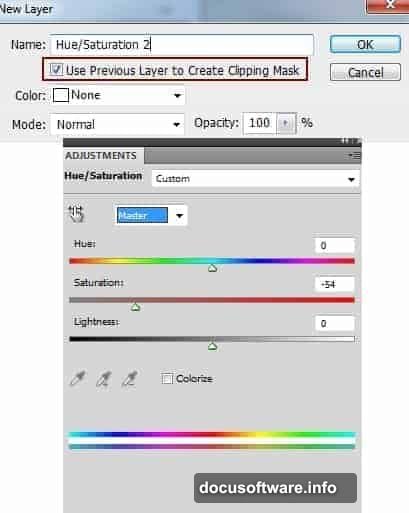
The model probably looks too bright and saturated compared to your moody background. Fix this with two adjustment layers, both set as Clipping Masks so they only affect the model layer.
First, add a Hue/Saturation adjustment and reduce saturation to help her blend in. Then add a Photo Filter adjustment to tint her coloring toward the overall palette of the scene. Cool tones work beautifully for matte portrait aesthetics.
Step 7: Darken the Model Selectively
Add a Curves adjustment layer clipped to the model. Drag the center point down to darken her overall. Here’s the key part: click the layer mask thumbnail attached to that Curves layer, pick a soft round brush, set your foreground color to black, and paint over the lighter areas of her face and skin where you want brightness to show through. This way, shadows deepen without flattening the natural highlights on her face.
Working with the Deer Layers
Step 8: Place and Duplicate the Deer
Drag the deer image onto your canvas and position it behind the model layer. Remove the background with a layer mask the same way you handled the model.
Now duplicate that deer layer and move the copy slightly to the right. On the duplicate’s layer mask, use a soft black brush to erase the left portion. This creates a subtle layered depth effect, almost like a ghostly double exposure.
Step 9: Add a White Color Fill for the Duplicate
Select the duplicated deer layer and go to Layer > New Fill Layer > Solid Color. Set the color to white and apply it as a Clipping Mask. On that fill layer’s mask, switch to a hard black brush and paint back over the horns area. This fades the body of the duplicate while keeping the horn detail visible. The result gives the deer a dreamy, semi-transparent quality.
Step 10: Group and Adjust the Deer
Select both deer layers and press Cmd/Ctrl+G to group them. Important: change the group’s blend mode from Pass Through to Normal at 100%. This contains the adjustment layers inside the group so they only affect the deer.
Inside the group, add a Hue/Saturation adjustment layer. Shift the deer’s coloring to match the cool, muted tones of your background and model. Small hue shifts go a long way here.
![Side-by-side view of the deer layers panel in Photoshop showing grouped layers with Hue/Saturation adjustment and layer masks applied]
Creating Abstract Effects in Illustrator
This is where the project gets really interesting. Switching to Illustrator lets you create crisp vector elements that photography alone can’t achieve.
Build geometric shapes, flowing lines, or abstract forms in Illustrator that complement the model’s silhouette. Circles, splatter patterns, and organic curves all work well for this style. Export your elements and bring them into Photoshop as Smart Objects so you keep the ability to scale without losing quality.
Place your forest render, flowers, and circle graphics around the model. Experiment with blend modes like Screen, Multiply, and Overlay to see how each element interacts with the layers underneath. Screen mode works especially well for bright abstract elements against darker backgrounds.
Final Color Grading
The last phase ties everything together. Add several adjustment layers above all your content layers. A subtle Gradient Map adjustment in soft light mode can unify all your tones beautifully. Follow that with a Color Balance layer to push shadows cooler and highlights warmer for that classic matte portrait feel.
A final Curves adjustment with a slight S-curve boosts contrast just enough to make the whole image feel finished rather than flat.
Step back and compare your final result to your canvas at Step 1. The transformation from plain landscape to layered, textured composite is exactly what makes this style so satisfying to create.
The skills you practice here, masking, adjustment layers, blend modes, and cross-app workflows between Photoshop and Illustrator, apply to almost every advanced compositing project you’ll ever tackle. So even if your first version isn’t perfect, you’re building a foundation that pays off fast.