
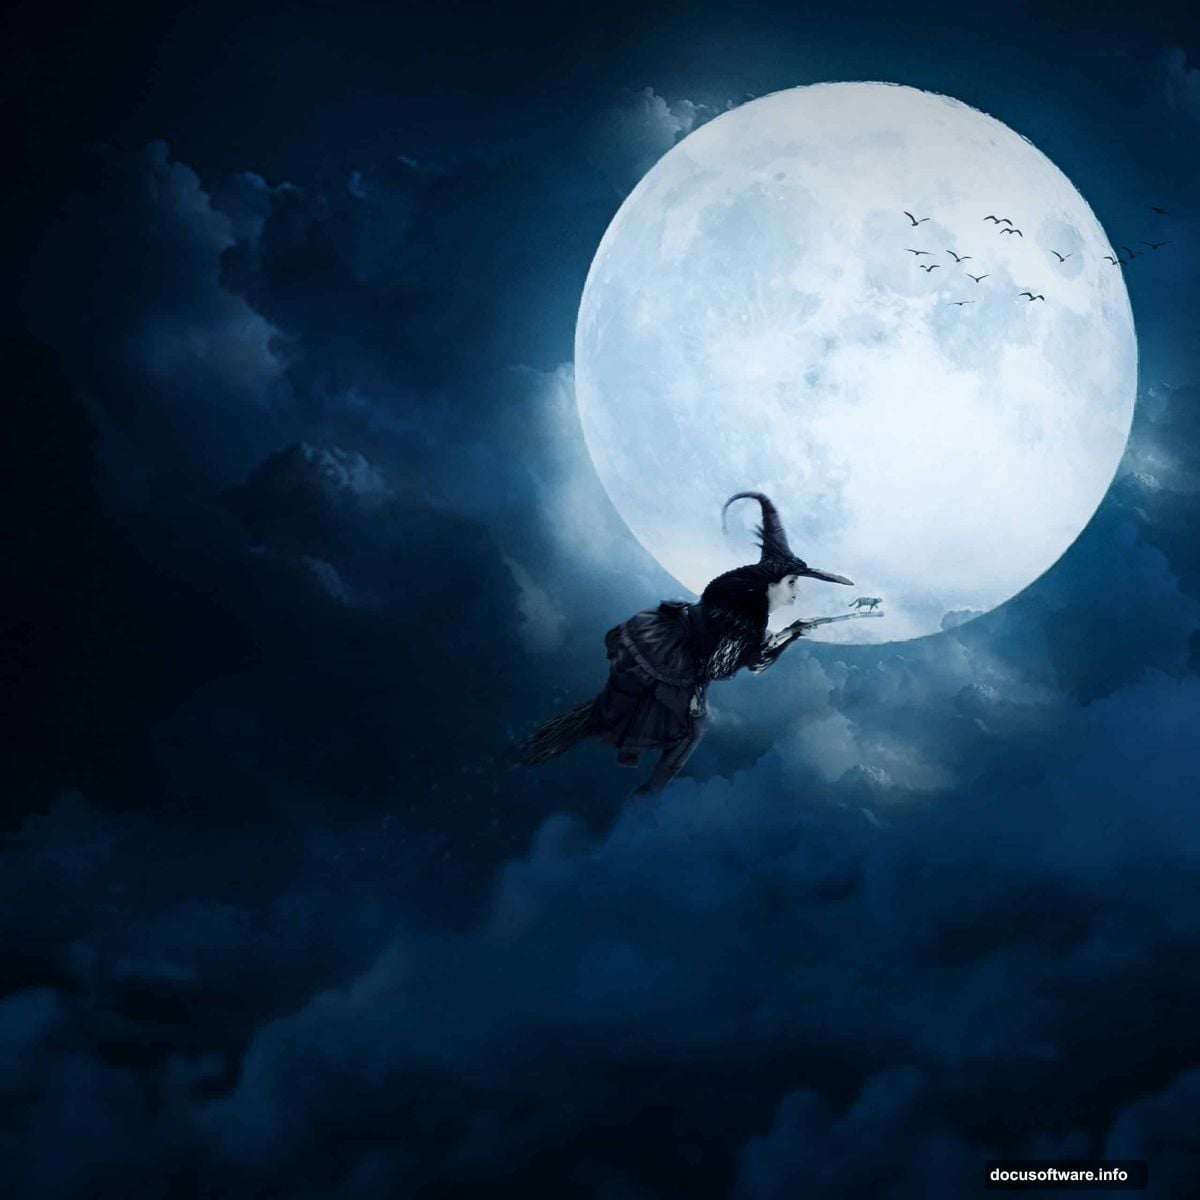
Halloween and Photoshop go together like fog machines and haunted houses. There’s something genuinely fun about taking a handful of separate photos and stitching them into one eerie, atmospheric scene that looks like it belongs on a movie poster.
This tutorial walks you through building a surreal Halloween composite using witches, cats, moons, clouds, and birds. Plus, you’ll get comfortable with some of Photoshop’s most powerful tools along the way, including Adjustment Layers, the Camera Raw Filter, and custom brushes.
Let’s get into it.
Setting Up Your Canvas First
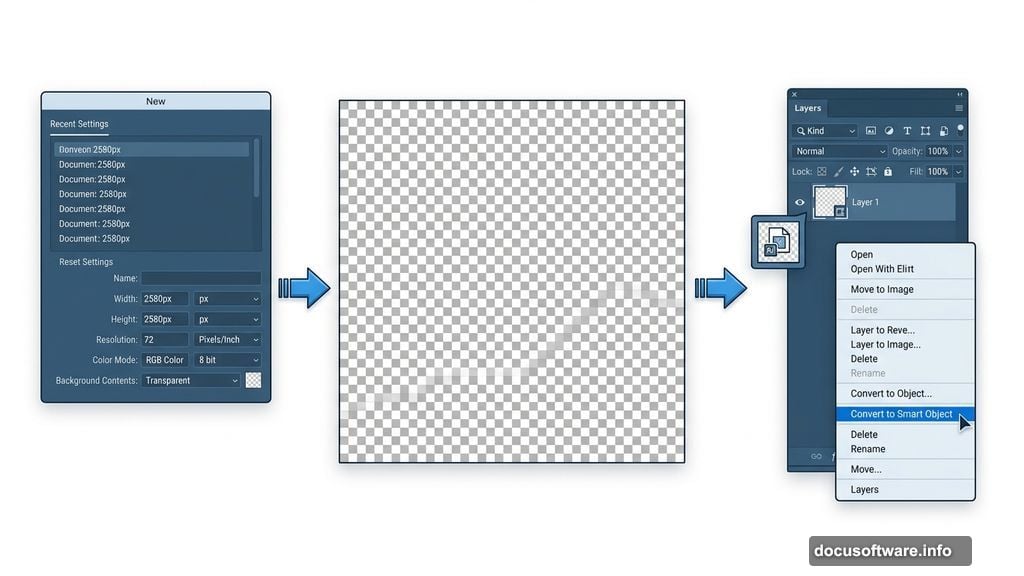
Every great composite starts with the right foundation. Open Photoshop and head to File > New to create a fresh document.
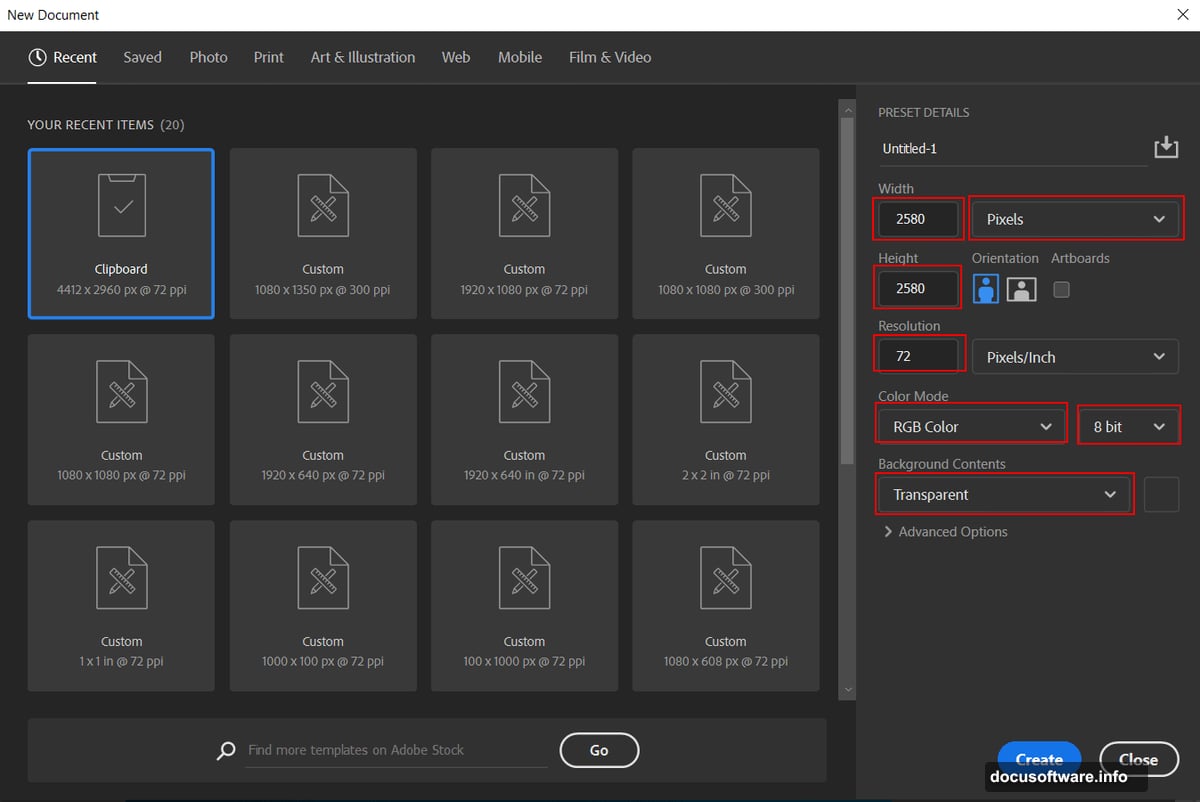
Use these settings to get started:
- Preset: Custom
- Width: 2580px
- Height: 2580px
- Resolution: 72px
- Color Mode: RGB Color, 8-bit
- Background Contents: Transparent
That square canvas gives you plenty of room to work with. And starting on a transparent background keeps your options open as you build up layers.
Placing and Prepping the Moon
The moon is the anchor of this whole scene. So naturally, it’s the first element to bring in.
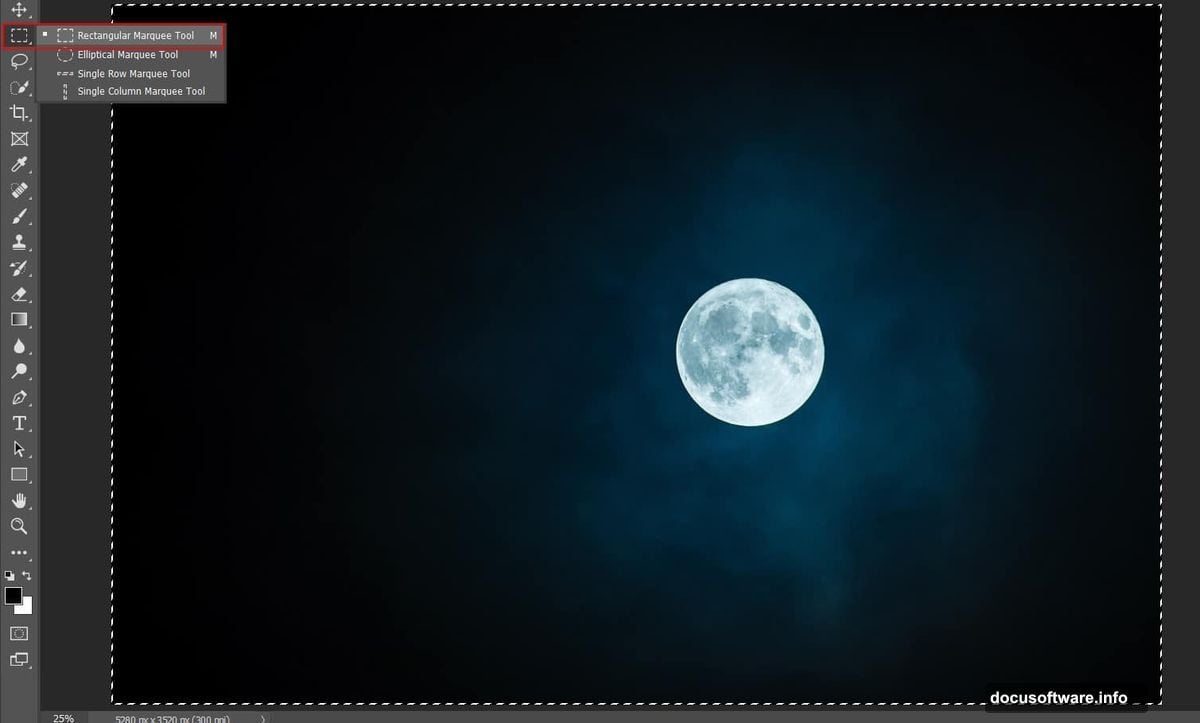
Go to File > Open and load your moon photo. Grab the Rectangular Marquee Tool (M), make your selection, then copy (Ctrl/Cmd + C) and paste (Ctrl/Cmd + V) it onto your canvas. Use the transform tool (Ctrl/Cmd + T) to resize and position it. Hold Alt + Shift to scale proportionally, or just Alt if you’re working in Photoshop CC.
Once you’re happy with the placement, right-click the layer and select Convert to Smart Object. This protects the image quality if you need to resize again later. Smart Objects are a habit worth building early.
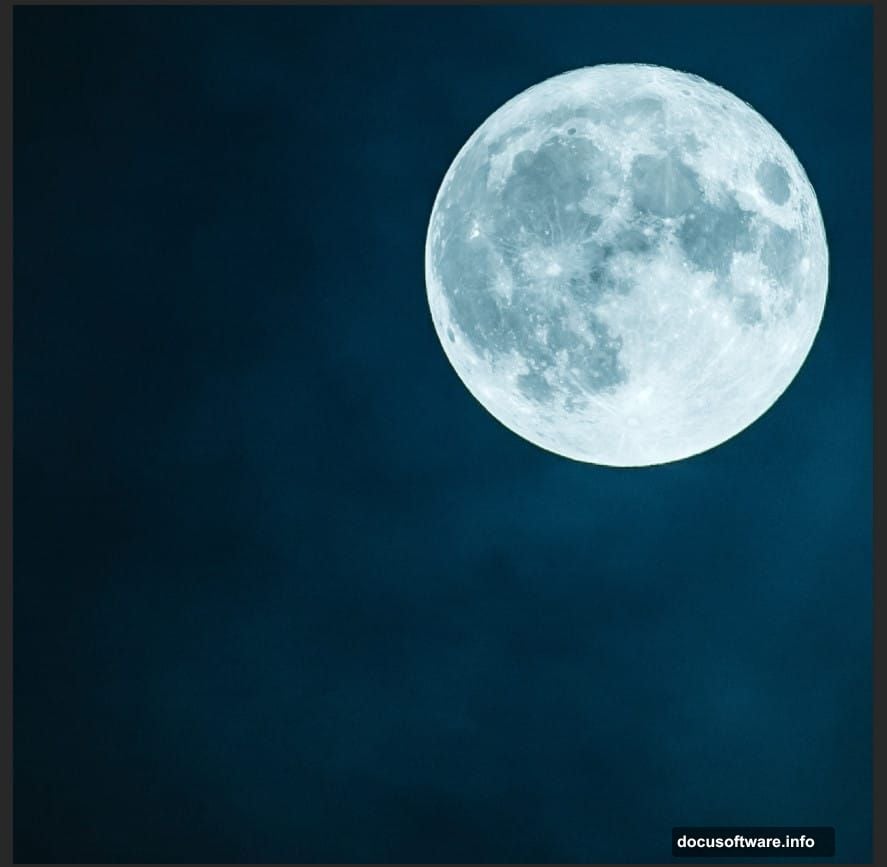
![A glowing full moon composited into a dark Photoshop canvas as the centerpiece of a Halloween scene]
Sculpting the Moon’s Glow with Adjustment Layers
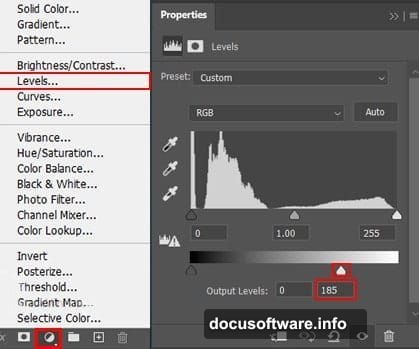
A raw moon photo rarely looks dramatic enough on its own. Two quick Adjustment Layers fix that.
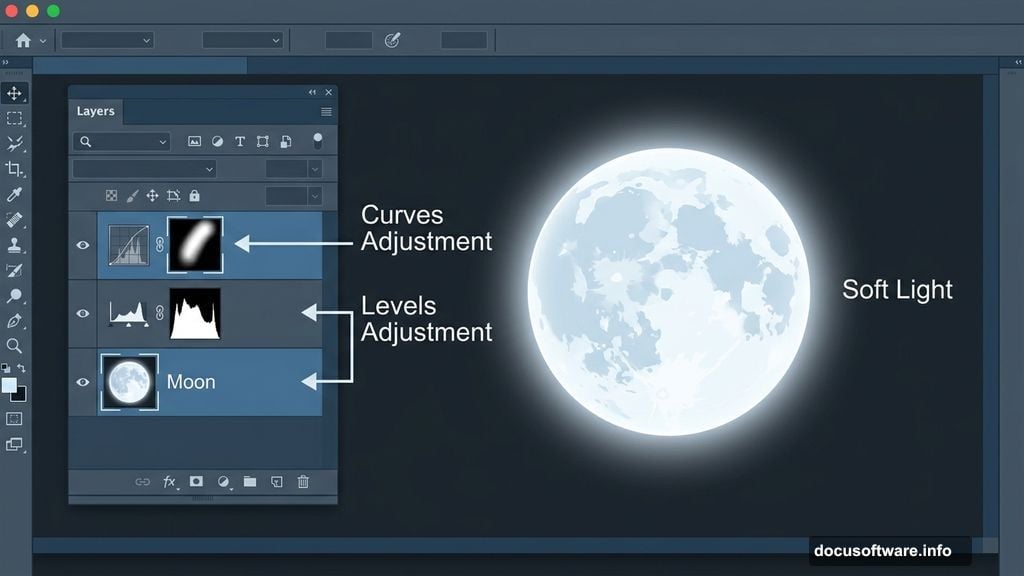
First, add a Levels Adjustment Layer to punch up the contrast. Then add a Curves Adjustment Layer and immediately press Ctrl/Cmd + I to invert the mask. This hides the adjustment from everything. Now grab the Brush Tool (B), pick a soft round brush, set your foreground color to white, and paint directly onto the moon. The brightness only shows up exactly where you paint it, giving you precise control.
That’s the beauty of masked Adjustment Layers. You’re not destructively changing anything. You’re just telling Photoshop where to apply the effect.
Adding That Dreamy Lunar Halo
Here’s a small touch that makes a big visual difference.
Create a new blank layer above your moon layers. Select the Brush Tool (B) with a large, soft round brush and white as your foreground color. Paint a single generous stroke right over the moon. Then set that layer’s Blend Mode to Soft Light and drop the Opacity to 64%.
Soft Light blends the white into the layers below rather than sitting on top of them harshly. The result is a soft, luminous halo that makes the moon feel like it’s actually glowing rather than just sitting flat on a dark background.
Importing Custom Brushes for the Clouds
This is where things get really fun. Custom brushes let you paint elements that would take ages to photograph and cut out separately.
Select the Brush Tool (B) and right-click anywhere on the canvas. Click the gear icon in the brush panel that pops up, then choose Import Brushes and navigate to your downloaded cloud brush set. They’ll load straight into your brush library.
Painting Atmospheric Clouds
Create a new layer above everything and set your foreground color to a deep blue, specifically #02557c. Select your cloud brush and start painting.
This step is genuinely about feel more than precision. Try a couple of different cloud brushes from the set. Vary your brush size between strokes. Build up the clouds in layers rather than trying to nail it in one pass. Check the reference images for the tutorial if you need a sense of how dense and where the clouds should sit.
The blue tone keeps the scene feeling cold and atmospheric rather than fluffy and cheerful. Halloween clouds should look like they belong in a storm.
![Custom cloud brushes painted in deep blue creating atmospheric Halloween clouds around the moon in Photoshop]
Bringing in the Birds
No spooky night sky is complete without a silhouette of birds cutting across the moon.
Go to File > Place and select your birds image. Position and resize it using the transform tool (Ctrl/Cmd + T). Keep the Blend Mode at Normal and bring the Opacity down to 65%. That slight transparency lets the background show through just enough to sell the idea that the birds are part of the scene rather than pasted on top of it.
Pulling It All Together with Final Adjustments
Once your scene elements are all placed, the real magic happens in the finishing adjustments. Gradient Map Adjustment Layers are your best friend here for pushing the overall color palette in a unified direction. They let you map shadows and highlights to specific colors, which is a fast way to give everything a cohesive tone.
For the final polish, run the Camera Raw Filter on a merged or stamped copy of your layers. Camera Raw gives you intuitive sliders for exposure, contrast, highlights, shadows, and color temperature. It’s essentially a darkroom for your digital composite. Spend some time here. Small tweaks to clarity and vibrance can completely transform how cinematic the final image feels.
Also bring in your witch, cat, and stars elements using the same Place and transform workflow you used for the birds. Use Stars Brushes on a new layer above the clouds for some scattered starlight that peeks through. Each element gets its own layer so you can adjust blend modes and opacity independently.
Working in composites this way means nothing is ever permanent. You can always come back, tweak a layer’s opacity, swap a blend mode, or repaint part of a cloud mask without starting over.
Building a scene like this really shows what Photoshop is capable of when you combine simple tools creatively. The moon, clouds, birds, and stars are all basic elements on their own. But layered together with thoughtful adjustments and a consistent color palette, they become something genuinely atmospheric. Give yourself permission to experiment with the cloud brushes especially. That step is more art than instruction, and the happy accidents you stumble into are often the best parts of the final image.