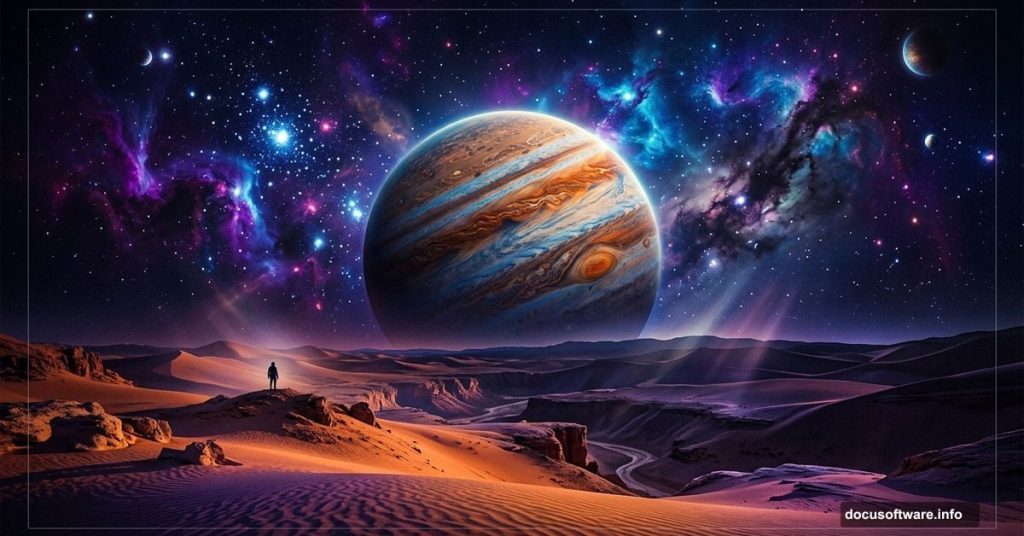
Ever stared at those jaw-dropping space artwork pieces and wondered how artists actually pull them off? The kind with moody desert landscapes, distant planets, and glowing nebula clouds all fused together into one cohesive sci-fi world? Good news — you can build something like that yourself, and it’s more approachable than it looks.
This walkthrough covers everything from setting up your night sky background to blending planets, a model, and abstract elements into a finished scene. You’ll practice combining stock images, working with adjustment layers, masking, and creating lighting effects that tie the whole composition together. All you need is Photoshop CS3 or newer.
Stock Resources You’ll Need First
Before opening Photoshop, gather your source materials. The tutorial uses a specific set of images, so having them ready saves time later.
Here’s what you’ll need:
- A model image (note: the original resource contains nudity)
- Star background pack
- Sky background
- Desert foreground image
- Light effect texture
- Four nebula textures (Nebula 1 through 4)
- Two planet images
- A wire triangle graphic
Pull all of these into a single folder on your desktop. Having assets organized before you start keeps your workflow smooth and frustration-free.
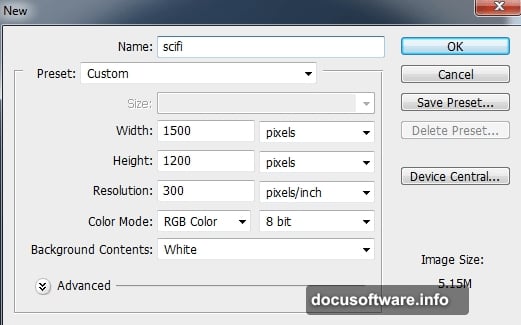
Step 1: Set Up Your Canvas
Create a new document in Photoshop using the tutorial’s recommended settings. This gives you the right resolution and color space for a detailed compositing project from the start.
Building the Night Sky Background
Laying Down the Base Gradient
Press Cmd/Ctrl+Shift+N to create a new layer. Hit G to activate the Gradient Tool, then choose Radial Gradient from the options bar.
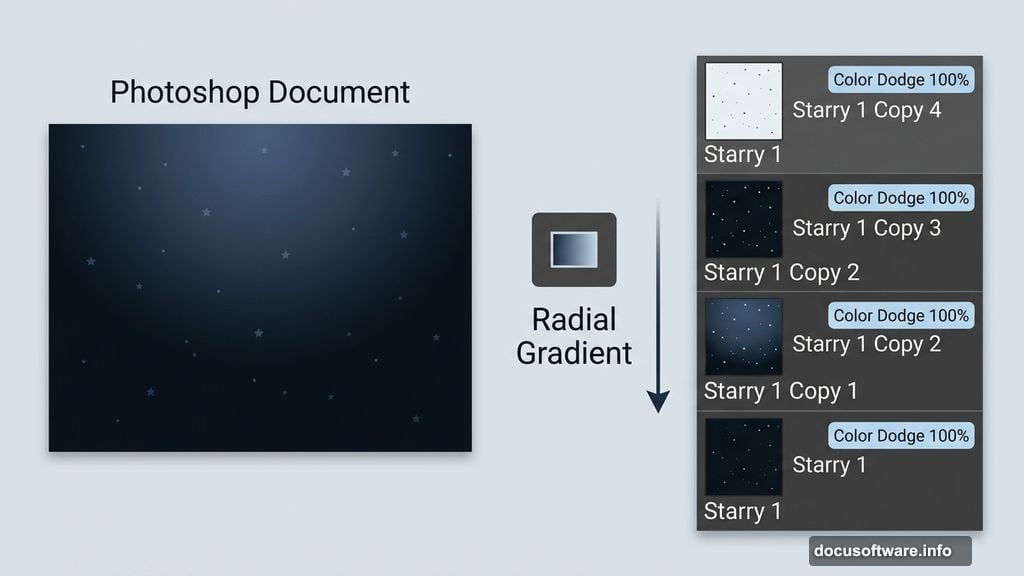
Set your colors to #384962 and #09131d — a muted blue and a deep navy-black. Drag a line from the top center of your canvas down to the bottom. This creates a natural-looking dark sky that fades from a subtle blue glow toward total darkness at the edges.
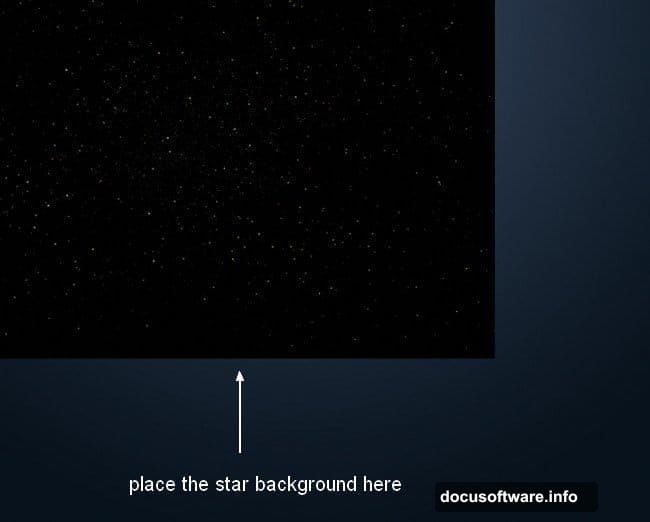
Adding Stars That Actually Pop
Open your star background pack and choose the “Starry 1” image. Drag it onto your main document and set the blend mode to Color Dodge at 100%.
Here’s where it gets interesting. Duplicate that starry layer three times and arrange the copies across the dark background. Spreading them around strengthens the overall starry effect and makes the night sky feel genuinely deep rather than flat. Color Dodge on multiple layers compounds the brightness of the stars, so even lighter details in the texture become visible.
Blending the Sky and Desert Environments
Soft-Light Sky Layer
Place the sky image over your document and change its blend mode to Soft Light at 100%. This blends the clouds and sky tones into the background without replacing what’s underneath.
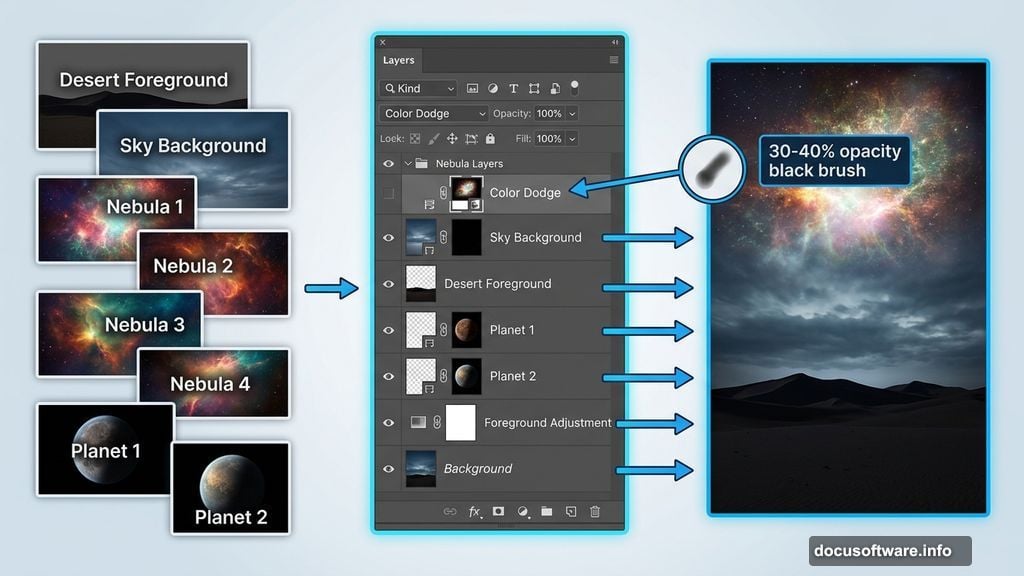
Add a layer mask by clicking the second button at the bottom of the Layers panel. Use a basic soft brush set to black with about 30-40% opacity to gently reduce the cloud effect in areas where you want the starry background to show through. Work slowly here — subtle strokes give you more control than aggressive erasing.
Drag the desert background image into your working document. Add a mask to this layer as well, then use a soft black brush to remove the hard sky edges from the desert photo. The goal is making it look like the desert exists within your sci-fi environment, not pasted on top of it.
Color-Matching the Desert
Raw stock photos rarely match each other straight out of the box. Two adjustment layers fix that here.
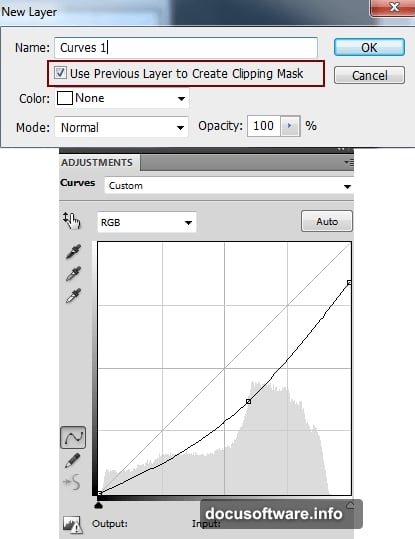
First, go to Layer > New Adjustment Layer > Curves and clip it to the desert layer. Drag the curve downward slightly to darken the desert and help it read as part of a nighttime scene.
Next, add a Color Balance adjustment layer (also clipped to the desert) to shift its tones toward the cooler, bluer palette of the rest of the background. Small adjustments in the Midtones and Shadows sliders go a long way toward making everything feel like it belongs in the same world.
Adding the Foreground Element
Open the foreground image and place it at the bottom of your composition. Use the Transform tool to scale and position it so it frames the scene naturally.
Add a mask and blend the foreground’s edges into the background the same way you handled the desert layer. Then go to Filter > Blur > Gaussian Blur and apply a radius of 8 pixels. This slight blur pushes the foreground into a soft, out-of-focus plane — it adds depth and makes the scene feel like it was captured with a real camera rather than assembled from flat cutouts.
What Comes Next
At this point your foundation is solid. You’ve got a layered night sky, a blended desert environment, and a softened foreground working together as one scene.
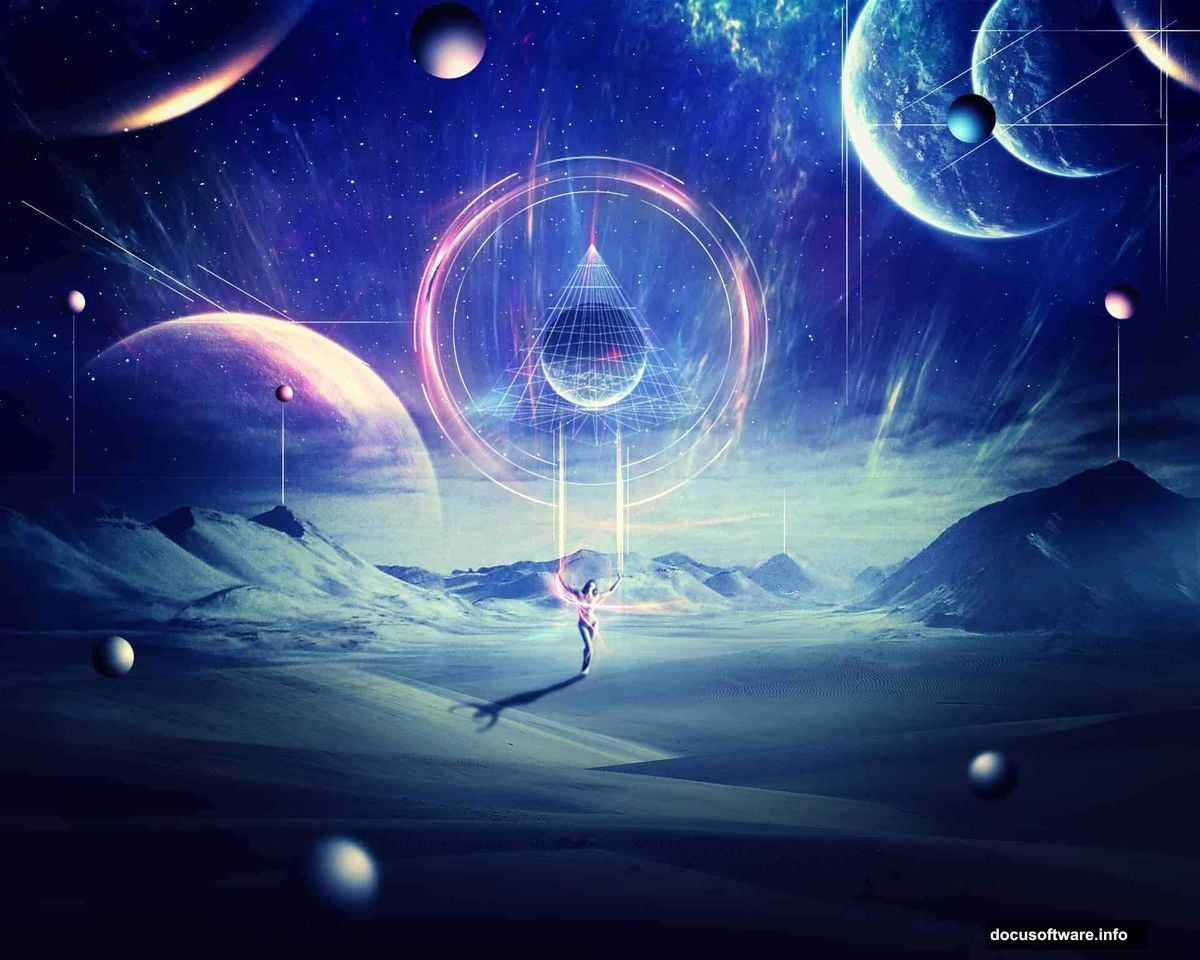
The remaining steps build on this base by adding planets, the model, nebula textures, and the wire triangle graphic. Then come the abstract elements — glowing light effects and color grading that pull everything into that finished sci-fi aesthetic. Each element follows the same core approach: place the image, adjust the blend mode, mask the edges, and use adjustment layers to match colors and tones.
If you’re new to compositing, this tutorial is genuinely one of the better learning experiences you can work through. Every technique here — Color Dodge blending for stars, Soft Light for atmospheric overlays, Curves for tonal control — shows up constantly in professional photo manipulation work. Nail these basics and you’ve built a toolkit that transfers to almost any project you tackle next.
Take your time with the masking. Rushed edges are the fastest way to make a composite look fake. Slow, patient brushwork on your masks is what separates a polished result from something that looks like a school project. That’s the real skill this tutorial is training, even more than the specific sci-fi aesthetic.