Creating a dramatic landscape scene from scratch feels intimidating at first. But with the right approach, you can combine multiple photos into something that looks completely natural and breathtaking.
This tutorial walks you through building a scenic landscape manipulation featuring blue water and sky. You’ll layer multiple landscape images, blend them seamlessly, and finish with atmospheric details like birds, mist, and painted light.
Let’s get into it.
Setting Up Your Canvas and Base Scene
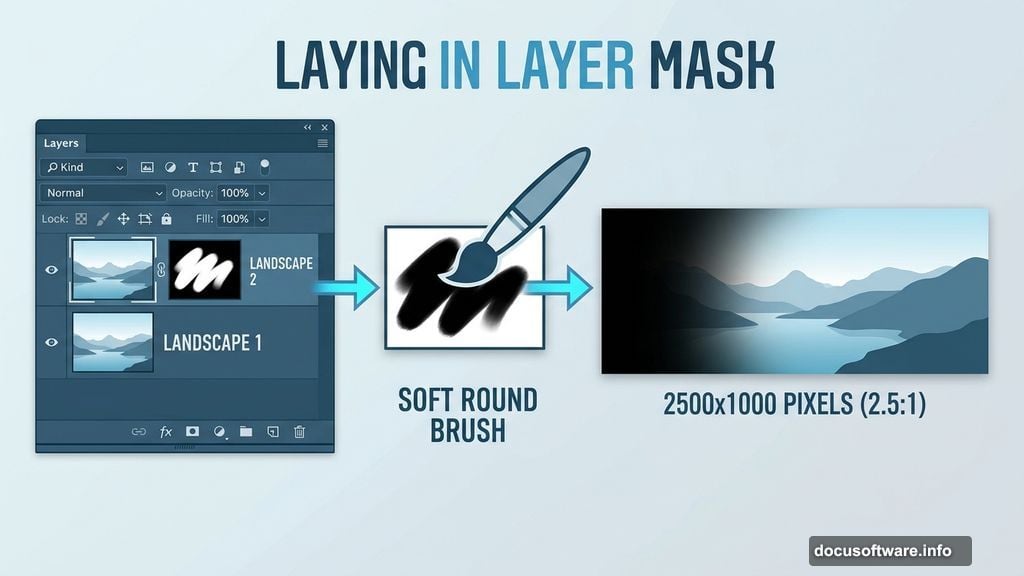
Start by creating a new document in Photoshop at 2500×1000 pixels and fill it with white. This wide, panoramic ratio works perfectly for landscape compositions.
Open your Landscape 2 image and drag it into the canvas using the Move Tool (V). Then right-click the layer and convert it to a Smart Object. This keeps your original image data safe while you make adjustments.
Next, add a layer mask by clicking the second icon at the bottom of the Layers panel. Activate the Brush Tool (B), choose a soft round brush, and paint with black on the mask. Use this to erase the left side of the midground and foreground, which creates a natural blend point for other images you’ll add later.
Cleaning Up Details with Clone and Color Tools
Now hit Ctrl+Shift+N to create a new layer and set it as a Clipping Mask. Switch to the Clone Stamp Tool (S) and use it to remove any unwanted shadows sitting in the middle of your composition. Small distractions like these break the illusion of a seamless scene, so it’s worth spending a few minutes here.
After cleaning up, add a Color Balance adjustment layer set as a Clipping Mask. Adjust the Midtones settings to push the colors toward your blue, atmospheric palette. This single step does a lot to unify the look of your base image.
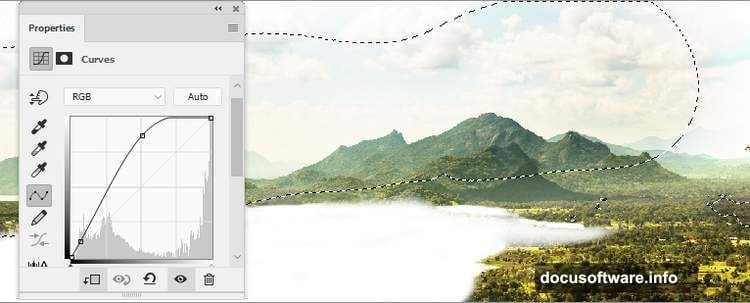
Then add a Curves adjustment layer to boost contrast. On the layer mask, use a soft black brush to erase the effect from the top of the mountains on the left, middle, and lower right. Protecting those areas keeps your sky and peaks from looking overcooked.
Follow that with another Curves layer to increase overall lightness. On this mask, brush away the effect from the top middle of the scene so the sky stays dark and dramatic while the foreground brightens up naturally.
Building Depth with Landscape 1
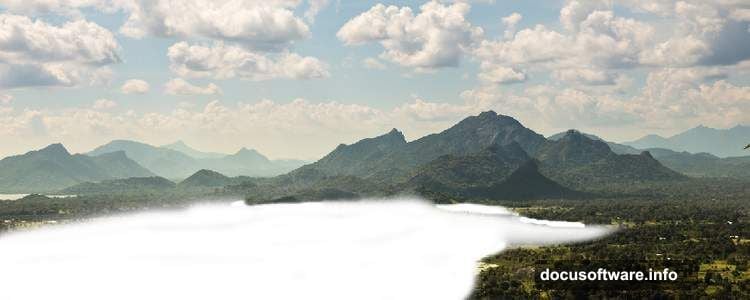
Drag in your Landscape 1 image and place this layer below Landscape 2 in the layer stack. Convert it to a Smart Object as well. Having it sit underneath creates the foundation that peeks through wherever you erased the layer above.
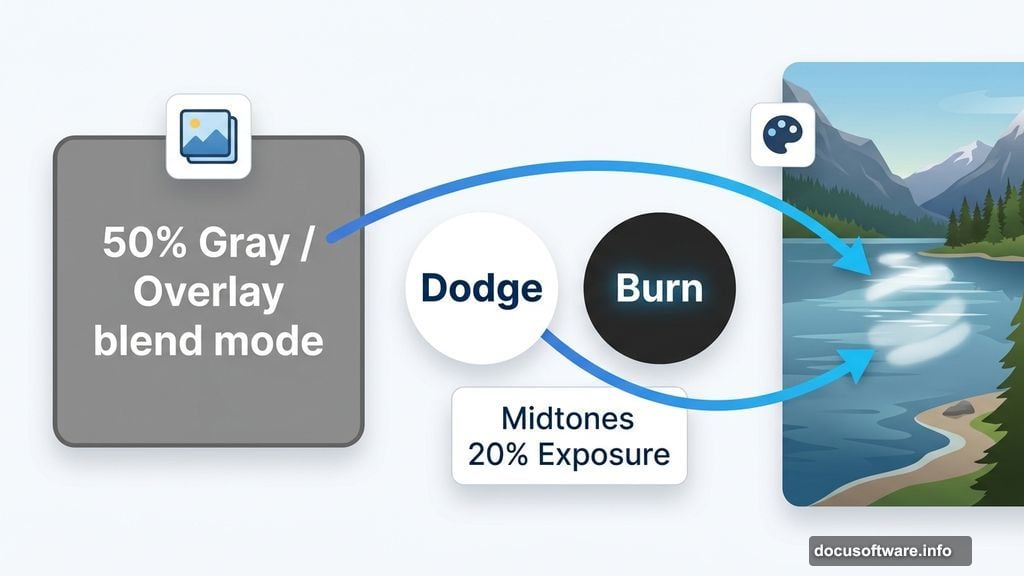
Create a new layer, change its blend mode to Overlay at 100%, and fill it with 50% gray. This neutral fill is invisible at first, but it gives you a surface to paint light and shadow. Activate the Dodge and Burn Tool (O), set it to Midtones Range with about 20% Exposure, and gently brighten the lakeside area. Subtle brightening here adds dimension and draws the eye naturally across the water.
Refining Color with Hue and Color Balance
Add a Hue/Saturation adjustment layer as a Clipping Mask and dial in the Yellows and Blues values. Landscapes often carry unwanted warm tones that fight against a cool, blue atmosphere. Pulling back the yellows and enriching the blues makes everything feel cohesive.
Follow this with a Color Balance adjustment layer targeting the Midtones. Small tweaks here tie your Landscape 1 image to the color grading you’ve already applied to Landscape 2 above it.
Finally, add a Curves adjustment layer to gently increase lightness and reduce contrast slightly. Reducing contrast at this stage softens the image a little, which helps when you start blending additional elements on top.
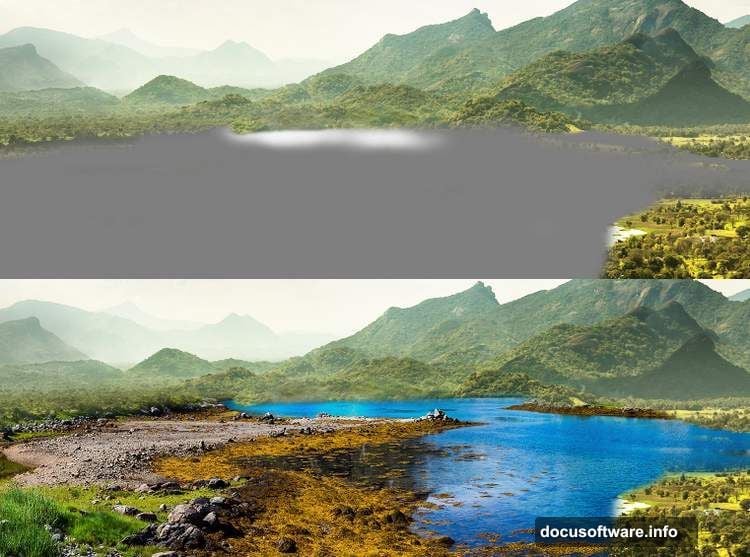
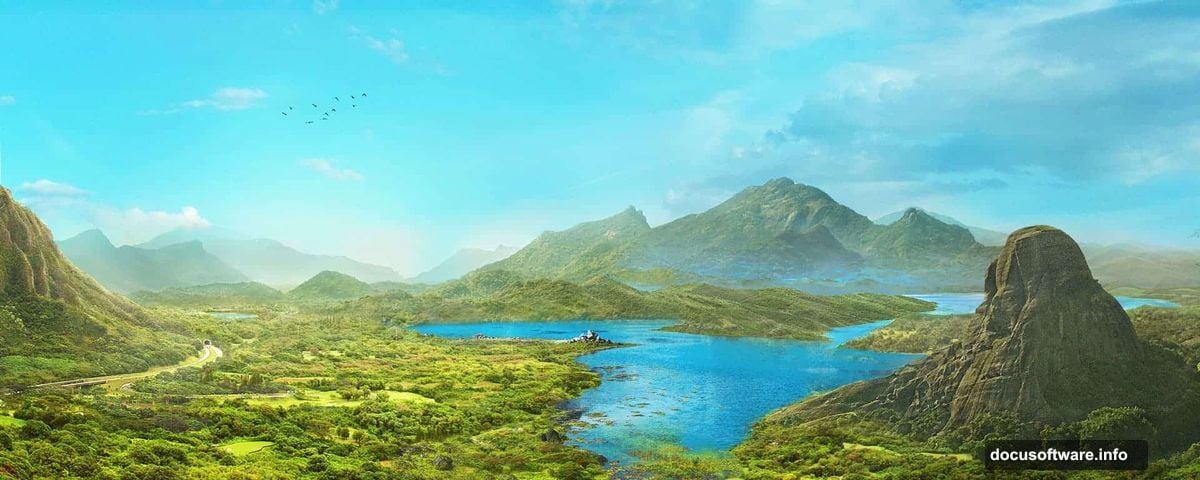
![Photoshop landscape photo manipulation tutorial showing layered mountain and water scene with blue color grading applied]
Adding Mountains and Blending the Layers
With your base built, bring in your mountain images and position them where they feel natural against the sky. Masking is everything at this stage. Use soft brushes at low opacity on each mountain layer’s mask to fade the edges into the sky and water. Hard edges immediately reveal a composite, so work slowly and zoom in on transition areas.
Adjustment layers clipped to each mountain layer let you match their brightness and color to the rest of the scene. A Curves layer to lift shadows and a Color Balance layer pushing cool midtones will bring rogue mountain images in line with your established palette.
Also consider the direction of light. If your sky suggests light coming from the left, make sure your mountains catch that light on their left faces. Consistency in lighting is what separates believable composites from obvious cut-and-paste jobs.
Painting Mist and Atmospheric Depth
Mist is one of the most powerful tools in landscape manipulation. It adds depth, hides rough blends, and makes a scene feel alive.
Create a new layer above your landscape elements. Set your brush to a large, soft round tip with very low opacity, around 10 to 15 percent. Paint with a desaturated light blue or white along the base of mountains and across the water surface. Build it up in several passes rather than one heavy stroke.
Plus, mist naturally catches light. So try adding a second mist layer in Soft Light blend mode with a slightly warmer tone to suggest sunlight filtering through. The contrast between cool base mist and warm lit mist creates beautiful depth.
Importing Birds and Adding Final Light
Birds instantly communicate scale and life. Bring your bird images into the composition and place them in the upper portion of the scene where they read clearly against the sky.
Mask any white or light backgrounds from your bird images carefully. Use the Magic Wand or Select Subject tool for an initial selection, then refine with a layer mask and a small hard brush. Even a few stray pixels around the birds will catch the viewer’s eye.
For the final light, paint on a new layer in Color Dodge or Soft Light mode. Use a warm golden or pale yellow and paint soft rays of light coming from your light source. Keep the opacity low and build gradually. Real light in landscapes is subtle and diffused, not a bright spotlight.
Final Adjustments to Pull It Together
Two adjustment layers at the top of your stack can elevate the entire composition significantly.
A Photo Filter adjustment layer set to a cool blue tone unifies all your elements under a single color temperature. Even if individual layers feel slightly mismatched, this top-level filter brings harmony to the whole scene.
Then add a final Curves layer to make global contrast and brightness decisions. Pull down the shadows slightly and lift the highlights. This creates that polished, cinematic quality that separates finished work from a work in progress.
Step back and look at the whole image. Check your edges, look for any tonal inconsistencies, and make sure your light source reads consistently across every element.
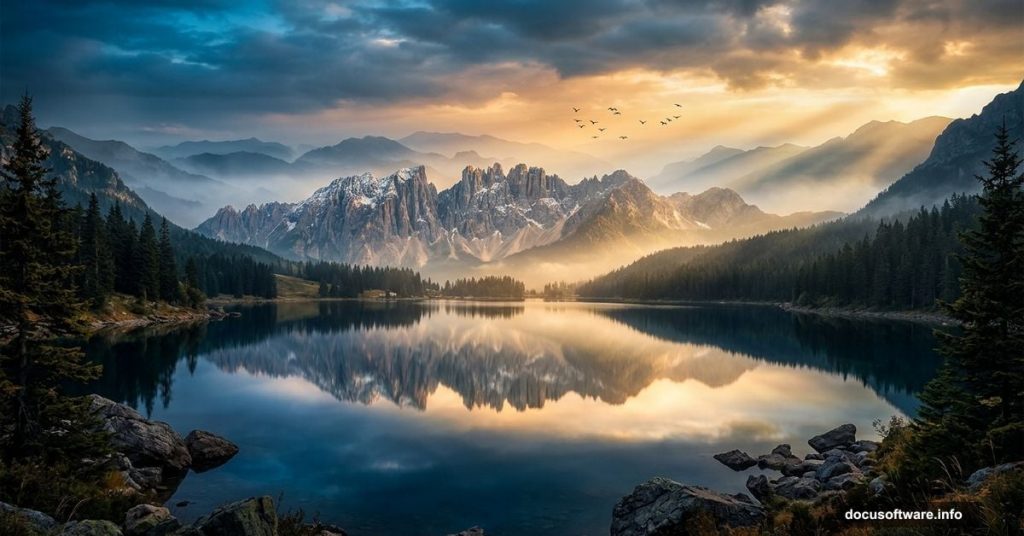
The result is a fully realized scenic landscape, built from separate photos but feeling like a single, unified world. Once you understand the logic behind each step, blending, masking, and color grading, you can apply this approach to any landscape concept you can imagine.