Photo manipulation is one of those Photoshop skills that feels like magic once you get the hang of it. You start with a handful of separate images, and somehow they transform into one cohesive, emotional scene that looks like it came straight from a dream.
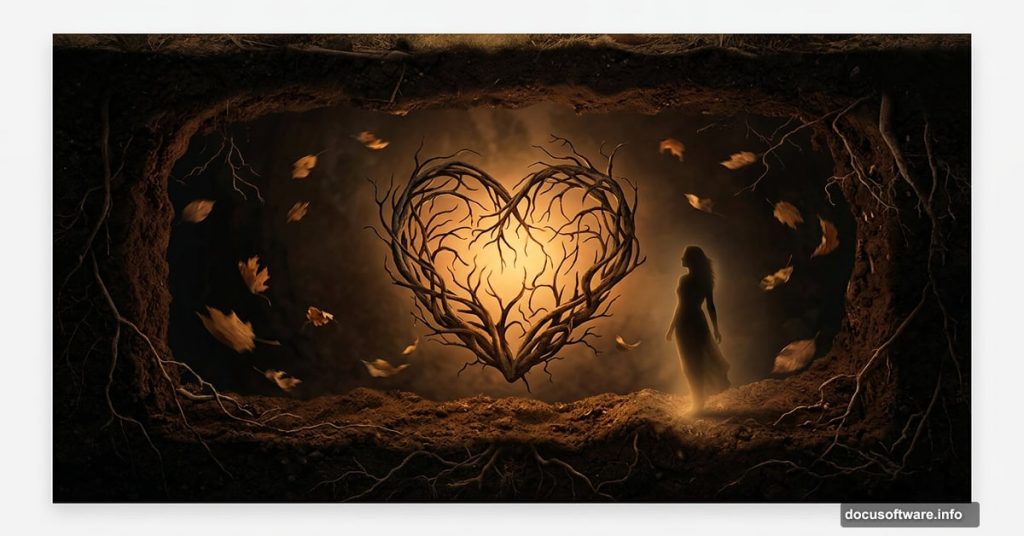
This tutorial walks you through creating a surreal underground world complete with a heart made from branches and scattering leaves. Along the way, you’ll pick up some genuinely useful techniques including layer blending, complex masking, painting, and smart use of adjustment layers. Whether you’re new to compositing or just looking to sharpen your skills, there’s plenty to work with here.
Setting Up Your Underground Canvas
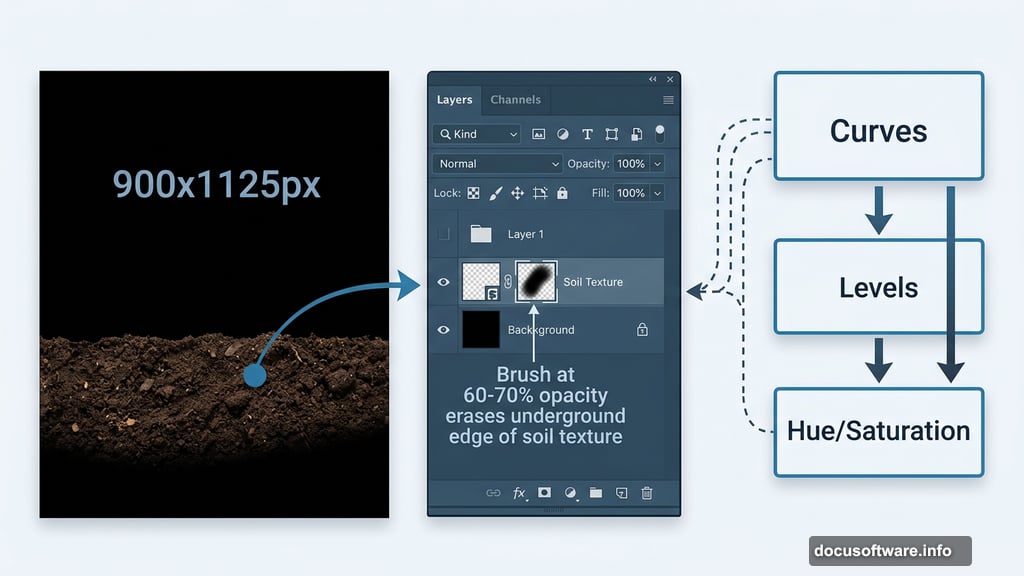
First, create a new document at 900×1125 pixels and fill it with solid black. This dark base gives you something to build contrast against right from the start.
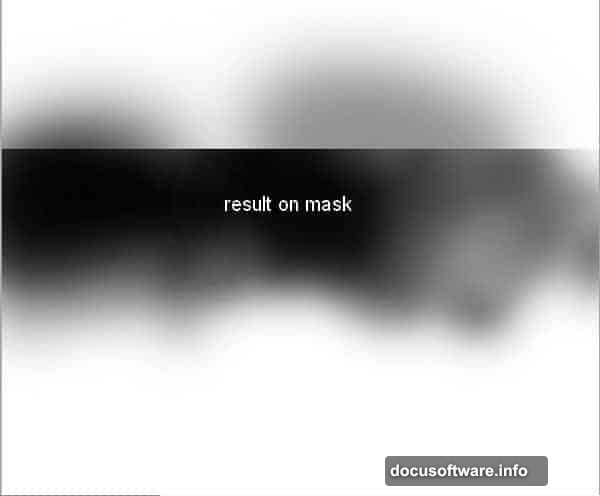
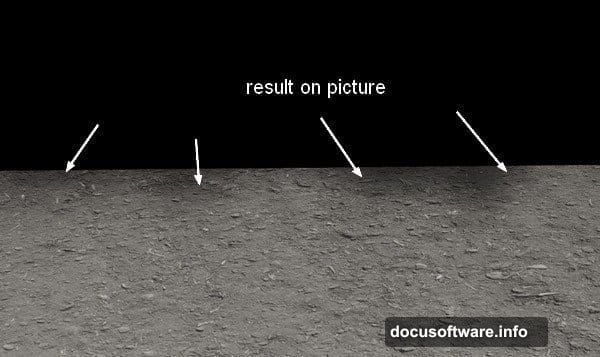
Open your soil texture and drag it onto the canvas using the Move Tool (V). Hit Cmd/Ctrl+T to transform and position it. Then add a layer mask by clicking the second button at the bottom of the Layer Panel. Use a soft black brush at about 60-70% opacity to gently erase parts of the underground edge. This softens the transition so your soil doesn’t look like it was stamped onto the canvas.
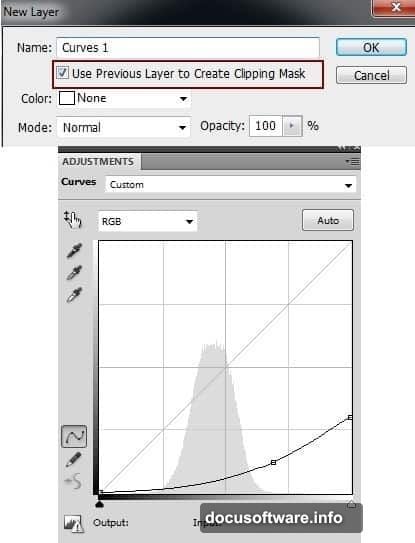
Next, clip a Curves adjustment layer to the soil layer. Darken the overall underground, then use a black brush at just 10-15% opacity on the Curves mask to ease back the darkening near the foreground. You want depth, not a muddy mess.
Contrast and Color Corrections for Soil
Add a Levels adjustment layer to bump the contrast slightly. Paint over the foreground area on the Levels mask with a black brush to keep that zone looking natural. Then throw in a Hue/Saturation layer and pull the saturation down a notch. Underground soil should feel muted and earthy, not vibrant.
These three adjustment layers, Curves, Levels, and Hue/Saturation, work together to make your soil feel genuinely underground. Each one handles a different quality of the image, so together they give you precise control without any single adjustment doing too much heavy lifting.
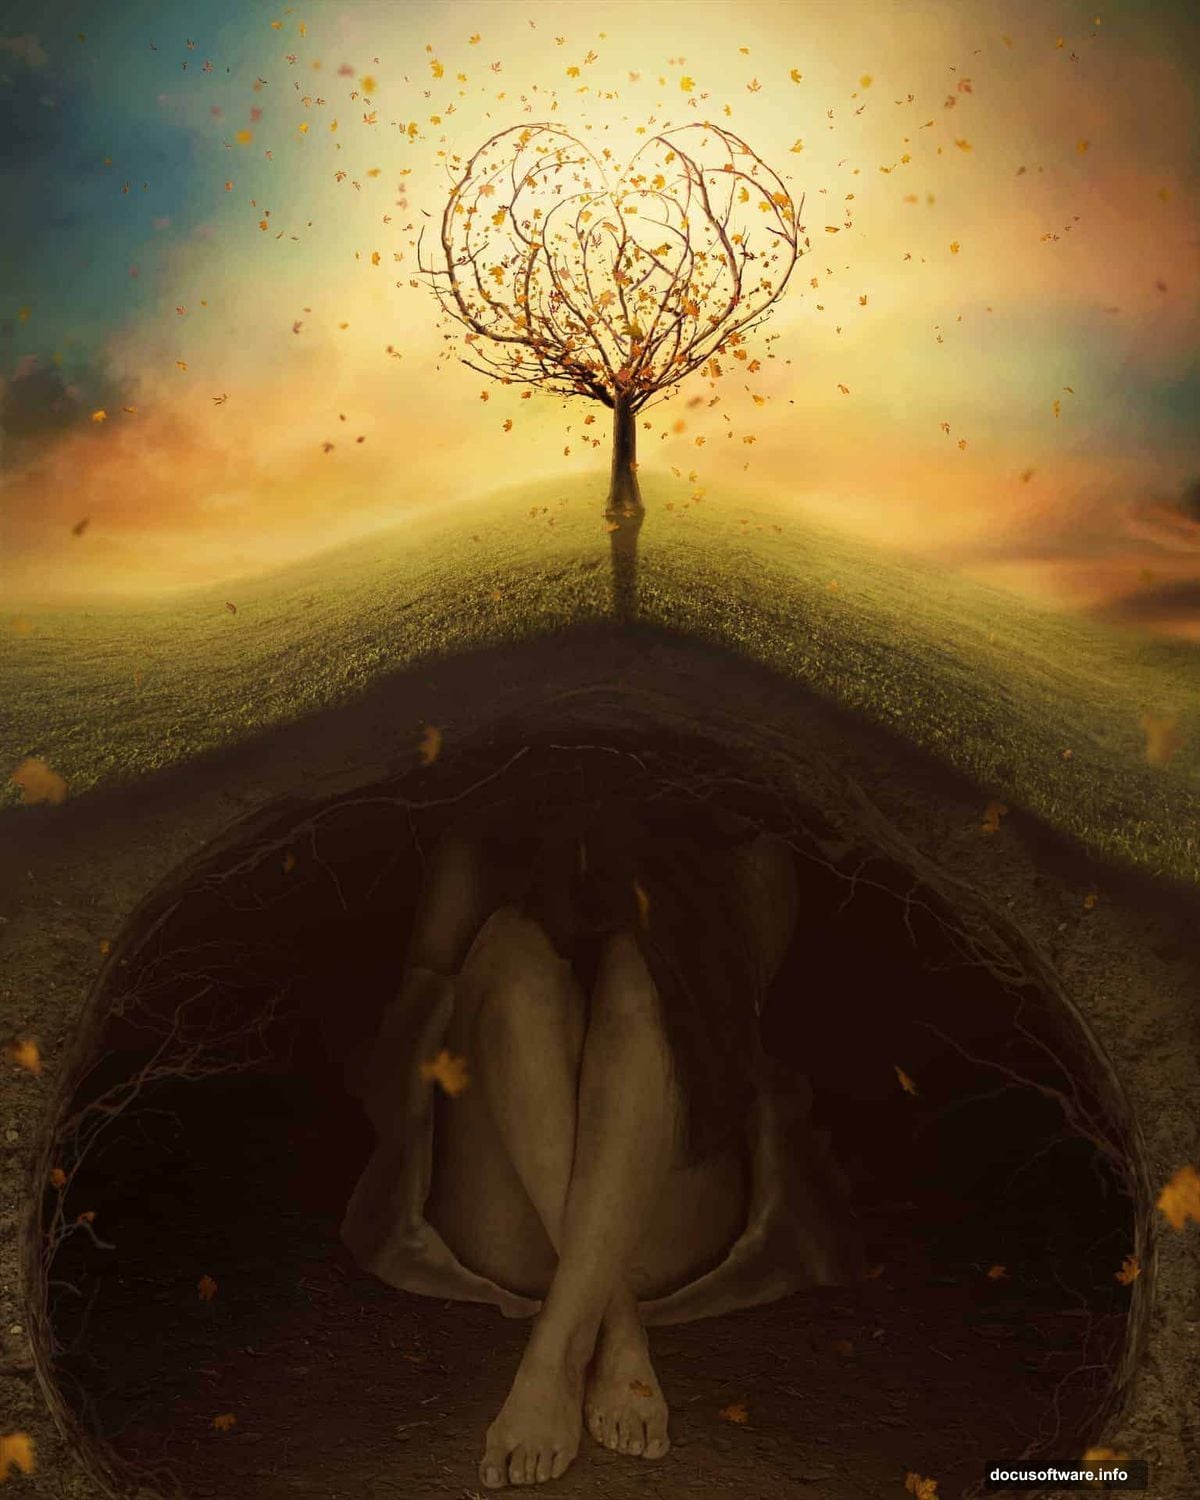
Placing and Blending Your Model
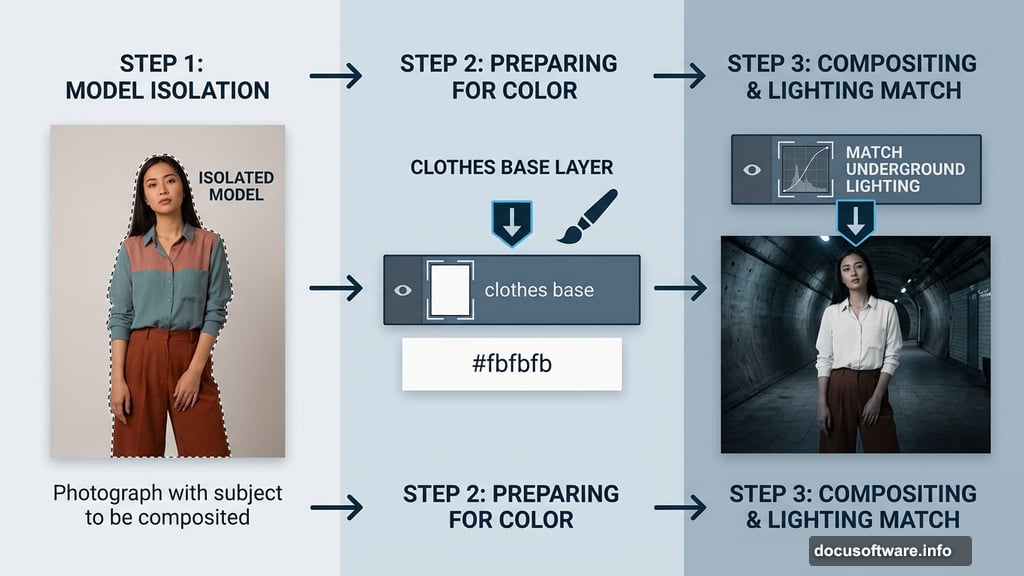
Isolate your model from her background and place her on the underground scene. Feel free to swap in your own stock photo here. The technique works regardless of which model you choose.
Now here’s a nice trick. If you don’t love the outfit your model is wearing, you can repaint it entirely. Create a new layer set as a Clipping Mask, grab a hard brush with color #fbfbfb, and fill in the shirt area. Name this layer “clothes base” so you can find it easily later. You’ll build detail on top of it in the next few steps.
Matching the Model to the Scene
Clip a Curves layer to your model to darken her and match the underground lighting. Follow that with a Levels layer to fine-tune contrast, then use a brush on the Levels mask to ease off the adjustment on specific parts of the model where you want to preserve highlights or shadows.
Finally, add a Hue/Saturation layer clipped to the model. Adjusting saturation here pulls her color palette closer to the muted, earthy tones of the underground scene. This step is what makes composites look convincing. When every element shares a similar color temperature and saturation level, your brain reads it as one real environment.
Adding Fabric Detail with Dodge and Burn
Here’s where your repainted shirt starts feeling real. Create a new layer, fill it with 50% gray, and change the blend mode to Overlay. A gray-filled Overlay layer is essentially invisible but lets you paint light and shadow non-destructively.
Grab the Burn Tool with Midtones Range and Exposure set to around 25-30%. Paint into the fabric areas to add shadow and form. Then create a second layer with the same settings and use both the Dodge and Burn tools to sculpt wrinkle details. The goal is a silky, slightly soiled look as if she’s been sitting on that underground floor.
Switching between Normal mode and Overlay mode while you work is a great way to check your progress. In Normal mode you see the actual gray strokes. In Overlay mode you see how those strokes translate to light and shadow on the fabric beneath.
Bringing in Branches and Natural Elements
This is where the composition really comes alive. Bring in your branch and tree stock images and start building your heart shape. Masking branches carefully takes patience, but the payoff is huge.
Work with each branch element on its own layer. Use masking rather than erasing so you can always go back and adjust edges. Blending modes like Multiply or Overlay can help branches integrate naturally with the underground surface and the model.
Scatter leaves around the scene to add movement and energy. Layer them at different sizes and opacities. Some sharp in the foreground, some soft and blurred further back. This depth of field effect sells the sense of real three-dimensional space.
Final Lighting and Atmosphere
Once all your elements are in place, step back and evaluate the overall light. Add a Color Balance or Photo Filter adjustment layer at the top of your stack to unify the scene with a warm or cool tint. Underground scenes often benefit from a slightly cooler, greenish tone that feels damp and otherworldly.
A gentle vignette, darkening the corners and edges, draws the eye toward the center where your model and the branch heart sit. You can create this with a simple Curves layer and a radial gradient on its mask.
The combination of careful masking, thoughtful color grading, and layered natural elements is what separates a convincing photo manipulation from one that looks cobbled together. Take your time with each step and don’t rush the blending. The results are absolutely worth the effort.