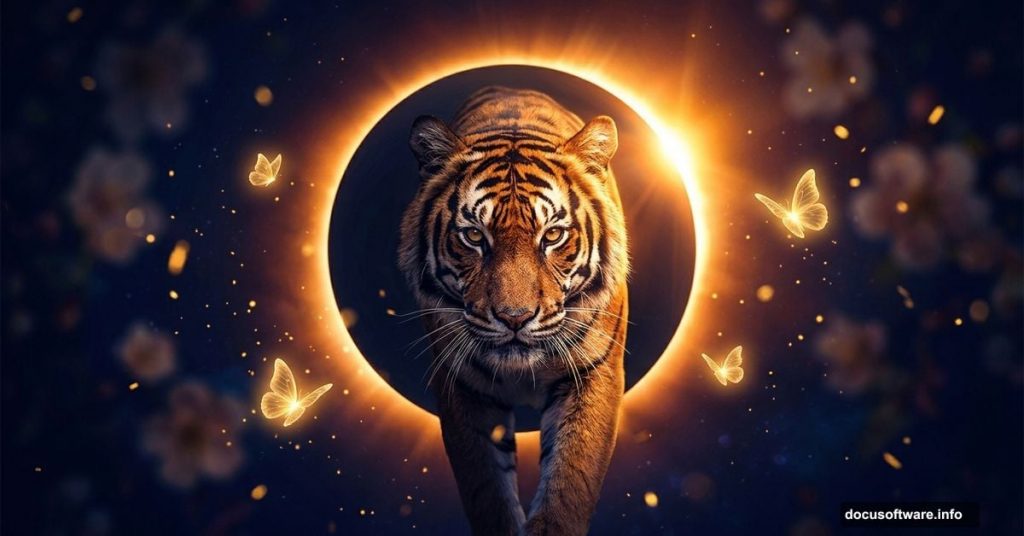
Nature and fantasy collide in one of the most satisfying types of photo manipulation you can create. A tiger emerging from a glowing eclipse, surrounded by butterflies and drifting particles — it sounds complex, but the process breaks down into clear, manageable steps.
This tutorial walks you through building that exact scene. You will work with blurred floral backgrounds, glowing ring effects, star brushes, and careful tiger extraction to pull it all together. Plus, a Camera Raw finish ties every element into one cohesive mood.
Here is everything you need before getting started.
Tutorial Resources:
- Background floral photo
- Tiger image
- Lava texture
- Butterflies stock image
- Starry Night brushes
- Rays brushes

Setting Up Your Canvas
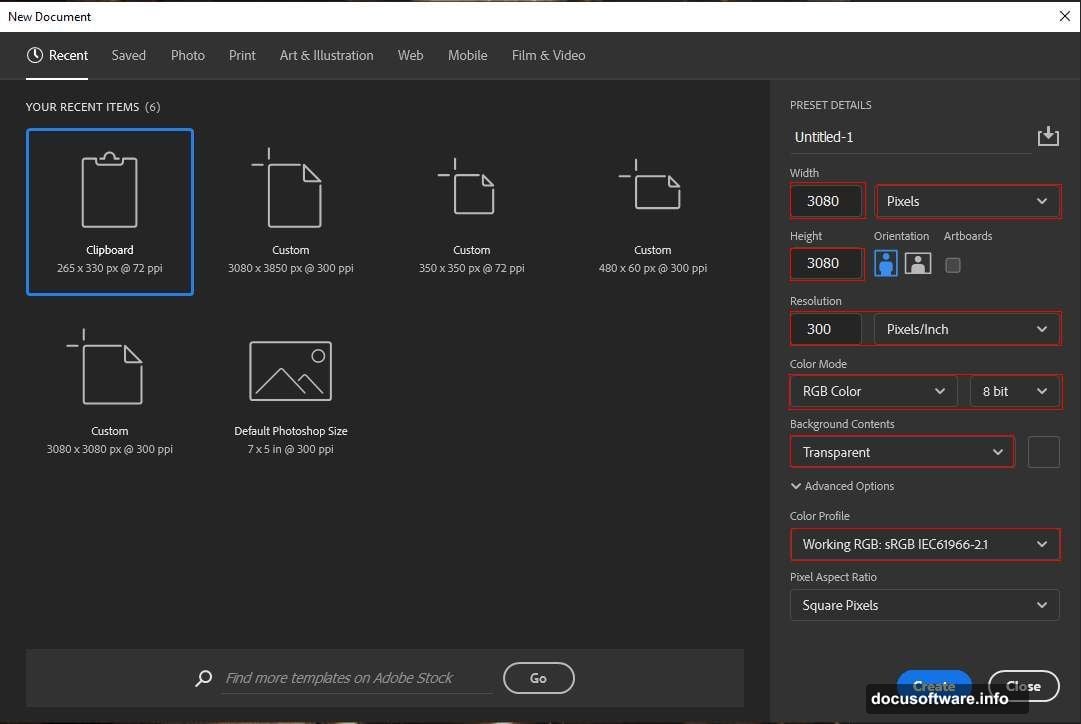
Start fresh. Go to File > New and enter these settings:
- Preset: Custom
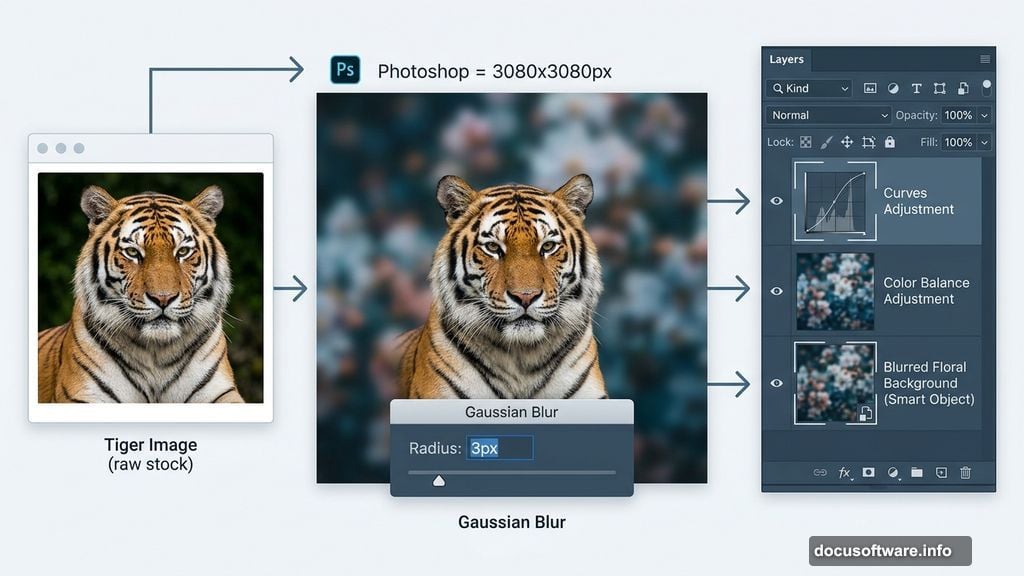
- Width: 3080px
- Height: 3080px
- Resolution: 300px
- Color Mode: RGB Color, 8-bit
- Background Contents: Transparent
A square canvas at 300 resolution gives you plenty of room to work. Plus, the transparent background keeps things flexible as you build up layers.
Placing and Blurring the Background
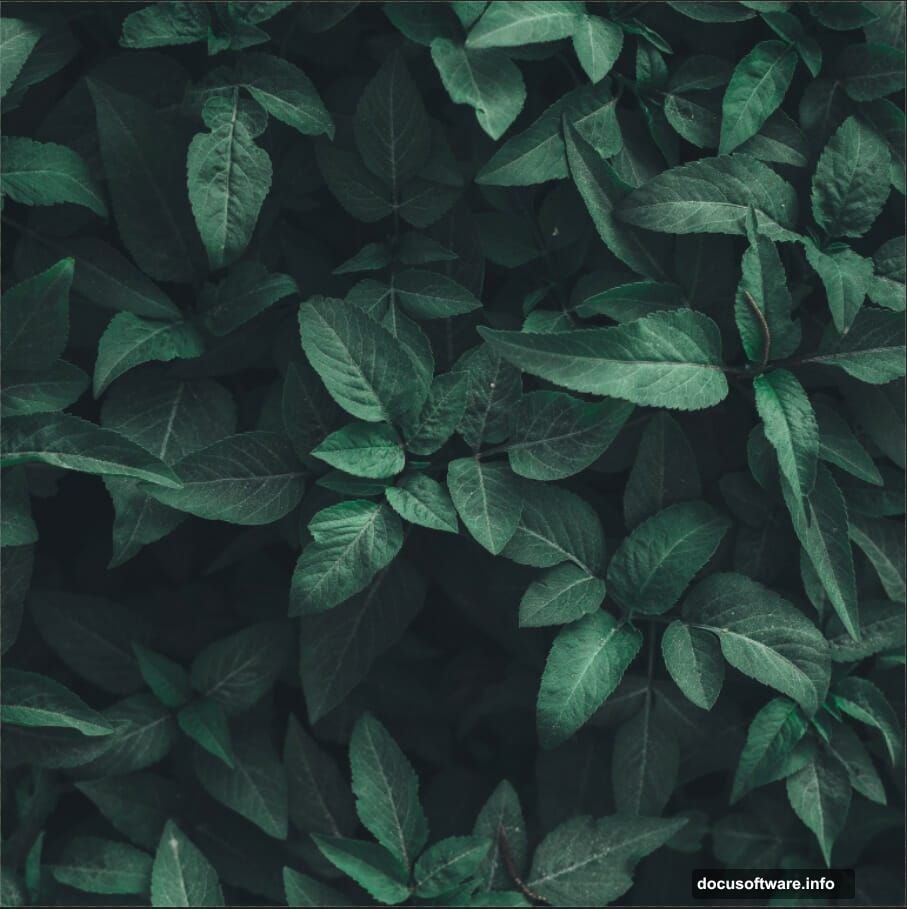
Go to File > Place and bring in your floral background image. Position it using the Transform tool (Ctrl/Cmd + T). Hold Alt + Shift to resize proportionally, or just Alt if you are using Photoshop CC.
Right-click the layer and convert it to a Smart Object. This protects your original while letting you apply filters non-destructively.
Then go to Filter > Blur > Gaussian Blur and set the radius to 3px. That soft blur pushes the background away visually, so your tiger and foreground elements read as the clear focal point.
Adding Color Balance and Curves Adjustments
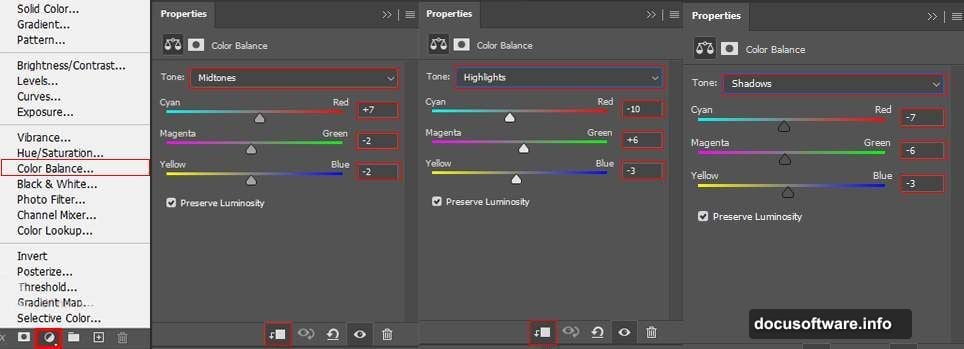
Next, add an Adjustment Layer for Color Balance. This shifts your overall scene toward warmer or cooler tones depending on the mood you want. For a dramatic eclipse feel, lean into deeper oranges and blues.
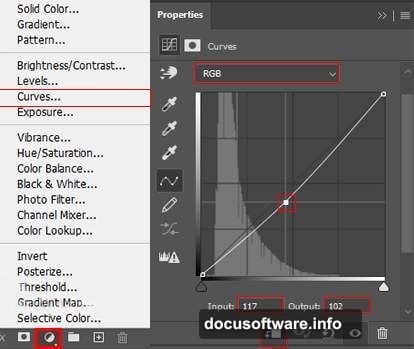
Follow that with a Curves Adjustment Layer. Pulling the curve into an S-shape adds contrast quickly. Darken the shadows and lift the highlights to build depth.
Both of these layers sit above your background and affect everything below them. So place them thoughtfully before you add more elements.
Painting the Eclipse Glow Effect
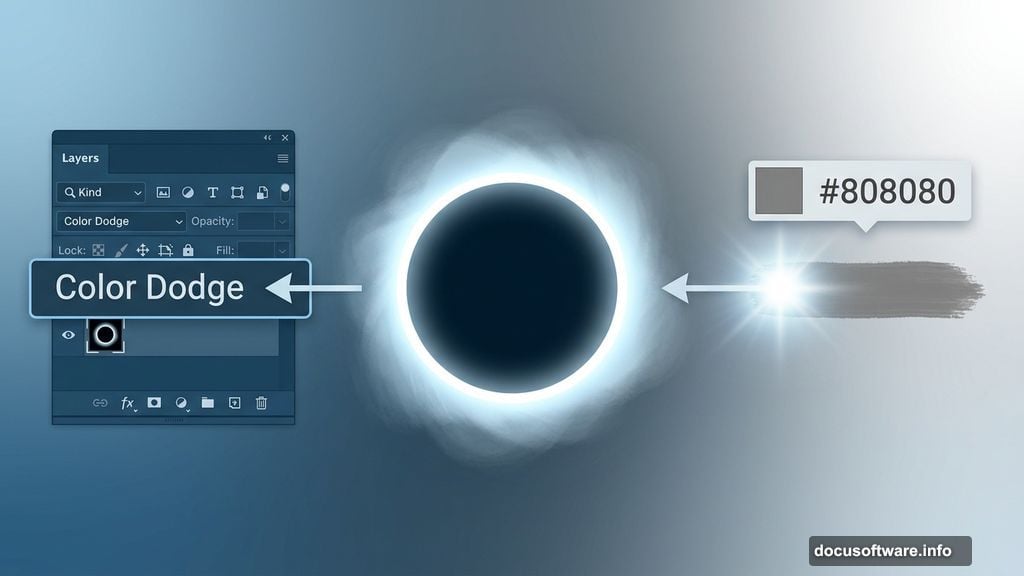
Create a new empty layer above your adjustments. Select the Soft Round brush, set your foreground color to gray (#808080), and paint a loose circular glow in the center of the canvas.
Change that layer’s blend mode to Color Dodge. Instantly, the gray paint transforms into a bright, luminous glow. Color Dodge works by lightening pixels beneath based on what you paint. So soft gray strokes become dramatic light bursts.
Building the Eclipse Ring
Press U to grab the Ellipse Tool. Set fill to none and stroke to 20px in white. Draw a circle at 1866px by 1866px. This becomes the core ring of your eclipse.
Now open Blending Options by right-clicking the layer. Apply two effects:
- Inner Glow — adds light bleeding inward along the ring edge
- Outer Glow — creates a soft halo radiating outward
Together these two effects make the ring feel like it is actually emitting light, not just sitting on top of the scene. The difference is subtle but makes everything look far more polished.
Importing and Painting Stars
Select the Brush Tool (B) and right-click on your canvas. Click the gear icon in the brush panel and choose Import Brushes. Navigate to your downloaded Starry Night brush set and load it.
Set your foreground color to white. Now paint stars across the interior of the eclipse ring. Vary your brush size and opacity across strokes to avoid a repetitive pattern. Real star fields have clusters and gaps, so mimic that randomness with loose, varied strokes.
Cutting Out the Tiger
Open your tiger image. Select the Quick Selection Tool (W) and paint over the tiger. Photoshop builds the selection automatically as you drag across edges and contrast areas. Refine any rough edges by holding Alt and painting back over areas you want deselected.
Once your selection looks clean, copy it (Ctrl/Cmd + C) and paste it (Ctrl/Cmd + V) onto your main canvas. Use the Transform tool to position and scale the tiger so it fills the eclipse ring naturally.
The tiger should feel like it is emerging from the light, not just sitting in front of it. So scale it large enough that the ring frames the face and upper body.
Applying Adjustment Layers to the Tiger
The tiger needs its own set of adjustments clipped directly to its layer. Clipping adjustments means they only affect the layer directly below them, not the entire canvas.
Add Curves and Color Balance adjustments clipped to the tiger. Use Curves to deepen the shadows in the fur. Use Color Balance to push the tiger’s tones toward the warm orange and gold tones of your eclipse glow. This integration step is what makes the tiger feel like it genuinely belongs in the scene instead of looking pasted in.
Adding Butterflies, Rays, and Light Layers
Bring in your butterfly stock image and extract the butterflies the same way you extracted the tiger. Scatter them around the tiger at varying scales. Smaller butterflies in the distance, slightly larger ones closer to the tiger, create a sense of depth.
Next, use your Rays brushes to paint light streaks radiating from the eclipse ring. Set these layers to Screen or Add blend mode so the rays only add light without blocking anything beneath them. Keep opacity around 40-60% so the effect stays subtle.
Add a few more light layers using soft white or gold brush strokes near the ring edges. These finishing light touches unify every element under the same light source.
Final Touch with Camera Raw Filter
Flatten your layers or stamp a merged visible layer (Ctrl/Cmd + Alt + Shift + E). Then go to Filter > Camera Raw Filter.
Use Camera Raw to make final global adjustments. Boost Clarity slightly to sharpen details. Pull Vibrance up for richer colors without oversaturating skin tones. Adjust Highlights and Shadows to recover any blown-out areas around the glow.
One note worth considering: as one reader pointed out, merging layers just to use Camera Raw can make it harder to go back and edit individual elements later. If you want more flexibility, try stacking Adjustment Layers instead of committing to a merged Camera Raw pass. Either approach works, but staying non-destructive keeps your options open.
What You Walked Away With
This manipulation works because every layer serves a purpose. The blurred floral background creates separation. The glowing ring frames the subject. The star brushes and butterfly scatter add atmosphere. The tiger extraction and clipped adjustments make the centerpiece believable.
What makes Photoshop photo manipulation genuinely fun is exactly this kind of layered problem-solving. Each step builds on the last. And by the end, you have something that feels like it exists in its own world, even though you built it from completely separate images.
Try swapping the tiger for a wolf, a hawk, or even a human portrait. The eclipse ring technique transfers directly to any subject you want to make feel mythic and powerful.