
Some of the most memorable digital art starts with a feeling, not a technique. This tutorial is a perfect example of that.
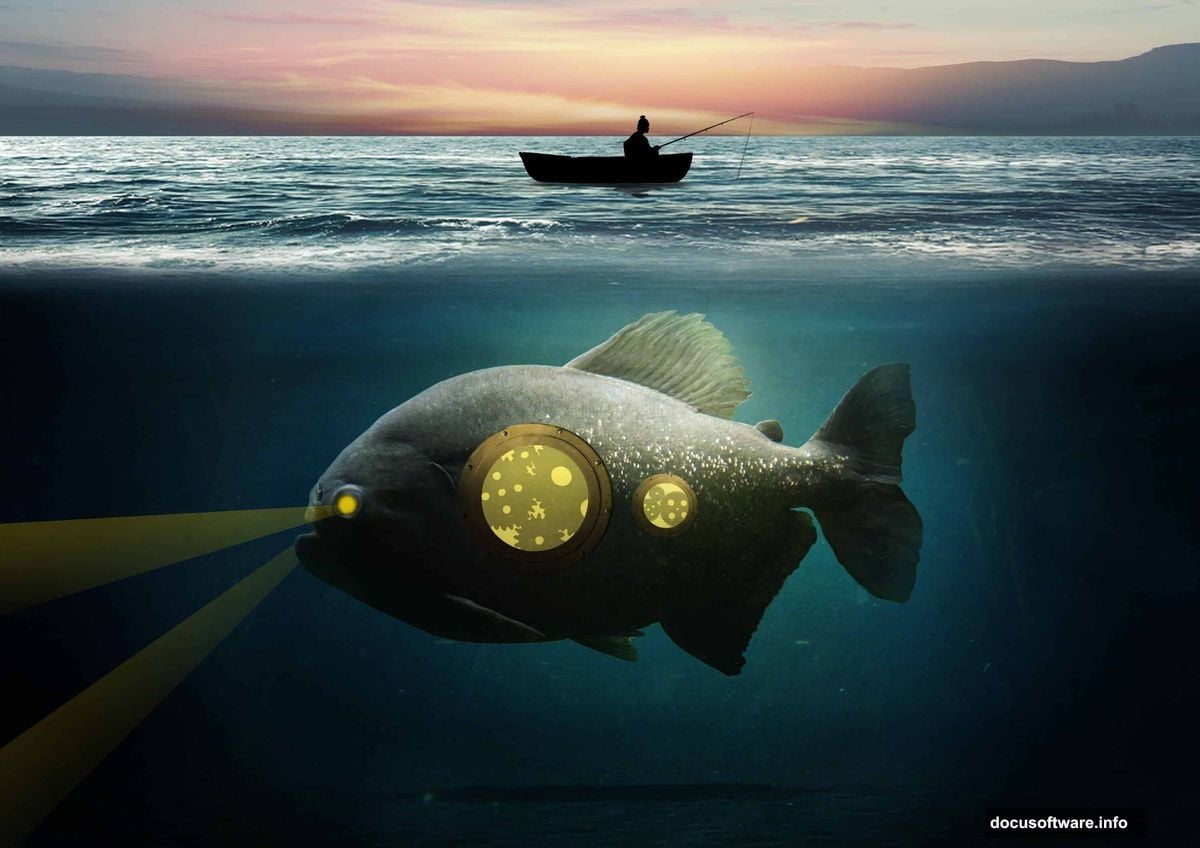
Artist Evan Lawrence built this piece around a deeply personal concept. A fisherman stands watch over a “fish” submarine, representing someone who guards their deepest memories and wraps their stories in mystery. The fish submarine holds those memories. The fisherman keeps them safe. It’s a beautiful concept, and the Photoshop skills you’ll pick up building it are genuinely practical for any photo manipulation project.
Here’s everything you need to recreate this underwater surreal scene from scratch.
What You’ll Need Before Starting
Gather these stock images before opening Photoshop. Having everything ready saves a lot of back-and-forth during the build.
- Fisherman by joelshine-stock
- Fish by Malleni-Stock
- Boat by Chibiangel-stock
- Water by Pure-Poison89
- Underwater scene by koko-stock
- Hublot by TheEdeonKnight
- Gears by redheadstock
- Sky 1 by CindysArt-Stock
- Sky 2 by resurgere
- Two texture layers from EverythingIsInStock and kuschelirmel-stock
Also worth noting: Adobe Stock offers 10 free images if you’re short on any resources.
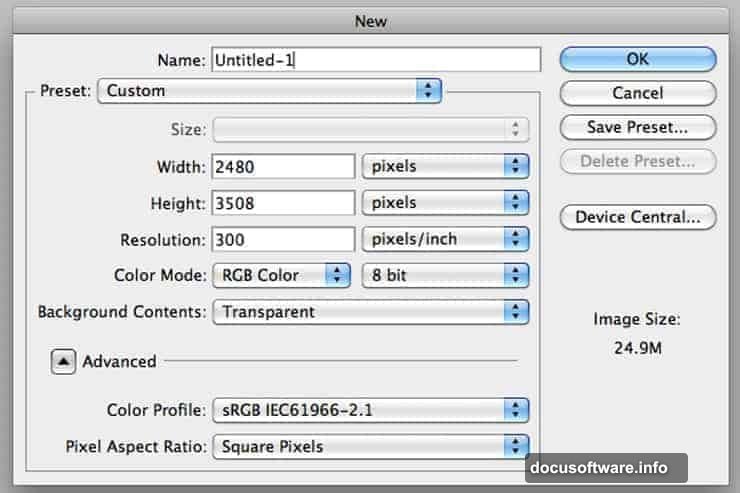
Setting Up Your Canvas
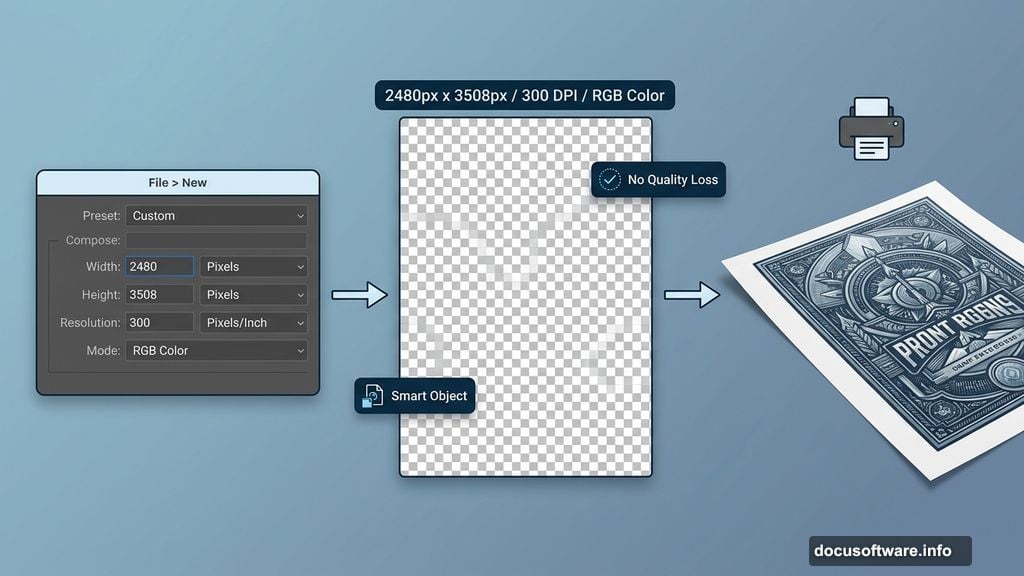
Start with a fresh document. Go to File > New and enter these exact settings.
Set the preset to Custom, width to 2480px, height to 3508px, and resolution to 300 pixels per inch. Choose RGB Color at 8-bit, and set the background contents to Transparent.
Why these dimensions? The 300 DPI resolution means your final image prints cleanly at large sizes. Plus, working at full resolution from the start avoids quality loss if you decide to export or resize later.
Building the Foreground Water Layer
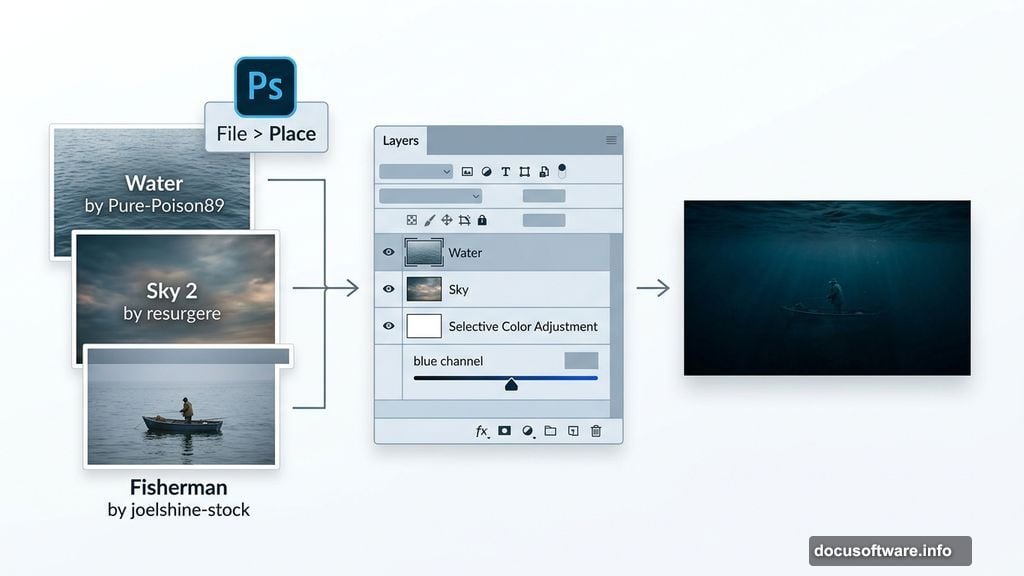
Now the real work begins. Import the “Water” stock by Pure-Poison89 using File > Place rather than a standard open command.
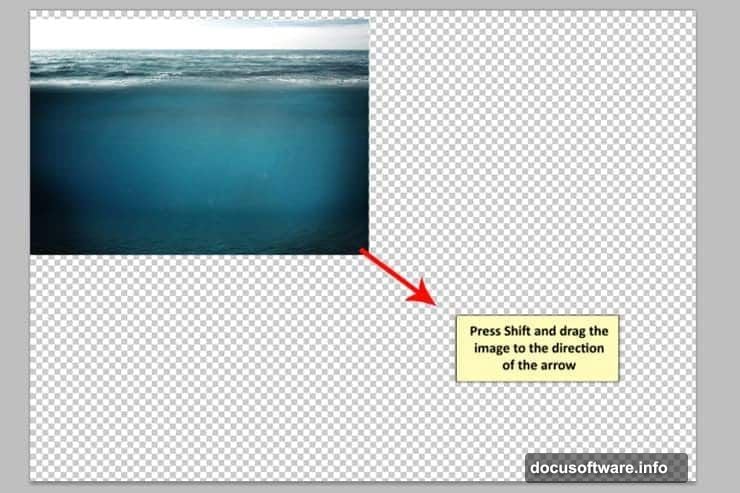
This distinction matters. Using Place automatically converts the image to a Smart Object. That means you can scale, rotate, and transform it as many times as you want without losing any image quality. It’s one of those Photoshop habits that saves headaches down the line.
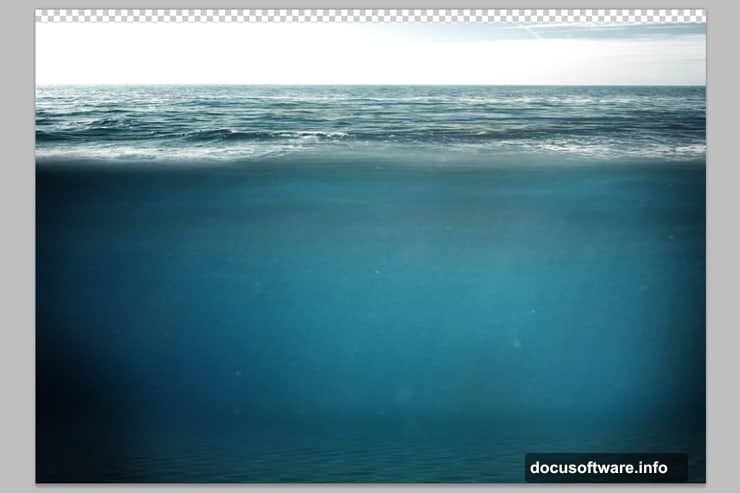
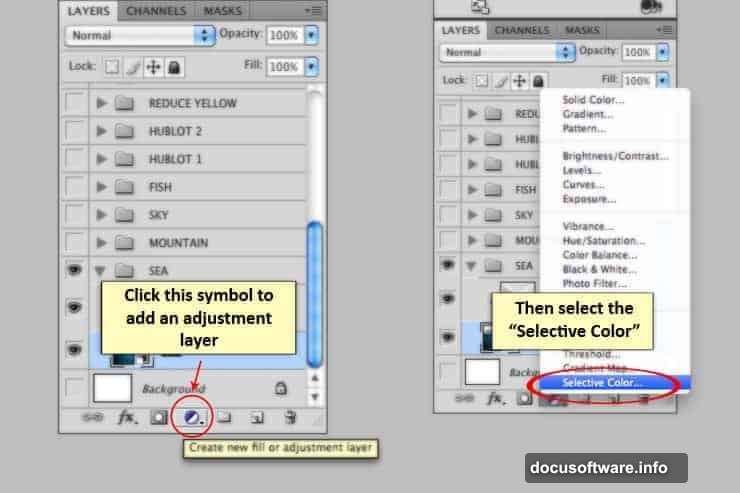
Once the water layer is placed, create a new Selective Color adjustment layer directly above it. Select the Blue channel and push the values darker. This deepens the water tones and starts building that moody, submerged atmosphere.
Adding the Sky Background
Next comes the background sky that sits behind the sea. Open the “Sky 2” package by resurgere and pull out the file named sky9_9504.jpg.
Grab the Rectangular Marquee Tool (M) and draw a selection around the portion of sky you want. Then activate the Move Tool (V) and drag that selection onto your main canvas. Alternatively, copy and paste works just as well with Ctrl/Cmd + C and Ctrl/Cmd + V.
Position this sky layer above everything you’ve built so far. Use the Transform Tool (Ctrl/Cmd + T) to scale and fit it to your composition.
Finally, add another Selective Color adjustment layer clipped to the sky. This time, adjust both the Cyan and Blue channels. The goal is color harmony between the sky and water so the scene reads as one cohesive environment rather than two separate stock photos stitched together.
![Photoshop underwater surreal scene showing a fisherman and fish submarine with layered sky and water compositing technique]
Working With Adjustment Layers Throughout
Here’s something worth understanding early. This entire tutorial leans heavily on adjustment layers, and for good reason.
Adjustment layers sit non-destructively above your image layers. So when you tweak a Selective Color or Levels adjustment, you’re not permanently changing pixels. You can revisit any adjustment at any time and dial it differently. That flexibility is what separates polished compositing work from heavy-handed edits that look stuck.
As you bring in each new stock element, the pattern stays consistent. Place the image, clip or mask it into position, then add adjustment layers to match its color and tone to everything around it.
Masking, Lighting, and Shadow Techniques
The later stages of this tutorial cover three critical skills that elevate any photo manipulation.
Masking lets you blend elements together cleanly. Instead of erasing pixels, you paint on a mask to hide or reveal parts of a layer. Paint black to hide. Paint white to reveal. This non-destructive approach means mistakes are easy to fix.
Light and shadow are where the scene really comes alive. Lawrence uses Levels adjustment layers to push selected areas toward pure black, creating convincing silhouette effects. One thing to keep in mind: the effectiveness of this technique depends on the quality and contrast of your source image. Some stock photos respond beautifully. Others need extra help from the Brush Tool to fill in shadow areas manually.
The Brush Tool plays a supporting role throughout, softening edges, adding atmospheric haze, and reinforcing where light would naturally fall in an underwater environment.
![Photoshop layers panel showing adjustment layers, Smart Objects, and masking setup for underwater surreal photo manipulation scene]
Common Questions From the Tutorial
A few issues come up repeatedly in the comments from people working through this project.
If you try to use a colored brush and only get grey tones, check your foreground and background colors in the toolbar. They’ve likely been reset to black and white defaults. Click the small icon near those swatches to restore them to your last used colors.
For oversaturated pixels that appear when working with Levels to create silhouettes, the Clone Stamp Tool works as a fix. So does careful Brush Tool work over the problem areas. Both approaches reach the same result.
And if you’re hitting problems with texture placement in the later steps, the relationship between the layer mask and where you apply the texture is the key variable. The texture layers integrate through blending modes rather than direct painting, so positioning matters differently than you might expect.
Why This Project Is Worth Your Time
Photo manipulation at this level teaches you to think about images as systems. Every element needs to feel like it belongs in the same world. Color, light, shadow, and atmosphere all have to agree.
Working through a project like this builds instincts that transfer directly to any composite work you do next. Whether that’s product retouching, fantasy illustration, or editorial design, the core skills stay the same.
Start simple with the canvas setup and water foreground. Then layer in complexity as you go. The tutorial is structured in a way that each step builds naturally on the last, which makes the process far less intimidating than the finished artwork might suggest.
The fisherman and his fish submarine are waiting. Time to build something worth remembering.