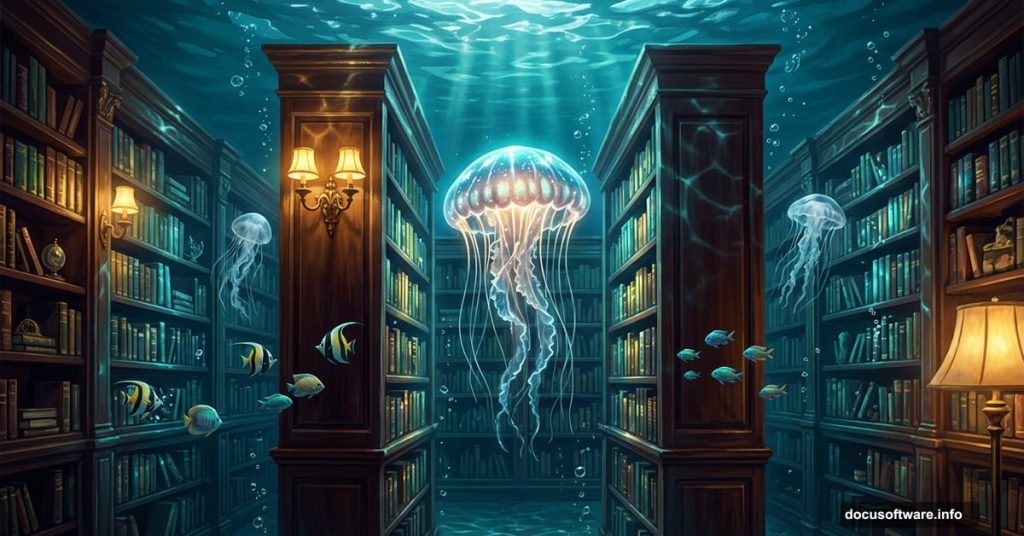
There’s something magical about combining the quiet world of books with the serene glow of an underwater scene. This Photoshop tutorial walks you through building exactly that — a dreamy library transformed into a jellyfish aquarium, complete with bubbles, glowing light, and that soft underwater haze that makes the whole thing feel like it exists somewhere between imagination and reality.
Whether you’re just getting comfortable with Photoshop or you’ve been pushing pixels for years, this project is a fantastic way to sharpen your compositing skills. Let’s get into it.
What You’ll Need Before Starting
Gather these resources before opening Photoshop. Having everything ready saves a lot of tab-switching mid-project.
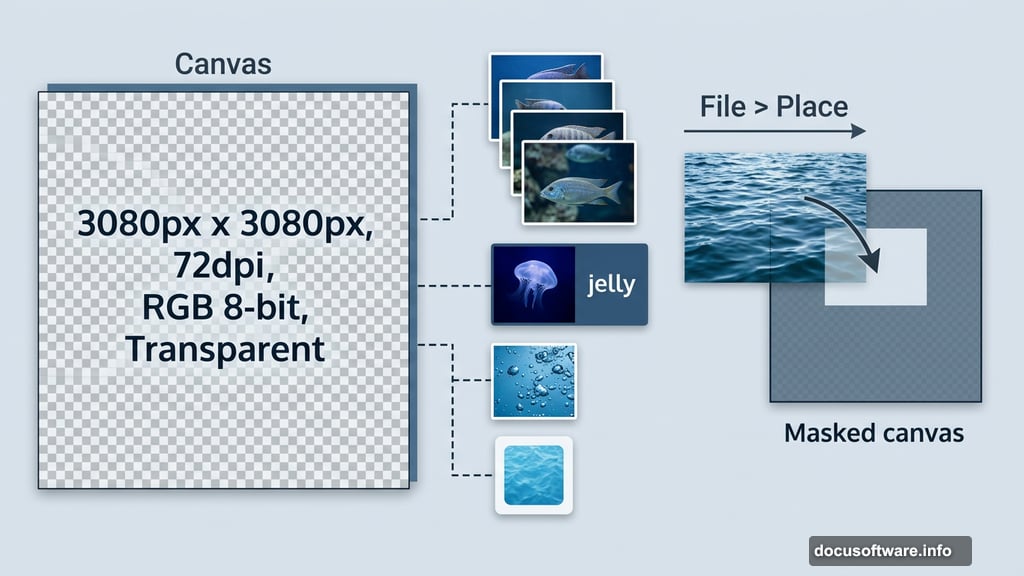
You’ll need a library interior photo, a water roof image, three fish photos, a jellyfish (or “jelly”) image, a bubbles photo, and a water texture. The tutorial page links to all of them directly, so grab those first.
Also make sure your Photoshop version supports Camera Raw filters, since that’s the finishing touch for the final effect.
Setting Up Your Canvas
Start fresh. Go to File > New and punch in these settings:
- Preset: Custom
- Width: 3080px
- Height: 3080px
- Resolution: 72px
- Color Mode: RGB Color, 8-bit
- Background Contents: Transparent
A square canvas gives you plenty of room to work and keeps the composition feeling balanced. The transparent background means you’re starting with total control — nothing locked in yet.
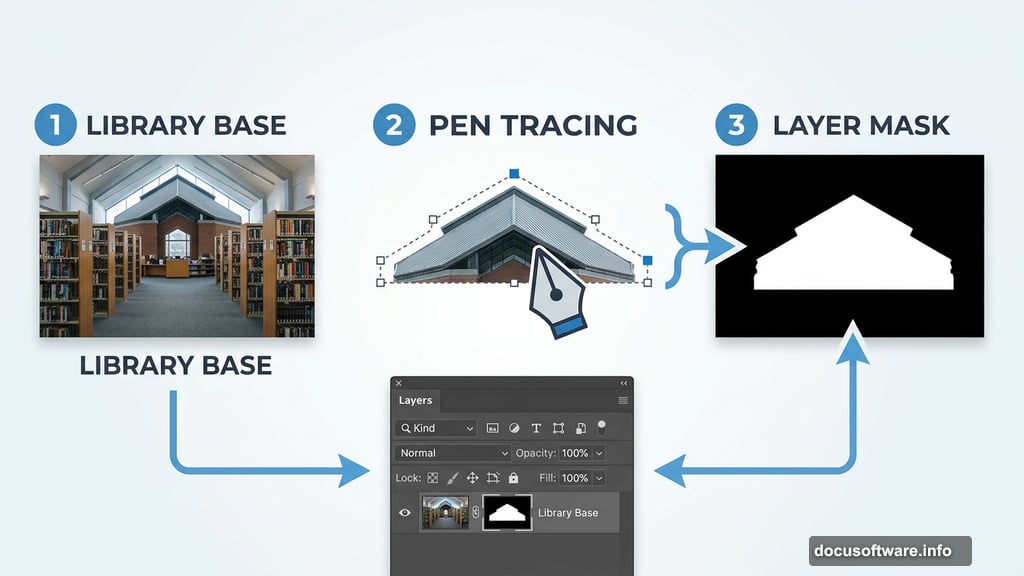
Placing the Library and Masking the Roof
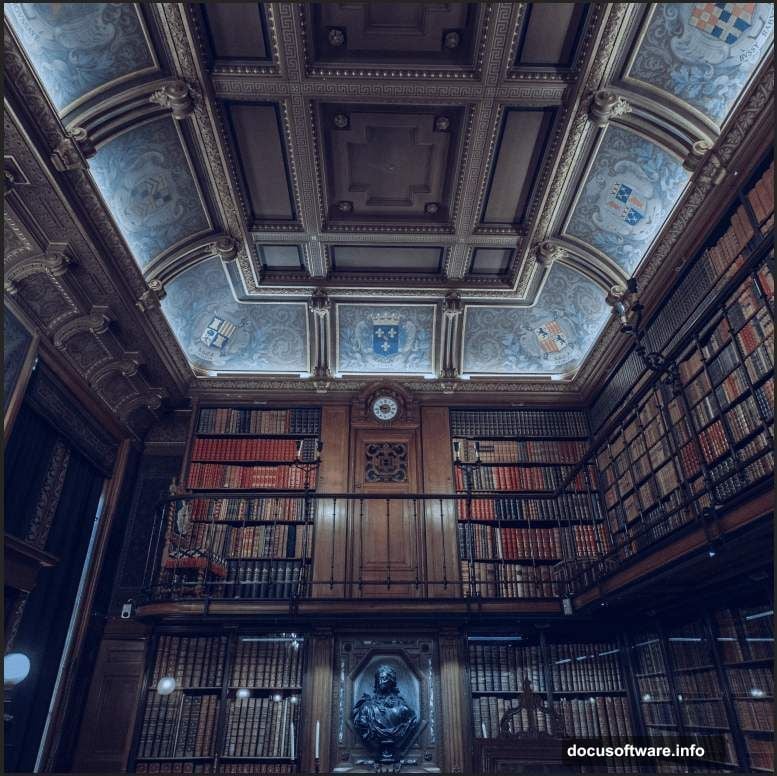
Go to File > Place and drop in your library image. Once it’s on the canvas, hit Ctrl/Cmd + T to open the transform controls and resize it to fit. In older Photoshop versions, hold Alt + Shift to scale from the center proportionally. In Photoshop CC, just hold Alt and all sides scale together automatically.
Now comes the most important masking step. Grab the Pen Tool (P) and carefully trace around the roof area of the library. The Pen Tool works by placing anchor points — click once to start, click again to set the next point, and keep clicking to build your selection path segment by segment.
A few Pen Tool tips worth knowing:
- The most recently placed anchor point shows as a solid square. Older points appear hollow.
- To close your path, hover back over your very first anchor point until you see a small circle appear next to the cursor, then click.
- To leave the path open, hold Ctrl/Cmd and click anywhere away from your shape.
Once your path is complete, right-click inside it and choose Make Selection. Then create a layer mask from that selection. This cleanly isolates the roof area so you can replace it with the water surface image in later steps.
Lighting and Color Adjustments
This is where the underwater atmosphere really starts to take shape. The tutorial layers several adjustment layers on top of the library image, each one nudging the mood a little further toward that cool, submerged look.
Step 3 adds a Levels adjustment layer to control overall brightness and contrast. Pull the shadows in a touch and lift the midtones slightly — you want the library to feel lit from above, like light filtering through water.
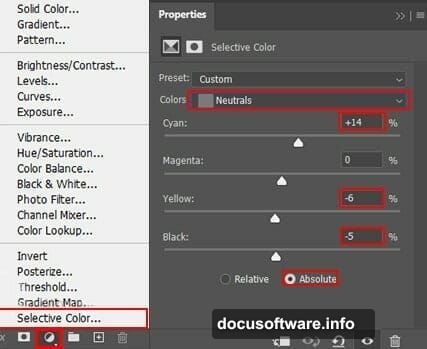
Step 4 brings in a Selective Color adjustment. This lets you push the color toward cooler, bluer tones that read as underwater without making things look artificially tinted.
Step 5 uses a Curves adjustment layer. After adding it, grab a Round Brush set to black and paint over the upper and middle portions of the library on the mask. This darkens those zones selectively, making the space feel deeper and more enclosed.
Building the Dark Underwater Atmosphere
Steps 6 through 8 continue refining the light and shadow balance — and this is honestly where the magic happens.
Step 6 adds a Color Fill adjustment layer set to solid black, then uses a Soft Round Brush at just 10% flow to gently paint darkness into the upper and middle areas. Low flow is the key here. Build the shadow gradually with multiple strokes rather than one heavy pass.
Step 7 adds another Curves layer, but this time press Ctrl/Cmd + I to invert the mask immediately after creating it. That makes the whole adjustment invisible by default. Then switch to a white brush and paint only where you want highlights — window frames, book spines, architectural details that would catch filtered light.
Step 8 repeats that same inverted Curves approach, this time painting the deeper shadow zones with a white brush on the mask. It sounds counterintuitive, but inverting first and painting with white gives you incredibly precise control over exactly where each adjustment appears.
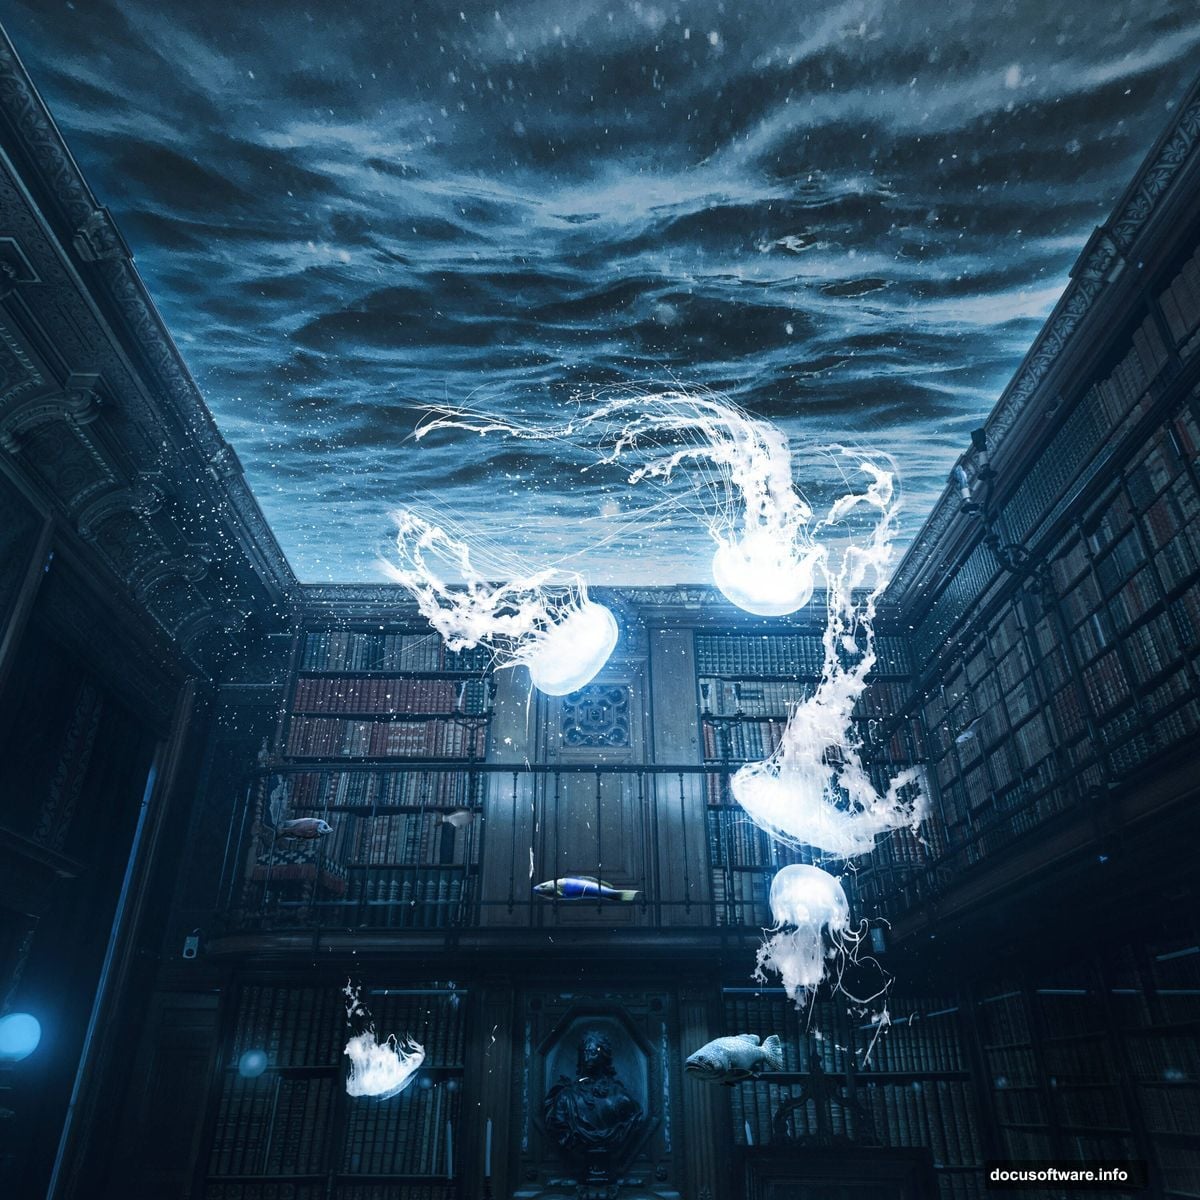
Adding the Water, Creatures, and Final Glow
After the base lighting is locked in, the remaining pages of the tutorial cover placing the water roof over the masked area, positioning your fish and jellyfish throughout the scene, and scattering bubbles to sell the underwater depth.
Each creature gets its own blend mode and lighting treatment to make it feel like it genuinely belongs in the space rather than sitting on top of it. Pay attention to where your light sources are — fish near the top of the frame should catch more brightness, while those lower in the scene can sit in softer shadow.
The very last step applies a Camera Raw filter across the entire composite. This is one of those finishing moves that ties everything together. It lets you fine-tune color grading, add a slight vignette, and boost that underwater glow in a way that makes the whole scene feel cohesive.
If you’ve made it this far, you’ve built something genuinely stunning. The combination of a familiar, cozy space — a library — with something as otherworldly as jellyfish drifting between bookshelves creates exactly the kind of surreal tension that makes great photo manipulation worth lingering over.
Experiment with the color grading in that final Camera Raw step. A cooler teal shift reads more like deep ocean. A warmer amber pushes the mood toward something more mysterious and antique. Either direction works beautifully with this concept.