
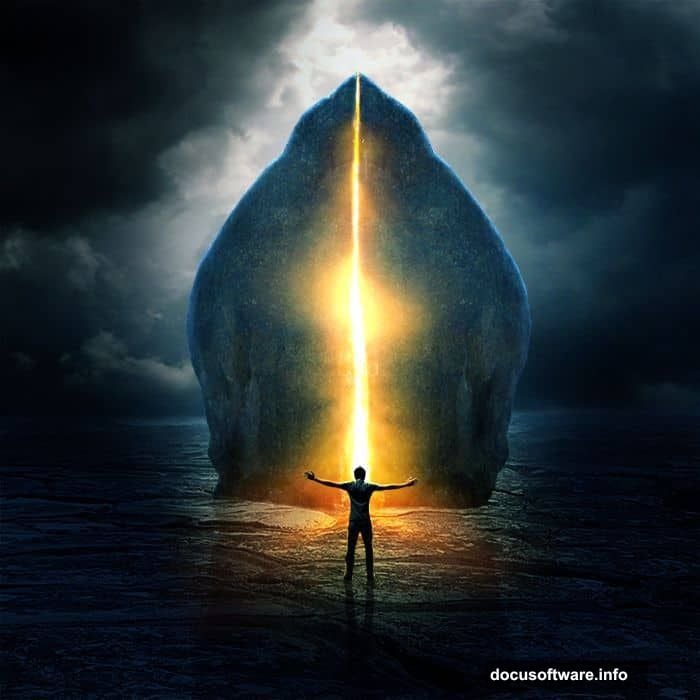
Photo manipulation is one of the most exciting things you can do in Photoshop. You start with a handful of ordinary stock images and end up with something that looks like it belongs in a sci-fi film.
This tutorial walks you through exactly how to do that. Specifically, you’ll learn how to build a surreal portal scene complete with a dramatic leaking light effect. The technique comes from designer Jenny Le, and it covers everything from basic layer setup to advanced masking and blending work.
Ready? Let’s get into it.
Stock Images and Resources You’ll Need
Before opening Photoshop, gather your source materials. Here’s what the original tutorial uses:
- Background image (landscape near a sky)
- A dramatic sky photo with strong contrast
- A cliff image
- A figure of a man
- Light texture photos
You’ll find these spread across stock sites like Morguefile, Photoxpress, and sxc.hu. A quick tip: for the sky especially, look for something dark with good contrast. That contrast does a lot of heavy lifting later when you’re building the portal’s glow effect.
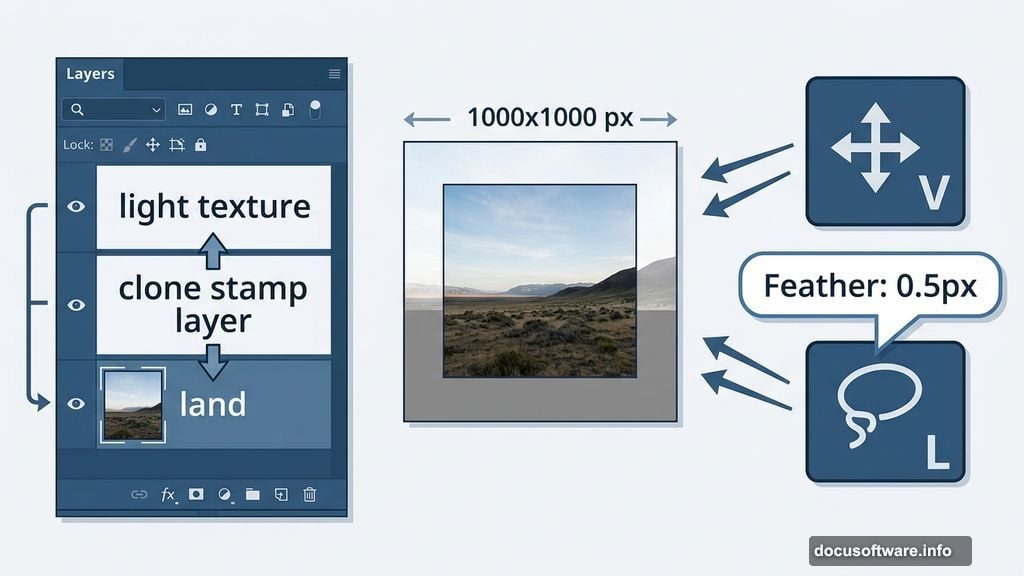
Setting Up Your Canvas and Background
First, create a new Photoshop document at 1000×1000 pixels. Fill it with any color you like — white works fine to start.
Next, open your background landscape image and drag it onto the canvas using the Move Tool (press V). You don’t need the whole image. Just use the portion near the sky. That section gives you the most natural-looking base for the scene.
Name this layer something simple like “land” so you can find it easily later.
Fixing the Background Edge with the Lasso Tool
Here’s where the real editing begins. The left edge of the background image probably has a bit of sky peeking through. It looks off. So you’ll want to fix it.
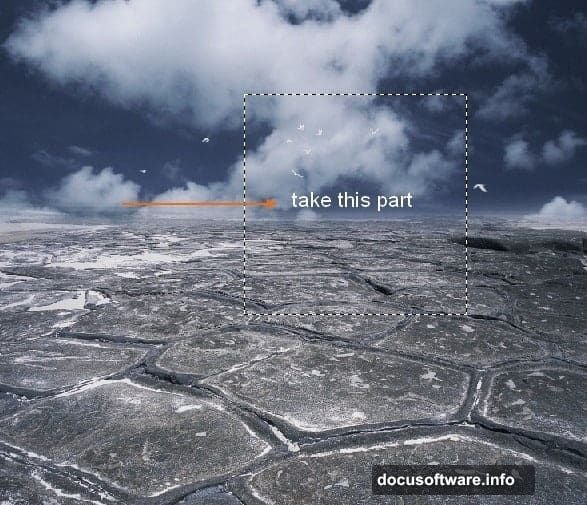
Grab the Lasso Tool (press L) and make a selection on the right edge of your background. Right-click that selection and choose Feather, setting it to 0.5 pixels. Then right-click again and choose Layer via Copy. That copies just that small section into its own layer.
Now move this copied section to the left to cover the awkward edge. Then go to Edit, Transform, and Flip Horizontal. This mirrors it so the edge looks seamless.
Finally, add a layer mask to this layer by clicking the mask button at the bottom of the Layers panel. Use a soft black brush to gently blend the edges. The goal is to make the patch invisible — like it was always part of the background.
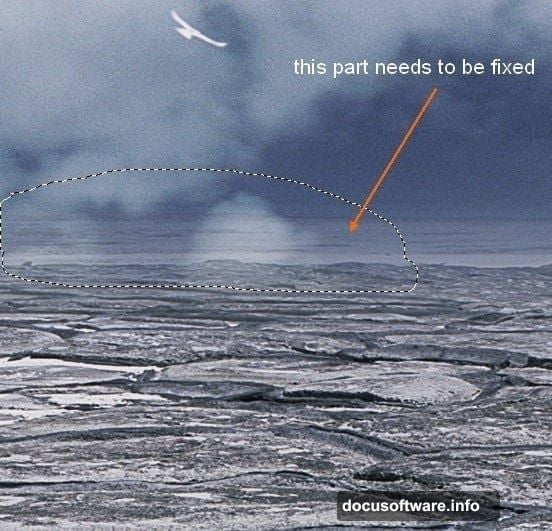
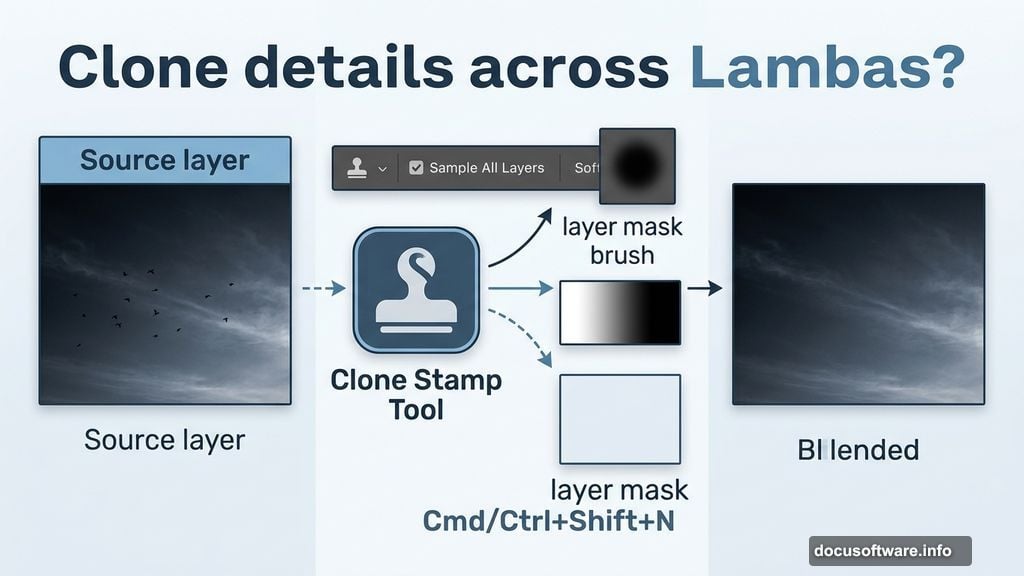
Removing Distracting Elements with the Clone Stamp Tool
The background probably has birds or other small details you don’t want. The Clone Stamp Tool handles this beautifully.
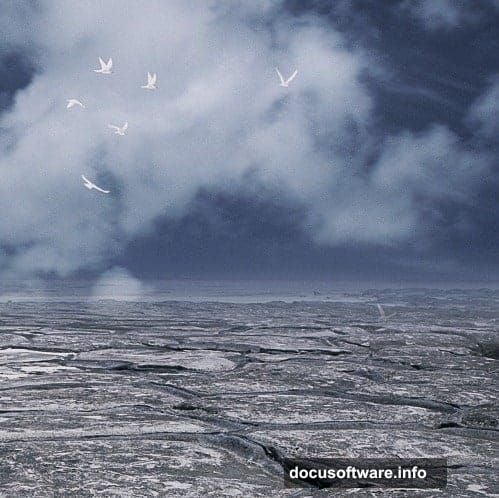
Press Cmd/Ctrl+Shift+N to create a fresh blank layer. Select the Clone Stamp Tool by pressing S. Make sure “Sample All Layers” is checked in the options bar at the top. This setting is important — it lets you clone from layers below without flattening anything.
Hold Alt and click the area you want to use as your source. Then paint over the birds or whatever’s in the way. Take your time here. Multiple small strokes look more natural than one big sweep.
Adding the Sky with Smart Layer Blending
Open your sky stock image. Drag it onto the canvas and position it above the background layer. Press Cmd/Ctrl+T to enter Free Transform mode, then resize and reposition it to replace the sky in the original background.
Here’s the key compositional choice: place the brightest part of the sky image at the top center of your canvas. That bright spot becomes the light source for the portal. Everything else in the scene will react to that light, so getting this placement right early saves a lot of adjustments later.
Why Masking Makes This Scene Work
Everything described so far leans heavily on one fundamental Photoshop skill: masking. And that’s really the heart of this whole tutorial.
Layer masking is the technique where you paint black or white on a special channel attached to a layer. Black hides parts of the layer. White reveals them. Because you’re not actually deleting pixels, you can always come back and adjust.
For a scene like this — where multiple images need to blend together convincingly — masking is what separates a rough composite from something that actually looks real. Spend extra time on the edges where two images meet. A soft brush at low opacity works better than one aggressive stroke.
Blending Techniques That Sell the Effect
Once your background layers are solid, you’ll build the rest of the scene on top — the cliff, the figure, and then the portal light effects.
For each new element, the process is similar. Drag it in, transform it to fit, then mask out the hard edges. Blend modes like Screen or Overlay help enormously with light effects. Screen mode, specifically, is your best friend for anything glowing. It drops out dark areas and lets only the bright parts show through, which makes light leaks and portal glows look convincing fast.
The leaking light effect in this tutorial comes from combining light texture photos on Screen mode with careful masking. Layer several of them at different opacities to build up depth and intensity.
Getting Retouching and Color Right
After all your elements sit in place, retouching and color grading pull everything together. Adjustment layers — specifically Curves, Hue/Saturation, and Color Balance — help unify the different stock images so they feel like they belong in the same world.
The trick is working with adjustment layers clipped to individual image layers. That way, you’re only adjusting one element at a time without affecting the whole composite. Once each piece looks right on its own, a final set of global adjustment layers ties the color palette together across the entire scene.
Dark, moody tones with a strong light source in the center tend to work best for this kind of surreal portal effect. Push the shadows toward cool blues or teals, and let the portal light blow out toward warm yellows and whites.
This kind of project teaches you more about Photoshop than almost any single-subject tutorial. You’re touching selection tools, masking, blending modes, retouching, and color correction all in one go. That’s what makes it worth attempting even if parts feel tricky at first.
Take it one step at a time, and don’t stress if your version looks a little different. That’s actually the fun of photo manipulation — the same techniques produce a thousand different results depending on the images you choose and the choices you make along the way.