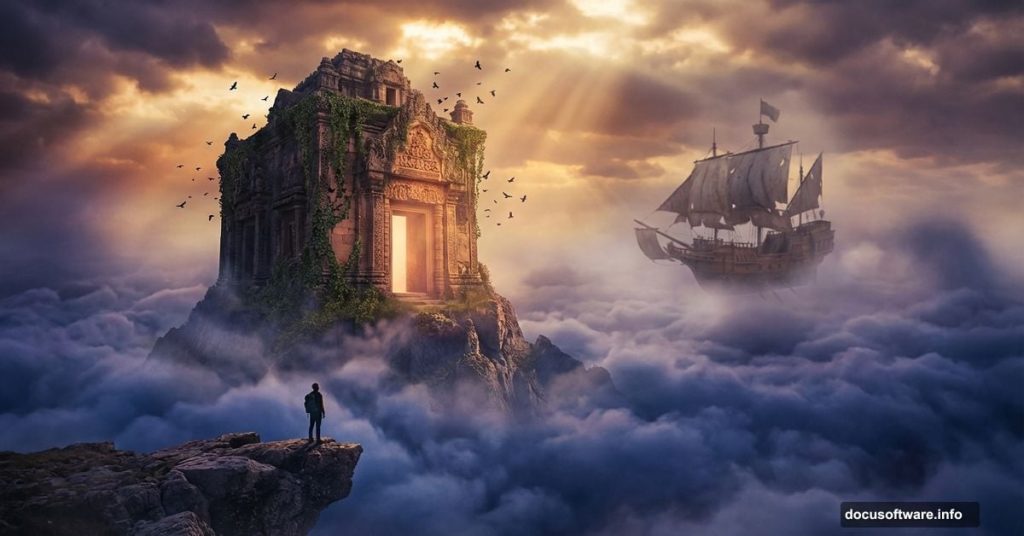
Ever looked at a dramatic mountain photo and thought, “What if there was an ancient temple hiding up there, above the clouds?” That’s exactly the kind of creative magic this Photoshop tutorial walks you through.
Artist Adi Panca takes you on a full photo manipulation journey. You’ll combine real mountain photography, stone textures, and sky images into one breathtaking surreal scene. Plus, the final image tells a complete story — a lone climber discovers a secret temple floating above the sky, with a mysterious flying ship drifting nearby.
Sound ambitious? It absolutely is. But the process breaks down into manageable steps that any intermediate Photoshop user can follow.
Start With a Sketch Before You Open Photoshop
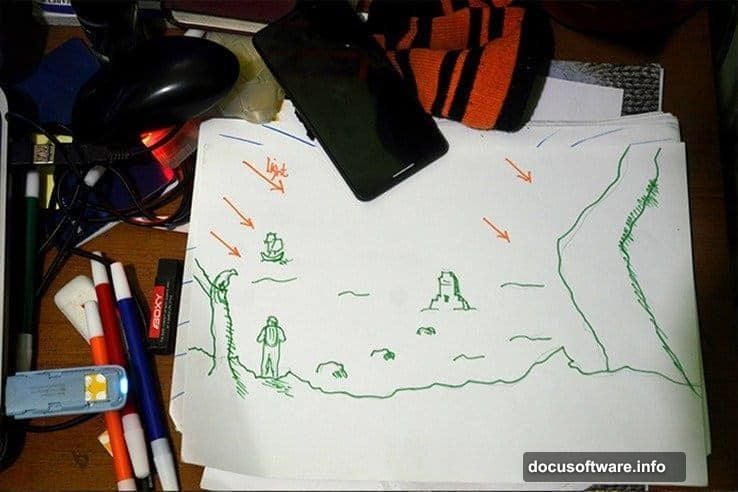
Here’s something many beginners skip: planning on paper first. Adi starts every complex manipulation with a hand-drawn sketch.
This isn’t about artistic talent. It’s about knowing what photos you need before you start hunting for them. Your sketch becomes a shopping list. It tells you what perspective matters, what lighting direction you need, and how all the elements fit together.
So grab a pencil and rough out your scene before touching Photoshop. You’ll save hours of frustration later.
Gather Your Raw Materials
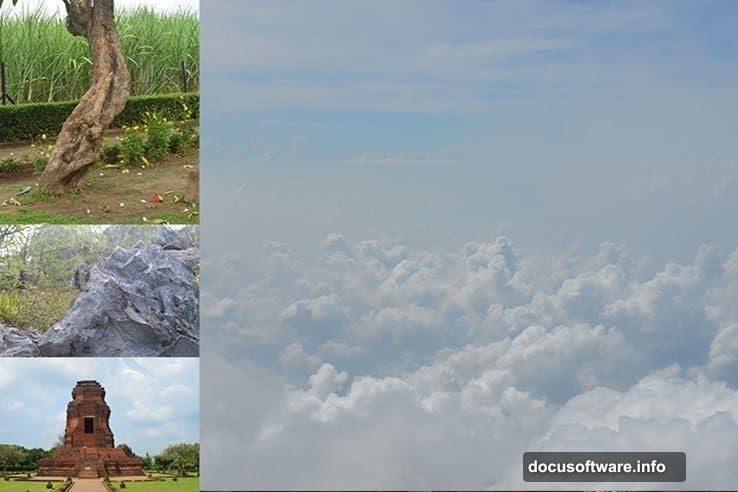
The mountain stone photos in this tutorial came from Gunung Lawu in Indonesia, where Adi actually hiked to capture them. That firsthand location photography gives the piece its authentic texture and believable lighting.
You’ll need several key resources to build this scene:
- Multiple sky photos to layer and blend
- Stone and rock textures for the cliff face
- A climber figure
- Temple imagery
- Trees, ivy, and crows for atmosphere
- A ship for that fantasy element
All the resource photos are available through Adi’s DeviantArt page and the links provided in the tutorial. Most importantly, pay close attention to perspective and light direction when selecting your stock photos. Mismatched lighting is the fastest way to make a composite look fake.
Setting Up Your Photoshop Canvas
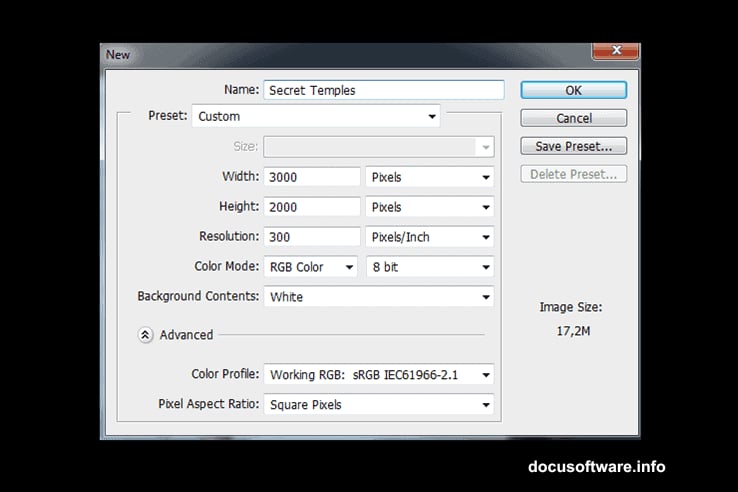
Open Photoshop CS5 or newer and create a new document using File > New (or Cmd/Ctrl + N). Set your canvas to 3000 pixels wide by 2000 pixels high. That generous resolution gives you room to work at full detail without losing quality when you resize elements.
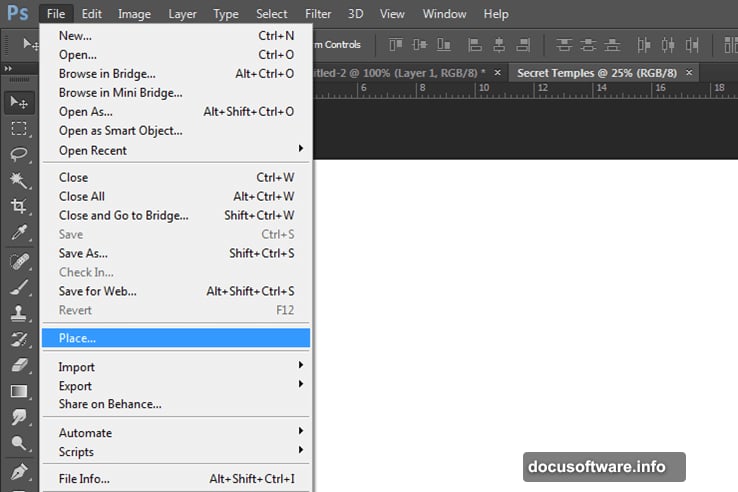
Then bring in your photos using File > Place. This embeds each image as a smart object, which lets you scale elements without permanently destroying pixels. A smart habit for any composite work.
Building the Sky Background
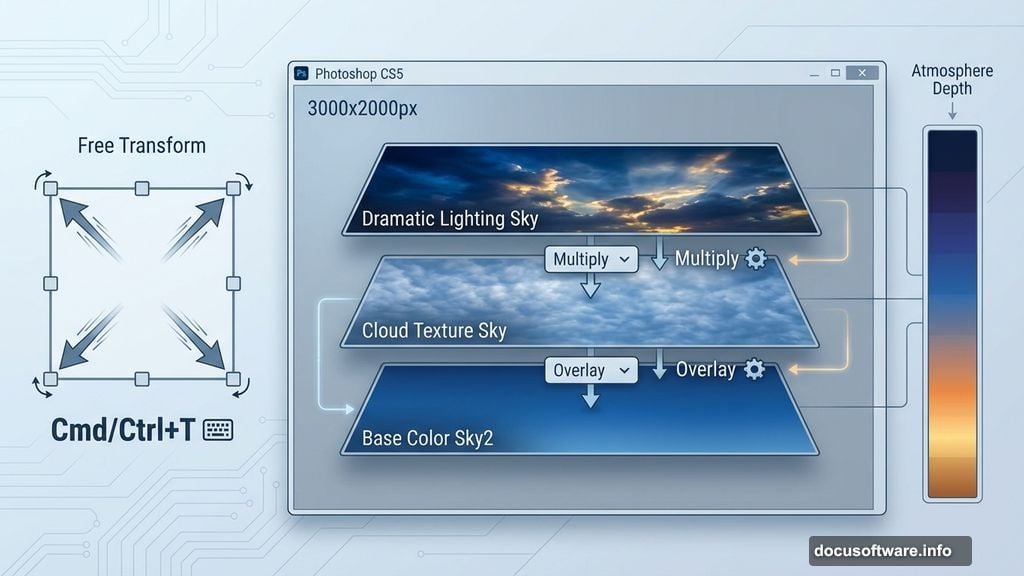
The sky forms your entire mood foundation. Adi layers three different sky photos to build depth and atmosphere. Each layer contributes something different — base color, cloud texture, and dramatic lighting.
After placing sky2 as your first layer, use Cmd/Ctrl + T to enter Free Transform mode. Pull the corner handles to stretch the image across your full canvas. This sets the initial atmosphere before you add any foreground elements.
Blending multiple skies together creates that otherworldly warmth that makes the final piece feel like it exists just beyond reality.
Constructing the Cliff With Stone Photos
This is where your mountain photography earns its place. Four different stone photos combine to build a convincing cliff face. The key technique here is masking — painting away hard edges so each stone photo blends naturally with its neighbors.
Think of it like building a puzzle where the pieces need to feel like they grew together naturally. Layer masks let you reveal and conceal portions of each stone photo with a soft brush. Hard edges immediately signal “this is fake,” so blend everything with patience.
Realistic shadows underneath stone overlaps add crucial depth. Use a dark, low-opacity brush to paint shadows where one rock sits above another.
Placing the Climber With Believable Lighting
Cutting out the climber figure requires careful selection work. The key isn’t just clean edges — it’s matching your figure’s lighting to the scene’s light direction.
Study where your sky light comes from. Then add a subtle highlight on the climber’s side facing that light source. Add a soft shadow on the opposite side. This matching process is what sells the illusion that the climber actually stands in that environment.

Realistic shadows on the cliff surface beneath the climber complete the grounding effect.
Adding Temples, Trees, and Atmospheric Details
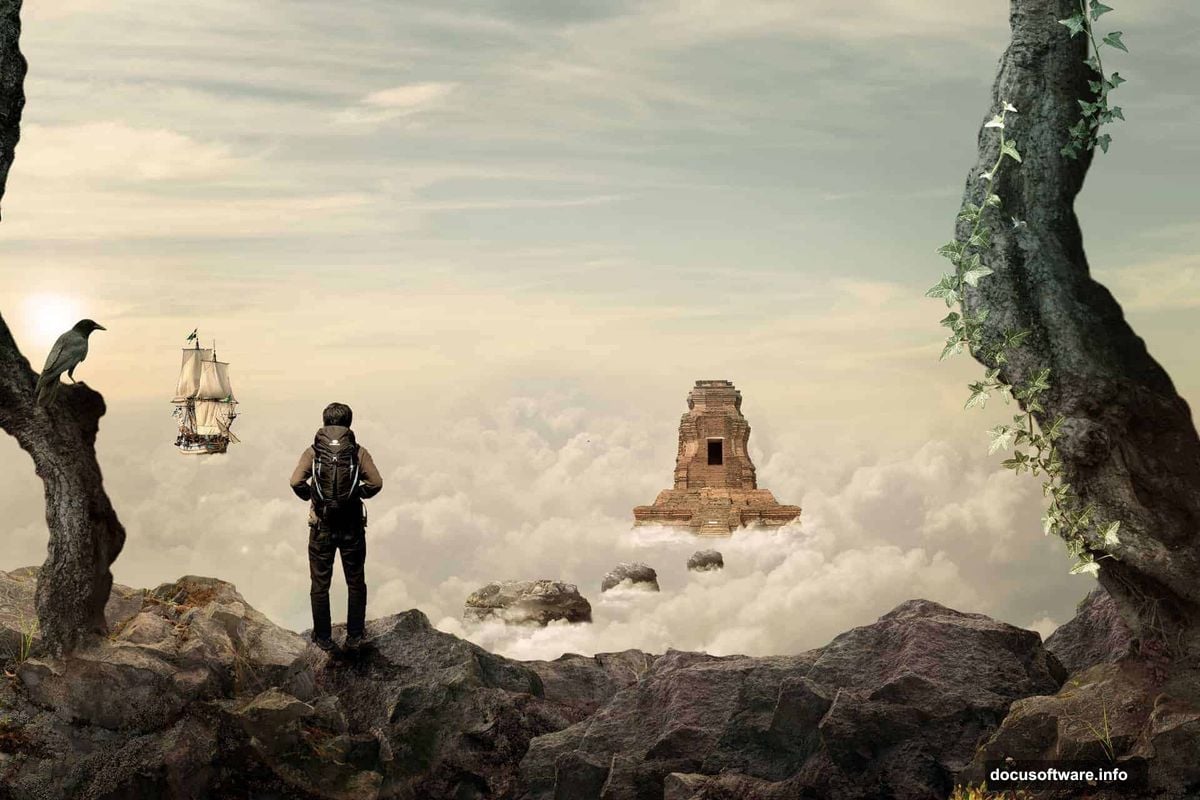
The temple and trees follow similar placement logic. Place each element, then adjust its brightness and contrast to match the ambient scene lighting. Elements in the distance should appear slightly hazier and less saturated than foreground elements. That atmospheric perspective is what commenters noted was missing in the original — distant objects fade into haze on real mountains.
The ivy uses Photoshop’s Puppet Warp tool to curl and wrap organically around surfaces. It’s a clever technique that gives plant elements natural movement instead of stiff, pasted-on appearance.
Crows scattered across the scene add life and scale reference. Small details like these push a scene from “technically correct” to genuinely immersive.
Finishing With a Warm Color Tone
The final step ties everything together. A warm color tone effect unifies all your separate photo elements under one consistent mood. Without it, each photo reads as its own distinct piece. With it, the whole scene breathes as one cohesive image.
Adi achieves this through adjustment layers — Color Balance and Photo Filter layers work particularly well. Pushing warmth into the midtones and highlights creates that golden, slightly mystical atmosphere the piece carries.
Creating a composite like this teaches you skills that transfer across every photo manipulation project you’ll ever attempt. Lighting matching, realistic shadows, atmospheric perspective, and color grading are fundamental techniques that show up constantly in professional work.
Start with a sketch. Gather photos thoughtfully. Build in layers. Match your light. The rest follows naturally from there.