Ever wonder how those stunning submersible scenes get made in Photoshop? The kind where a helicopter or vessel seems to float through deep ocean water, surrounded by coral and soft blue light?
Good news. You don’t need advanced skills to pull this off. This tutorial walks you through the whole process using blending modes, adjustment layers, and a few clever masking tricks. No complex selections required, and beginners can follow along just fine.
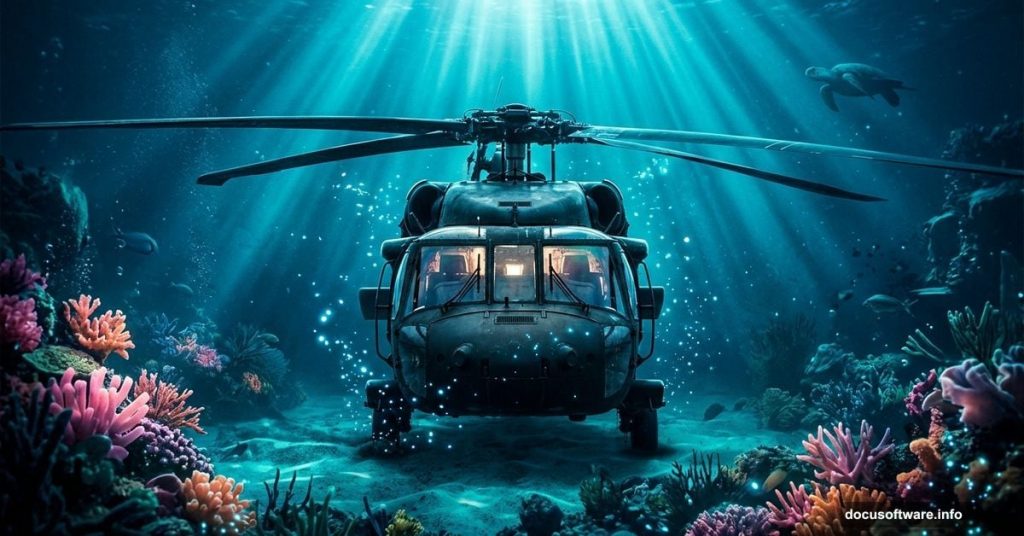
Here’s what you’ll create: a dreamy underwater scene that feels like you’re peering through the glass of a real submersible. Let’s get started.
What You Need Before Starting
Grab these free resources before opening Photoshop:
- Coral image
- Coral Reef image
- Helicopter image
- Turtle image
- Lens Flare image
Once you have everything downloaded, you’re ready to build your canvas.
Setting Up Your Canvas
First things first. Create a brand new document by going to File > New. Then enter these exact values:
- Preset: Custom
- Width: 4000px
- Height: 6000px
- Resolution: 300
- Color Mode: RGB Color, 8-bit
- Background Contents: Transparent
Why these dimensions? The high resolution keeps everything crisp if you decide to print or display the final piece at large sizes. Plus, working big gives you more room to reposition elements without losing quality.
Placing the Helicopter
Next, go to File > Place and bring your helicopter image onto the canvas. This becomes the centerpiece of your entire scene, so don’t worry about perfect placement yet. You’ll refine the position later.
Cutting Out the Windows
This step is where the magic starts. You need to remove the helicopter’s windows so the underwater environment shows through them, creating that classic submersible porthole effect.
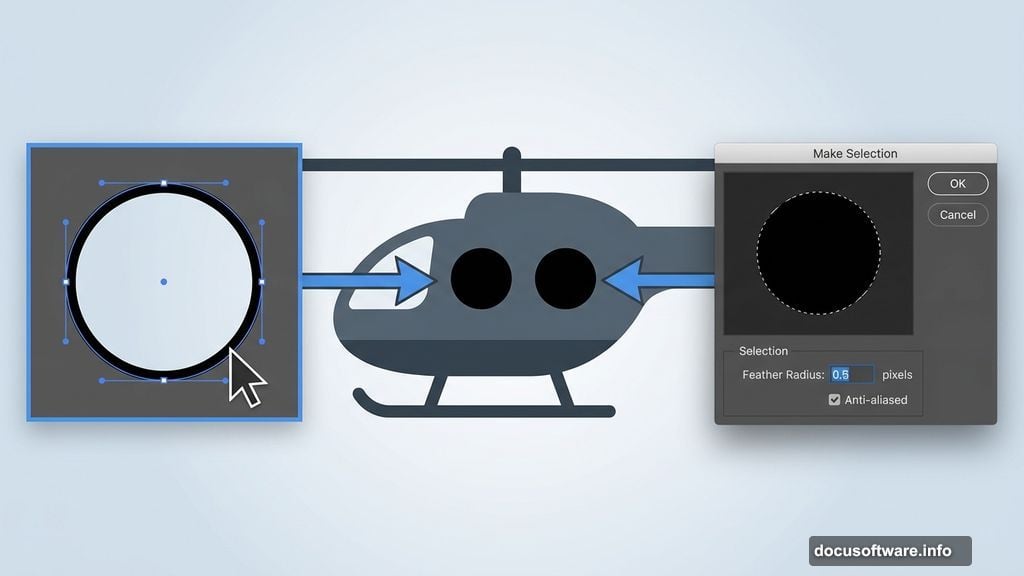
Select the Pen Tool (P) and carefully trace around each window on the helicopter. Take your time here. The Pen Tool gives you smooth, precise curves that the Lasso Tool simply can’t match for rounded shapes.
Once you’ve traced a window, right-click and choose Make Selection. Set these options:
- Feather Radius: 0.5
- Anti-aliased: Checked
- Operation: New Selection
Hit OK. Then press D to set your foreground color to black and white defaults, and hold Alt + Delete to fill the selection with black. This knocks out the window area cleanly.
Repeat this for every window on the helicopter. Yes, it takes a few passes. But the result looks professional and totally convincing.
Adding Atmosphere With Adjustment Layers
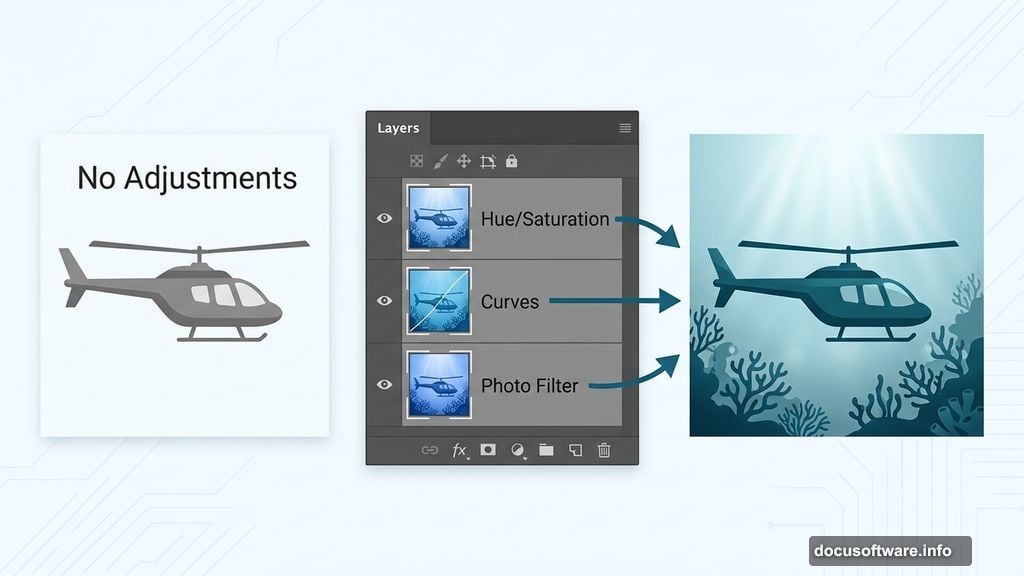
Now comes the fun part. Three adjustment layers will transform your flat helicopter cutout into something that genuinely feels submerged.
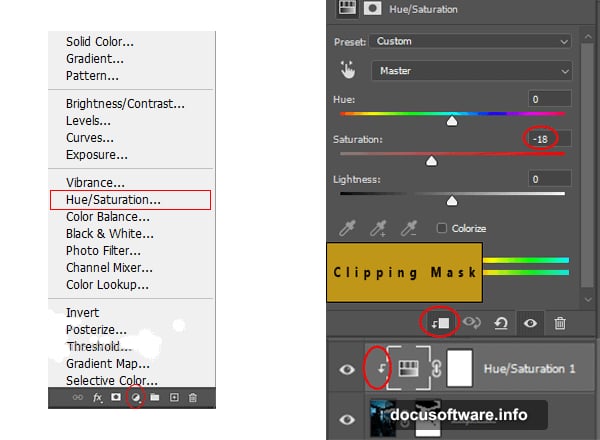
Hue/Saturation shifts the color temperature toward that cool, blue-green tint you associate with deep water. Pull the hue slightly toward cyan and reduce saturation a touch.
Curves lets you control the overall brightness and contrast. Underwater scenes tend to lose light quickly, so darkening the midtones creates depth and realism.
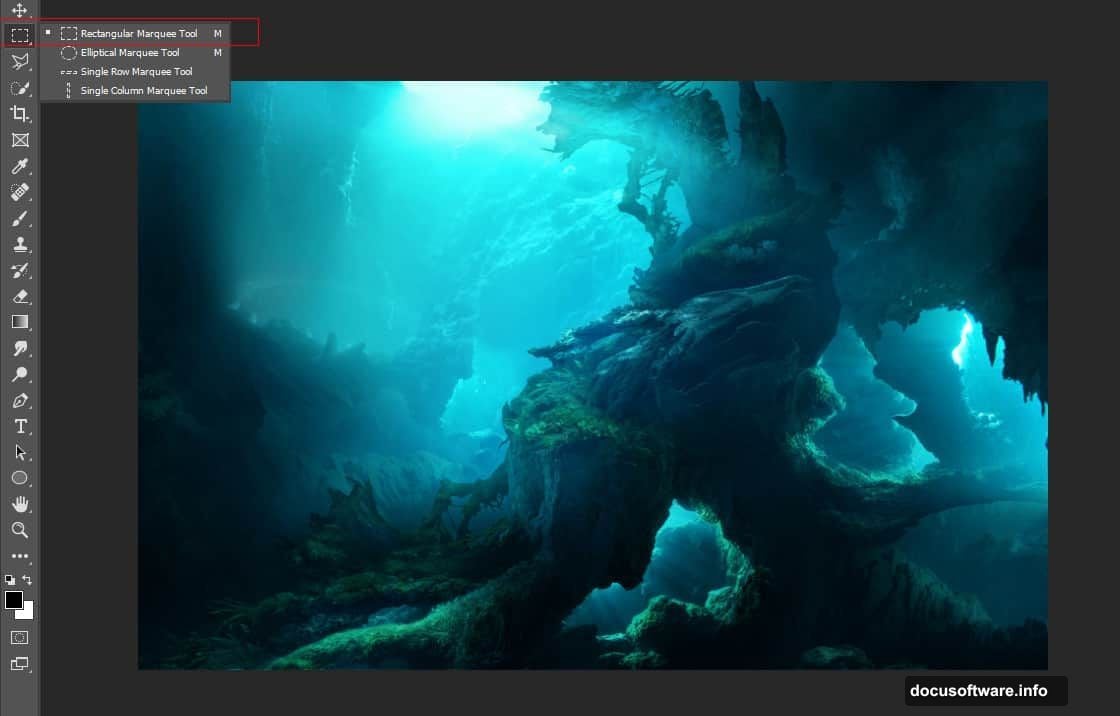
Photo Filter applies a unified color cast across the scene. A cooling filter works beautifully here. It ties all the elements together so nothing looks like it was pasted in from a sunny beach photo.
Stack these three adjustment layers on top of your helicopter layer. Already your scene should start feeling like it belongs somewhere far below the surface.
Bringing In the Coral
Open your coral image and grab the Rectangular Marquee Tool (M). Make a selection around the coral, then copy and paste it onto your main canvas with Ctrl/Cmd + C followed by Ctrl/Cmd + V.
Here’s a critical detail. Place this coral layer beneath all the other layers you’ve created so far. That positions it naturally in the background, behind your helicopter and adjustment effects.
Use the Transform Tool (Ctrl/Cmd + T) to resize and reposition. Hold Alt + Shift while dragging a corner handle to scale proportionally from the center. Arrange the coral so it frames the bottom of your composition.
Adding the Coral Reef Layer
Open the coral reef image and use the same Rectangular Marquee Tool (M) to select it. Copy and paste onto your canvas.
Now switch to the Round Brush Tool (B) to blend the edges naturally. Set the brush Size to 1000px and Hardness to 0%. This gives you an ultra-soft edge that feathers beautifully into the surrounding scene.
Here’s a tip that will save you headaches later. Always use a layer mask instead of the Eraser Tool. Click the layer mask icon at the bottom of the Layers panel, set your foreground color to black, and paint away any areas you want to hide.
Why does this matter? With a layer mask, you can always bring areas back by switching to white and painting again. The Eraser Tool permanently deletes pixels. Make a mistake with the eraser and there’s no recovery. Layer masks are forgiving and reversible, which is exactly what you want when learning.
Paint along the top edge of the coral reef layer to blend it smoothly into the water above. The soft brush creates a natural gradient transition rather than a harsh, obvious cutout line.
Finishing Touches That Elevate the Scene
At this stage your core composition is in place. The adjustment layers handle the color science, the coral frames the scene, and the helicopter sits center stage with its windows cut clean.
From here, adding the turtle and lens flare props brings life and light to your creation. The turtle drifts naturally through the scene when placed on its own layer with similar Hue/Saturation adjustments applied. The lens flare, when blended with the Screen blending mode, creates that beautiful light scattering effect you’d see filtering through deep water.
The whole process relies on one principle: blending modes and adjustment layers do the heavy lifting. You’re not drawing complex selections or painting detailed textures. Instead, you’re letting Photoshop’s tools handle the technical color matching while you focus on composition and storytelling.
That’s what makes photo manipulation so rewarding for beginners. A handful of techniques, applied thoughtfully, produce results that look genuinely impressive. And once you understand layer masks and adjustment layers, you can apply this exact workflow to any composite scene you want to create.