Lewis Carroll’s fantasy world has inspired artists for over 150 years. And honestly, it’s easy to see why. The swirling corridors, pocket watches, and falling-down-rabbit-hole energy translate beautifully into digital art. So if you’ve been looking for a creative Photoshop project that pushes your skills, this one is a fantastic choice.
In this tutorial, you’ll build an Alice in Wonderland-inspired photo manipulation from scratch. Along the way, you’ll work with masks, blending modes, warp transforms, and adjustment layers to pull everything together into one unified, dreamlike scene.
Ready? Let’s fall into the rabbit hole.
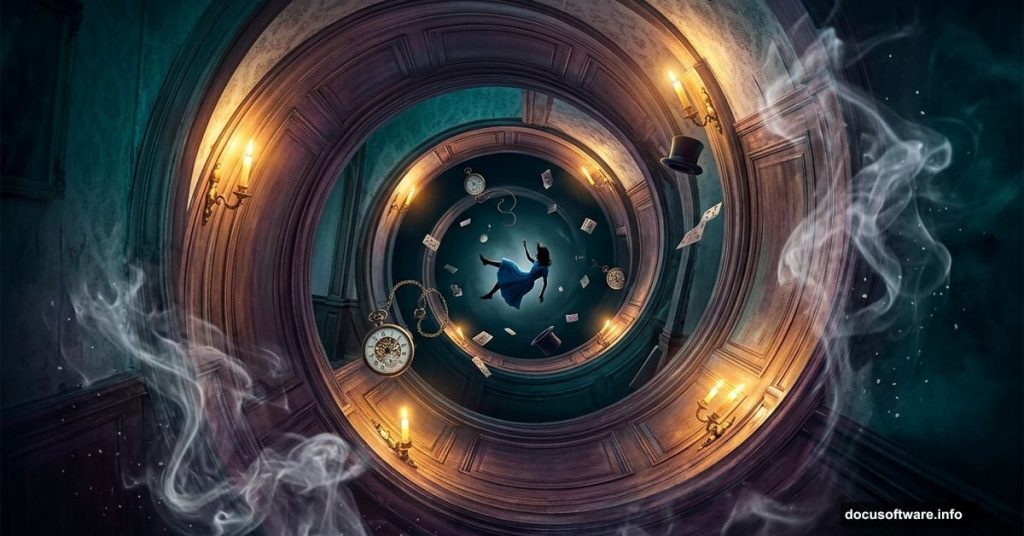
![A surreal Alice in Wonderland-inspired Photoshop photo manipulation featuring a Victorian corridor warped into a circular shape with a falling figure, smoke, and dramatic lighting]
Gather Your Resources Before You Start
Before opening Photoshop, collect everything you need. Hunting for assets mid-project breaks your creative flow and wastes time.
Here’s the full resource list for this project:
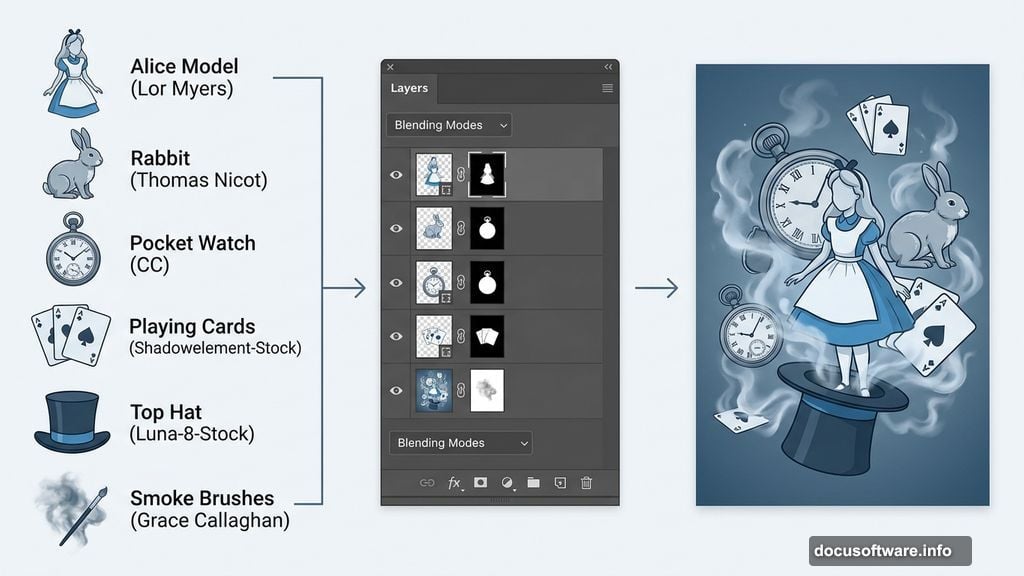
- Victorian background – Enchanted Stock
- Alice model – Lor Myers
- Rabbit – Thomas Nicot
- Smoke Brushes – Grace Callaghan
- Hair Brushes – Falln Stock
- Pocket Watch – CC
- Candle – Lindsay Coffman (alternative available)
- Playing Cards – Shadowelement-Stock
- Top Hat – Luna-8-Stock (alternative available)
Also, memorize these shortcuts now. You’ll use them constantly throughout the project.
- Cmd+Shift+N (Mac) or Ctrl+Shift+N (PC) creates a new layer fast
- [ and ] keys raise and lower your brush diameter while painting masks
- B switches to the Brush Tool, V switches to Move/Transform
- Add a mask via Layers > Layer Mask > Reveal All
These four shortcuts alone will save you serious time.
Step 1: Set Up Your Document
Launch Photoshop and create a new document. Since this project targets web display, set your resolution to 72 pixels/inch. For dimensions, go with a standard wallpaper size like 1680 x 1050 pixels. That gives you plenty of room to work without slowing down your machine.
Step 2: Fill the Background and Place Your Victorian Scene
Grab the Bucket Tool and fill your background layer with solid black. This dark base will show through any gaps as you warp and blend elements later, so getting it in place now matters.
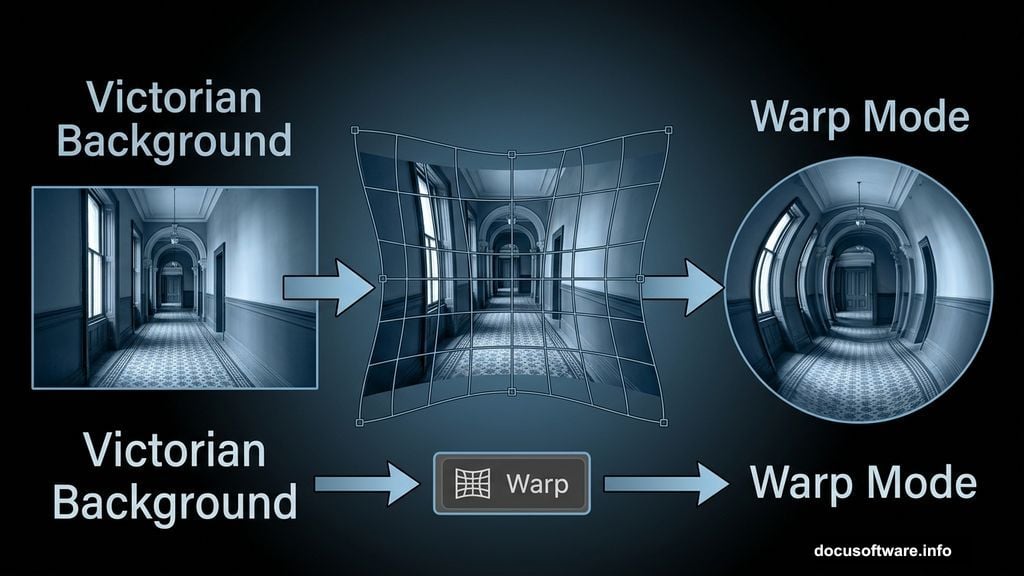
Next, go to File > Place and bring in your Victorian background image. Once it’s placed, click the Warp button in the selection toolbar to switch into Warp Mode. You’re about to reshape this image quite dramatically.
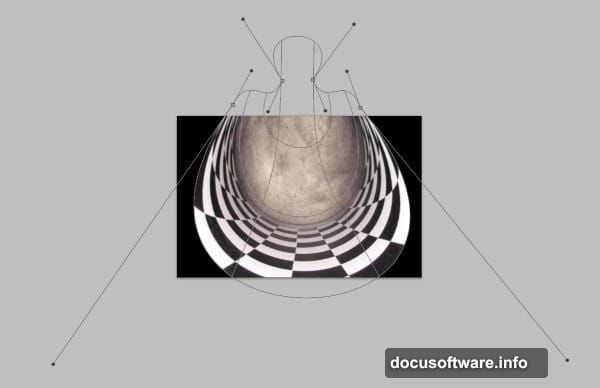
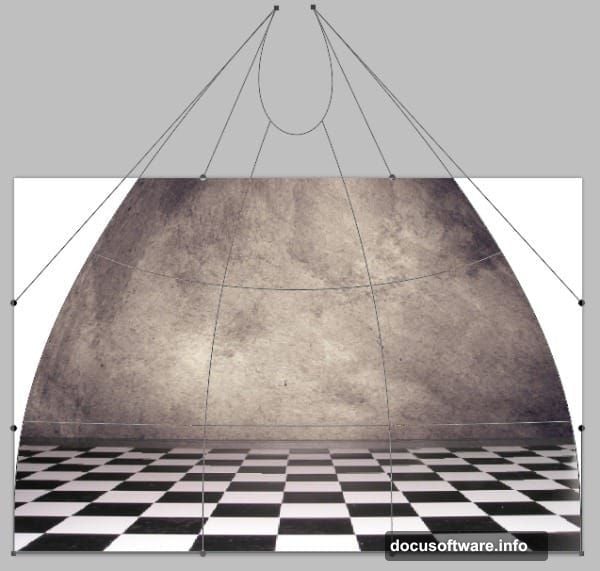
Step 3: Warp the Background into a Circular Corridor
This is genuinely the hardest part of the whole project. Expect to spend real time here, and don’t stress about getting it perfect on the first pass.
Your goal is to bend the Victorian background into a circular tunnel shape, like looking down a curved corridor. Start by pulling the top corner nodes upward and inward. Then do the same with the bottom corners.
Think of it as creating a teardrop silhouette with two imaginary circles sitting in the center of the composition. Work the nodes gradually until the center lines curve evenly and leave an opening at the top of the tunnel shape.
![Close-up of the Photoshop Warp tool being used to bend a Victorian hallway background into a circular tunnel shape for an Alice in Wonderland scene]
For perspective, click the wide bottom section of the background and drag it outward. This creates the illusion that the floor of the corridor extends toward the viewer. Try to keep both sides symmetrical as you work. Check your nodes regularly to make sure the curve stays balanced.
And again, don’t try to nail this perfectly before adding other elements. You’ll come back and fine-tune the warp as the rest of the scene takes shape around it.
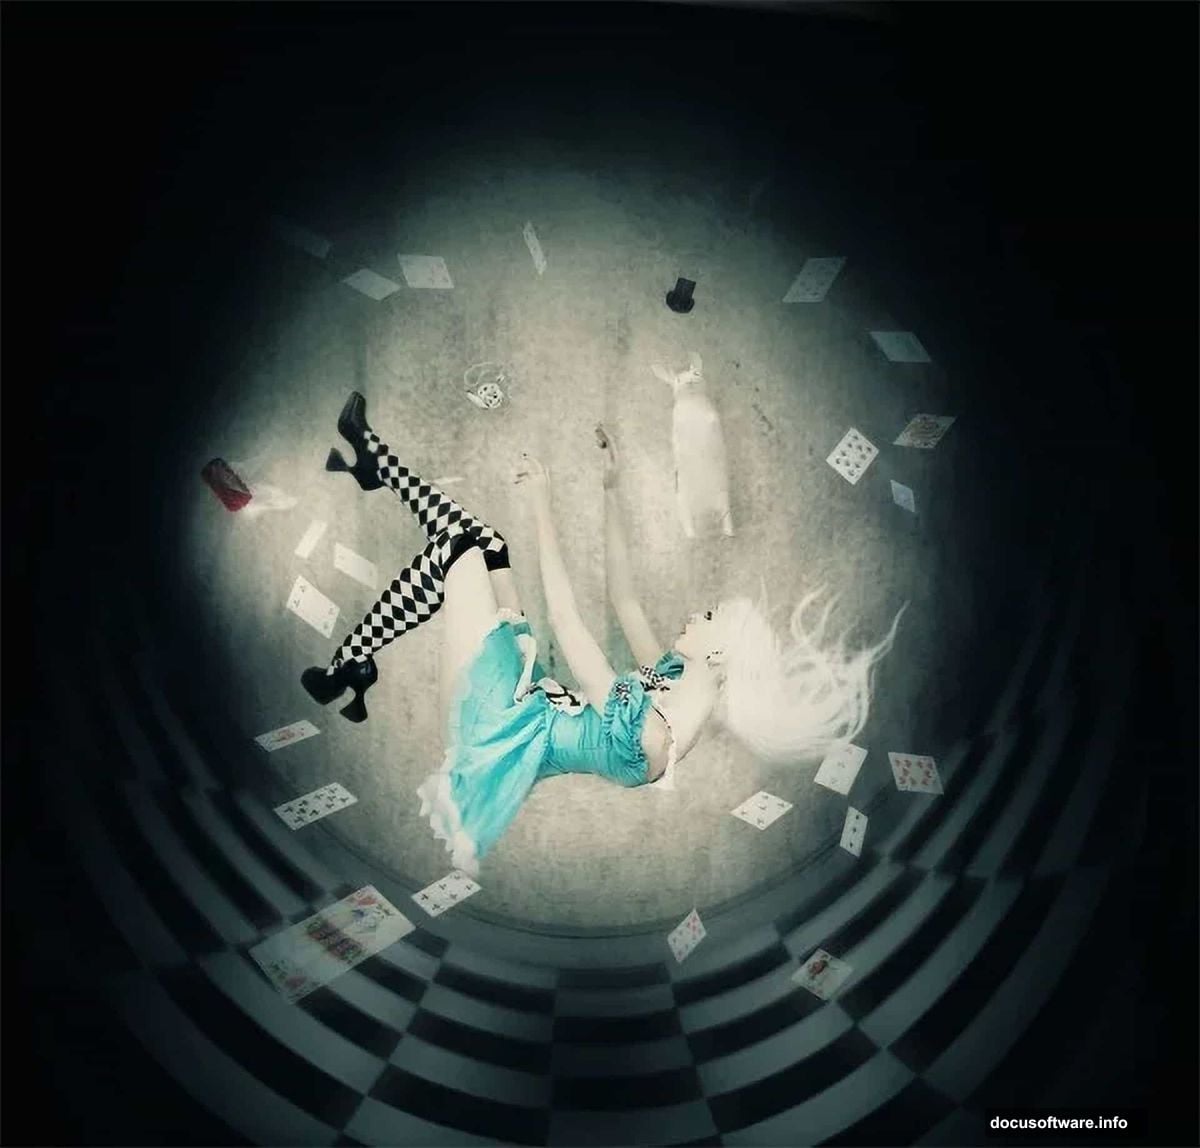
Step 4: Place and Position the Alice Model
Go to File > Place and bring in the Alice model photo. Scale her down slightly to fit comfortably within your document dimensions.
Here’s where you start creating that iconic falling sensation. Drag upward on the top node of the placed image to elongate the photo by about 70 pixels. This small stretch suggests movement and makes the figure feel like she’s tumbling through space rather than simply standing still.
Position her so she sits above the curved line at the back of the corridor, roughly 250 pixels from the top of the document. That placement puts her in the visual sweet spot, falling toward the viewer through the warped tunnel you’ve built.
Building the Rest of the Scene
From here, the project expands layer by layer. Each new element — the rabbit, the pocket watch, the playing cards, the top hat, the candle — gets placed, masked, and blended into the scene individually.
The smoke brushes add atmosphere and help soften hard edges where elements meet the background. Hair brushes let you extend or modify the model’s hair to feel more dynamic and windswept. Blending modes like Screen, Multiply, and Overlay help each element feel like it belongs in the same lighting environment rather than pasted on top.
Adjustment layers are your final step. Think Hue/Saturation, Color Balance, and Curves applied across the whole composition. These pull everything into a single unified color tone, which is what separates a polished manipulation from a collection of floating cutouts.
Tips to Keep Your Sanity Mid-Project
With a manipulation this complex, your Layers panel will fill up fast. Name your layers as you go. Group related elements together. It takes an extra ten seconds per layer and saves enormous frustration later when you need to find something buried in a stack of 40 unnamed layers.
Also, save versions as you progress. Use File > Save As and add a version number each time you hit a milestone. That way, if you warp something badly and realize it three steps later, you can roll back without losing everything.
This kind of Photoshop project rewards patience over speed. The warp work, the masking, the adjustment tuning — none of it is technically complicated. But it all requires attention and a willingness to iterate. Every time you step back and look at the full composition, you’ll spot something to refine.
That iterative process is exactly how professional photo manipulations get built. One small adjustment at a time, until suddenly the whole thing clicks into place and looks like a world you’d actually want to fall into.