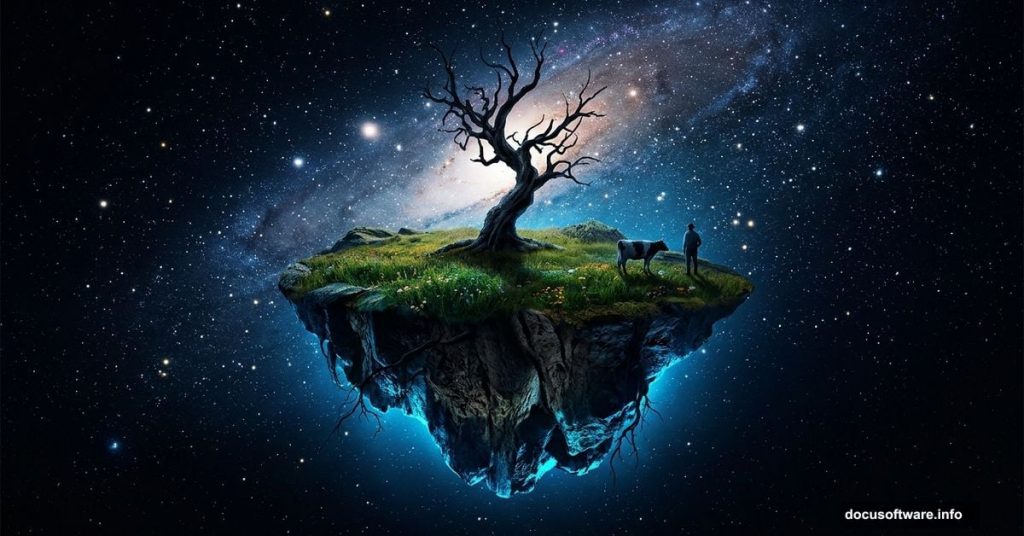
Ever looked at a surreal floating island artwork and wondered how it was made? The answer is simpler than you might think. With a handful of stock images, a few smart techniques, and Photoshop CS3 or later, you can build a complete scene packed with atmosphere, quirky characters, and that unmistakable eerie charm.
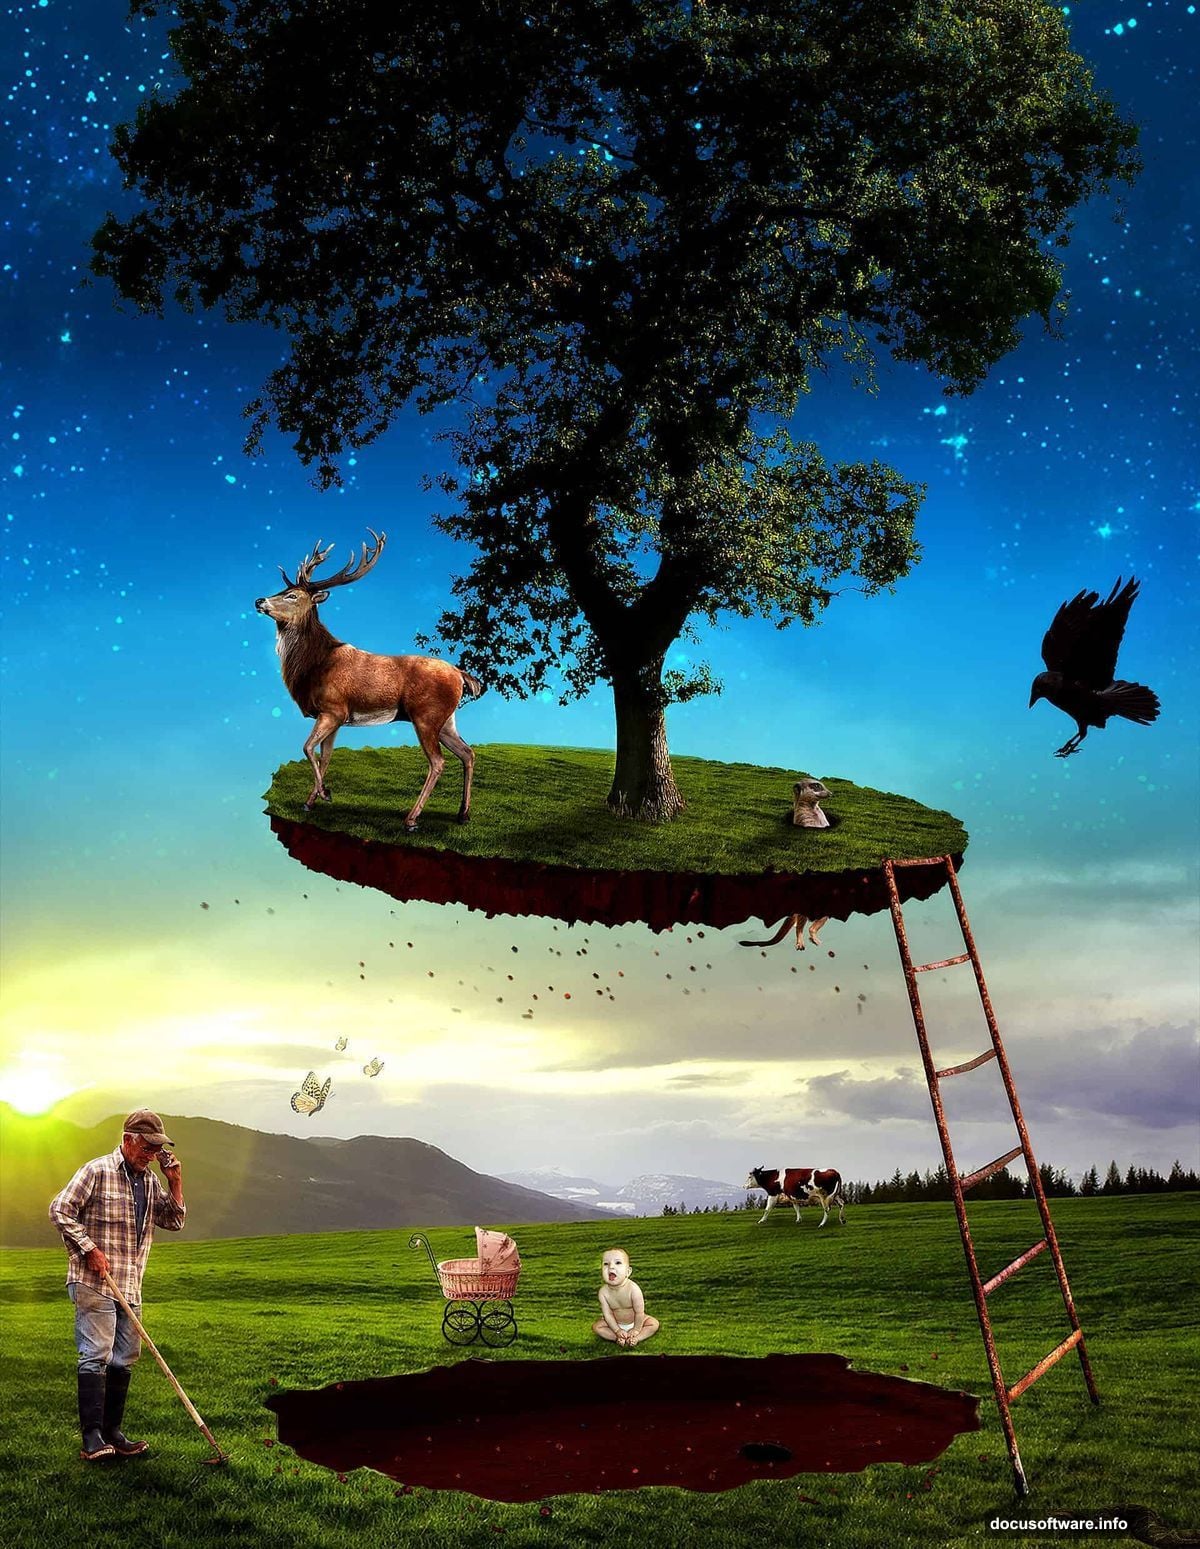
This tutorial walks you through creating exactly that kind of scene. A classic floating island, hovering in a starlit sky, populated with a meerkat, a deer, a farmer, a baby carriage, and even a cow. Strange? Absolutely. Fun to make? Even more so.
Let’s get into it.
Stock Resources You’ll Need First
Before touching Photoshop, gather your assets. Here’s everything the scene requires:
- Stars by fantmayo
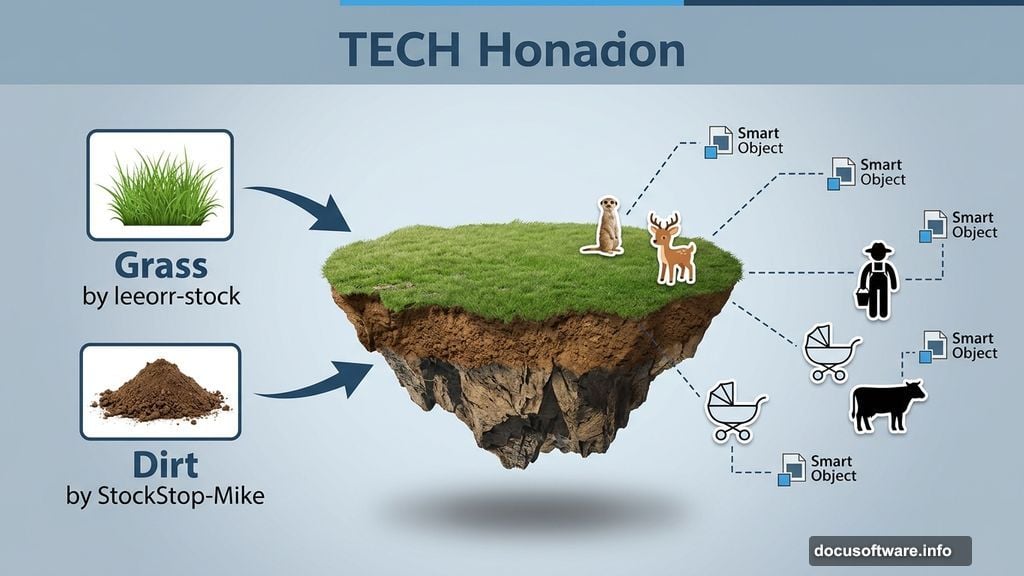
- Grass by leeorr-stock
- Dirt by StockStop-Mike
- Island by mindsqueeze
- Meerkat by malenni stock
- Stairs by freeimages.com
- Tree by gd08
- Deer by lg-design
- Crow by frankandcarystock
- Farmer by freeimages.com
- Baby by o0otamarastocko0o
- Baby Carriage by doloresminette
- Cow by freeimages.com
- Butterfly by jjd
- Snake by wolverine041269
Having all of these ready before you start saves a lot of back-and-forth later.
Building the Background Sky

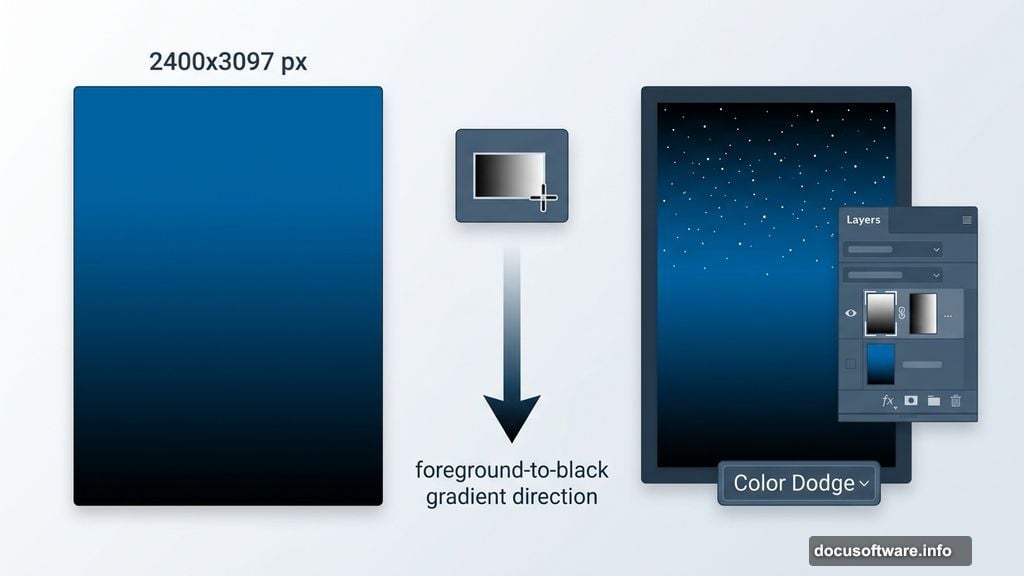
Start by creating a new document at 2400×3097 pixels. This tall canvas gives plenty of breathing room for the floating island composition.
Next, grab the Gradient Tool. Set your foreground color to a deep blue (#0068ae), then set up a foreground-to-black gradient. Hold Shift while dragging the tool vertically across the canvas. This gives you a clean, atmospheric sky that fades from blue into darkness.
Smart Objects: Your Best Friend Here
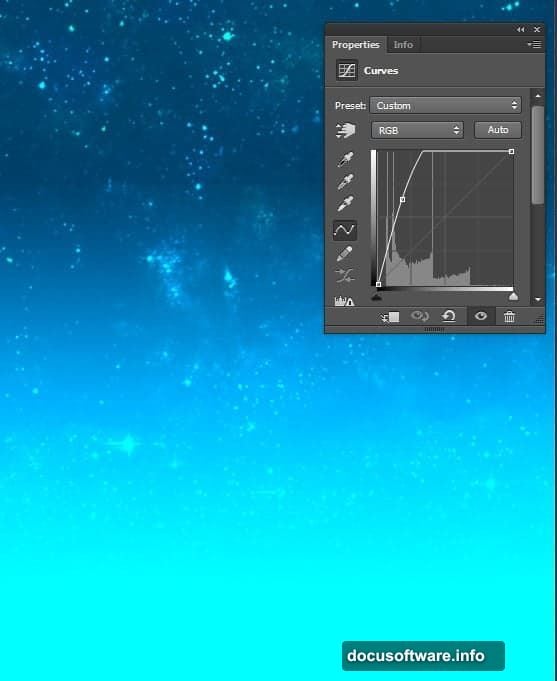
Open the Stars file, select all with Ctrl+A, copy it, and paste it into your main document. Before doing anything else, right-click the layer in the Layers panel and choose “Convert to Smart Object.”
Do this for every single imported layer throughout this project. It sounds like an extra step, but it protects you. Smart objects let you resize, warp, and apply filters without permanently destroying pixel data. So if you scale something down and then decide it needs to be bigger, you can bring it back without losing quality.
Position the stars layer across the upper portion of the canvas using the Free Transform Tool (press T to activate it).
Blending Stars Into the Sky
Add a layer mask to the stars layer by going to Layer > Layer Mask > Reveal All. Click the mask thumbnail to make it active.
Now use the Gradient Tool again, this time dragging from the top of the canvas downward. This fills the lower portion of the mask with black, which hides that part of the stars layer. The result is a seamless fade where the stars naturally disappear into the darker lower sky.
Change the blending mode of the stars layer to Color Dodge. This makes the stars glow and integrate far more naturally into the background than a standard blend would allow.
Lighting Up the Background
Add a Curves Adjustment Layer by going to Layer > New Adjustment Layer > Curves. Pull the curve upward slightly to brighten the overall background. This lifts the scene from feeling flat and adds that slight luminous quality that good photo manipulations need.
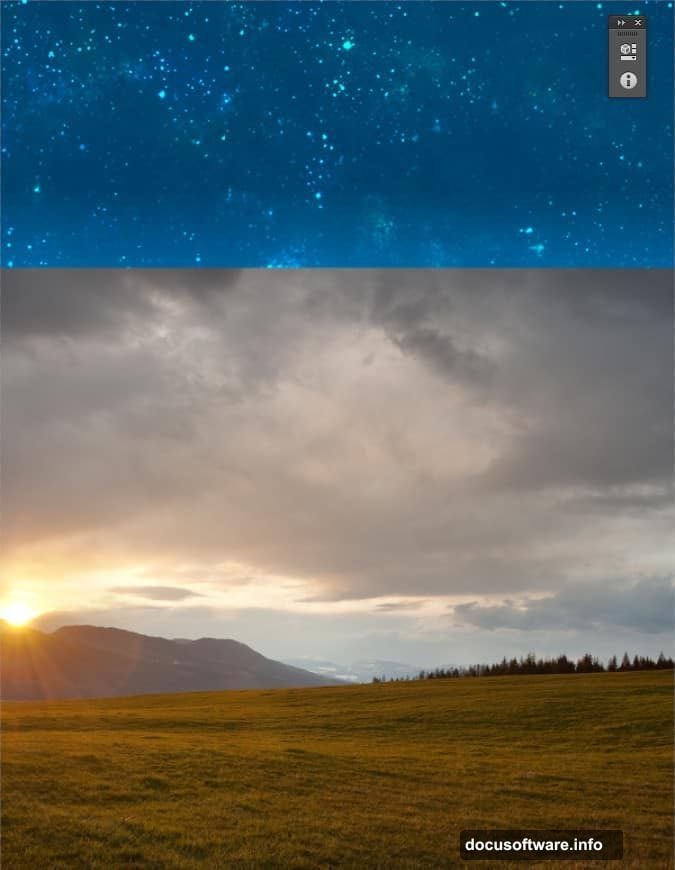
Bringing In the Ground
Open the Grass file and paste it into the document. Use Free Transform to position it in the lower section of the canvas, roughly where the ground level of your floating island will eventually sit.
Add a layer mask to the grass layer, then use the same gradient technique from the stars step. This time, blend the upper portion of the grass layer into the background so it doesn’t have a hard, obvious edge. The goal is for the grass to feel like it belongs in the scene, not like a rectangle dropped on top of it.
Why This Foundation Matters
These first seven steps might feel like setup, but they’re doing something important. Every technique introduced here, layer masks for blending, smart objects for flexibility, adjustment layers for non-destructive lighting, forms the foundation for every element still to come.
The floating island, the animals, the farmer, the baby carriage, all of them get built using these same principles. Master the workflow in these early stages and the rest of the tutorial feels intuitive rather than overwhelming.
The next phase brings in the island itself, starts populating the scene with characters, and introduces shadow work that ties every element into a single believable world.
Get your stock images lined up, your canvas ready, and your Gradient Tool set. The island isn’t going to float itself.